





Last Updated on August 3, 2026 by sandeeppote
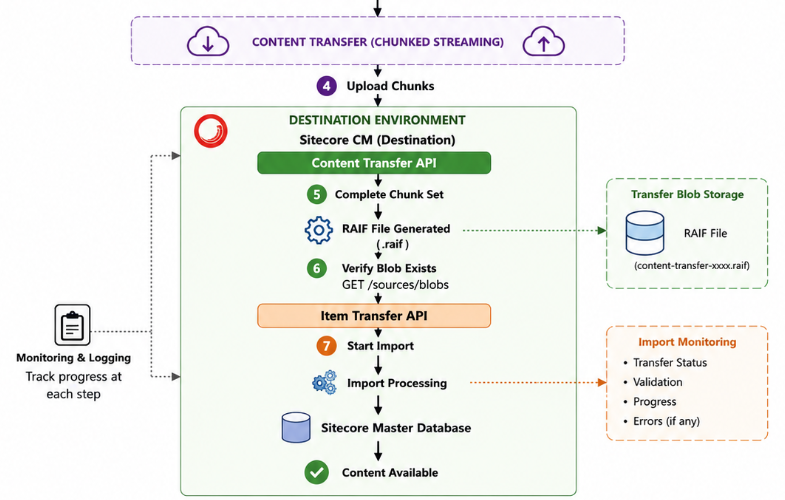
See the blog post on how to create a transfer in source environment – Link
To generate the Automation client and token see this blog post – Link
State of content tree in source environment
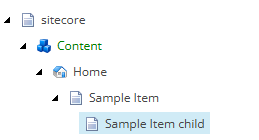
State of content tree in destination environment before migration
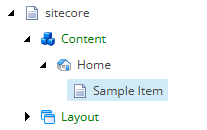
Step 1 – Save Data Chunk
Destination environment
Http Method – PUT
Url – https://your-xmc-instance.sitecorecloud.io/sitecore/api/content/transfer/v1/transfers/{transferID}/chunksets/{chunksetID}/chunks/{chunkID}
Example- https://your-xmc-instance.sitecorecloud.io/sitecore/api/content/transfer/v1/transfers/004d321e-1100-4e41-ad25-465fb304ee5a/chunksets/95e3b762-a002-4333-b141-13cdc513b1ee/chunks/0
Headers-
Content-Type: application/octet-stream
Authorization – token
Payload– Attach the file (response.bin)
Response-
201 – Created
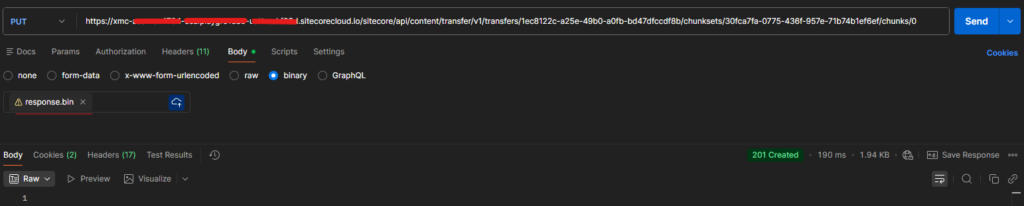
This saves the chunck to the Azure Blob
Step 2 – Complete the chunk set
Http Method- Post
Url- https://your-xmc-instance.sitecorecloud.io/sitecore/api/content/transfer/v1/transfers/{transferID}/chunksets/{chunksetID}/complete
Example – https://your-xmc-instance.sitecorecloud.io/sitecore/api/content/transfer/v1/transfers/1ec8122c-a25e-49b0-a0fb-bd47dfccdf8b/chunksets/30fca7fa-0775-436f-957e-71b74b1ef6ef/complete
Headers-
Authorization – token
Payload– Not Applicable
Response-
{
    "ContentTransferFileName": "contentTransfer-1ec8122c-a25e-49b0-a0fb-bd47dfccdf8b-30fca7fa-0775-436f-957e-71b74b1ef6ef.raif"
}
Note down the file name with extension raif
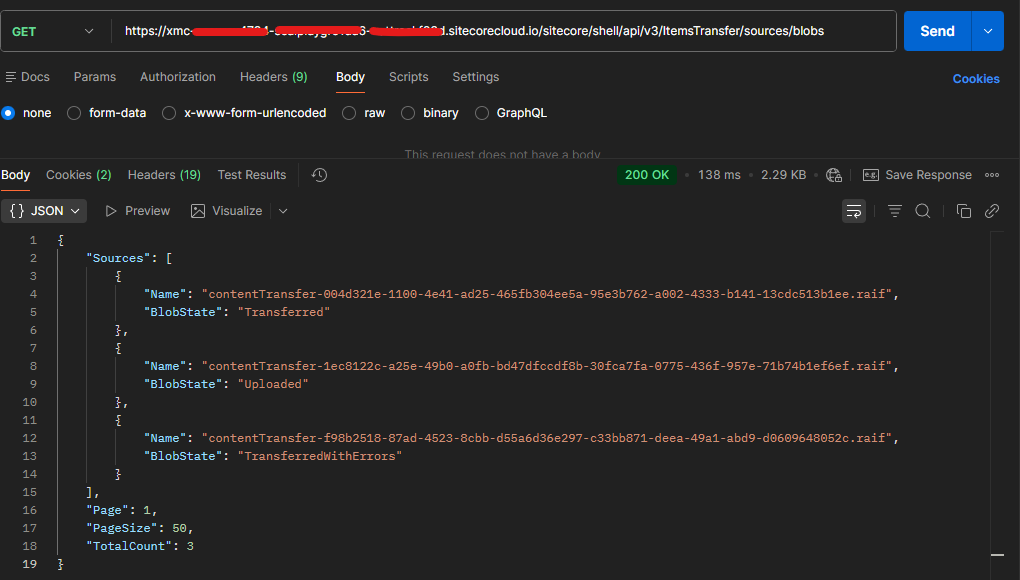
Step 3 – Verify the blob
Http Method- Get
Url- https://your-xmc-instance.sitecorecloud.io/sitecore/shell/api/v3/ItemsTransfer/sources/blobs
Headers-
Authorization – token
Response-
{
    "Sources": [
        {
            "Name": "contentTransfer-1ec8122c-a25e-49b0-a0fb-bd47dfccdf8b-30fca7fa-0775-436f-957e-71b74b1ef6ef.raif",
            "BlobState": "Uploaded"
        }
    ],
    "Page": 1,
    "PageSize": 50,
    "TotalCount": 3
}
Check the BlobState- Uploaded
Step 4 – Consume Blob (Transfer chunk)
Http Method- POST
Url- https://your-xmc-instance.sitecorecloud.io/sitecore/shell/api/v3/ItemsTransfer/transfers/databases/master/sources?blobName=contentTransfer-{transferID}–{chunksetID}.raif
Example – https://your-xmc-instance.sitecorecloud.io/sitecore/shell/api/v3/ItemsTransfer/transfers/databases/master/sources?blobName=contentTransfer-1ec8122c-a25e-49b0-a0fb-bd47dfccdf8b-30fca7fa-0775-436f-957e-71b74b1ef6ef.raif
Headers-
Authorization – token
Response–
202 – Accepted

Verify the blob and you should see the BlobState changed to – Transferred. The earlier state was Uploaded
If transfer has issues ths state will be – TransferredWithErrors
  {
            "Name": "contentTransfer-1ec8122c-a25e-49b0-a0fb-bd47dfccdf8b-30fca7fa-0775-436f-957e-71b74b1ef6ef.raif",
            "BlobState": "Transferred"
        },
Monitor Transfer Status
Http Method – GET
Url – https://your-xmc-instance.sitecorecloud.io/sitecore/shell/api/v3/ItemsTransfer/transfers
Response –
{
    "Transfers": [
        {
            "Id": "consumed.20260719 073111 3698598.6d40ff72-58e9-4940-a0bc-a88909f8f3a7",
            "SourceName": "contentTransfer-1ec8122c-a25e-49b0-a0fb-bd47dfccdf8b-30fca7fa-0775-436f-957e-71b74b1ef6ef.raif",
            "DatabaseName": "master",
            "ConsumedDate": "2026-07-19T07:31:11.3698598Z",
            "TransferState": "Finished",
            "Strategy": "OverrideExistingItem",
            "Description": null
        }
    ],
    "Page": 1,
    "PageSize": 50,
    "TotalCount": 9
}
Post transfer-
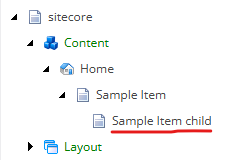
You can also check the items that are transfered. In the next blog we will see how to check the items been transfered with the item details.