Sitecore Webhooks allows to receive real-time notification about events to the web api that can handle these requests.
In this blog post will see how to debug such handlers in local environment, events triggered by XM Cloud or from the local instance using ngrok.
What is ngrok?
ngrok allows to connect external netwroks in a consistent, secure and repeatable manner without changing any network configurations.
Pre-requisite-
Sitecore Instance-
Either have a local Sitecore instance or XM Cloud instance. See how to setup local XM Cloud instance
Create a Webhook Handler(Web Api)
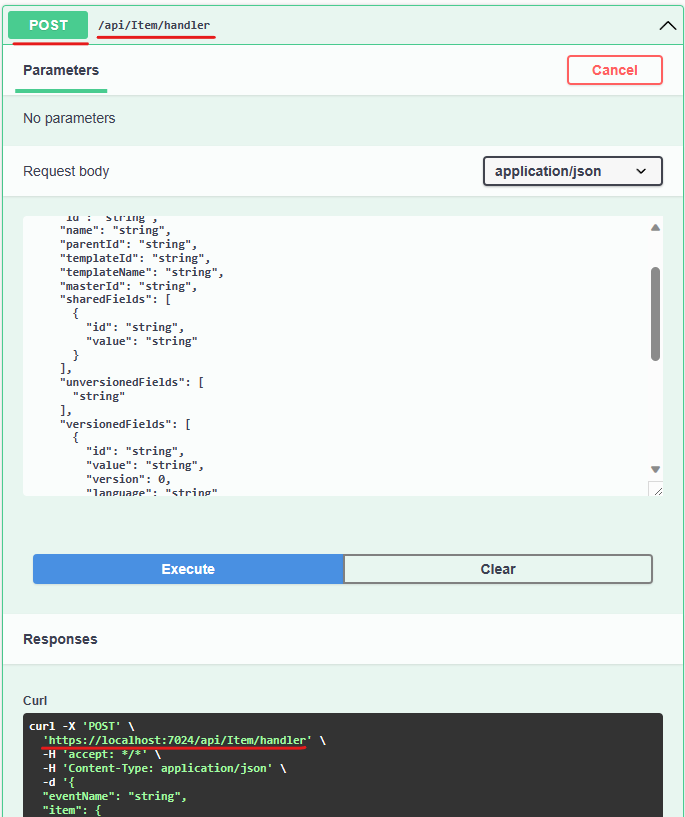
For this blog post I have created a simple Web Api with a endpoint /api/item/handler which receives POST requests with a Item payload and just return OK or Badrequest response.
We are going to create a Webhook with item:saved event in Sitecore.
using Microsoft.AspNetCore.Mvc;
using Sitecore.Webhook.Handler.Models;

namespace Sitecore.Webhook.Handler.Controllers;

[ApiController]
[Route("api/[controller]")]
public class ItemController : Controller
{
    [HttpPost("handler")]
    public async Task<IActionResult> ItemHandler(ItemPayload? payLoad,
        CancellationToken cancellationToken)
    {
        if (payLoad == null)
        {
            return BadRequest();
        }

        // Process the item handler
        return Ok();
    }
}
When I run this from VS the endpoint listens on the port 7024 for me.
Host Name:- https://localhost:7024/
Endpoint: /api/item/handler
Install ngrok on dev machine
Use choclatey to install ngrok on local machine
choco install ngrokCheck the ngrok once installed
ngrok -vIMP– Antivirus might block executing the ngrok. For me I had to turn off the real time scan. Do this at your own risk based on your antivirus software this might be different.
Execute ngrok http command to listen to the api endpoint-
ngrok http --host-header="localhost:7024" https://localhost:7024
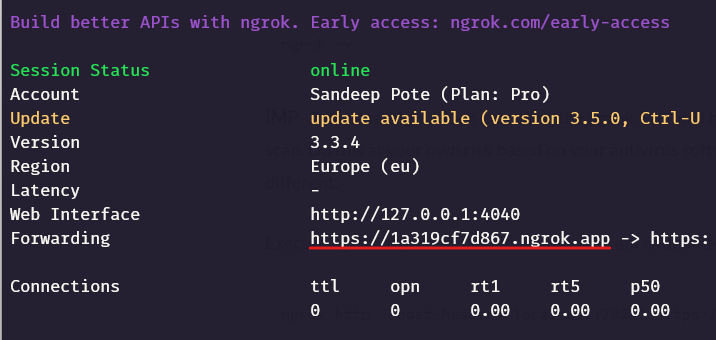
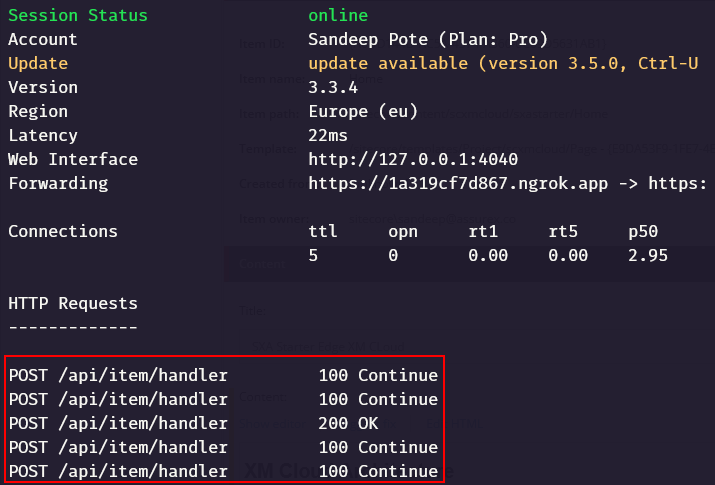
In this example https://1a319cf7d867.ngrok.app should forward request’s to https://localhost:7024 where the Web Api is running on my local machine.
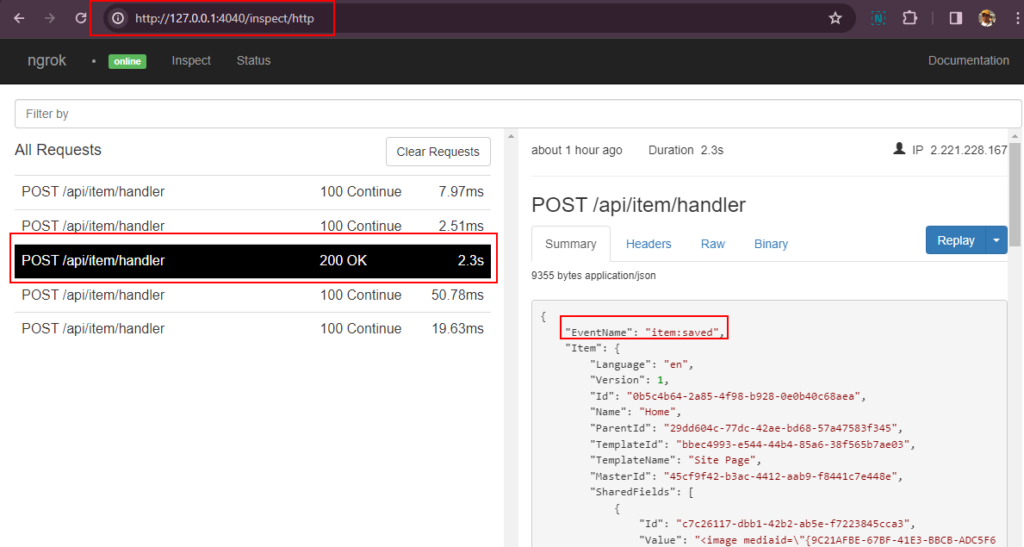
Also note the Web Interface – http://127.0.0.1:4040/
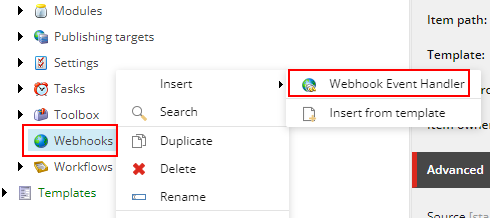
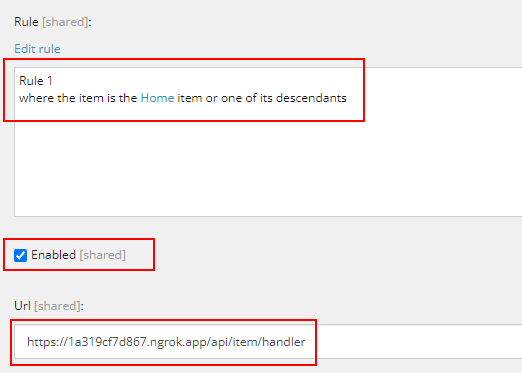
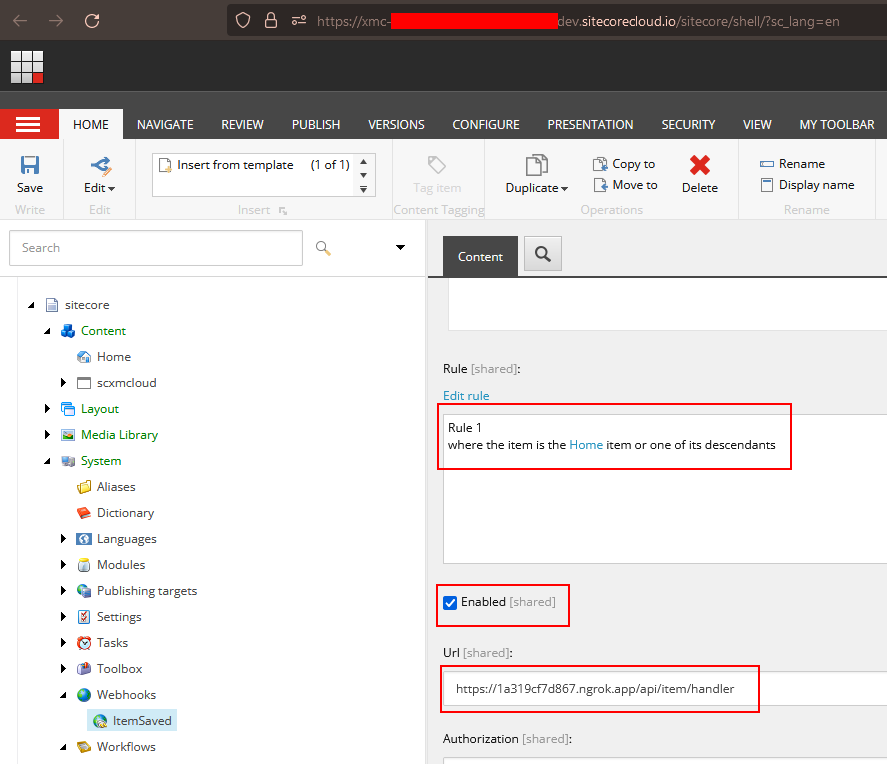
Create a Webhook Handler
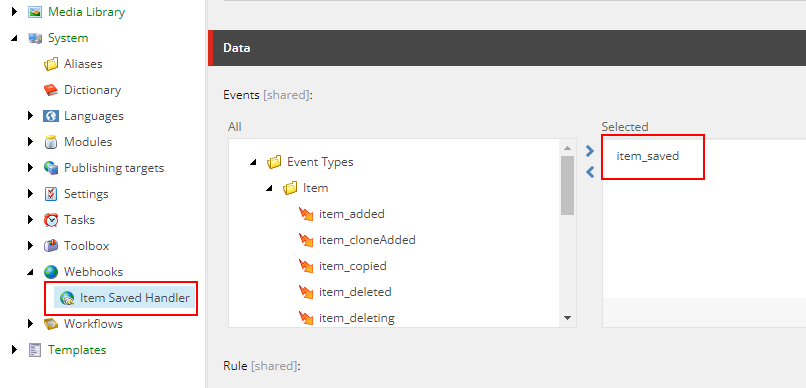
Navigate to /sitecore/system/Webhooks and create a webhook handler. In this case will create a item:saved handler.
In the newly created handler select the event the webhook should trigger and call the endpoint created by nrgok (i.e. web api)
Setup the rule – “where the item is the Home item or onle of its descendants”
Means Home or any of its child items when saved this event will be triggered.
Also setup the Url the webhook should call when this event fires.
IMP – Ensure the handler is enabled or it won’t fire the event.
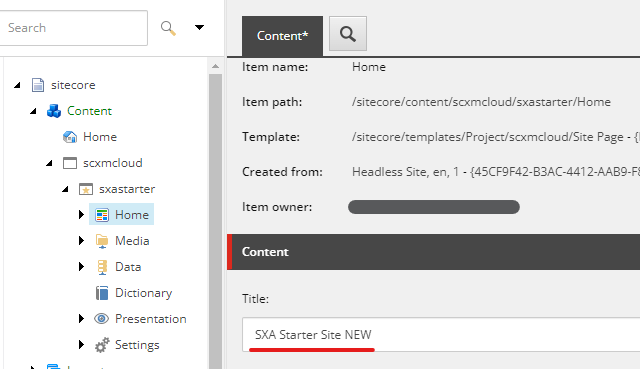
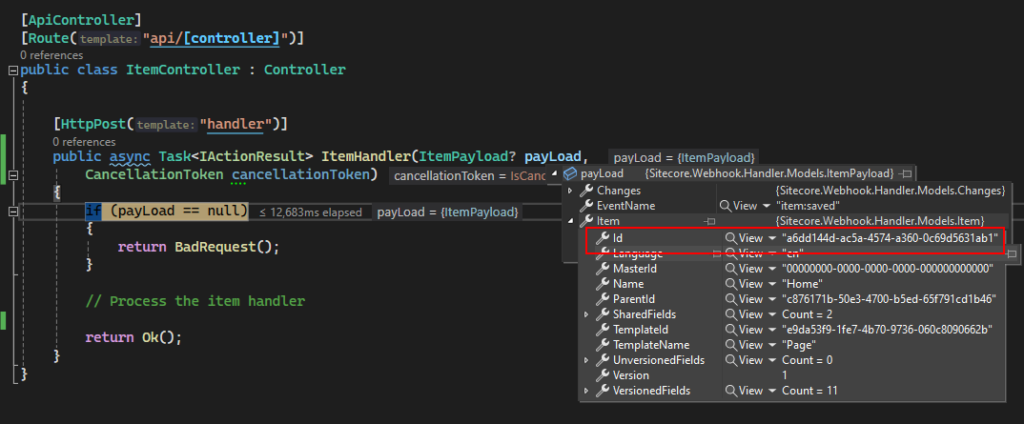
Save the Home or any of its child to fire the event
I changed a field in Home item and Saved the item-
Ensure your Web Api solution is running in debug mode.
And now you should be able to debug, inspect and test the handler. This was done in local Sitecore instance but can also be done in XM Cloud.
ngrok helps to forward the requests to the localy hosted web api running in debug mode.

Now you can handle what should happen on item:saved event.
XM Cloud
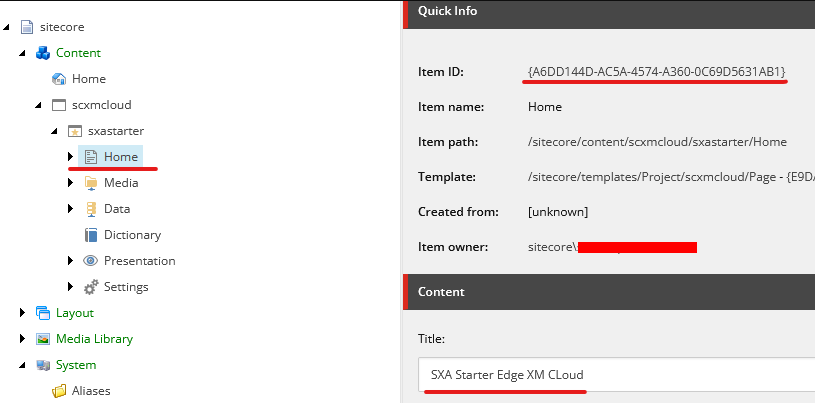
I did the same process in XM Cloud-
Updated the Home item and Saved. Note the item id
The event is fired and web api in my local machine is called-
Also the ngrok also shows the calls it is listening.
Web interface should also show the request and payload details-
Hope this helps debuging your Webhook requests fired from Sitecore local or XM Cloud.
If you want to see the webhook payload and perform further actions, like sending mails etc there are online tools availabl e-
Hope this helps.
![]()