Last Updated on November 29, 2025 by sandeeppote

Sitecore 10.2 uses Sitecore Headless Rendering 19.0.0. See link here
See this blog for prerequisites and setting jss using next js in disconnected mode.
Follow below steps after the steps completed in above blog
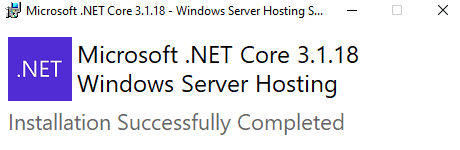
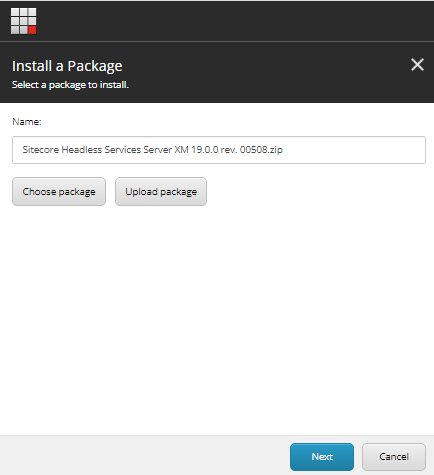
Download Sitecore Headless Services for Sitecore XM
Prerequisite
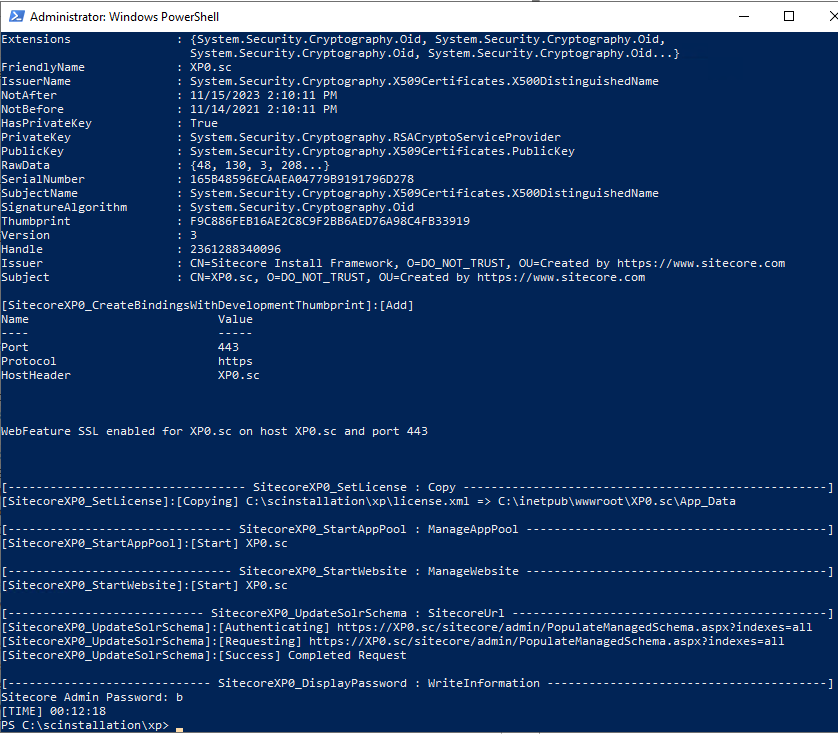
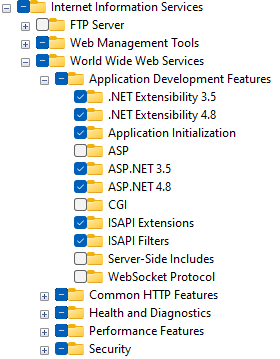
Install Sitecore 10.2 XP0 on local development environment. See hte blog here if not already installed
Install downloaded package for Headless Service
Run the next js app in connected mode
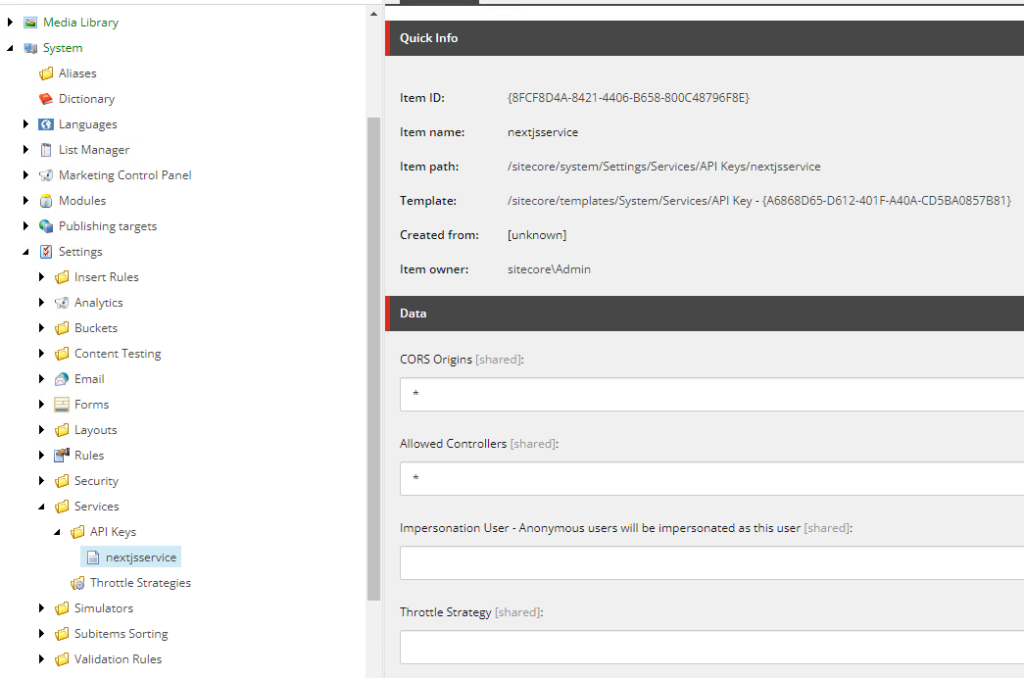
Before working on connected mode create API Key
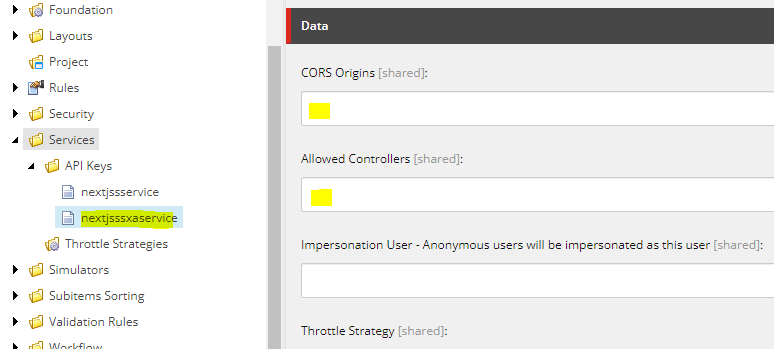
Navigate to – /sitecore/system/Settings/Services/API Keys
Create a new API Key e.g.:- nextjsservice
API key here is Item ID
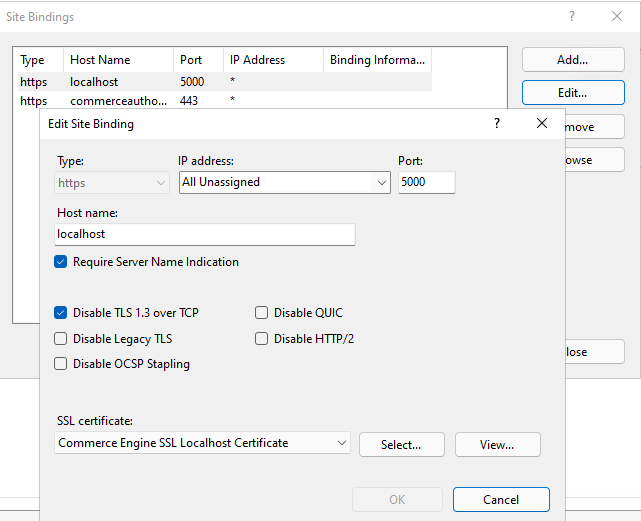
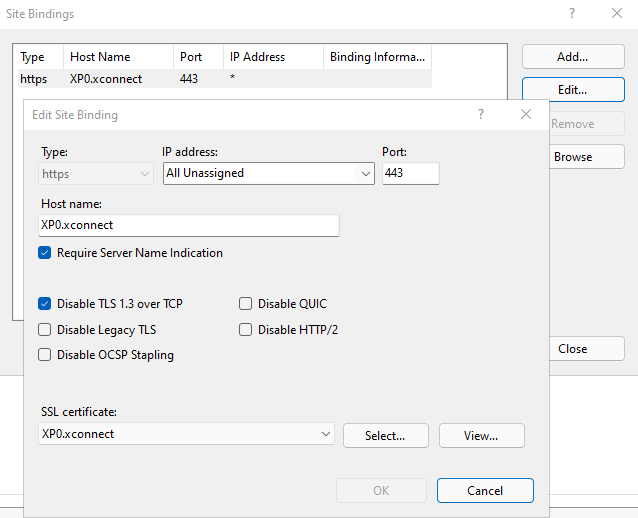
Create a custom binding-
For this create a self signed certificate with a custom domain name in this case – next-jss-prj.dev.local
New-SelfSignedCertificate -CertStoreLocation C:\certificates -DnsName "next-jss-prj.dev.local" -FriendlyName "My First Next JSS App" -NotAfter (Get-Date).AddYears(10)
Create a new https binding and assign the newly create SSL certificate
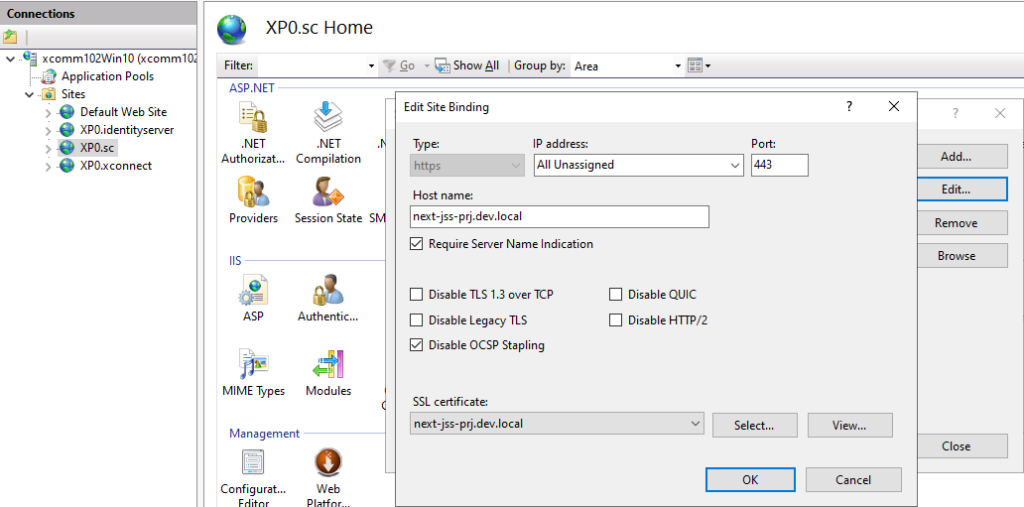
Add domain to the host file – next-jss-prj.dev.local
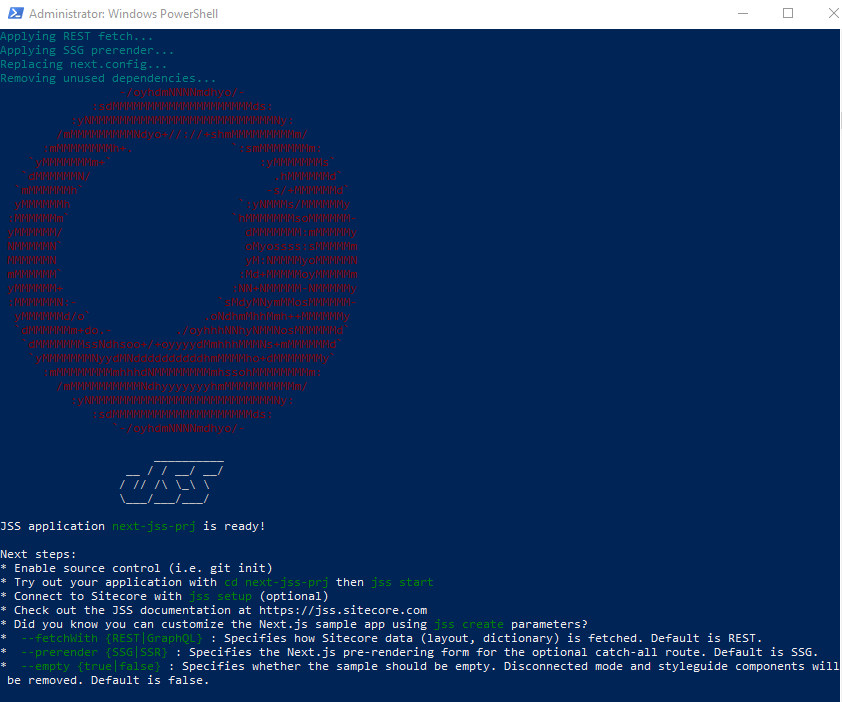
Inititate JSS
Run the command
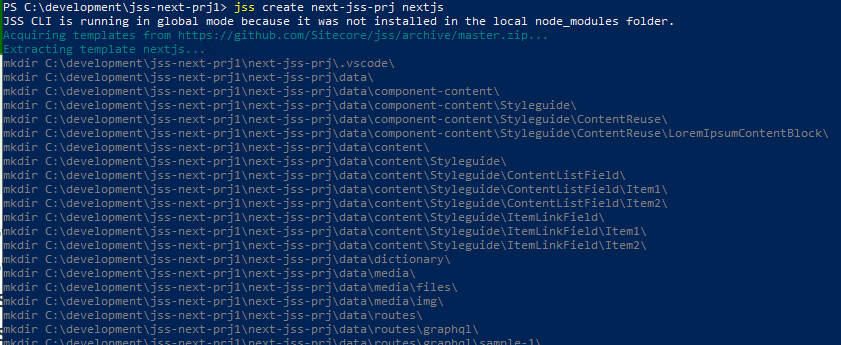
npm init sitecore-jss nextjsWhere would you like your new app created? C:\projects\nextjs
Initializing ‘nextjs’…
What is the name of your app? next-jss-prj.dev.local
What is your Sitecore hostname (used if deployed to Sitecore)? next-jss-prj.dev.local
How would you like to fetch Layout and Dictionary data? REST
How would you like to prerender your application? SSG
Would you like to include any add-on initializers? nextjs-styleguide – Includes example components and setup for
working disconnected
Initializing ‘nextjs-styleguide’…
Which additional language do you want to support (en is already included and required)? da-DK
Setup JSS
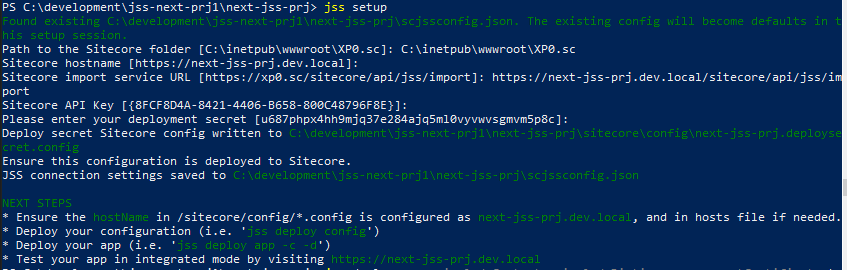
jss setupIs your Sitecore instance on this machine or accessible via network share? [y/n]: y
Path to the Sitecore folder (e.g. c:\inetpub\wwwroot\my.siteco.re):
Invalid input.
Path to the Sitecore folder (e.g. c:\inetpub\wwwroot\my.siteco.re): C:\inetpub\wwwroot\xp102sc.dev.local
Sitecore hostname (e.g. http://myapp.local.siteco.re; see /sitecore/config; ensure added to hosts): next-jss-prj.dev.local
Invalid input. Must start with http(s)
Sitecore hostname (e.g. http://myapp.local.siteco.re; see /sitecore/config; ensure added to hosts): https://next-jss-prj.dev.local
Sitecore import service URL [https://next-jss-prj.dev.local/sitecore/api/jss/import]: https://next-jss-prj.dev.local/sitecore/api/jss/import
Sitecore API Key (ID of API key item): {2318A20A-6DF1-4AB8-B49E-F933A3B79160}
Please enter your deployment secret (32+ random chars; or press enter to generate one):
Deployment secret– Leave this blank as this will generate new secret key
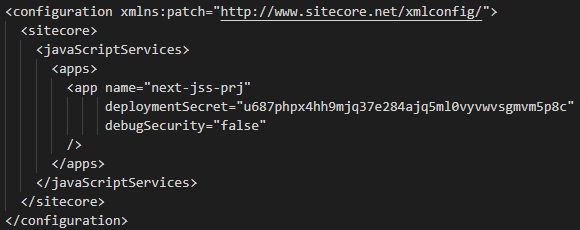
Deployment secret key is generate and stored in <<jss development folder>>\sitecore\config\next-jss-prj.deploysecret.config

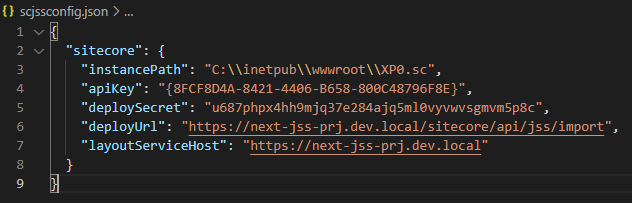
JSS connection settings saved to scjssconfig.json
Connection and the deployment secret is created, now this needs to be deployed to Sitecore instance so the JSS app is able to establish a connection with Sitecoore
To deploy the config setting deploy the config to Sitecore instance-
jss deploy config

Configs are copied to Sitecore instance App_Config\Include\zzz…
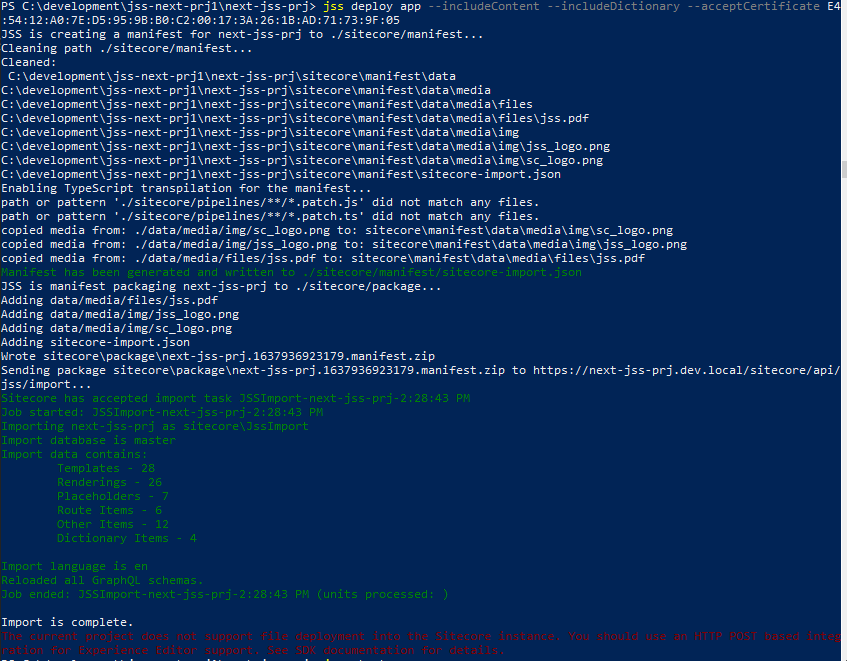
Deploy the artifacts to Sitecore instance-
Since we don’t know hte thumbprint use the below command with –acceptCertificate as test
jss deploy app –includeContent –includeDictionary –acceptCertificate test
This will provide the thumbprint. highllighted in red

Copy the certificate and try deploying again-
jss deploy app –includeContent –includeDictionary –acceptCertificate E4:54:12:A0:7E:D5:95:9B:B0:C2:00:17:3A:26:1B:AD:71:73:9F:05
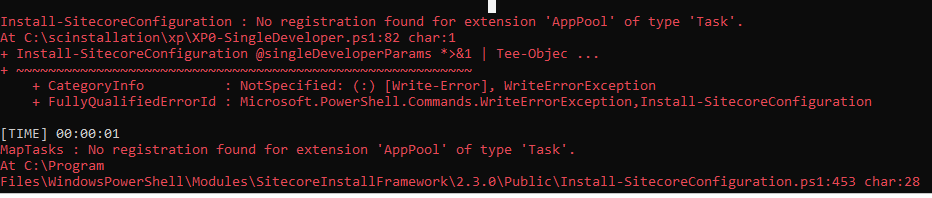
if you see this error while importing – Message: An item name must satisfy the pattern: ^[\w*\$][\w\s-\$]*((\d{1,})){0,1}$ (controlled by the setting ItemNameValidation)
Change the ItemnameValidation to .* while importing and revert back to original in Sitecore.config file. Refer this –
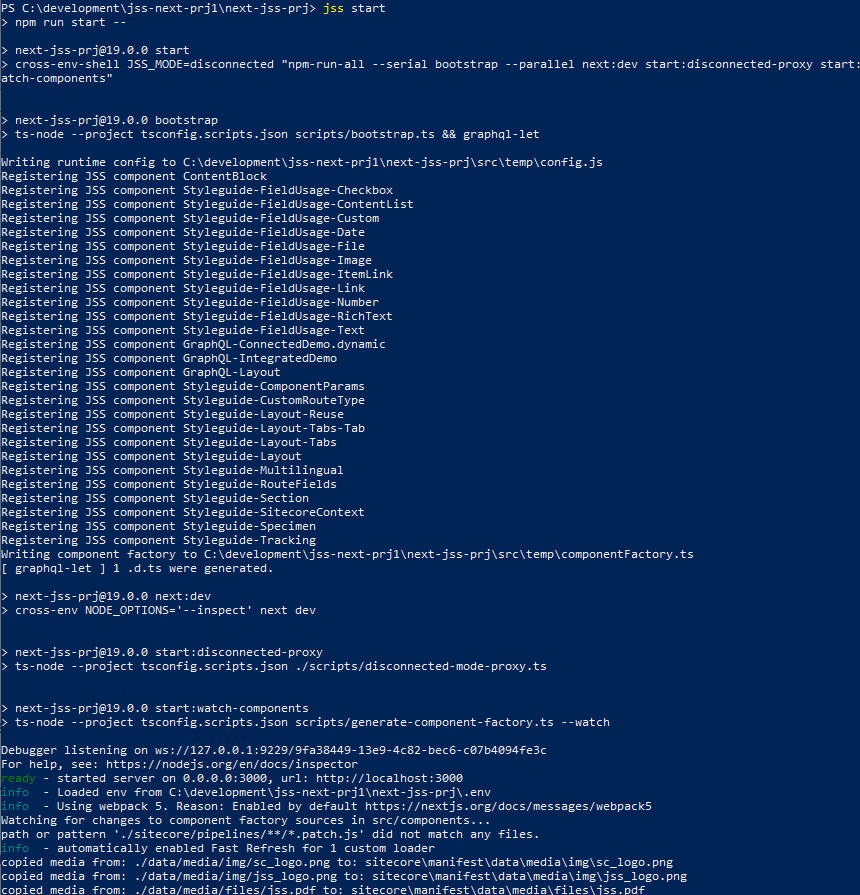
To run the app run following command
jss start:connected
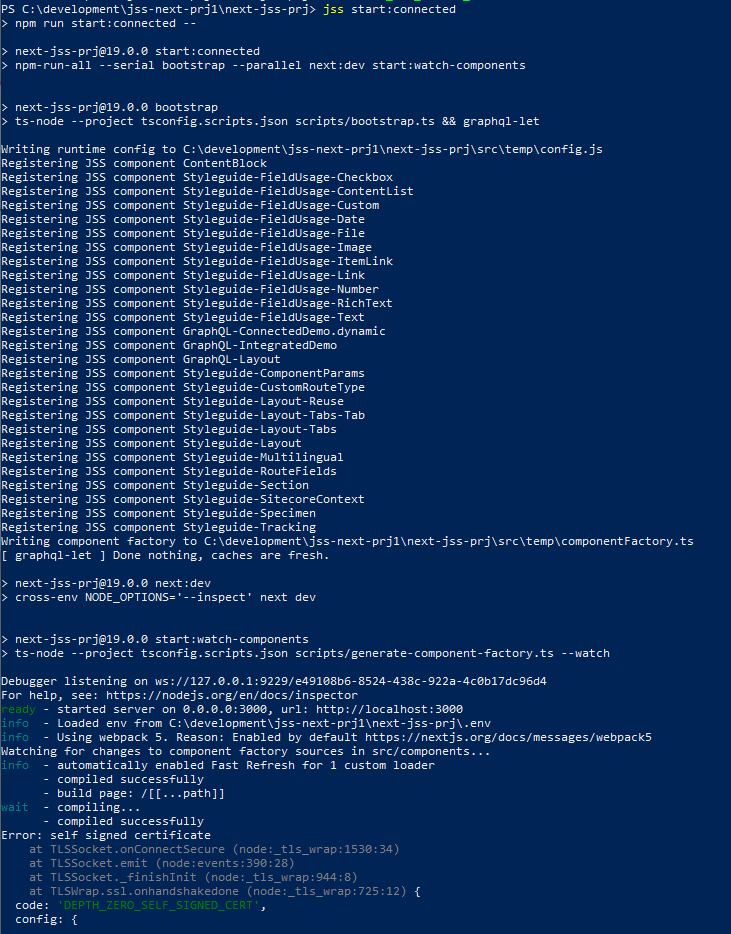
If you receive this error-
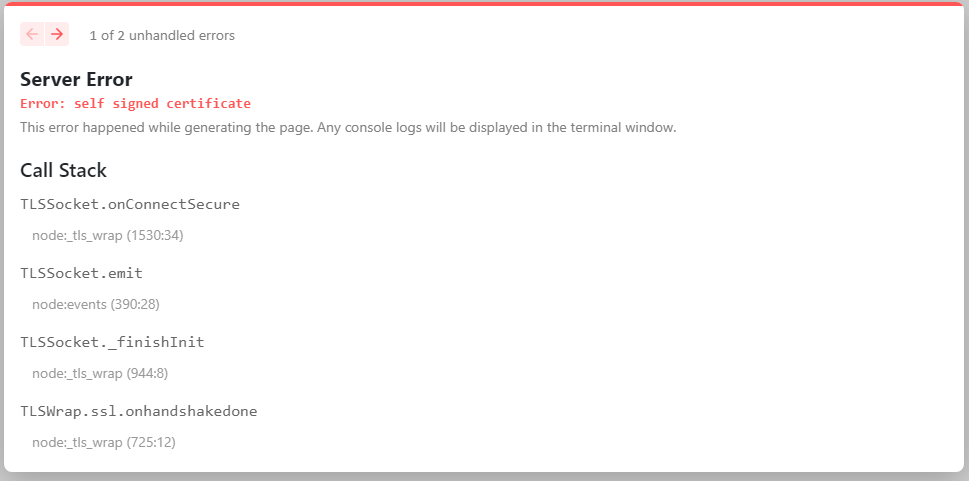
Execute following command to get this working on port 3000
$env:NODE_TLS_REJECT_UNAUTHORIZED=0Execute JSS start again-
jss start:connectedERROR-
Connection to your rendering host failed with a Not Found error. Ensure the POST endpoint at URL http://localhost:3000/api/editing/render has been enabled.
Copy the deploy secret and update the – value of setting of JavaScriptServices.ViewEngine.Http.JssEditingSecret in Sitecore.JavaScriptServices.ViewEngine.Http with the deploy secret.
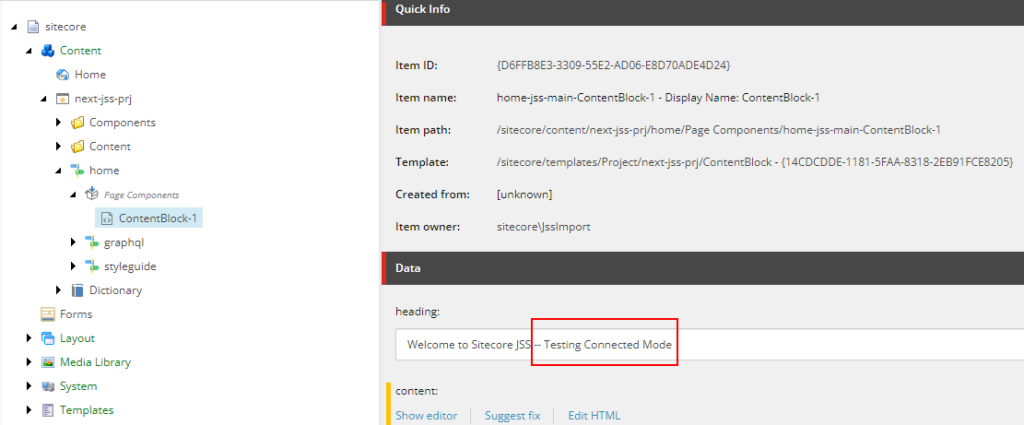
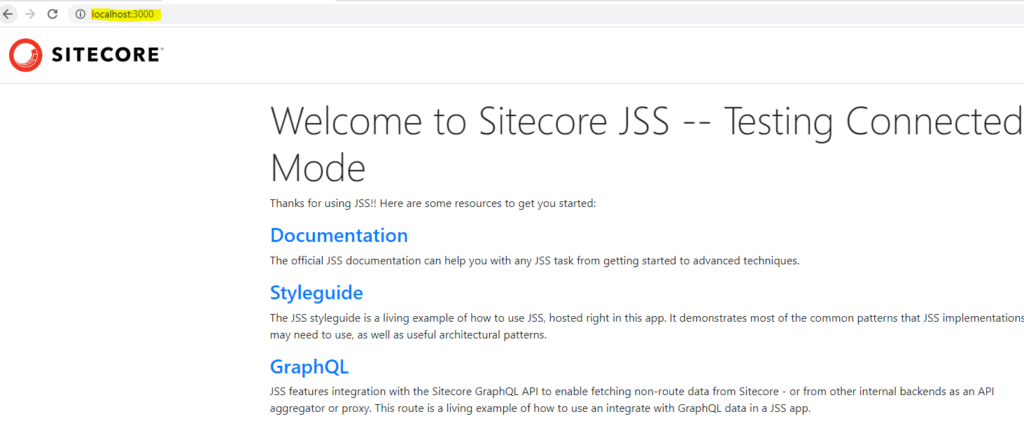
This now work in connected mode. Any content changes in Sitecore should reflect localhost:3000 and Sitecore instance (https://next-jss-prj.dev.local/)
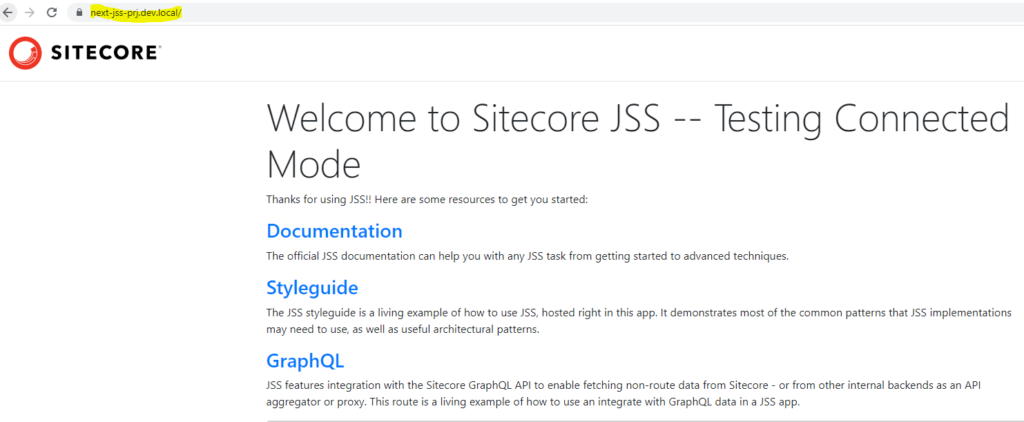
Sitecore next js working in connected mode with SSL
Error-

Exception thrown while importing JSS app
Exception: System.UnauthorizedAccessException
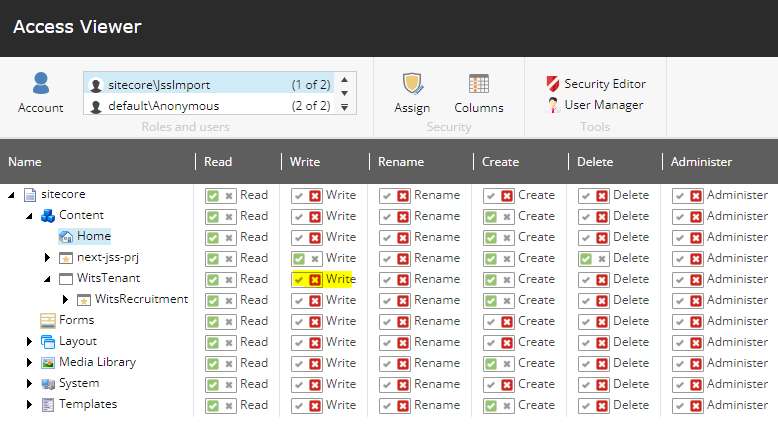
Message: The current user does not have write access to this item. User: sitecore\JssImport, Item: ContentBlock ({23CE8001-F405-5E50-AE61-AD3057660BBD})
Source: Sitecore.Kernel
Resolution-
Error-


Resolution-
Check if the API key is correct at the location – /sitecore/system/Settings/Services/API Keys
Also check if the CORS and Allowed Controllers are set correctly
For developement environment put * for both the highlighted fields