Last Updated on January 21, 2025 by sandeeppote
Sitecore Send lets you automate your communication with customers by identifying specific situations that trigger the sending of an email message
In this blog lets create automated mails using automation recipes.
For more details see this link.
Pre-requisite-
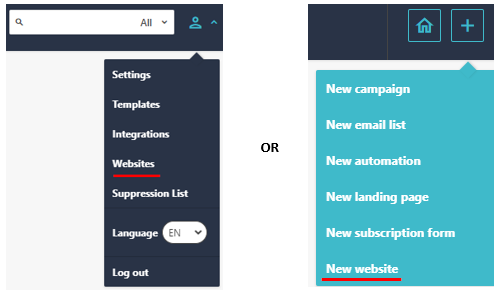
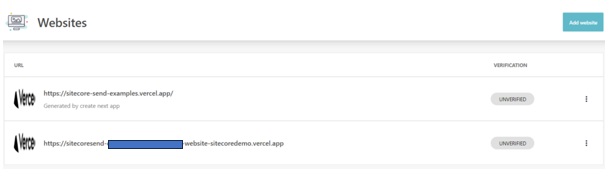
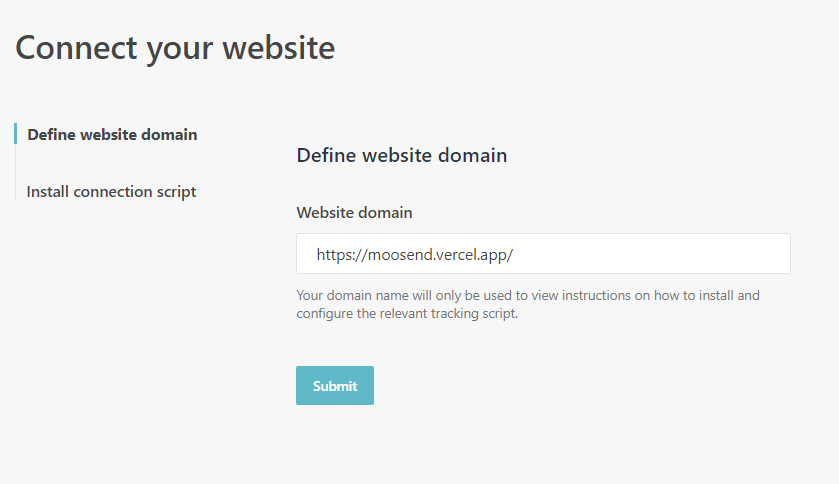
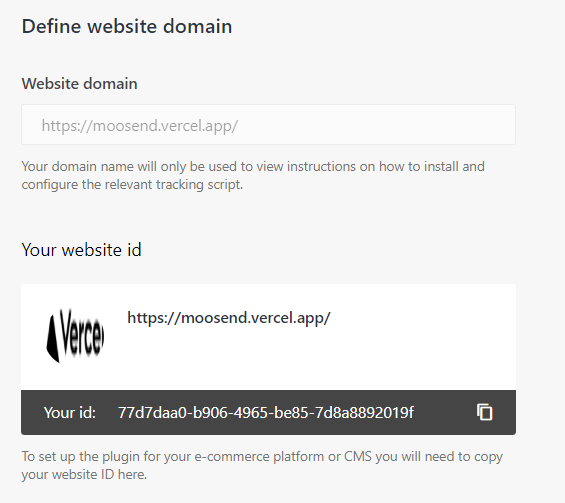
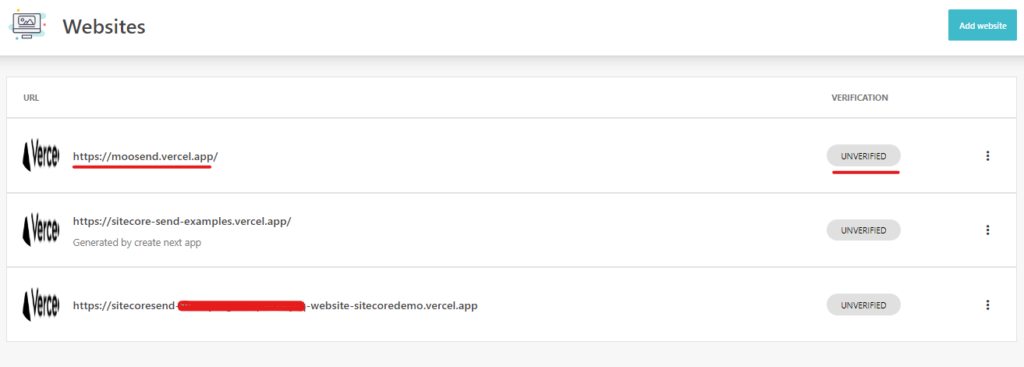
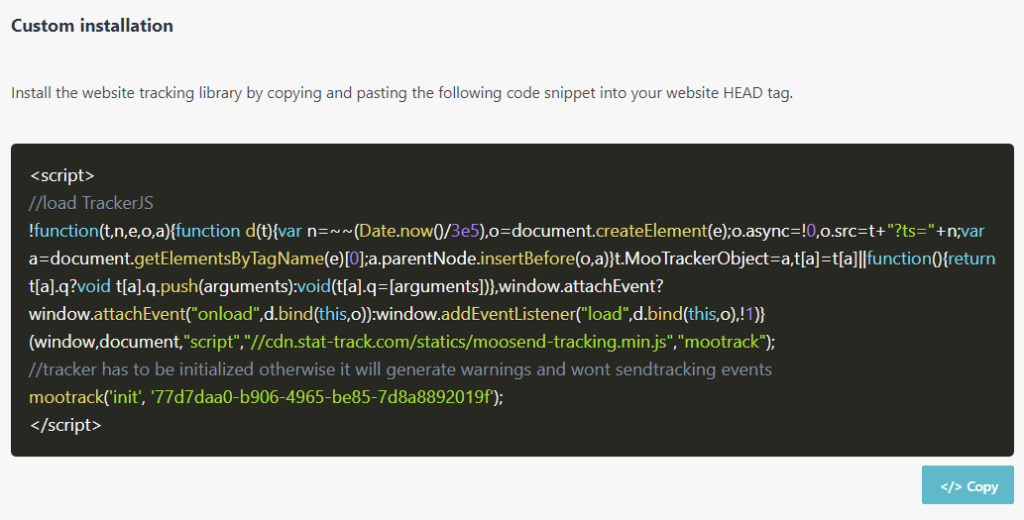
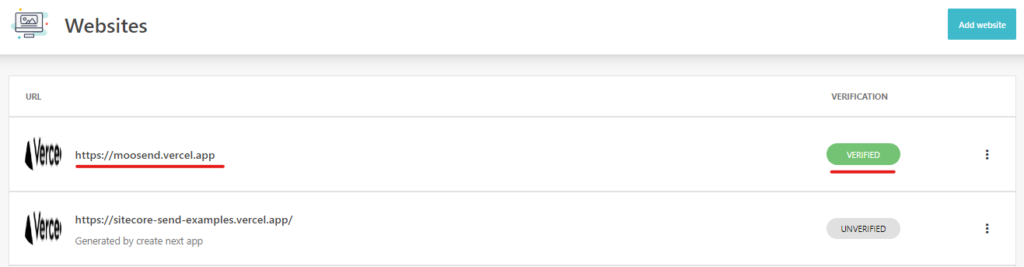
Ensure the website is configured and verified before using the automation. See this blog. For this blog post I am using – https://moosend.vercel.app/

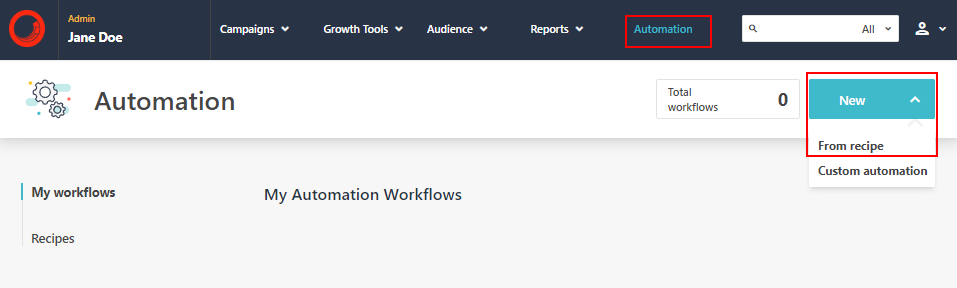
Create automation using Abandoned Cart automation recipe
Navigate to Automation link and create new automation using recipe-
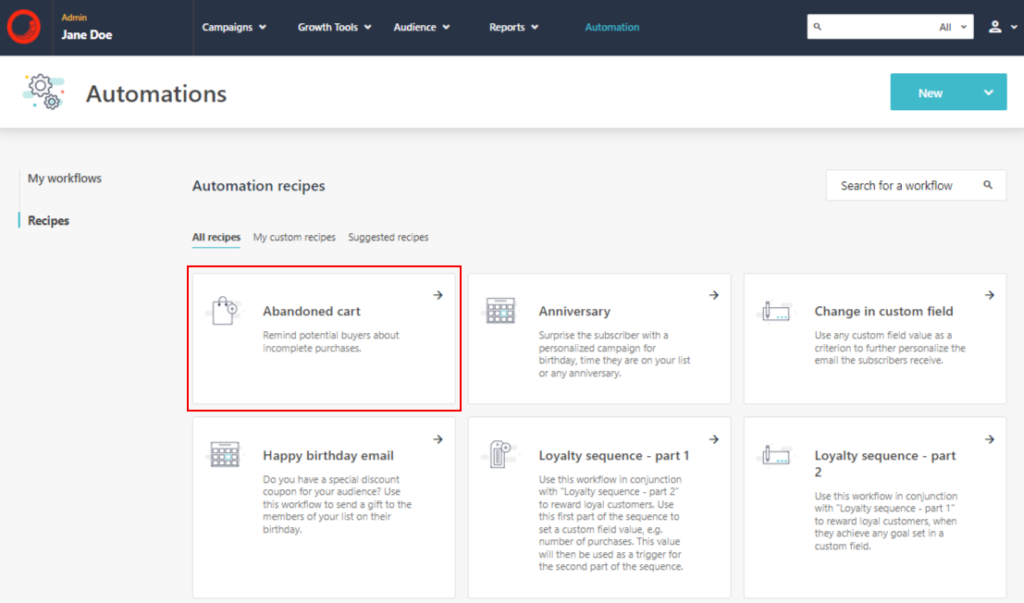
Select Abandoned cart recipes-
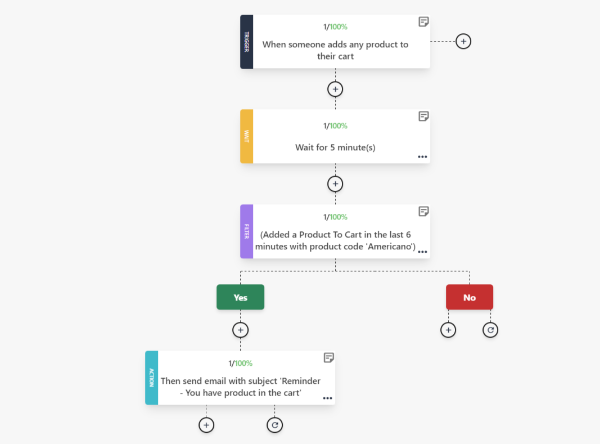
Will be shown the Abandoned Cart Workflow-
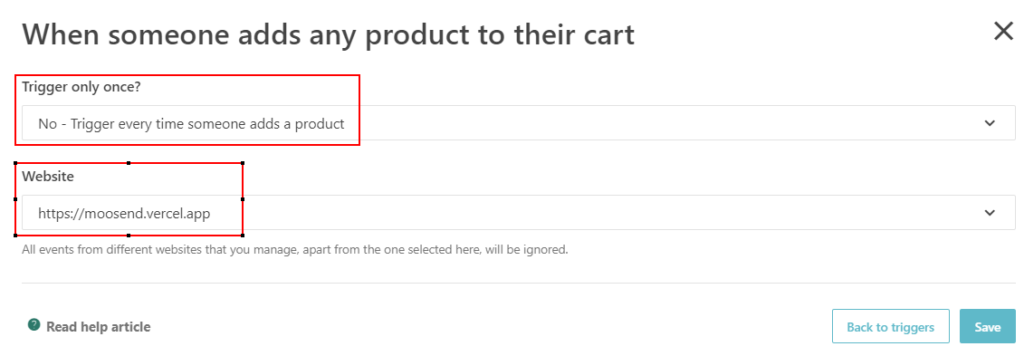
Choose Trigger option-
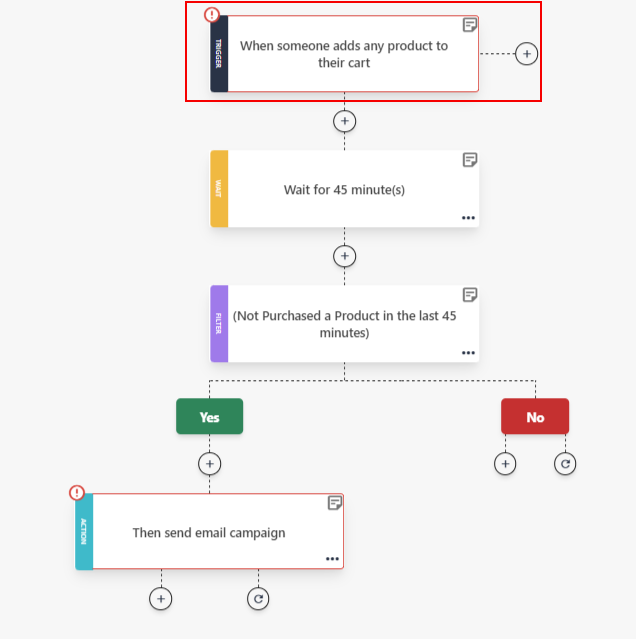
Select- Trigger every time option
Select your website from dropdown and Save. Only verified website will be visible here. You may also choose all sites.
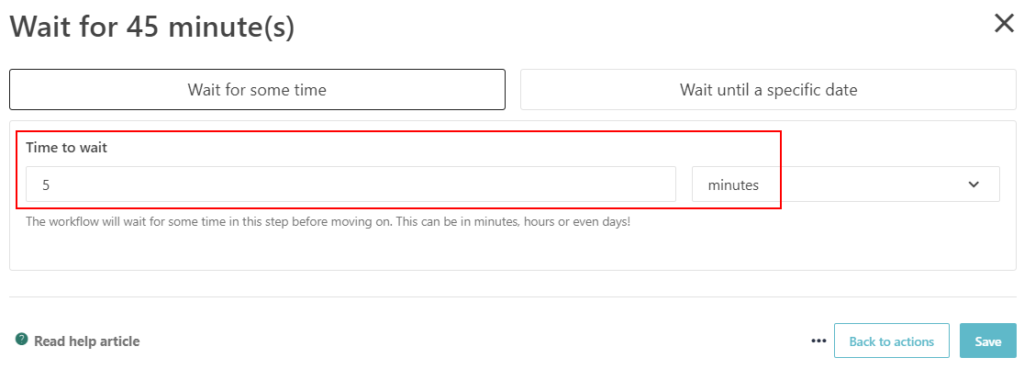
Open wait operation-

For testing I have selected 5 minutes. Ideally this can be few hours/days as per the requirement or enter specific date. By default it is 45 minutes. Enter the wait time and Save.
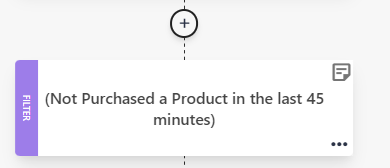
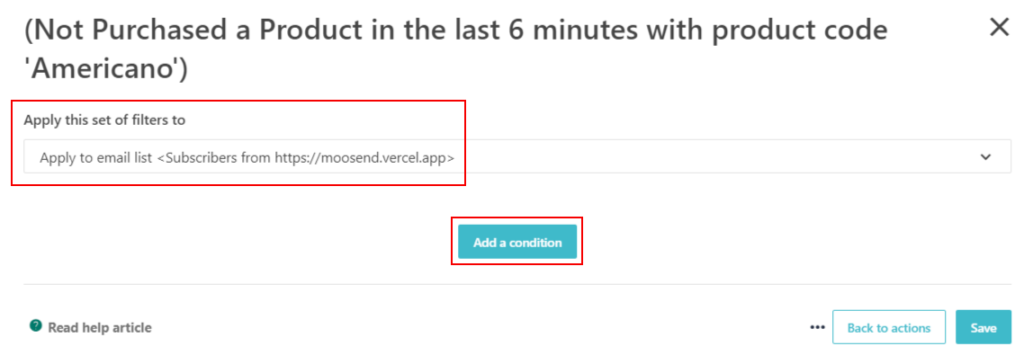
Setup the filter
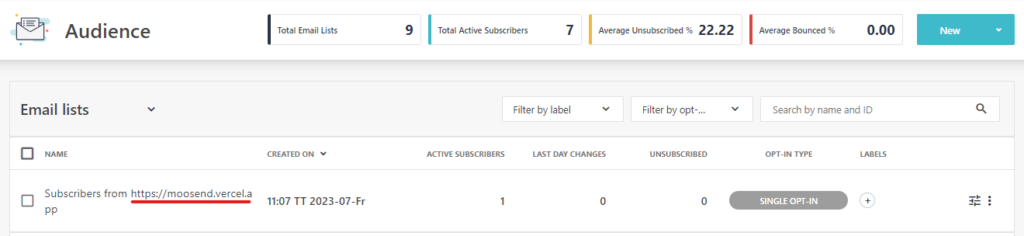
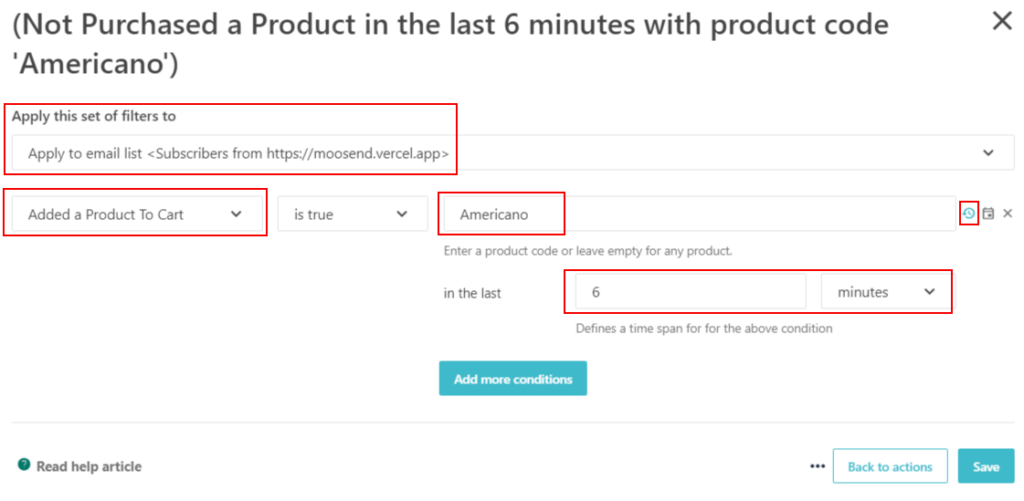
Select apply this filter to mailing list. I have selected the email list of the site, you may select different list.
Enter the product if you wish to or leave empty.
Click on “Add a collection”.
Select the time if the product is not purchased for certain time. I have entered 6 minutes. Enter the details and Save.
Select “Added a Product To Cart” and filter value. In this I have added product “Americano”.
Select timer and enter the wait time to 6 minutes and Save
Select the action
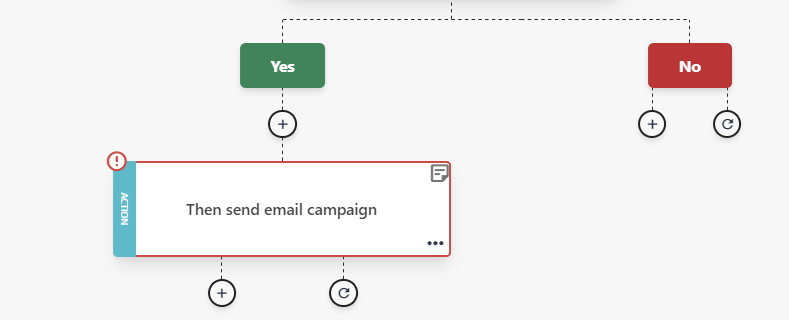
In this case Send the mail to user if the product is not purchased in selected time.
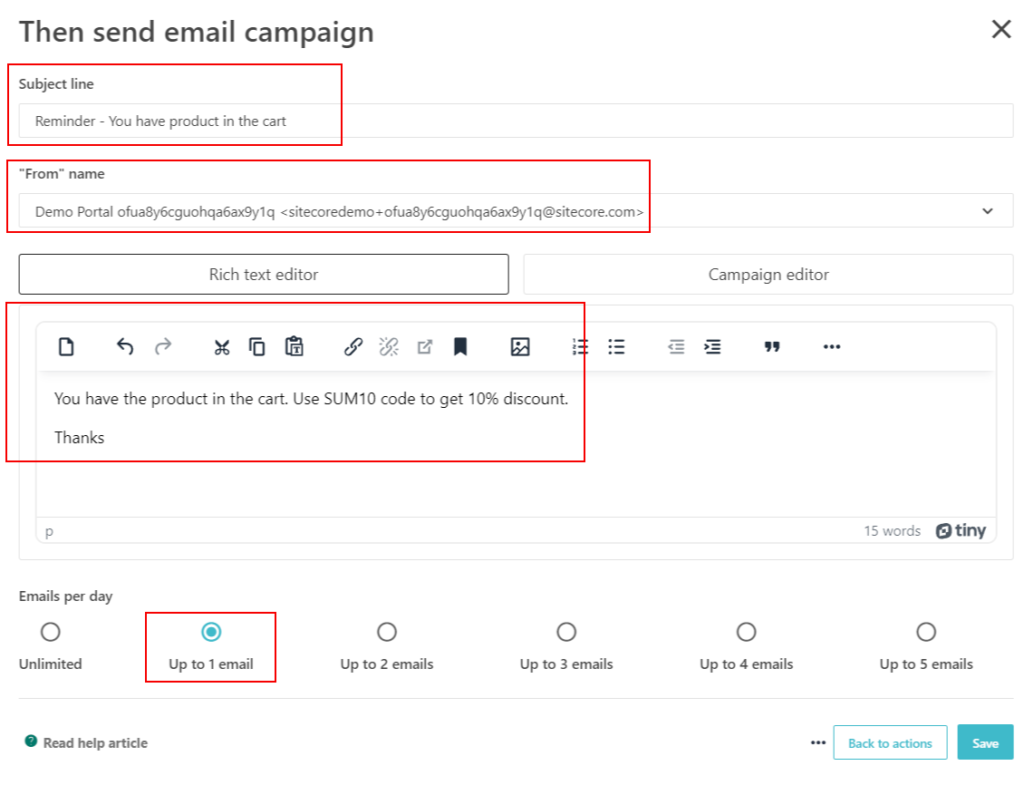
Select Send Mail campaign-
Enter the subject, From address, mail body. Select Emails per day. Save once this option is filled.
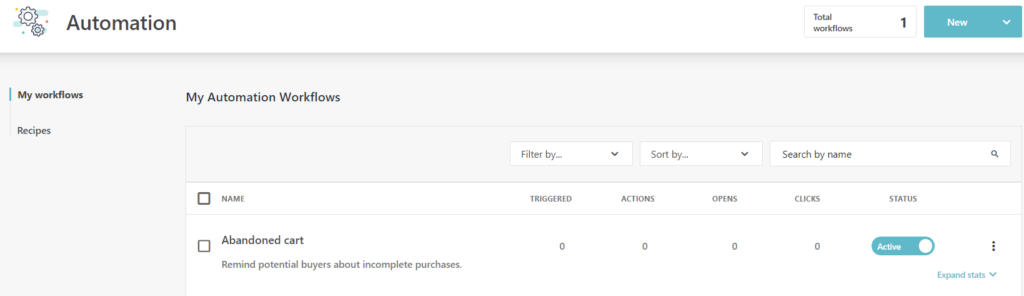
Activate the “Abandoned Cart” automation-
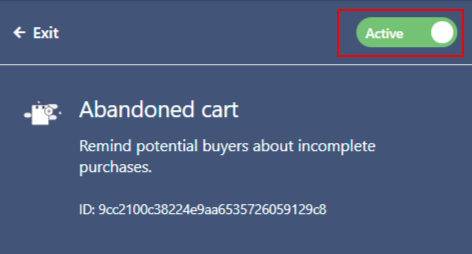
Automation List with activated
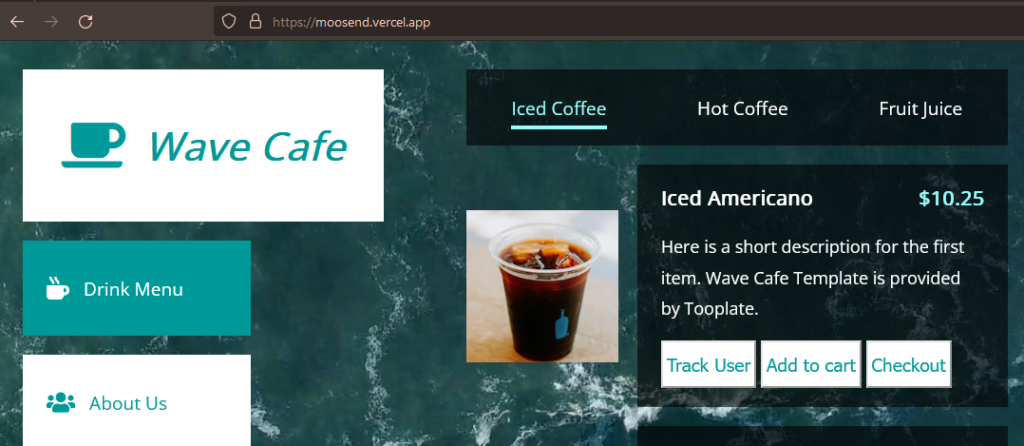
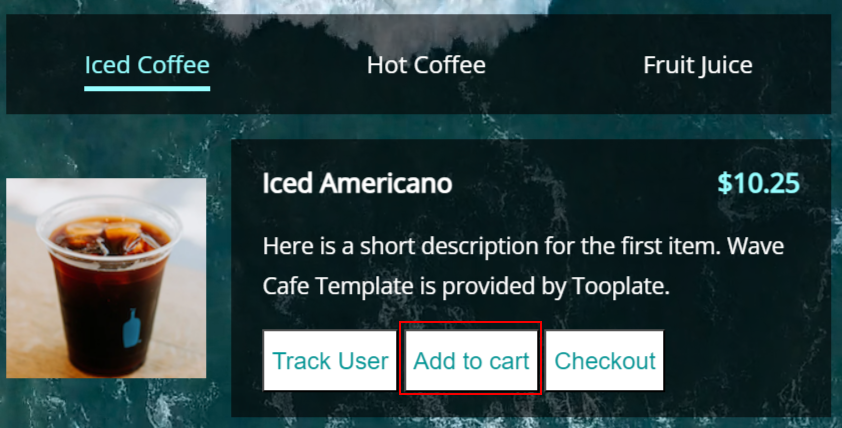
Once the automation configuration is complete will now add product to cart. the product name here is “Americano” as selected in filter.
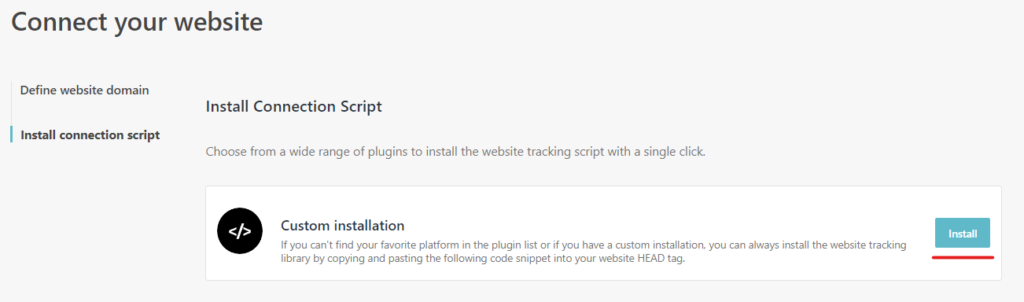
In the installation script you can find the details on how to add the product to cart.
function addToCart(){
// mandatory - a unique code for the product, like its SKU
var itemCode = 'Americano';
// mandatory - the name / title of this product
var itemName = 'Iced Americano';
// mandatory - the image url of this product
var itemImage = 'http://your.store/product-color-blue.jpg';
// mandatory - the price of this product
var itemPrice = 10.25;
// mandatory - the url to get to the relevant product page
var itemUrl = 'http://your.store/product-101';
// mandatory
var itemQuantity = 1;
// mandatory - the total price for purchasing the given quantity of this product
var itemTotalPrice = 10.25;
// optional - the category of this product
var itemCategory = 'Drinks';
// optional - the manufacturer, brand name or company / owner of this product (if any)
var itemManufacturer = 'Acme Co';
// optional - the supplier of this product (if any)
var itemSupplier = 'Supplier Co';
// you can add custom properies and later use them in segmentations or automations
// You can track things like the color or the sze of the t-shirt in this case
var extraProps = {'flavor': 'Chocolate', 'type': 'Iced'};
// Tracking add to cart events with mandatory arguments
mootrack('trackAddToOrder', itemCode, itemPrice, itemUrl, itemQuantity, itemTotalPrice);
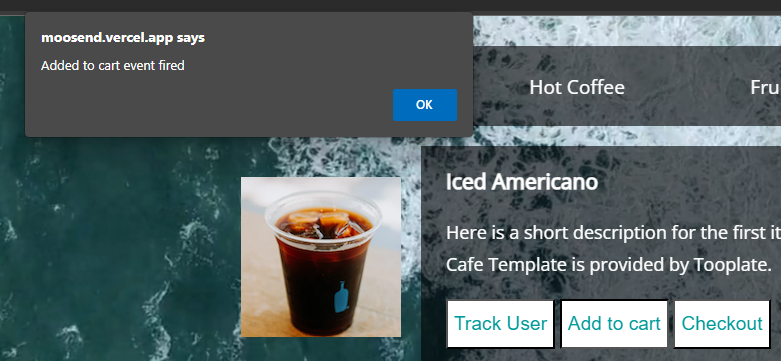
alert("Added to cart event fired");
}Hook the Add to cart to button-
<button class="button" onclick="addToCart()">Add to cart</button>
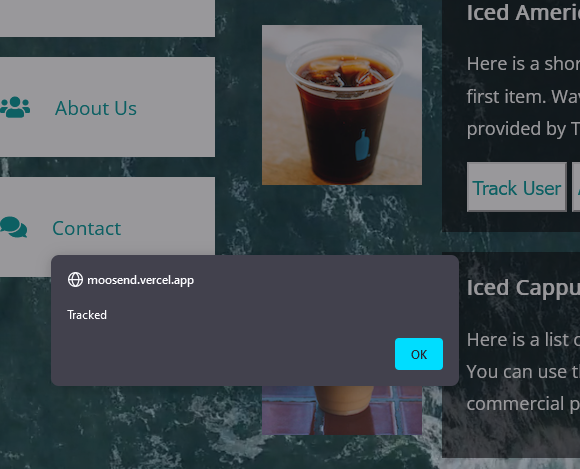
The site looks like this with the “Add To Cart” button
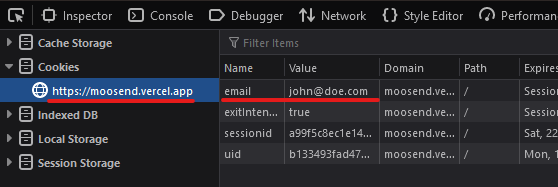
Website confirm the event was triggered.
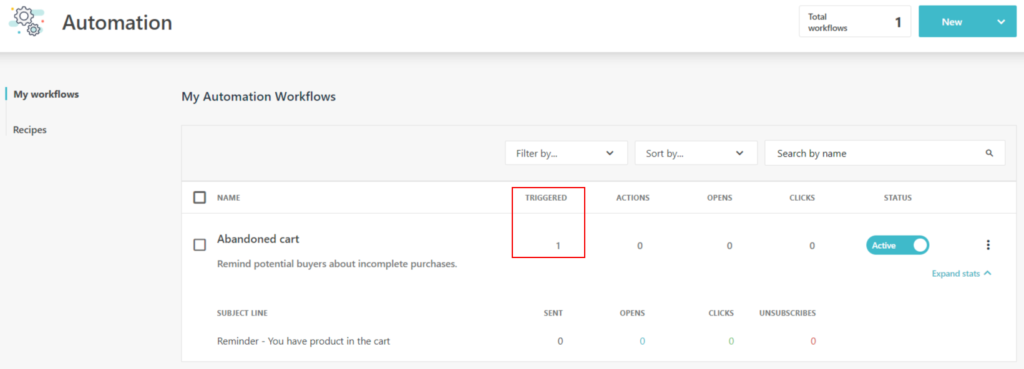
In the automation list you can see the automation been Triggerd-
Once this is triggered you can see the next operation Wait for 5 minutes-
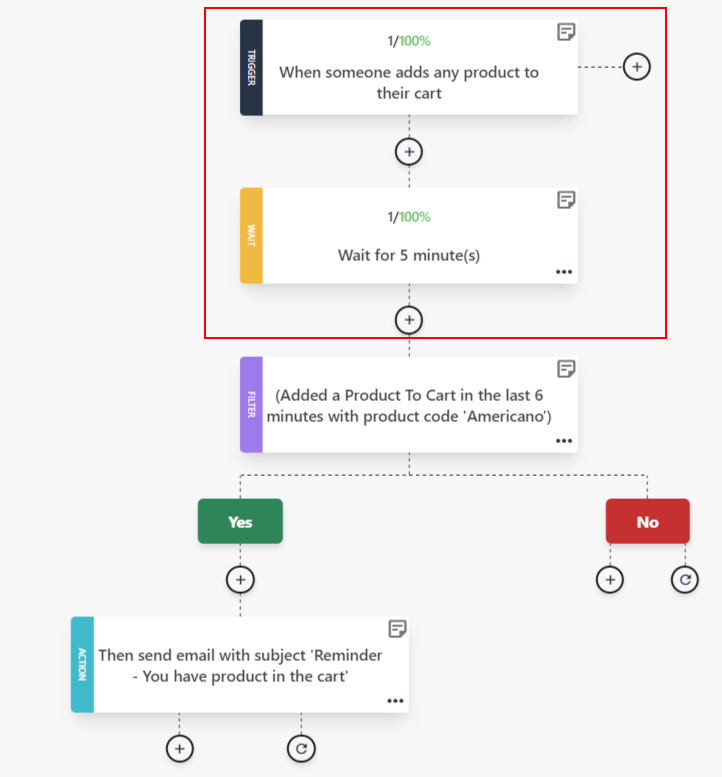
A mail should be triggerd after 6 minutes. Since the product is still in cart and not purchased.
After 5 minutes all the actions should be triggered.
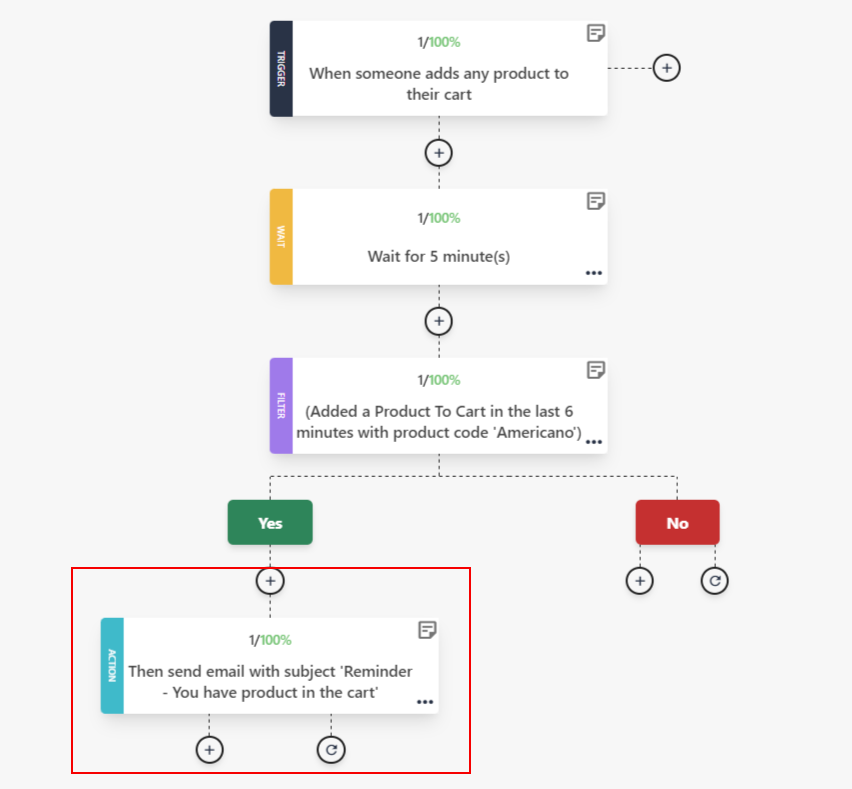
Once all the actions are triggered should receive the mail-
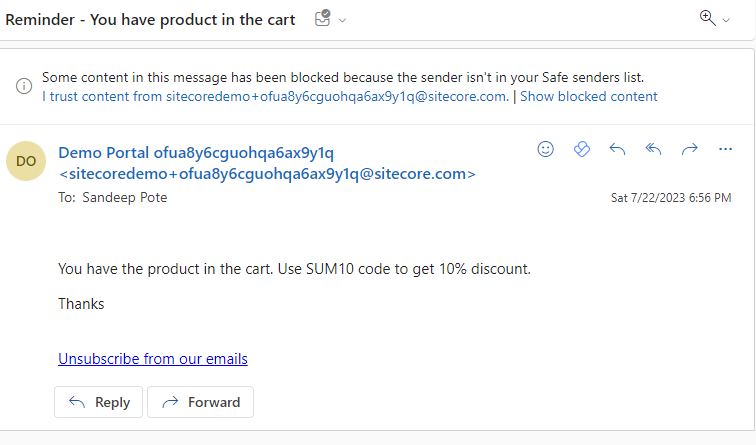
Thats it for this blog. We have managed to trigger a automation event and send themail to the users who have product in the cart and not purchased e.e. Abandoned Cart.
![]()