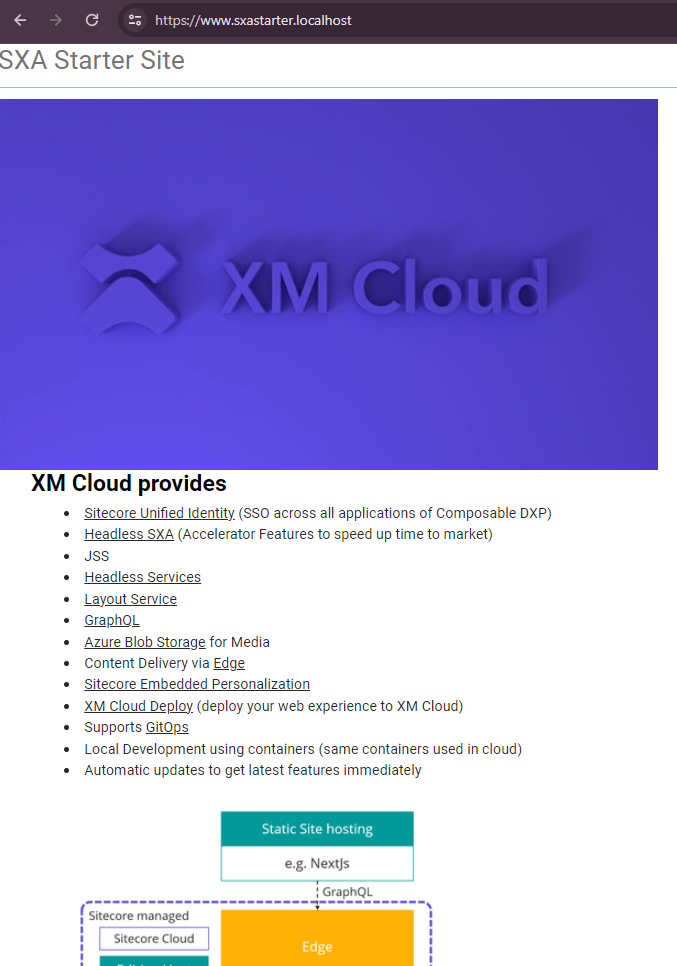
In this blog post we wil setup nextjs application i.e. sxastarter assuming your local Sitecore instance is up and running.
We will create a Headless SXA site in Sitecore local instance and then setup the FE application. This is can also moved outside the Foundation Head repo so that FE devs can work on this spearately.
Setup JSS app to work with local Sitecore instance
Ensure you have Sitecore instance up and running see this blog << 2. XM CLoud for local env>> or you can also see this blog
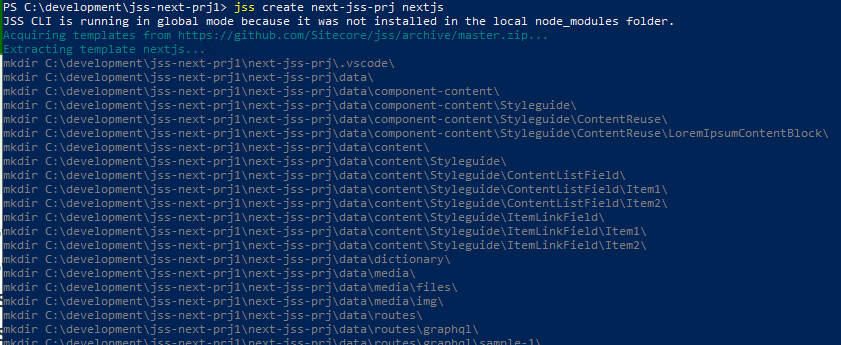
1. Setup your JSS app
Ensure you execute this commands on FE folder i.e. /src/sxastarter
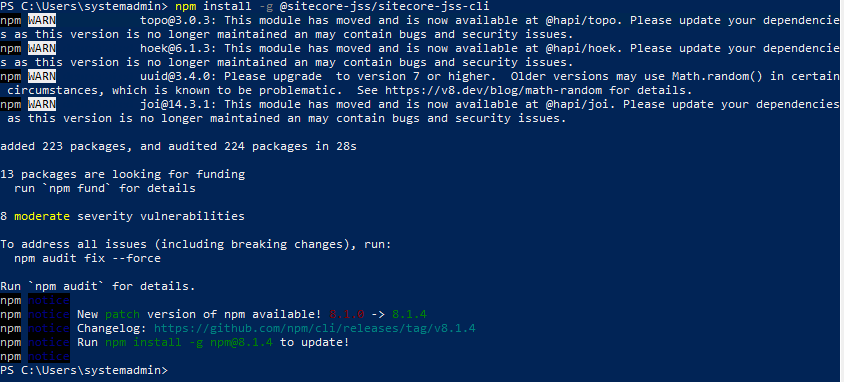
Ensure you have Sitecore JSS CLI installed on local machine

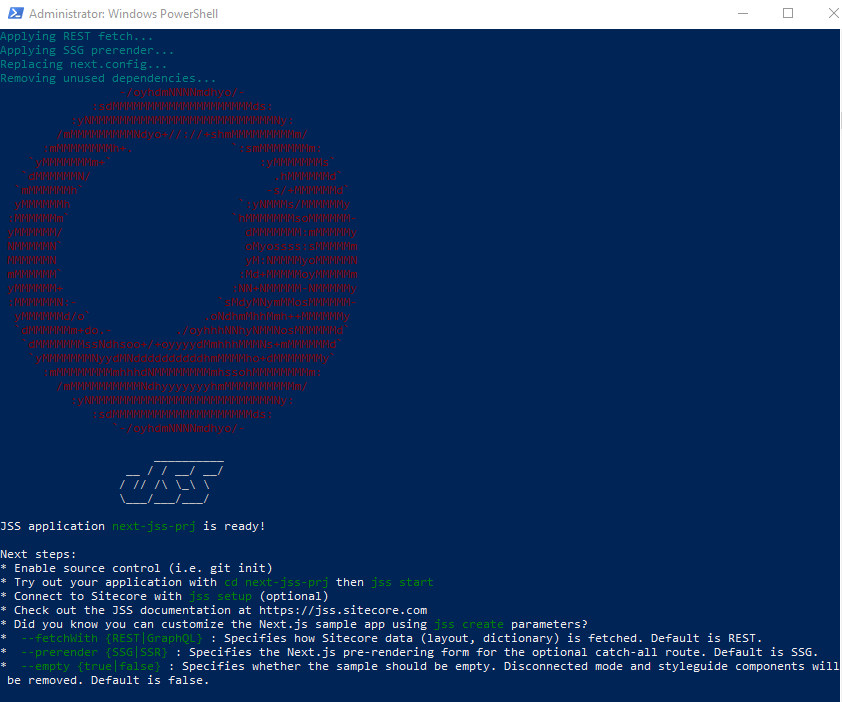
Once this is installed Setup the JSS app-
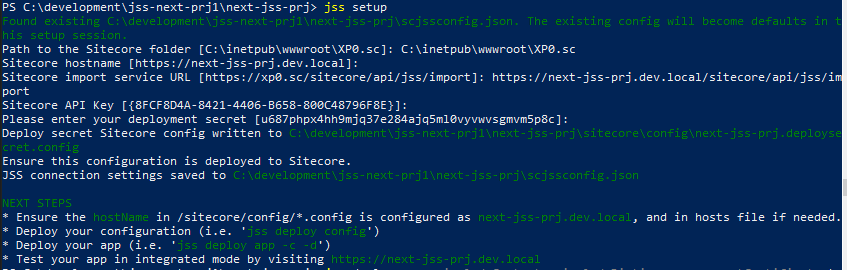
jss setup
Following is required to setup-
jss setup
Is your Sitecore instance on this machine or accessible via network share? [y/n]: n
Sitecore hostname (e.g. http://myapp.local.siteco.re; see /sitecore/config; ensure added to hosts): https://xmcloudcm.localhost
Sitecore import service URL [https://xmcloudcm.localhost/sitecore/api/jss/import]:
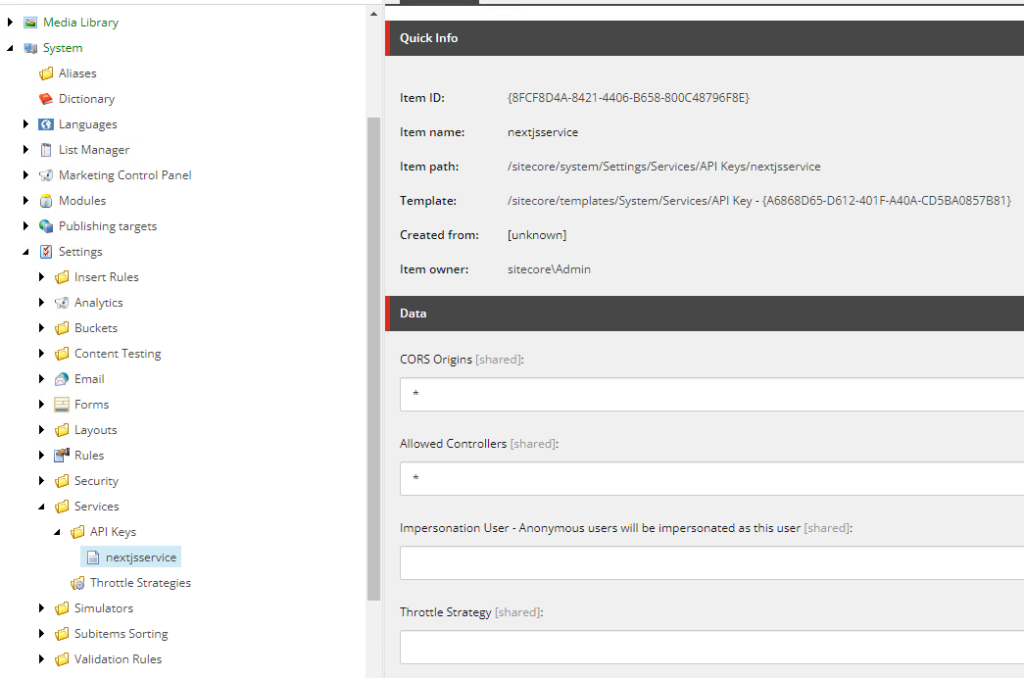
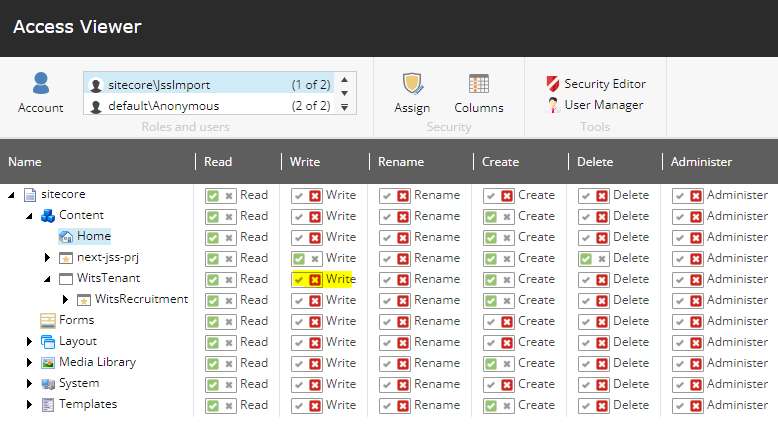
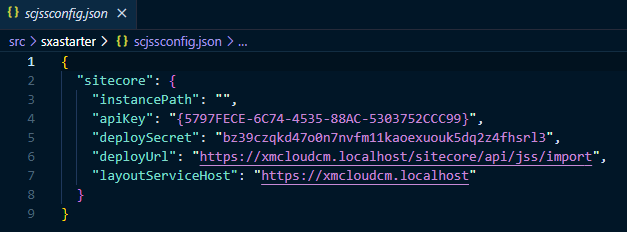
Sitecore API Key (ID of API key item): {5797FECE-6C74-4535-88AC-5303752CCC99}
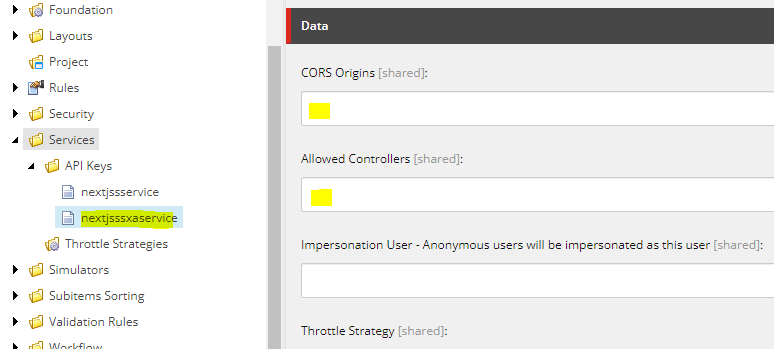
Please enter your deployment secret (32+ random chars; or press enter to generate one): Provide the Sitecore hostname and the api secret, in this case xmcloudpreview item id at following location /sitecore/system/Settings/Services/API Keys/xmcloudpreview
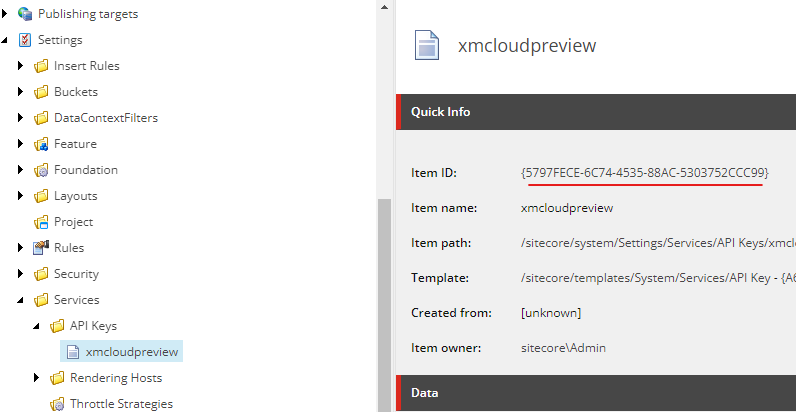
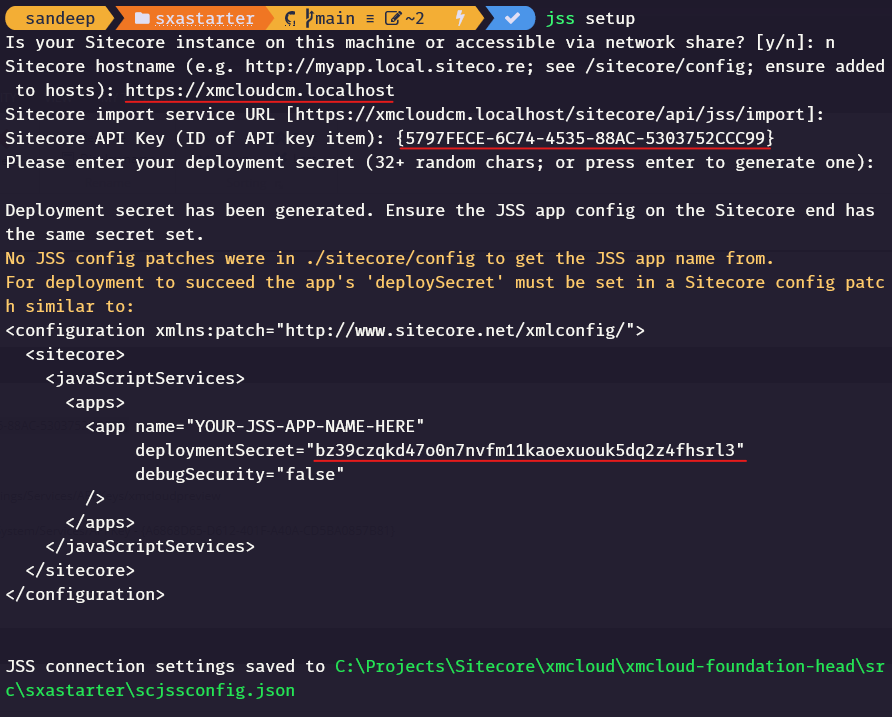
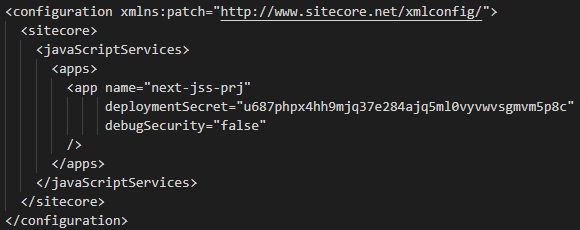
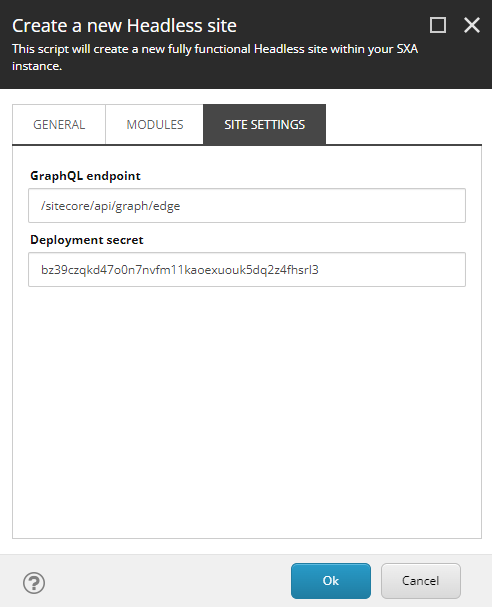
Note the deployment secret. This is required to setup Headless Site, in this case it is bz39czqkd47o0n7nvfm11kaoexuouk5dq2z4fhsrl3
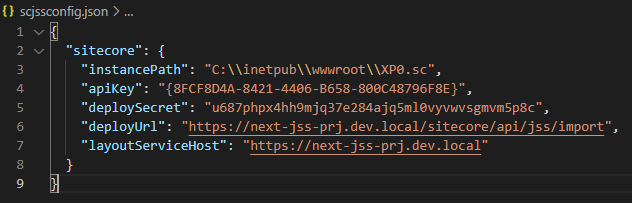
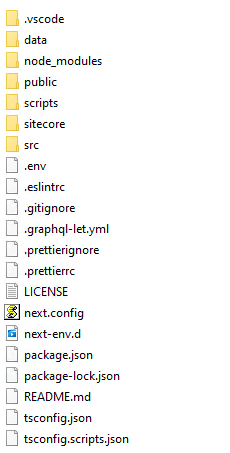
Also note the sscjssconfig.json file updated.
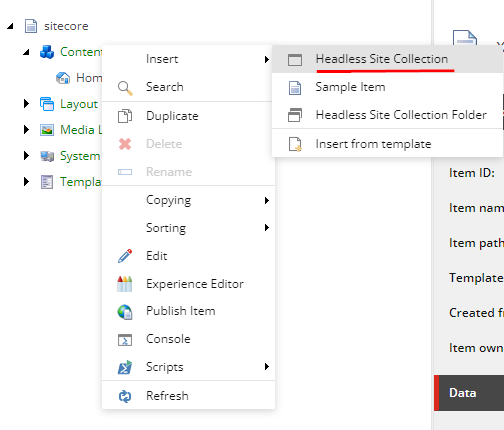
2 . Create a Healdess Tenant and Site
In your Sitecore instance create a Healdess Site Collection, you may create a folder Site Collection Folder if required-
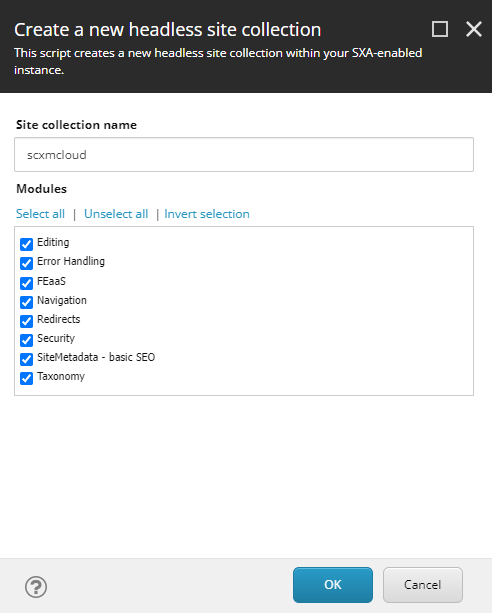
Next provide the Site collection name, in this case scxmcloud and select the required modules-
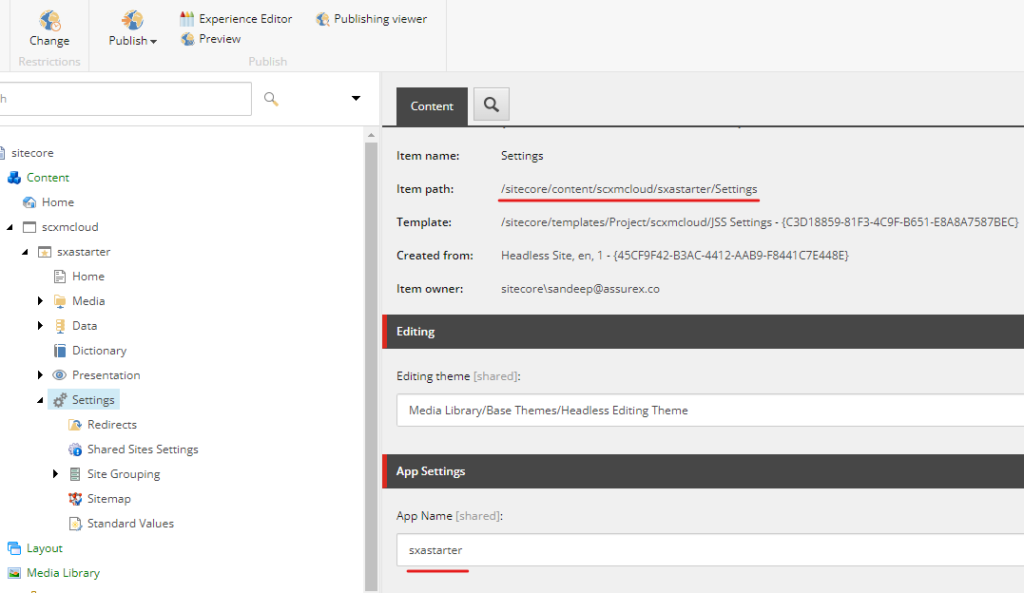
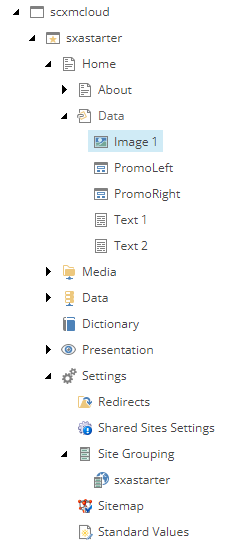
You should see the Site collection created along with the required templates in Project/scxmcloud folder.
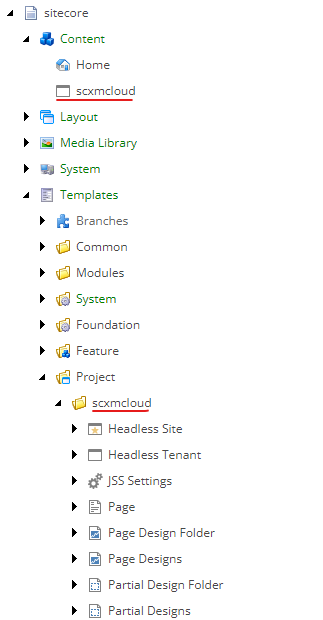
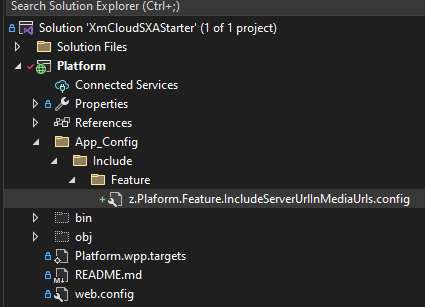
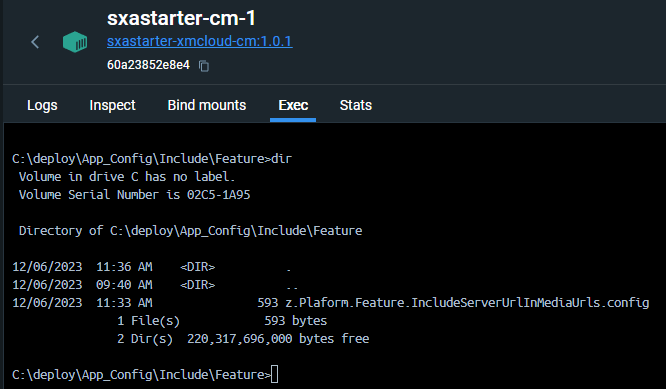
Setup should create folders and required items in following location. Note this as this is required whilst setting the item sync using Sitecore SCS (Sitecore Content Serialization)
Layout Placeholder Settings- /sitecore/layout/Placeholder Settings/Project/scxmcloud
Layout Renderings – /sitecore/layout/Renderings/Project/scxmcloud
Media Library – /sitecore/media library/Project/scxmcloud
Templates – /sitecore/templates/Project/scxmcloud
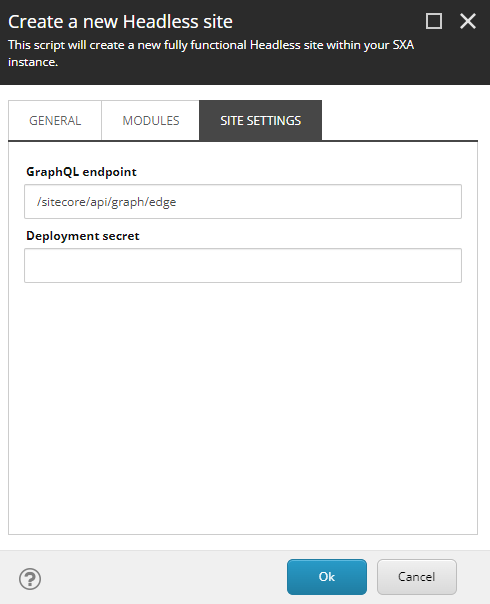
Create a Headless SXA Site
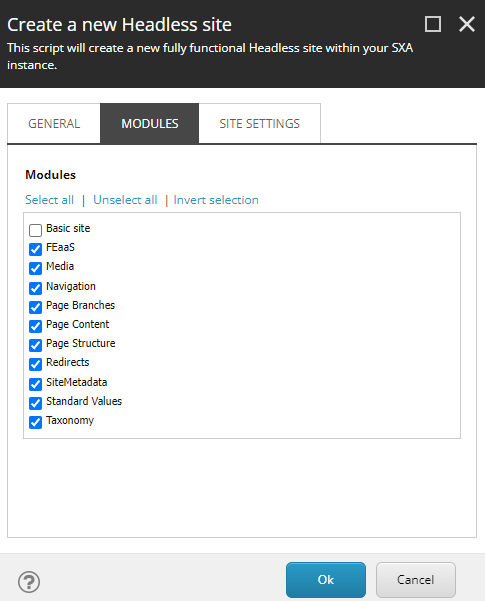
Create headless site under site collection-
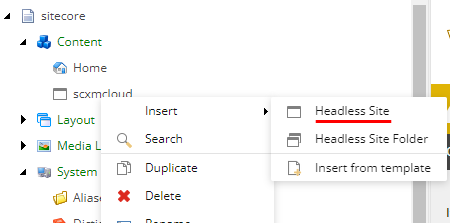
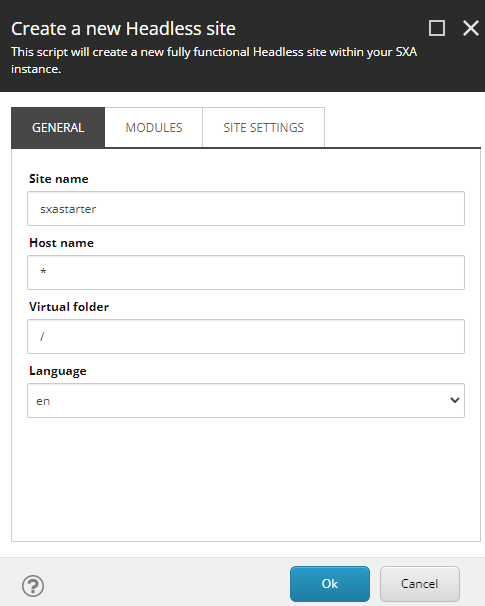
Provide the name of the site- sxastarter
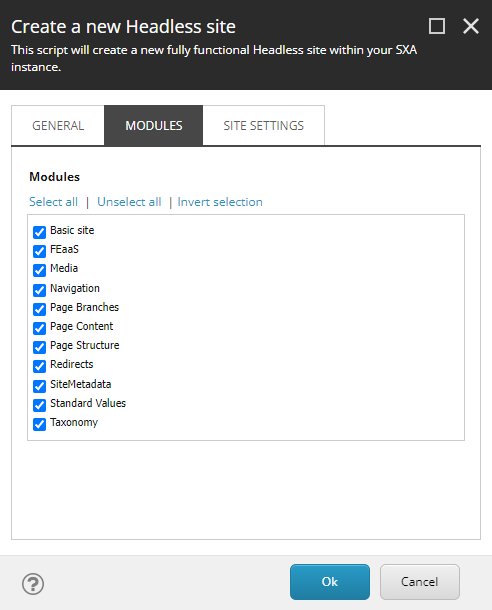
Select the modules- Note I selected the basic site module. This should add sample items to home page along with About page. You may choose not to select the basic site module.
Enter the deployment secret created whilst setting up the JSS app
Site should now be created-
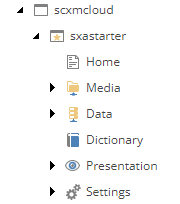
Site without Basic Site module-
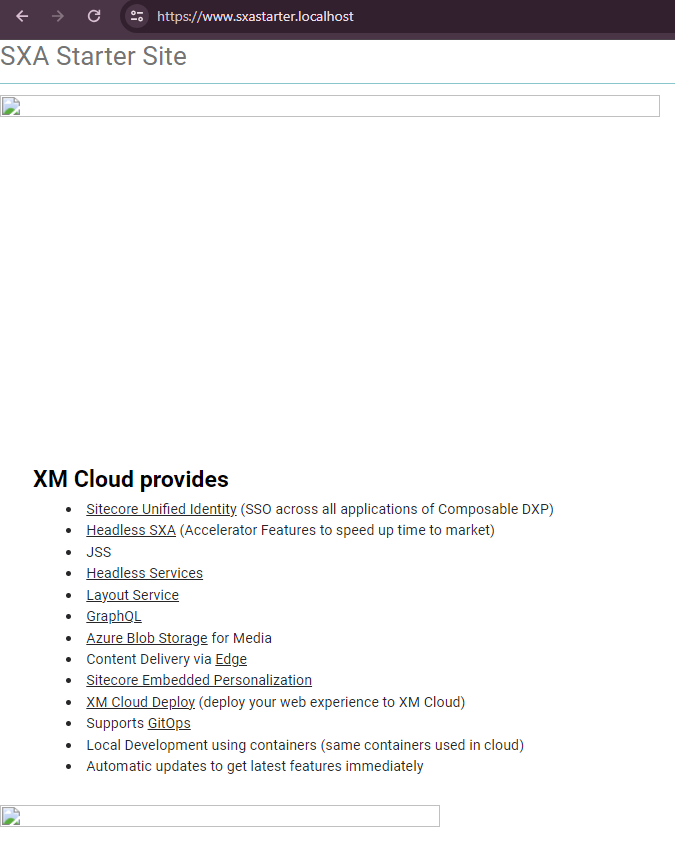
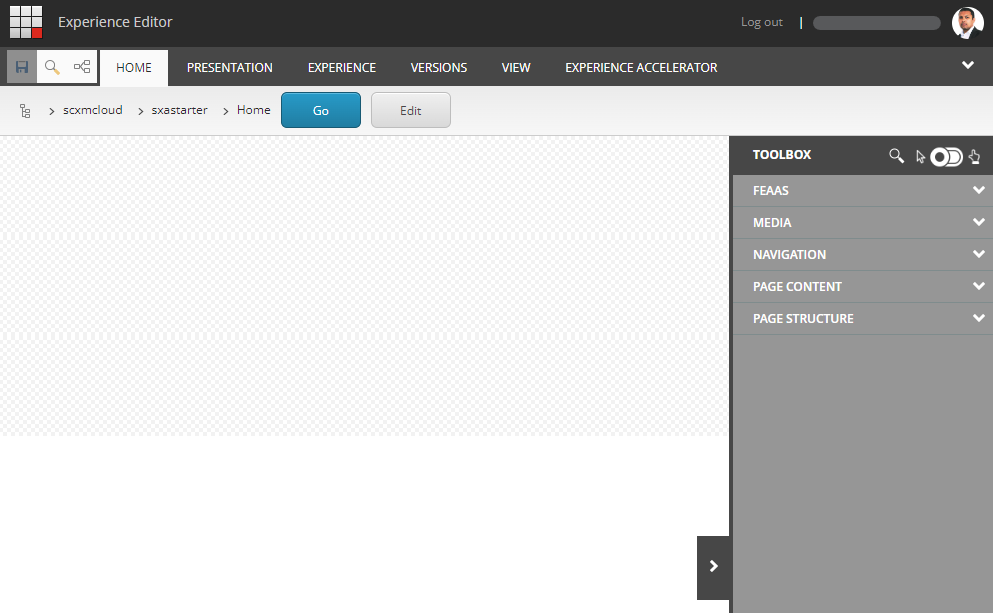
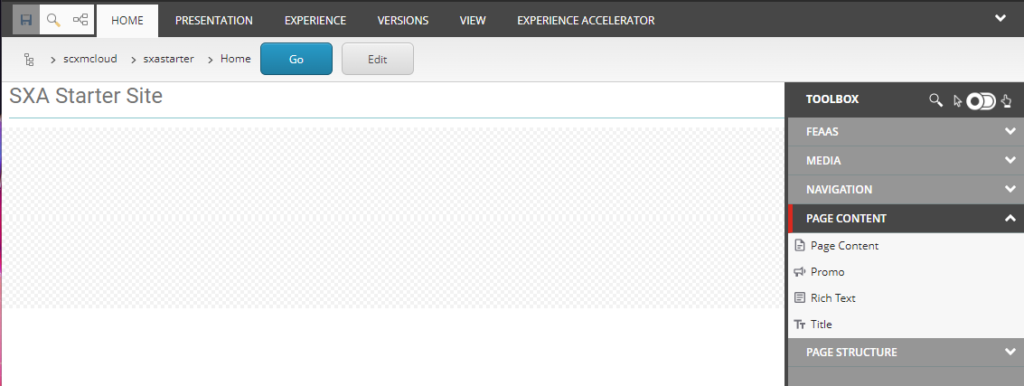
Open the experience editor and you should see the blank page-
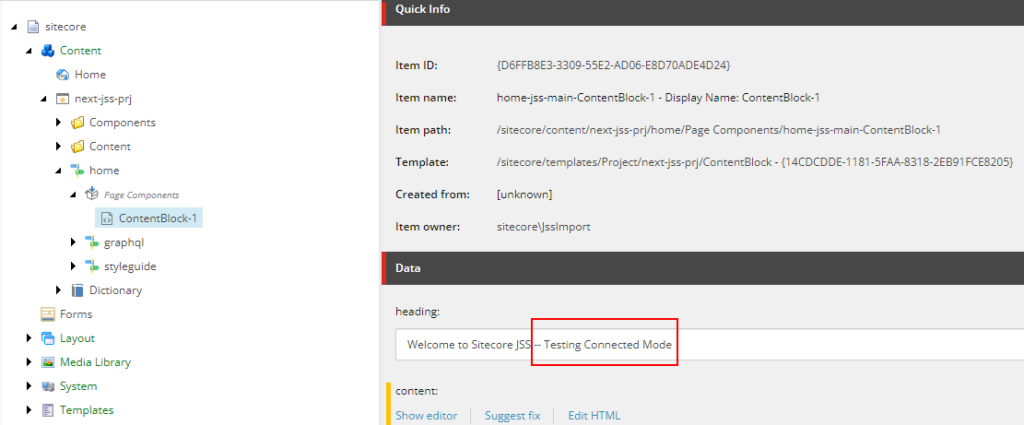
Lets add the Title component to see if the changes are reflecting in Experience Editor and FE.
Testing GraphQL IDE for local environment
Try the graphql ide here on your local instance –
https://xmcloudcm.localhost/sitecore/api/graph/edge/ide
And the request for same should be sent to –
https://xmcloudcm.localhost/api/graphql/v1
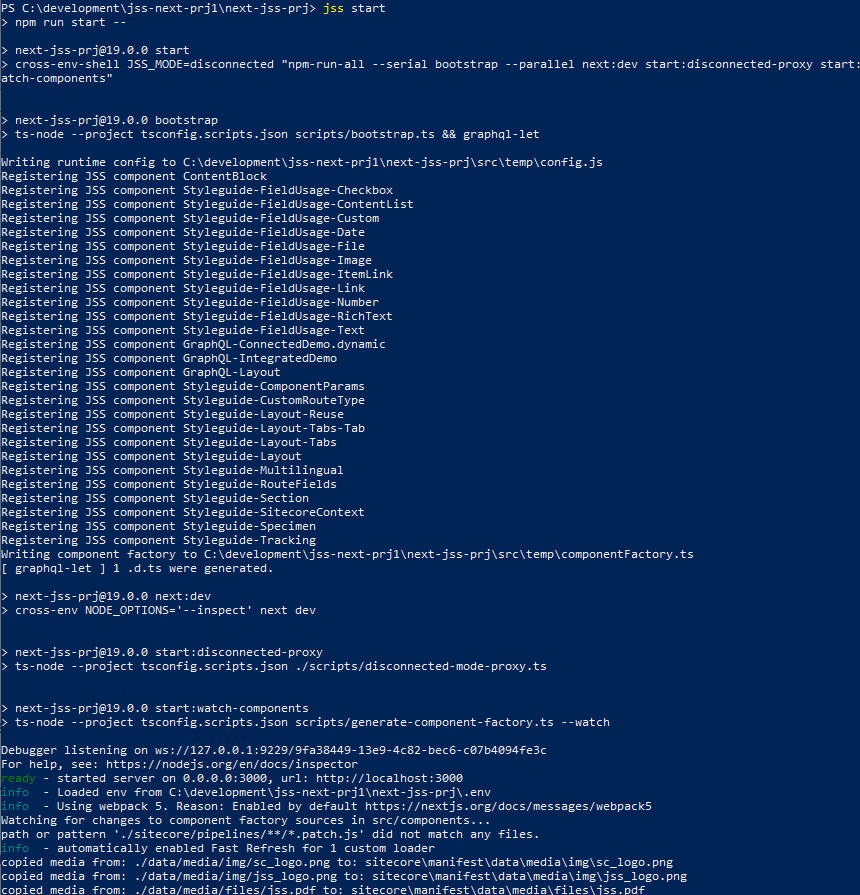
We now have site ready to start developing components.
Run the FE site
On your root folder /src/sxastarter folder run following-
npm install
npm run start:connected
npm install – should download all the required dependencies
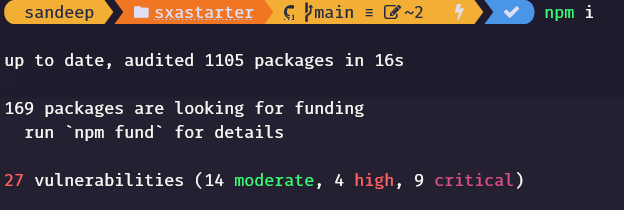
You may fix any vulnerabilities by running-
npm audit fix
OR
npm audit fix --force
Before starting the jss app ensure the app name in Sitecore matches the app name in package.json file.

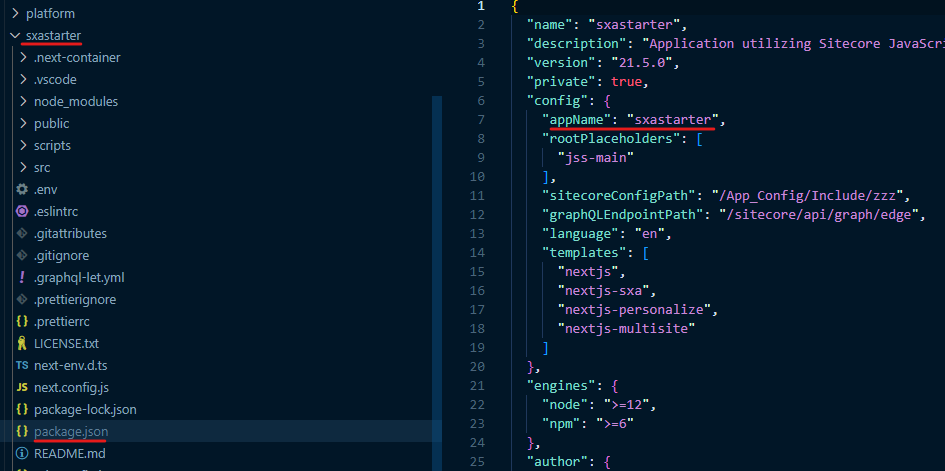
If you wish to change the app name you to make changes in Sitecore and package.json file.
To start the sxastarter jss app run-
npm run start:connected
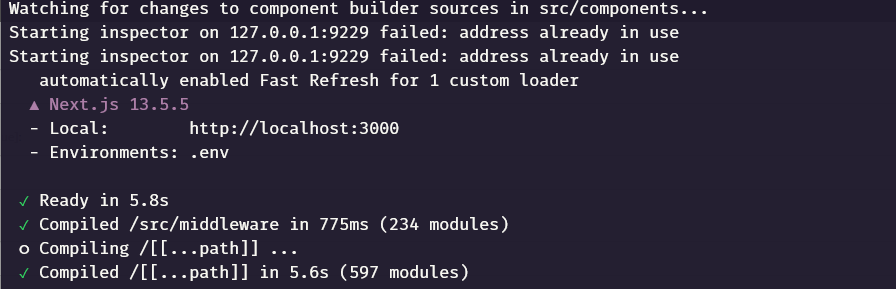
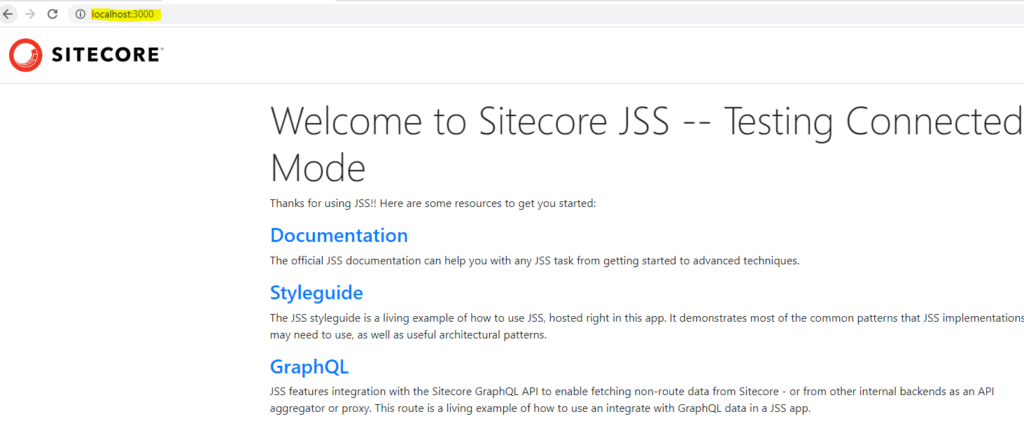
If no errors the app should be available on http://localhost:3000
The newly added title in header should also be displayed-
Managed to add inbuilt components to page-
This conculdes setting up the local environment with having Sitecore CM instance and the jss app (FE) running on localhost. Note JSS app is not runing on containers as we should not force FE devs to work on containers. This scenario is good for Sitecore developers for bulding and testing the components locally.
You may pull out the sxastarter folder outside this repo and FE devs should be good to develop on theri own. Although there is a dependency to have Sitecore instance hosted on local environment.
In next blog post we will how to setup the FE without having Sitecore local instance and connect to XM Cloud.
But before that we need to setup the XM Cloud project and environments, for that we will configure the Sietcore Content Serilization to push the changes made in local to XM Cloud. Coming in next blog.
Connect your local FE app to XM Cloud.
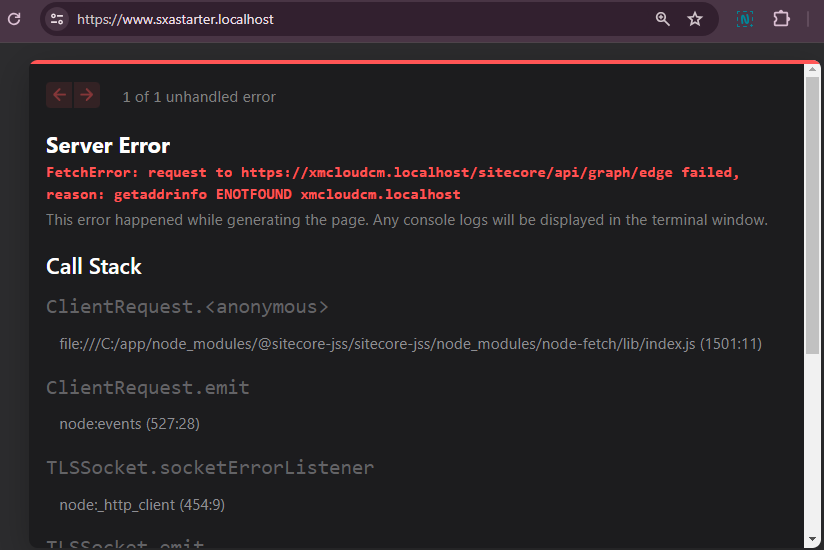
Although not recommended but if you want ot connect the XM Cloud instance to local FE app. Follow these steps.
I need to make changes in 2 places to get this working.
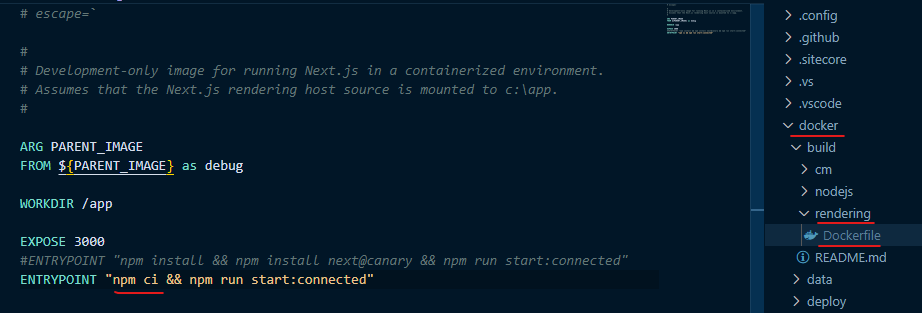
docker-compose.override.yml – rendering
Change environement settings–
SITECORE_API_HOST – The host name of XM instance.
SITECORE_API_KEY- This is the delivery api token
Generate this from XM Cloud if not done before.
environment:
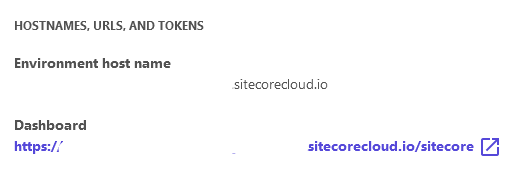
SITECORE_API_HOST: "https://your-instance.sitecorecloud.io" #"http://cm""http://${CM_HOST}"
NEXTJS_DIST_DIR: ".next-container"
PUBLIC_URL: "https://${RENDERING_HOST}"
JSS_EDITING_SECRET: ${JSS_EDITING_SECRET}
SITECORE_API_KEY: "your_delivery_api_token" #"${SITECORE_API_KEY_xmcloudpreview}"
DISABLE_SSG_FETCH: ${DISABLE_SSG_FETCH}
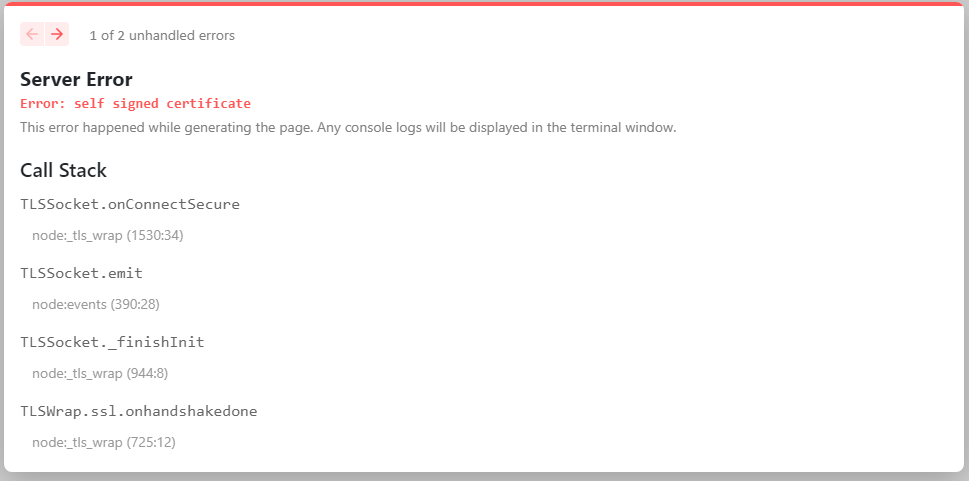
NODE_TLS_REJECT_UNAUTHORIZED: 0FE (sxastarter) .env file-
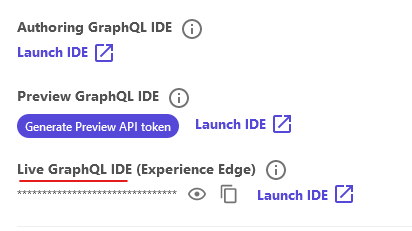
GRAPH_QL_ENDPOINT to https://edge.sitecorecloud.io/api/graphql/v1
Spin-up the containers again and shold render the content
Hope this helps.
![]()