


Last Updated on February 1, 2025 by sandeeppote

In my last post, I have described the steps to set up the Sitecore Commerce development environment. In this post, I will describe how to create a custom plugin in Sitecore Commerce. I was working on version 9.3 but these steps should work with all versions of 9 series.
Sitecore Commerce provides an extensible framework which can be extended using plugins. A plugin is an independently publishable extension to the Sitecore Commerce Engine. Generally, you will find the following contained in a plugin and are used to extend the platform.
- Entities
- Components
- Entity Views
- Pipeline
- Policies etc.
You can extend the platform or add more features using the plugins. Let’s get started and look into the steps to create a new plugin in Sitecore Commerce 9.3. If you have already set up your commerce development environment, please skip to step 2
Step 1 – Setup developer environment
Create a developer environment for Sitecore Commerce to run the engine from Visual Studio, can be either VS 2017 or 2019. Follow this blog post for same Setup development environment for Sitecore Commerce 9.3 Engine
Step 2 – Install Visual Studio Extension for creating plugin
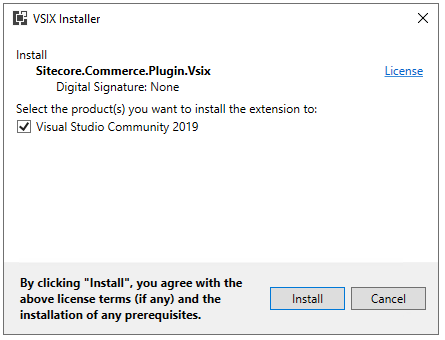
- Go to solution root folder or SDK folder and run the Sitecore.Commerce.Plugin.vsix file. Close the Visual Studio solution if open.
- This should install extension on selected Visual Studio Version
Step 3 – Create a plugin
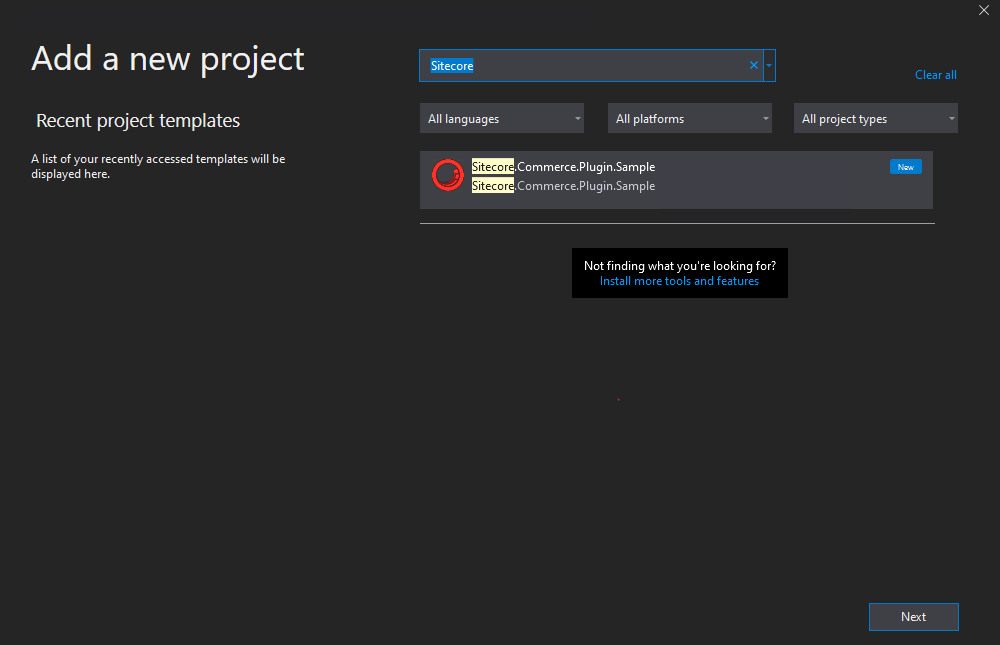
- Open your solution. Create a Feature solution folder, just to follow Helix best practice. Right click solution folder to create a new project
- Search Sitecore.Commerce.Plugin. Select project type and click next.
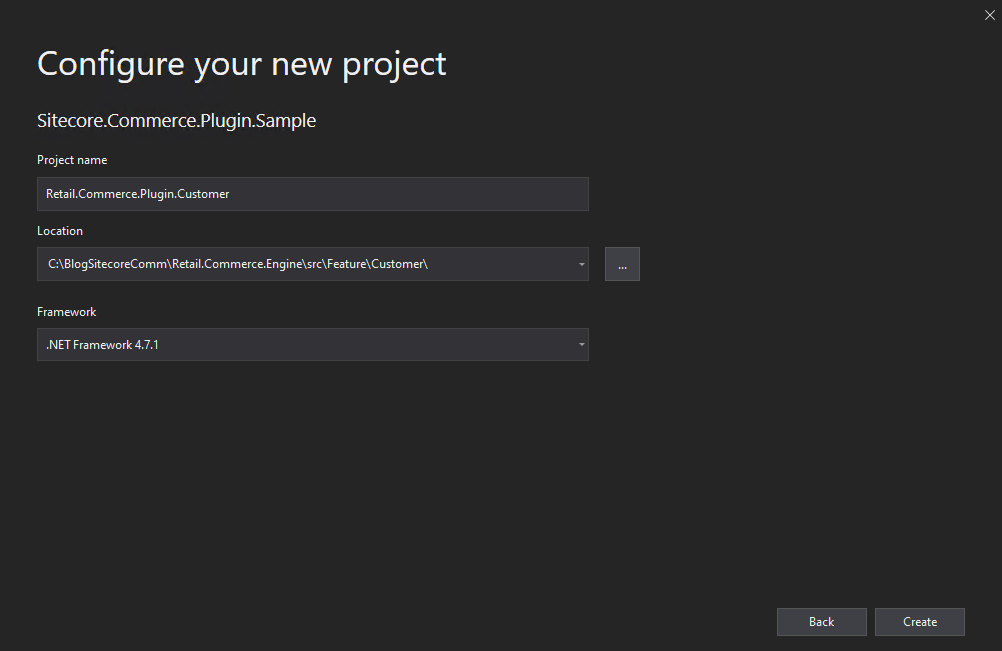
- Give the project name, location and select .Net Framework 4.7.1. Create a Project.
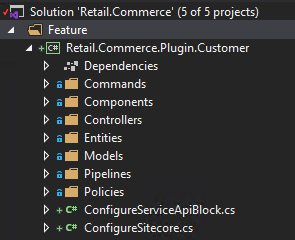
- Sample Folder and Files for Commands, Components, Controller etc shall be added.
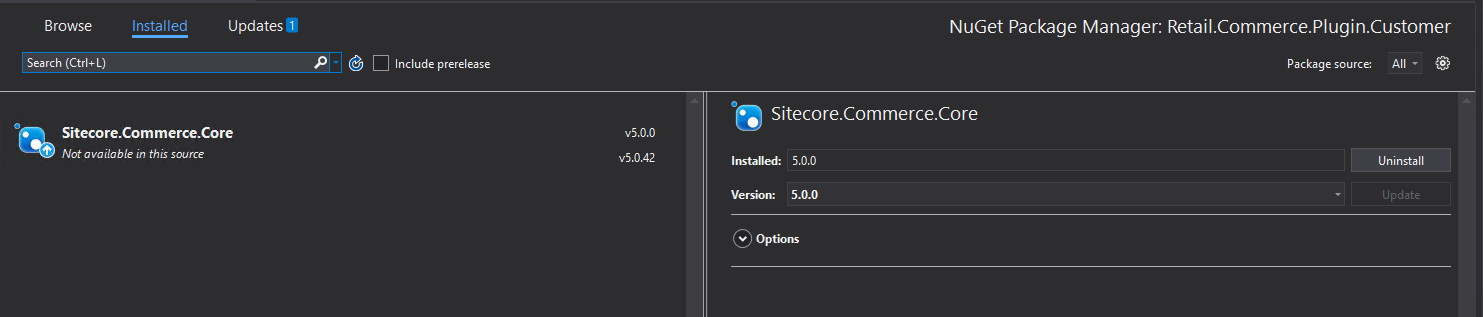
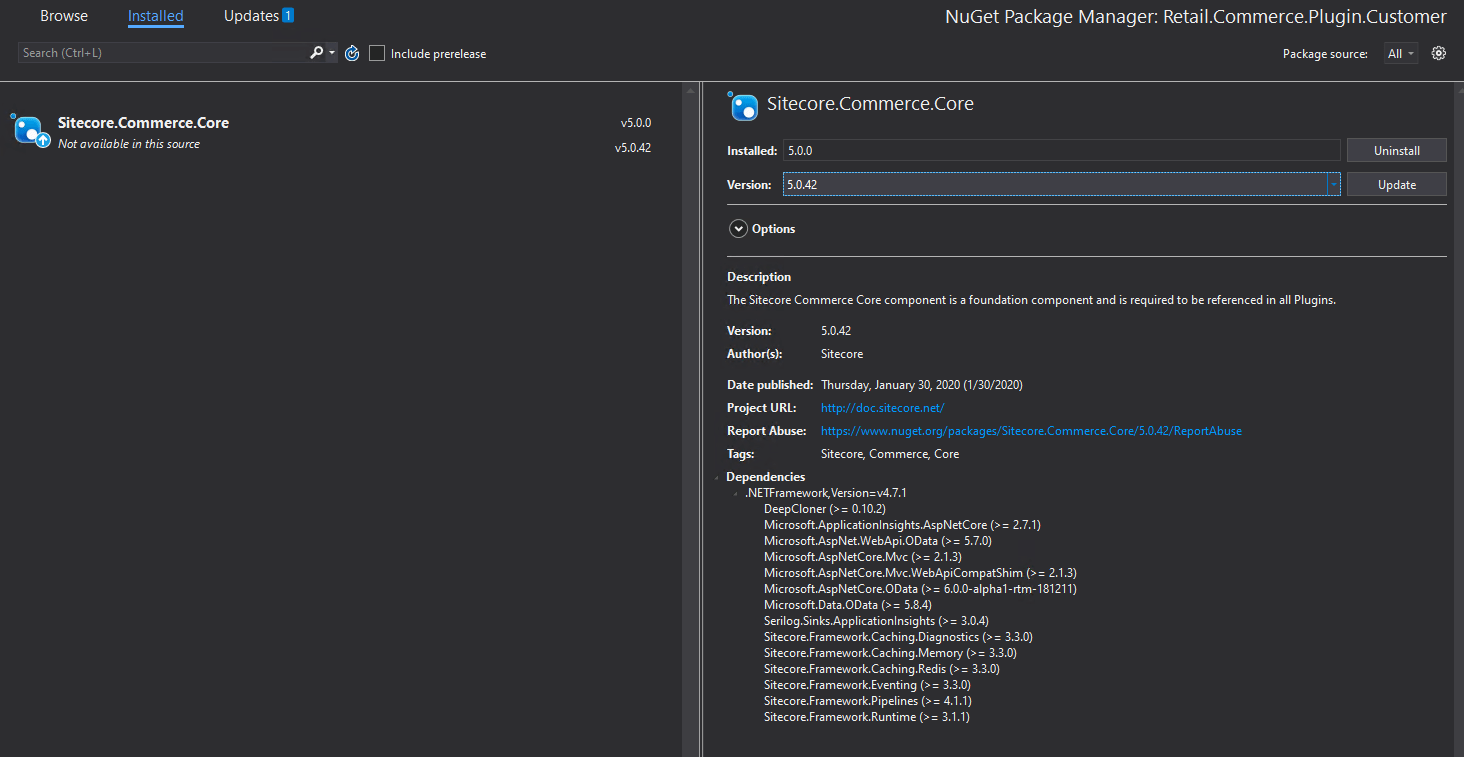
- Update the Sitecore Commerce Core from 5.0.0 to 5.0.4
4. Build the project. There shouldn’t be any reason the build should fail.
Step 4 – Reference project and run engine
- Add Plugin project reference to your Commerce.Engine Project
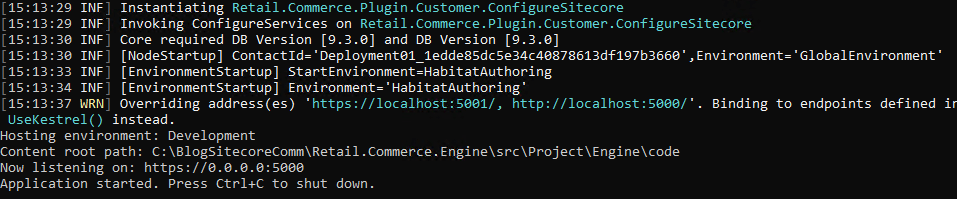
- Run the Engine. You should be able to see the newly created plugin is now registered in Engine.
This should allow to start customizing commerce and truly use plug-gable and extendable feature of Sitecore Commerce.
We intentionally didn’t add any code to this plugin to keep this simple. In the next blog, we will cover the anatomy of the newly created plugin and show how to inject this plugin into Commerce Pipelines and execute some custom code.
Next understand the Elements of Sitecore Commerce Plugin project templates
Hope you enjoyed this post. Stay tuned.