


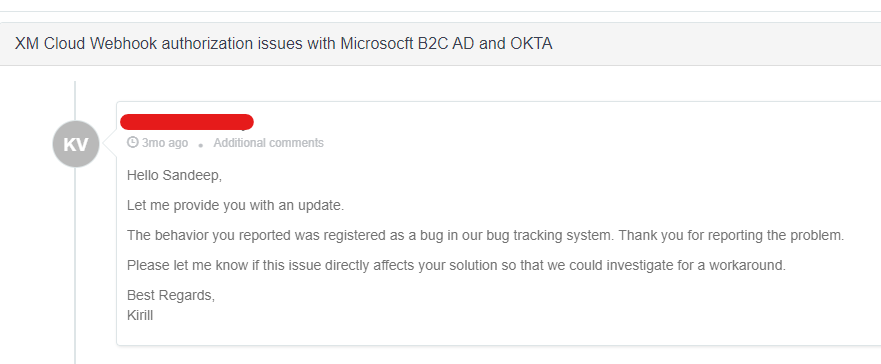
Few months back I was trying to Authorize Sietcore Webhooks using Microsoft Actice Directory B2C and found issue that it wasn’t working.
After creating a support ticket, Sitecore logged this as a bug.
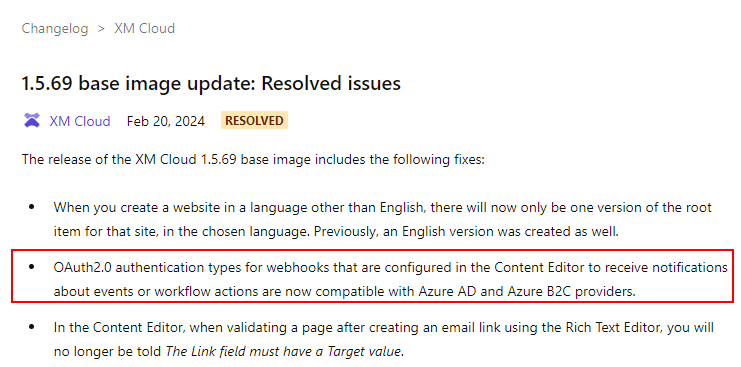
This was resolved and release on 20th Feb 2024.
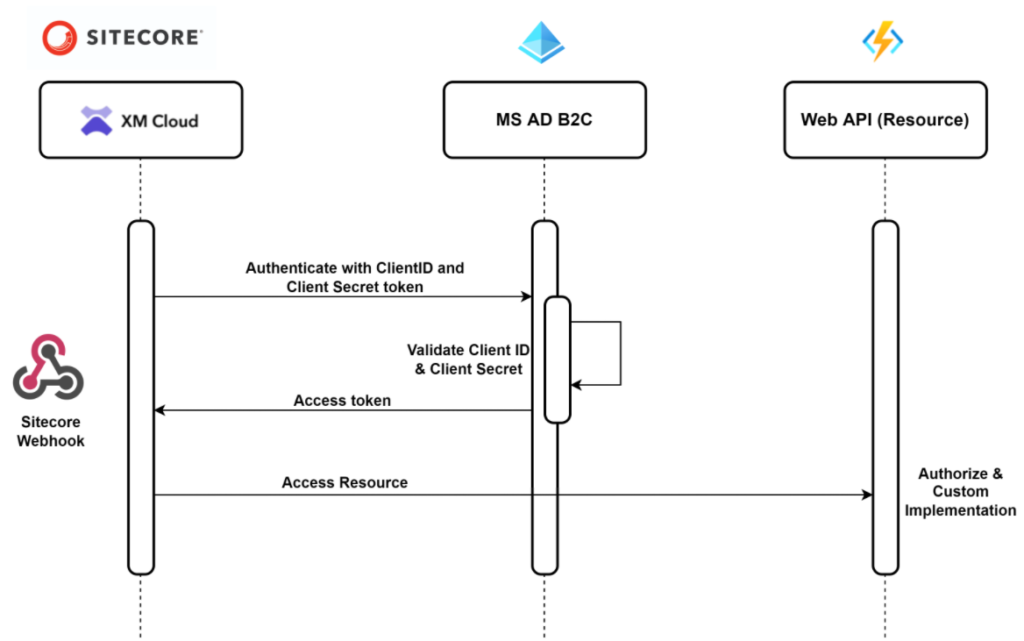
This blog helps on how to configure MS AD B2C and configure in Sitecore as Client Credential grant to generate an access token so the Event receiver can authorize and process the request.
Note- text highlighted in red is required later to configure in Sitecore.
Reference-
https://developers.sitecore.com/changelog/xm-cloud/1.5.69-base-image-update%3a-resolved-issues
Pre-requisite
You should have your Azure AD B2c tenant. See this link on how to set this – Tutorial – Create an Azure Active Directory B2C tenant | Microsoft Learn
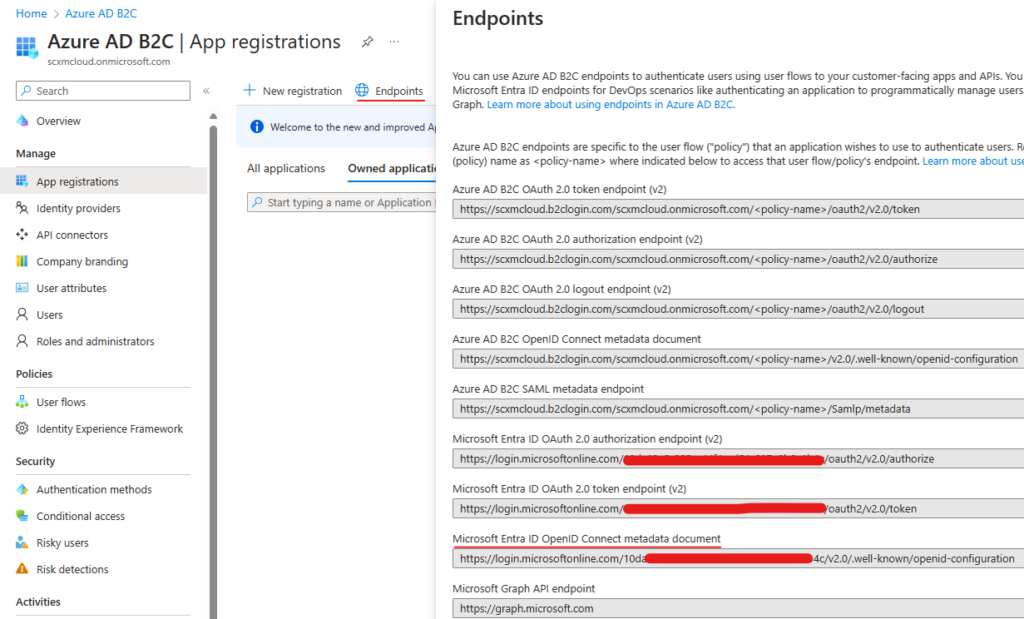
Once configured you see the options to register your app.
Before registering app note down the highlighted. This should be available as the part of Endpoint-
Microsoft Entra ID OpenID Connect metadata document.
This is Authority URL in Sitecore Webhook.
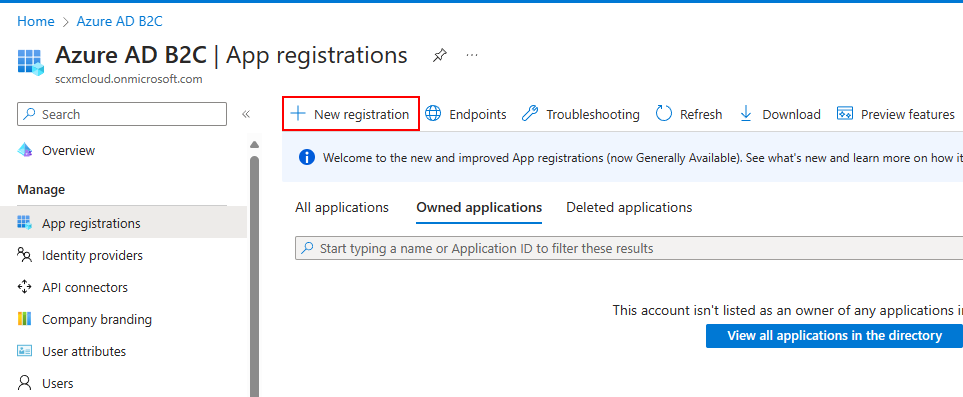
Step 1 – Register App
Click on New registration
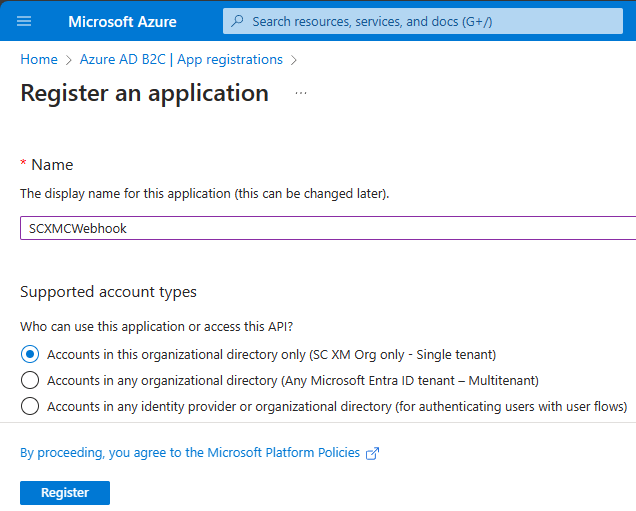
Provide the App registration name and selected supported account types. In this case I have given name – SCXMCWebhook and selected “Accounts in this organizational directory only (SC XM Org only – Single tenant)“
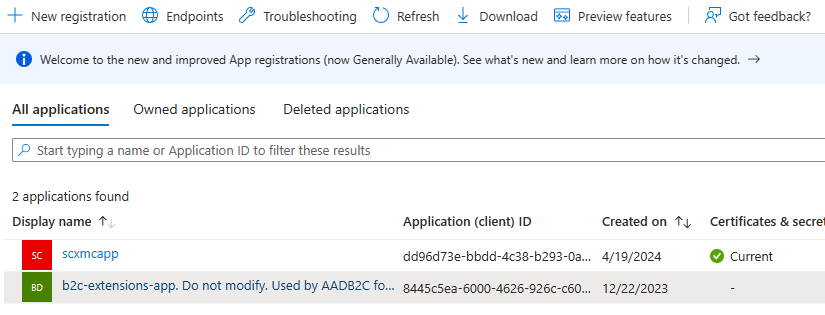
Register App and it should show the registered app-
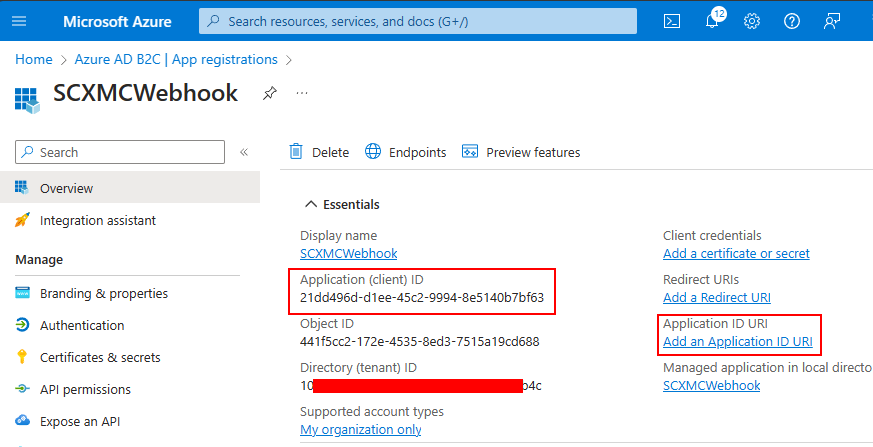
Application (Client) ID – Required to configure in Sitecore
It should also list your newly created app-
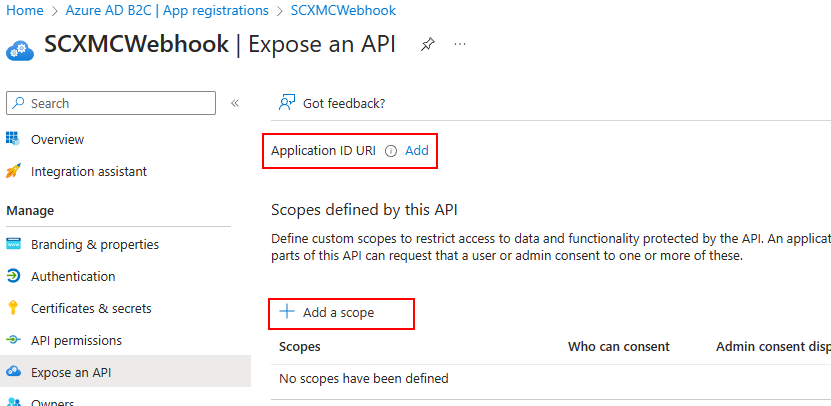
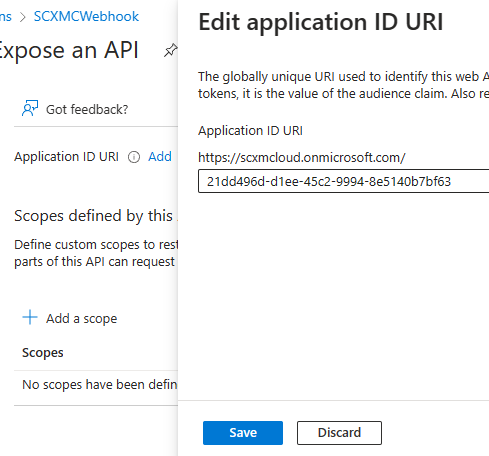
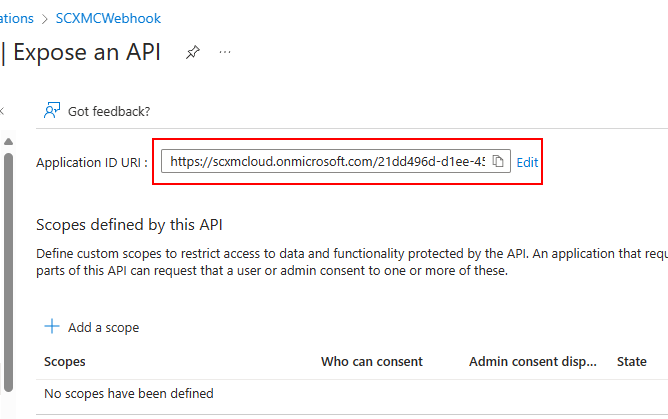
Step 2 – Add an Application URI
Click on Application ID URI “Add”link and then “Add a scope”
This should create a URI –
Step 3 – Add a scope
Now create a scope “Add a scope”. Enter scope name, admin consent and description. Ensure you enable the scope.
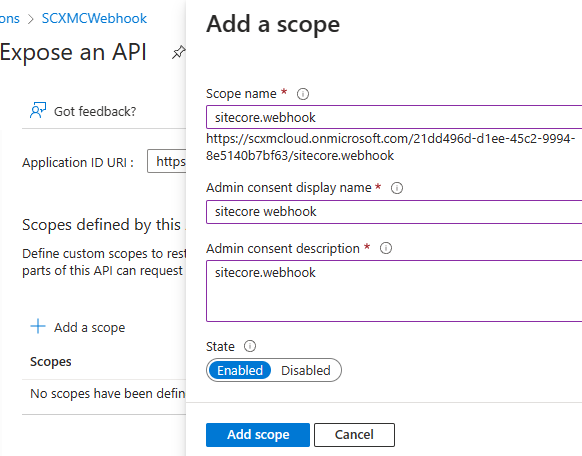
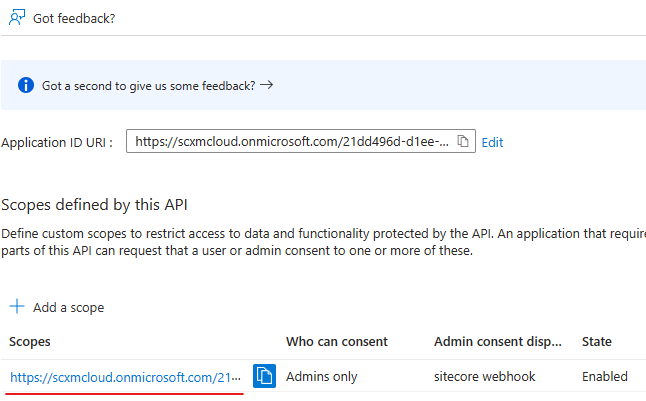
A new scope isadded . Copy the scope as highlighted –
required in Sitecore Auth Scope field
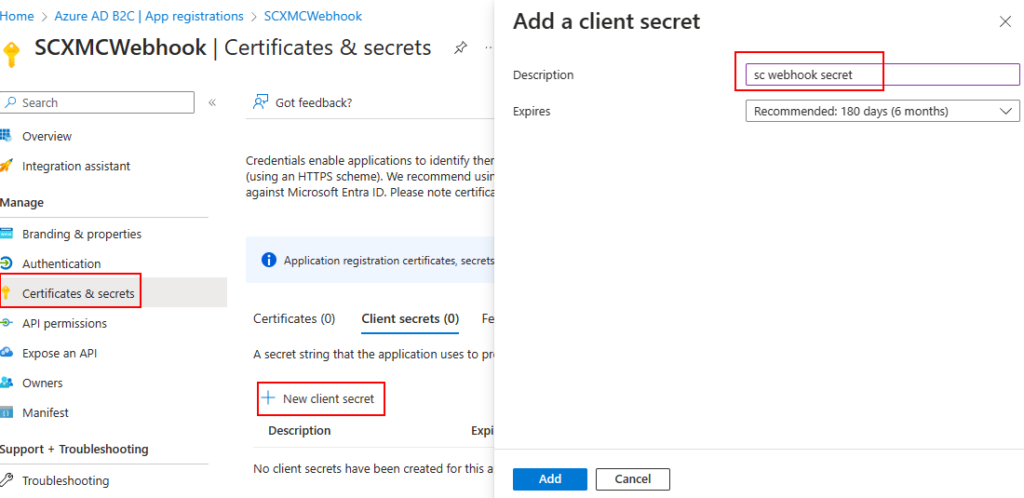
Step 4 – Create Secrets
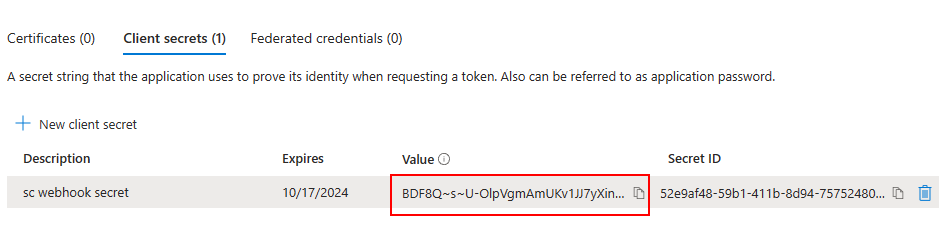
Copy the secret value. This value won’t be shown again. This is required to configure in webhook Client Secret field
Navigate to Overview tab and you should see all the configured details.

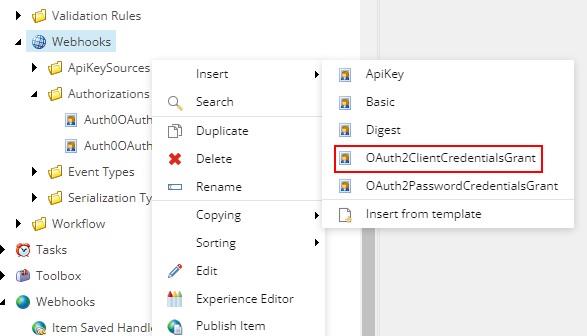
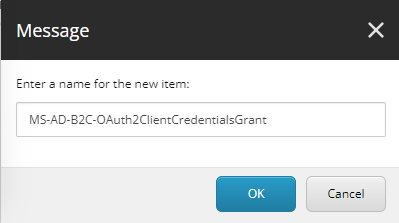
Step 5 – Create a Client Credential Grant Authorization in Sitecore
| Sitecore Client Credential | Microsoft AD B2C |
| Authority URL | Microsoft Entra ID OpenID Connect metadata document. (Check Endpoints) |
| Client ID | Application (client) ID (Check Overview tab) |
| Client Secret | Client Secret Value (Check Certificates & Secrets tab) |
| Scope (Append /.default) | Application ID URI (Check Overview tab) |
| Header Prefix (Bearer) | |
| Additional Endpoint Base Addresses (See Semicolon seperated values below) | Directory (tenant) ID (Part of the url- Check Overview tab) e.g.:- 10d**************1b4c |
Additional Endpoint Base Addresses–
| https://login.microsoftonline.com/10d**************1b4c/discovery/v2.0/keys |
| https://login.microsoftonline.com/110d**************1b4c/oauth2/v2.0/token |
| https://graph.microsoft.com/oidc/userinfo |
| https://login.microsoftonline.com/10d**************1b4c/oauth2/v2.0/authorize |
| https://login.microsoftonline.com/10d**************1b4c/oauth2/v2.0/devicecode |
| https://login.microsoftonline.com/10d**************1b4c/oauth2/v2.0/logout |
| https://login.microsoftonline.com/10d**************1b4c/kerberos |
Client Credential Grant Authorization Item should look like this-
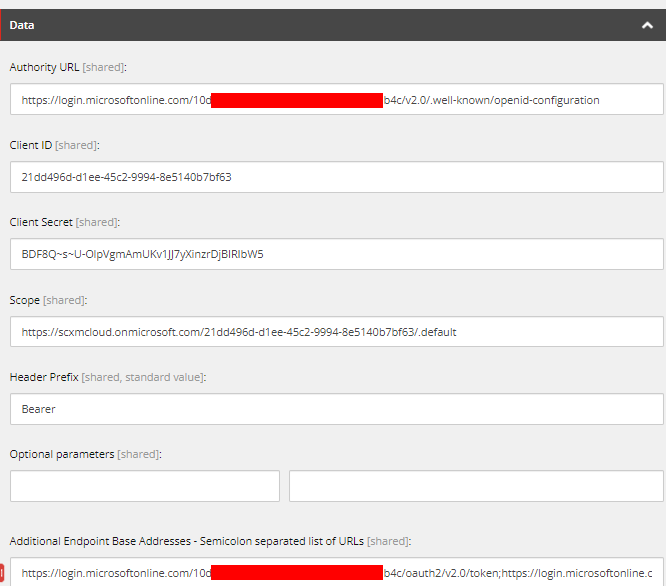
Please note Additional Endpoint Base Address are Semicolon seperated.
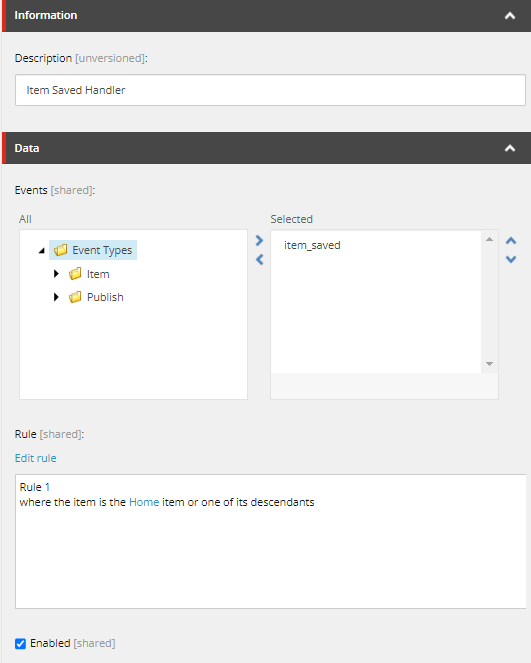
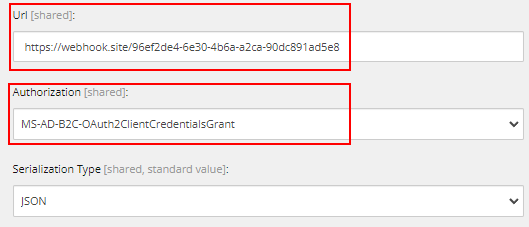
Step 6 – Create a Webhook Handler in Sitecore
Create Webhook handler at this location- /sitecore/system/Webhooks/
Provide the Description, Select the events the webhook should trigger, Add any rules as per your requirements, Ensure to Enable the Webhook, provide the Url the webhook should send the item data, select the newly created Authorization and Selrialization type (JSON).
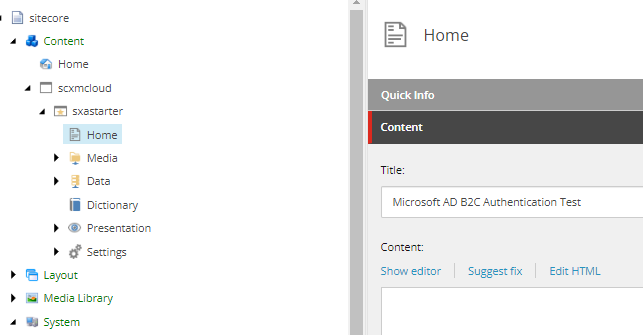
Step 7 – Save an Item in Sitecore
Update an Item, in this case I updated Home item
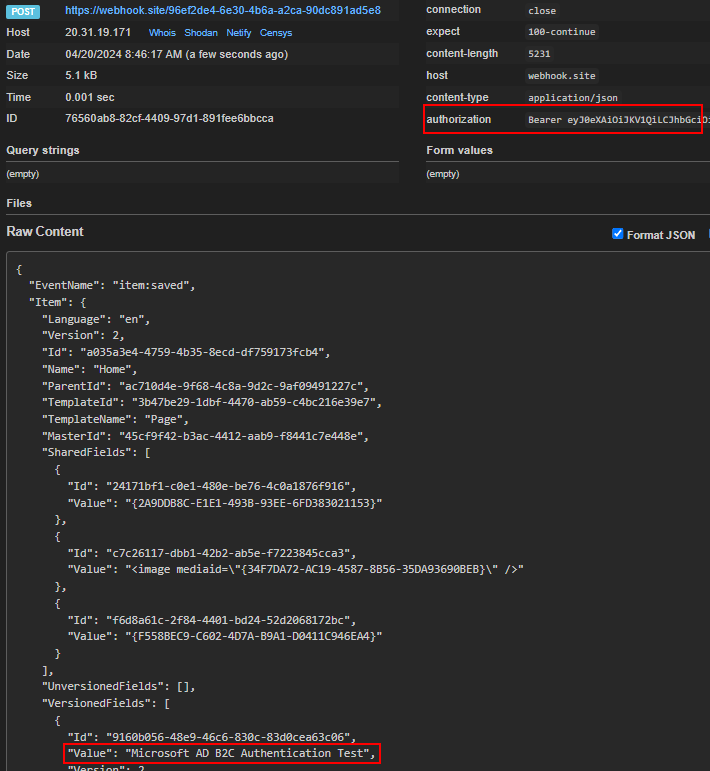
You should see the webhook sends the request to defined Url with Access Token, as highlighted below-
Hope this helps to cionfigure MS AD B2C in your Sitecore instance
More reads-
![]()