Tag: Sitecore

Gracefully handle user subscription using Sitecore Send

In this blog will walk you through on implementing subscribing and ubsubscribing user from the mail list using Sitecore Send

Use hostname- https://api.sitecoresend.io/v3

Subscribing a user to a mailing list

Api endpoint to subscribe a user to a mailing list

{hostname}/subscribers/{MailingListID}/subscribe.{Format}?apikey={apikey}

Subscribe Code

function SubscribeNewsletter(){

              let email = document.getElementById("newsletteremail");
              console.log(email)

              if (email.value == "") {
                alert("Ensure you input a value in both fields!");
              } else {
                // perform operation with form input
                
                var request = new XMLHttpRequest();
                request.open('POST', 'https://api.sitecoresend.io/v3/subscribers/{maillist}/subscribe.json?apikey={apikey}');
                request.setRequestHeader('Content-Type', 'application/json');
                request.setRequestHeader('Accept', 'application/json');
                request.onreadystatechange = function () {
                  if (this.readyState === 4) {
                    console.log('Status:', this.status);
                    console.log('Headers:', this.getAllResponseHeaders());
                    console.log('Body:', this.responseText);
                  }
                };
                var body = {
                  'Name': 'Sandeep Pote',
                  'Email': email.value,
                  'HasExternalDoubleOptIn': false
                };
                request.send(JSON.stringify(body));
                email.value = "";
                alert("User subscribed to newsletter")
              }
            };

Unsubscribe a user from a mailing list

Api endpoint to un-subscribe a user to a mailing list

{hostname}/subscribers/{MailingListID}/unsubscribe.{Format}?apikey={apikey}

Unsubscribe Code-

function UnSubscribeNewsletter(){

              let email = document.getElementById("optout-newsletteremail");
              console.log(email)

              if (email.value == "") {
                alert("Ensure you input a value in both fields!");
              } else {
                // perform operation with form input
                
                var request = new XMLHttpRequest();
                request.open('POST', 'https://api.sitecoresend.io/v3/subscribers/{maillist}/unsubscribe.json?apikey={apikey}');
                request.setRequestHeader('Content-Type', 'application/json');
                request.setRequestHeader('Accept', 'application/json');
                request.onreadystatechange = function () {
                  if (this.readyState === 4) {
                    console.log('Status:', this.status);
                    console.log('Headers:', this.getAllResponseHeaders());
                    console.log('Body:', this.responseText);
                  }
                };
                var body = {
                    'Email': email.value,                  
                };
                request.send(JSON.stringify(body));
                email.value = "";
                alert("User subscribed to newsletter")
              }
              };

Looks simple, but you might see when the user un-subscribed from a mailing list the user is never sent a mail from other mailing list or any other transactional mail.

Set user to unsubscribe from a specific mailing list

To allow only to unsubscribe from the a specific mailing list update a Unsubscribe setting-

For this goto Settings –> Set your account settings in Sitecore Send and check the Unsubscribe settings

Select option- When unsubscribing users from a list send to them from other mailing lists

Now the user will be only unsubscribed from the specific mailing list and sending mails from the Other mailing list of capaign should be possible.

This setting is very important whilst working with Sitecore send.

Reference-

https://doc.sitecore.com/send/en/developers/api-documentation/add-a-new-subscriber.html

https://doc.sitecore.com/send/en/developers/api-documentation/unsubscribe-a-subscriber-from-a-mailing-list.html

Loading

Sitecore CDP – Abandon cart with force close event

You can force close event to test Abandon Cart. This works only in non-prod environments.

Assumption- An identified guest which is active and has added products in cart.

If you are corectly tracking you should see in the timeline Session and event a Product been added.

So whilst developing if you want to force close this session, since you might not want to wait for 20 minutes for session to expire or whatever time is set to expire the session, you can force close the session to see or perform the next steps if the cart is been abandoned.

The force close event can be triggered by providing message type as FORCE_CLOSE in the payload.

Send the payload to this endpoint. For more details on what should be the apiEndpoint and client key see this blog

https://{{apiEndpoint}}/{{apiVersion}}/event/create.json?client_key={{CLIENT_KEY}}&message={{message}}

var browser_id = pm.environment.get("browserId") -- browser id
var pointOfSale = pm.environment.get("PointOfSale") -- point of sale

var message = {    
    "channel": "WEB",
    "type": "FORCE_CLOSE",
    "language": "EN",
    "currency": "GBP",
    "page": "home page",
    "pos": pointOfSale,
    "browser_id": browser_id
}

postman.setEnvironmentVariable("message", JSON.stringify(message));

Since the session is now closed we can see the Abandoned Revenue. Further reminder mails can be sent to user to complete the purchase on the abandoned cart.

Hope this helps.

Loading

Sitecore CDP – Upload guest data

Prepare guest data file to upload

Prepare Json file

Take a sample guest data from here

Sample data guest looks like this-

{
   "ref":"b4b92667-54e9-444f-8f64-11672fe9843a",
   "schema":"guest",
   "mode":"upsert",
   "value":{
      "guestType":"customer",
      "firstSeen":"2010-03-07T16:15:11.000Z",
      "lastSeen":"2012-08-23T16:17:16.000Z",
      "firstName": "Eager",
      "lastName": "Benz",
      "email": "eager.benz@malify.com",
      "extensions":[
         {
            "name":"ext",
            "key":"default",
            "loyaltytier":"level2",
            "rewardBalance":"50125"            
         }
      ]
   }
}
{
   "ref":"0cc6c80b-0b19-446f-9e14-579f75a96c4a",
   "schema":"guest",
   "mode":"upsert",
   "value":{
      "guestType":"customer",
      "firstSeen":"2010-03-07T16:15:11.000Z",
      "lastSeen":"2012-08-23T16:17:16.000Z",
      "firstName": "Goofy",
      "lastName": "Trovalds",
      "email": "goofy.trovalds@malify.com",
      "extensions":[
         {
            "name":"ext",
            "key":"default",
            "loyaltytier":"level3",
            "rewardBalance":"50130"            
         }
      ]
   }
}

Load the data in json file. Note that the above is a single row in a json and repeat the rows to upload multiple guets. This is not a json formatted file and should not have “,” to seperate rows as normally json file has. Highlighted email is important to identify the customer and add/update the extended data. This depends on the rule setup for your environment to identify the customer.

gzip the json file to upload

Example-

tar -czvf guest-upload.gz .\guest-upload.json

Generate MD5 File Checksum

Upload the gzip file to generate the check sum on this url –

https://emn178.github.io/online-tools/md5_checksum.html

Prepare Pre-signed Request

Create a new guid for the below batch upload. This guid will be used to know the status of the batch upload.

https://api.boxever.com/v2/batches/<<your guid>>

Request body –

{
    "checksum": "aaab5899b405bc3cb1d9b*******",
    "size": 412
}

Setup the Basic Auth before sending the request-

Request after setting up Authentication and body-

Response-

location – where the file needs to be uploaded. Will see this is next request where we actually upload file.

expiry – date time until the location to upload file is valid

The response should be saved in environment with uploadURL and batchRef variable-

Upload file

Upload URL request should contain the URL received from the pre-signed request-

Set the headers-

x-amz-server-side-encryption – AES256

Content-Md5 – <<Hex to Base checksum value>>

Content-Md5 is the Hex to Base64 converted value of checksum

Use this url to convert to base64-

https://base64.guru/converter/encode/hex

Request Headers should look like this-

The request signature we calculated does not match the signature you provided. Check your key and signing method.

Send request to the provided URL with the attached gzip file and headers. Response 200 Ok

Check the status of the uploaded file-

https://api.boxever.com/v2/batches/{{batchRef}}

The upload is queued and may take time depending on the items queued.

With the below request it shows the upload request is processing.

This request took almost 2 hours to complete, and the response here is error where 1 of the guets is updated but opther failed.

This is the log, where you should be able to rectify any errors in json file-

Lets check the other guest if available in portal-

Errors

SignatureDoesNotMatch

Loading

Send Abandoned Cart email using Sitecore Send Automation

Sitecore Send lets you automate your communication with customers by identifying specific situations that trigger the sending of an email message

In this blog lets create automated mails using automation recipes.

For more details see this link.

Pre-requisite-

Ensure the website is configured and verified before using the automation. See this blog. For this blog post I am using – https://moosend.vercel.app/

Create automation using Abandoned Cart automation recipe

Navigate to Automation link and create new automation using recipe-

Select Abandoned cart recipes-

Will be shown the Abandoned Cart Workflow-

Choose Trigger option-

Select- Trigger every time option

Select your website from dropdown and Save. Only verified website will be visible here. You may also choose all sites.

Open wait operation-

For testing I have selected 5 minutes. Ideally this can be few hours/days as per the requirement or enter specific date. By default it is 45 minutes. Enter the wait time and Save.

Setup the filter

Select apply this filter to mailing list. I have selected the email list of the site, you may select different list.

Enter the product if you wish to or leave empty.

Click on “Add a collection”.

Select the time if the product is not purchased for certain time. I have entered 6 minutes. Enter the details and Save.

Select “Added a Product To Cart” and filter value. In this I have added product “Americano”.

Select timer and enter the wait time to 6 minutes and Save

Select the action

In this case Send the mail to user if the product is not purchased in selected time.

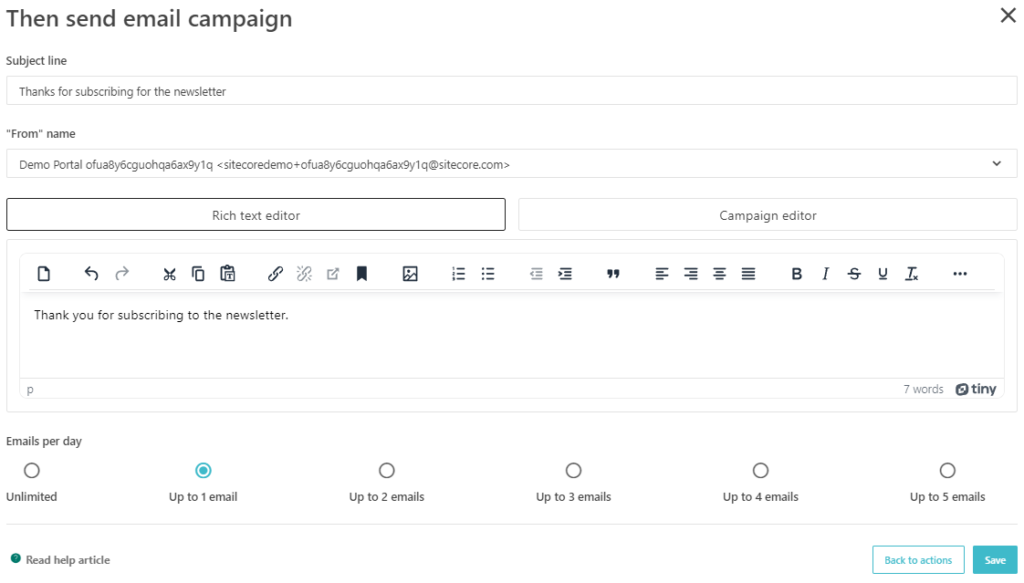
Select Send Mail campaign-

Enter the subject, From address, mail body. Select Emails per day. Save once this option is filled.

Activate the “Abandoned Cart” automation-

Automation List with activated

Once the automation configuration is complete will now add product to cart. the product name here is “Americano” as selected in filter.

In the installation script you can find the details on how to add the product to cart.

function addToCart(){
                // mandatory - a unique code for the product, like its SKU
                    var itemCode = 'Americano';
                    // mandatory - the name / title of this product
                    var itemName = 'Iced Americano';
                    // mandatory - the image url of this product
                    var itemImage = 'http://your.store/product-color-blue.jpg';
                    // mandatory - the price of this product
                    var itemPrice = 10.25;
                    // mandatory - the url to get to the relevant product page
                    var itemUrl = 'http://your.store/product-101';
                    // mandatory
                    var itemQuantity = 1;
                    // mandatory - the total price for purchasing the given quantity of this product
                    var itemTotalPrice = 10.25;
                    // optional - the category of this product
                    var itemCategory = 'Drinks';
                    // optional - the manufacturer, brand name or company / owner of this product (if any)
                    var itemManufacturer = 'Acme Co';
                    // optional - the supplier of this product (if any)
                    var itemSupplier = 'Supplier Co';

                    // you can add custom properies and later use them in segmentations or automations
                    // You can track things like the color or the sze of the t-shirt in this case
                    var extraProps = {'flavor': 'Chocolate', 'type': 'Iced'};

                    // Tracking add to cart events with mandatory arguments
                    mootrack('trackAddToOrder', itemCode, itemPrice, itemUrl, itemQuantity, itemTotalPrice);

                alert("Added to cart event fired");
}

Hook the Add to cart to button-

<button class="button" onclick="addToCart()">Add to cart</button>

The site looks like this with the “Add To Cart” button

Website confirm the event was triggered.

In the automation list you can see the automation been Triggerd-

Once this is triggered you can see the next operation Wait for 5 minutes-

A mail should be triggerd after 6 minutes. Since the product is still in cart and not purchased.

After 5 minutes all the actions should be triggered.

Once all the actions are triggered should receive the mail-

Thats it for this blog. We have managed to trigger a automation event and send themail to the users who have product in the cart and not purchased e.e. Abandoned Cart.

Loading

Enable website tracking service using Sitecore Send

Sitecore Send website tracking service enables to collect data and makes it available for users. It uses cookie-based technology to track data on end-user page visits, product view, add to cart and purchase.

Add website to Sitecore Send

Pre-requisite-

You need to have a website up and running. this can be a simple HTML site or you can choose any other web techology with any Fronetend framework like nextjs, react or jquery etc.

I have created a simple site and hosted using vercel – e.g.:- https://moosend.vercel.app/

To add a website to Sitecore Send –

Navigate to Account –> Websites or New Website option

List of Websites-

Should display list of Websites already configured and if its verified.

Add Website-

On this page enter your website url- https://moosend.vercel.app/

Once this is submitted it should show the Website Id alond with Connection Script. Website Id is required to add this in script to start tracking.

The website list should show the newly added website which should be in unverfied state-

Connect Website

Navigate to Install connection script option. Install button should show the script that is require to add to your website

Copy this script to you website head section, this may be different for you site –

mootrack('init', '77d7daa0-b906-4965-be85-7d8a8892019f');

The Id in the above code is website id.

Identify the visitor

To verify your site and to track the visitor use this script-

mootrack('identify', 'john@doe.com');

The above email will be identified.

Add script to you Website-

Add the above script in your website Head section, something like this-

The initila script which allows to use the mootrack fucntion with various options.

The mootrack init along with you website id

Local function to track user. I have hooked this function to a button

<button class="button" onclick="trackuser()">Track User</button>

Deploy the site to vercel-

I have deployed the site to vercel but you can choose your own hosting provider or the way you want to deploy the site.

My site looks like this and have button to “Track User”, “Add to cart” and “Checkout”

Click on “Track User” button, it should confirm the tracking.

This should also add cookie entry with user email-

And now you should see the website in Sitecore send should be in Verified state-

A new Email List will be created and a subscriber should have been added-

This concludes enabling the Sitecore Send for your website.

Errors

If you see this warning the site might not be tracking correctly due to cookie conflict. Delete all cookies before starting the tracking.

Loading

Setting up a Sitecore JSS development environment with the Containers template for Next.js

Follow steps in this link —

https://doc.sitecore.com/xp/en/developers/hd/211/sitecore-headless-development/walkthrough–setting-up-a-development-environment-with-the-sitecore-containers-template-for-next-js.html

Following are thre pre-requisite for setting on your local machine-

Apart from this also install Sitecore JSS CLI-

npm install -g @sitecore-jss/sitecore-jss-cli

Install the template

dotnet new -i Sitecore.DevEx.Templates --nuget-source https://sitecore.myget.org/F/sc-packages/api/v3/index.json

dotnet new sitecore.nextjs.gettingstarted -n samplejss

Should first Restores dotnet local tools for the solution and Initializes the JSS project

What is your Sitecore hostname (used if deployed to Sitecore)? (samplejss.dev.local) << leave blank or provide the host name>>

How would you like to fetch Layout and Dictionary data? 
GraphQL
REST

How would you like to prerender your application?
SSG
SSR

Which additional language do you want to support (en is already included and required)? << leave blank or type the language you want. should select da-DK by default and additional language>>

JSS application is now ready and updated for continerized environment.

Navigate to project folder and initialize the environment.

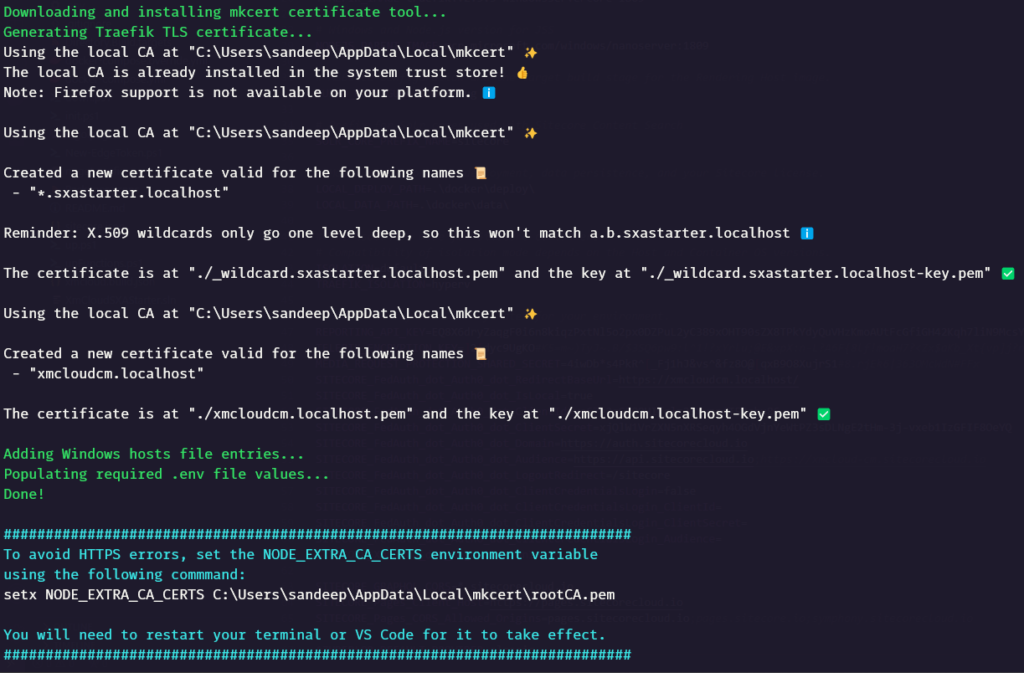
.\init.ps1 -InitEnv -LicenseXmlPath "<C:\path\to\license.xml>" -AdminPassword "<desired password>"
setx NODE_EXTRA_CA_CERTS C:\Users\sandeep\AppData\Local\mkcert\rootCA.pem

Execute up.ps1 to create containers-

.\up.ps1

Error-

CM is not coming up-

Checked the docker logs, and found this error-

The path is not set correctly. Need to escape the characters-

Resolution-

Change – entrypoint: powershell.exe -Command “& C:\tools\entrypoints\iis\Development.ps1” to entrypoint: powershell.exe -Command “& C:\\tools\\entrypoints\\iis\\Development.ps1” in docker-compose.override.yml file for xm1, xp0 and xp1

Take down all the containers and build again.

Now this should look fine-

Enter CM admin credentials and allow the access-

CM and App should load –

As of writing this post, this setup installed Sitecore 10.3.

Loading

Sitecore CDP- Sending View Event using direct HTTP requests

The VIEW event captures the guest’s action of viewing a page. To track guest behavior use VIEW event on all pages.

Sending a request through postman- use below URL-

https://{{apiEndpoint}}/{{apiVersion}}/event/create.json?client_key={{CLIENT_KEY}}&message={{message}}

To know more what should be the API endpoint and api version see this blog

Generate browser id – see how to generate browserid using postman here

URL – contains event to create view event.

Message-

var browser_id = pm.environment.get("browserId")
var pointOfSale = pm.environment.get("PointOfSale")

var message = {    
    "channel": "WEB",
    "type": "VIEW",
    "language": "EN",
    "currency": "GBP",
    "page": "home page",
    "pos": pointOfSale,
    "browser_id": browser_id
}

postman.setEnvironmentVariable("message", JSON.stringify(message));

Check the view event in Sitecore CDP portal-

Search the Broswer Id in guests page-

Select the Anonymous Visitor.

Select the Timeline tab

Select the orange color settings icon to check the view event details which is only displayed in debug mode-

See the detials the message that was sent as part of request-

CURL command for same –

curl --location -g --request GET 'https://api-engage-eu.sitecorecloud.io/v1.2/event/create.json?client_key=<<enter client key>>&message={"channel":"WEB","type":"VIEW","language":"EN","currency":"GBP","page":"home page","pos":"pastoral-witty-grill","browser_id":"<<enter browser id>>"}'

C# code-

var client = new RestClient("https://api-engage-eu.sitecorecloud.io/v1.2/event/create.json?client_key=<<enter client key>>&message={\"channel\":\"WEB\",\"type\":\"VIEW\",\"language\":\"EN\",\"currency\":\"GBP\",\"page\":\"home page\",\"pos\":\"pastoral-witty-grill\",\"browser_id\":\"<<enter browser id>>\"}");
client.Timeout = -1;
var request = new RestRequest(Method.GET);
IRestResponse response = client.Execute(request);
Console.WriteLine(response.Content);

Python- http client code snippet-

import http.client

conn = http.client.HTTPSConnection("api-engage-eu.sitecorecloud.io")
payload = ''
headers = {}
conn.request("GET", "/v1.2/event/create.json?client_key=<<enter client key>>&message=%7B%22channel%22:%22WEB%22,%22type%22:%22VIEW%22,%22language%22:%22EN%22,%22currency%22:%22GBP%22,%22page%22:%22home%20page%22,%22pos%22:%22pastoral-witty-grill%22,%22browser_id%22:%22<<enter browser id>>%22%7D", payload, headers)
res = conn.getresponse()
data = res.read()
print(data.decode("utf-8"))

Reference-

https://doc.sitecore.com/cdp/en/developers/api/index-en.html#UUID-281a2b8f-627d-a71b-4a1f-df545bc617e9

Loading

Setup Sitecore OrderCloud headstart with Angular in Ubuntu system the docker way

Working on Linux system after been worked on Windows for 2 decades is always fun.

This blog post is to setup the Sitecore OrderCloud Headstart on Ubuntu the Docker way. As all the images used for the Headstart is are Linux based, this I didn’t find major difference how this is been setup in Windows system apart from few changes while installing Storage Explorer and few other erros which I have noted in this blog post.

Note – use sudo for each command or “sudo i”to run as root.

Ensure node js is installed

This might be required for your local build.

sudo apt update

sudo apt install nodejs

Ensure npm is installed

sudo apt install npm

Ensure docker and docker -compose is installed

See this blog post Install Docker on Linux

sudo snap install docker

sudo apt install docker-compose

Docker Compose

Lets start composing and solve errros that might come ourr way-

sudo docker-compose up -d

npm needs TLS1.2

npm notice Beginning October 4, 2021, all connections to the npm registry – including for package installation – must use TLS 1.2 or higher. You are currently using plaintext http to connect. Please visit the GitHub blog for more information: https://github.blog/2021-08-23-npm-registry-deprecating-tls-1-0-tls-1-1/
npm WARN @ordercloud/headstart-sdk@0.0.0 No repository field.

https://stackoverflow.com/questions/69044064/npm-notice-beginning-october-4-2021-all-connections-to-the-npm-registry-incl

npm cache clear --force

npm set registry=https://registry.npmjs.org/

npm install -g https://tls-test.npmjs.com/tls-test-1.0.0.tgz

Install .Net SDK

Middleware runs on .Net. So this neds to be installed.

https://learn.microsoft.com/en-us/dotnet/core/install/linux-ubuntu

https://devblogs.microsoft.com/dotnet/dotnet-6-is-now-in-ubuntu-2204/

sudo apt-get update && \
sudo apt-get install -y dotnet-sdk-6.0
sudo apt-get update && \
sudo apt-get install -y aspnetcore-runtime-6.0
sudo apt install dotnet6

I found difficulties installing .Net on Ubuntu. You may have todo few restarts.

 docker compose up -d

This should start all the containers. Note- cosmos container takes time to start till then middleware waits and starts when comos is ready.

Comos should be available now –

Install Azure Storage- Explorer

Install Storage explorer in Ubuntu-

snapd should be already installed if you are using Ubuntu 16.04 LTS or later, you may have to update.

sudo apt update
sudo apt install snapd

Install Storage Explorer

sudo snap install storage-explorer

Open Azure Storage Explorer and follow the steps here –

Execute the command-

snap connect storage-explorer:password-manager-service :password-manager-service

Azure Storage Explorer should be able to open with above command.

Apply the same settings mentioned in this blog

Once you have followed and applied the settings mentioned in the blog, should be able to see the translation files in local storage and able to access the file.

We also have to set CQRS for blob container – lets do this later.

Middleware exited with errors-

Error –

See the resolution to this issue here – section – Unable to start Middleware container due to erros

Error – Connection refused (127.0.0.1:8081)

System.AggregateException: One or more errors occurred. (Connection refused (127.0.0.1:8081))
       ---> System.Net.Http.HttpRequestException: Connection refused (127.0.0.1:8081)

See the resolution to this issue here – section – Connection to Comos DB is failing

Error- Unsupported platform

0 18.52 npm ERR! code EBADPLATFORM
#0 18.53 npm ERR! notsup Unsupported platform for fsevents@2.3.2: wanted {"os":"darwin","arch":"any"} (current: {"os":"linux","arch":"x64"})
#0 18.53 npm ERR! notsup Valid OS:    darwin
#0 18.53 npm ERR! notsup Valid Arch:  any
#0 18.53 npm ERR! notsup Actual OS:   linux
#0 18.53 npm ERR! notsup Actual Arch: x64

Changed the node version- see the blog here

Also changed the nginx version – see Error 4 here

 => ERROR [headstart-seller:local-linux production 4/8] RUN apk add --update nodejs nodejs-npm && npm install -g json                                                                                 1.0s

see Error 4 here

Change from this  -
RUN apk add --update nodejs nodejs-npm && npm install -g json

to-
RUN apk add --update nodejs npm && npm install -g json
#0 51.97 npm ERR! npm ERR! Cannot read properties of null (reading 'pickAlgorithm')

See the resolution to this error here

Now you should have all containers up and running with

sudo docker compose up -d

If you see this error-

Check for Configure CORS to Blob Containers in this blog post

And here I have Seller, buyer and middleware working on Ubuntu system-

This has really opened the horizon to develop, deploy and maintain OrderCloud solution on a technology agnostic platform.

Loading

Setup Sitecore OrderCloud headstart the docker way

There is quite a lot todo to setup, lets start-

Clone OrderCloud repository for Headstart

Clone the repository for HeadStart from here – https://github.com/ordercloud-api/headstart

Setup/Install Docker

Install Docker Desktop from here – https://docs.docker.com/desktop/

Switch to Linux containers

Stop IIS

Ensure you dont’ have Azurite insalled and listening to 10000, 10001 and 10002 ports

Ensure you dont have Azure Cosmos DB Emulator running on the machine as this will use 8081 port which will also be exposed by cosmos container.

Copy .env.template and save as .env (Will fill in the required details in .env file one by one)

Add the following records to your Hosts file

127.0.0.1 buyer.headstart.localhost

127.0.0.1 seller.headstart.localhost

127.0.0.1 api.headstart.localhost

As this is set in .env file (you may change as per your requirement)

There will be quite a few issues coming our way and will try to note it here one by one and the solution for same-

Execute docker compose

Navigate to the working directory and execute following command-

 docker compose up -d

Following images and containers will be created as part of the headstart setup-

Cosmos DB

Storage (Azurite)

Middleware

Seller App

Buyer App

Error 1- Uncompatible node version

0 2.885 Node.js version v12.20.0 detected.

0 2.885 The Angular CLI requires a minimum Node.js version of either v14.15, or v16.10.

See here how I resolved this error- Uncompatible node version

Error 2- Package installation must use TLS 1.2 or higher and Cannot read properties of null (reading ‘pickAlgorithm’)

0 47.60 npm notice Beginning October 4, 2021, all connections to the npm registry - including for package installation - must use TLS 1.2 or higher. You are currently using plaintext http to connect. Please visit the GitHub blog for more information: https://github.blog/2021-08-23-npm-registry-deprecating-tls-1-0-tls-1-1/

0 114.7 npm ERR! Cannot read properties of null (reading 'pickAlgorithm')

See here how I resolved this error- Package installation must use TLS 1.2 or higher

Errror 3-

#0 2.885 Node.js version v12.20.0 detected.
#0 2.885 The Angular CLI requires a minimum Node.js version of either v14.15, or v16.10.


 > [headstart-buyer:local-linux builder 9/9] RUN cd /build/APP && npm run build --prod:
#0 0.954 npm WARN config production Use `--omit=dev` instead.
#0 0.983
#0 0.983 > headstart@0.0.0 build
#0 0.983 > ng build --configuration=deploy && node scripts/hash-css-files && node scripts/move-release-scripts && node scripts/copy-main-js && node scripts/copy-index-html
#0 0.983
#0 11.70 - Generating browser application bundles (phase: setup)...
#0 16.88 Processing legacy "View Engine" libraries:
#0 17.75 - @ngx-translate/http-loader [es2015/esm2015] (git+https://github.com/ngx-translate/http-loader.git)
#0 18.98 - ngx-forms-typed [es2015/esm2015] (https://github.com/gparlakov/forms-typed)
#0 21.65 Encourage the library authors to publish an Ivy distribution.
#0 109.2 Killed
------
failed to solve: executor failed running [/bin/sh -c cd /build/APP && npm run build --prod]: exit code: 137

Not sure why this error but I ran following command instead-

docker-compose build --no-cache

Error 4 –

cannot write C:\Users\sande\AppData\Local\Temp\tmppxl_v0jp because server did not provide an image ID
ERROR: Service 'buyer' failed to build : Build failed

Solution-

Set the latest nginx alpine base image in the Dockerfile as nginx:1.23.3-alpine. See the latest availabel bae image here – https://hub.docker.com/_/nginx

Change Dockerfile in this location headstart\docker\build\UI

Update nodejs-npm to just npm in the Dockerfile

Dockerfile should look like this-

Sometimes you may have to restart Docker Desktop

Error 5-

Error response from daemon: Ports are not available: exposing port TCP 0.0.0.0:80 -> 0.0.0.0:0: listen tcp 0.0.0.0:80: bind: An attempt was made to access a socket in a way forbidden by its 

The said port might be in use. This is mostly when IIS is running. Stop IIS.

Once you get thhrough these errors, should have following images downloaded and containers created-

Here you can see the warnings compalining few env variable values not set. This is next we are going to setup.

Unable to start Middleware container due to erros-

Also the middleware container has errors- (docker log <<middleware container>>

Unhandled exception. System.Exception: Required app settings are missing: StorageAccountSettings:ConnectionString or StorageAccountSettings:BlobPrimaryEndpoint
2023-03-17 16:28:21    at OrderCloud.Integrations.EnvironmentSeed.Extensions.ServiceCollectionExtensions.AddDefaultTranslationsProvider(IServiceCollection services, StorageAccountSettings storageAccountSettings) in /src/Middleware/integrations/OrderCloud.Integrations.EnvironmentSeed/Extensions/ServiceCollectionExtensions.cs:line 16

Check the Cosmos DB if its working on http://127.0.0.1:8081/_explorer/index.html

Error 6- Check the COMOS DB evaluation period-

Stop and delete the COSMOS DB container and delete the image

Compose the containers again and should pull the image and start the COSMOS DB container again.

Error 7-

This is a timezone issue. Check this form ore detials-

https://askubuntu.com/questions/1096930/sudo-apt-update-error-release-file-is-not-yet-valid

Error 8-

failed to solve: process "/bin/sh -c apk add --update nodejs nodejs-npm && npm install -g json" did not complete successfully: exit code: 1

Update docker to use this command instead-

RUN apk add --update nodejs npm && npm install -g json

Install and Setup Account in Microsoft Azure Storage Explorer

See blof here – How to setup Storage Explorer for Sitecore OrderCloud Headstart Docker

Update the .env file-

Update StorageAccountSettings_ConnectionString to –

change storage to 127.0.0.1 in the connections tring

DefaultEndpointsProtocol=http;AccountName=devstoreaccount1;AccountKey=Eby8vdM02xNOcqFlqUwJPLlmEtlCDXJ1OUzFT50uSRZ6IFsuFq2UVErCz4I6tq/K1SZFPTOtr/KBHBeksoGMGw==;BlobEndpoint=http://127.0.0.1:10000/devstoreaccount1;QueueEndpoint=http://127.0.0.1:10001/devstoreaccount1;

Update StorageAccountSettings_HostUrl to –

http://127.0.0.1:10000/devstoreaccount1

Ensure the StorageAccountSettings_Key is correct –

Eby8vdM02xNOcqFlqUwJPLlmEtlCDXJ1OUzFT50uSRZ6IFsuFq2UVErCz4I6tq/K1SZFPTOtr/KBHBeksoGMGw==

For any environment changes use “docker compose down” and then “docker compose up -d”

Compile/Build the Headstart.sln

In the ServiceCollectionExtensions.cs file in OrderCloud.Integrations.EnvironmentSeed project

remove the condition for checking the BlobPrimaryEndpoint as it is not used and hence not required.

Same way if you are not using ExchangeRates, Tax Provider, payment Provider etc remove the values from .env file to avoid such errors. Following I have removed, you can add this later as and when required. Make the values for this variables empty


EnvironmentSettings_AddressValidationProvider=""
EnvironmentSettings_CurrencyConversionProvider=""
EnvironmentSettings_EmailServiceProvider=""
EnvironmentSettings_PaymentProvider=""
EnvironmentSettings_ShippingProvider=""
EnvironmentSettings_TaxProvider=""
EnvironmentSettings_OMSProvider=""

Recreate the middleware and container again. Delete the middleware image as the code is changes. We dont have the volume mounted hence for setup this way 🙂

docker rmi <<middleware image id>>

docker compose up -d

More errors-

Connection to Comos DB is failing-

2023-03-17 18:16:43 Application startup exception: System.AggregateException: One or more errors occurred. (Connection refused (127.0.0.1:8081))
2023-03-17 18:16:43  ---> System.Net.Http.HttpRequestException: Connection refused (127.0.0.1:8081)
2023-03-17 18:16:43  ---> System.Net.Sockets.SocketException (111): Connection refused

Change CosmosSettings_EndpointUri in .env from “http://127.0.0.1:8081” to use localhost i.e.- change to –

CosmosSettings_EndpointUri="http://localhost:8081"

Address not available (localhost:8081) – Cosmos DB address not available

2023-03-17 18:22:34 Application startup exception: System.AggregateException: One or more errors occurred. (Address not available (localhost:8081))
2023-03-17 18:22:34  ---> System.Net.Http.HttpRequestException: Address not available (localhost:8081)
2023-03-17 18:22:34  ---> System.Net.Sockets.SocketException (99): Address not available

Solution-

Change following in entrypoing.sh file located at – headstart\docker\build\middleware

i.e. instead of using $CosmosSettings_EndpointUri use $CosmosEndpointURI

this varaible contains the IP address of the comos db hosted. This can change everytime the container is created.

Change this - 
-e "this['CosmosSettings:EndpointUri']='$CosmosSettings_EndpointUri'" 
to 
-e "this['CosmosSettings:EndpointUri']='$CosmosEndpointURI'"

Recreate the middleware image.

Now all the containers should be up and running

Middleware API is accessible at – http://api.headstart.localhost/index.html

Seed the OrderCloud Marketplace-

Create a Marketplace in OrderCloud portal-

Send post request to – http://api.headstart.localhost/seed

Request body should be, also see the template here –

https://github.com/ordercloud-api/headstart/blob/development/assets/templates/SeedTemplate.json

{
  "Portal": {
    "Username": "your-portal-email@address.com",
    "Password": "XXXXXXXXX"
  },
  "Marketplace": {
    "Environment": "sandbox",
    "Region": "Us-West",
    "ID": "ocdockerway",
    "Name": "ocdockerway",
    "InitialAdmin": {
      "Username": "demoadminuser",
      "Password": "XXXXXXXXX"
    },
    "EnableAnonymousShopping": true,
    "MiddlewareBaseUrl": "http://api.headstart.localhost",
    "WebhookHashKey": "hashkey"
  }
}

Error- “Message”: “Could not find a part of the path ‘/app/wwwroot\\i18n’.”,

Tried to debug this and seems some how the path is not correctly formed to upload the translations from /app/wwwroot\\i18n folder in container. Changed this to /app/wwwroot/i18n and the files are now uploaded to storage.

"Message": "Connection refused (127.0.0.1:10000)",

Should now see the API Client created in OrderCloud-

Configure .env post seed

TRANSLATE_BLOB_URL="http://127.0.0.1:10000/devstoreaccount1/ngx-translate/i18n/"
BLOB_STORAGE_URL="http://127.0.0.1:10000/devstoreaccount1"
SELLER_CLIENT_ID="Enter the Default Headstart Admin UI Client ID"
BUYER_CLIENT_ID="Enter the Default Buyer Storefront Client ID"

OrderCloudSettings_MiddlewareClientID="Enter Middleware Integrations ClientID"
OrderCloudSettings_MiddlewareClientSecret="Enter Middleware Integrations secret"
OrderCloudSettings_ClientIDsWithAPIAccess="SELLER_CLIENT_ID, BUYER_CLIENT_ID"
OrderCloudSettings_MarketplaceID="Enter Marketplace ID" // ocdockerway
OrderCloudSettings_MarketplaceName="Enter Marketplace Name"

After setting the .env variables lets spin up the containers again-

docker compose up -d

Lets try to access http://seller.headstart.localhost/

Error-

In Buyer.sh and Seller.sh – -test.json update the supported language. This is a array but assigned as a string-

Change from this -
-e "this.supportedLanguages='$SUPPORTED_LANGUAGES'"

to

-e "this.supportedLanguages=$SUPPORTED_LANGUAGES" //Remove single quotes

Recreate Image and container for Seller and Buyer.

Now its loading Seller and Buyer app but wiht errors-

Configure CORS to Blob Containers

Following values in –

Allowed Origins- http://api.headstart.localhost

Also add this for the Seller and Buyer app url’s

Allowed Headers – x-ms-meta-data,x-ms-meta-target,x-ms-meta-abc

Exposed Headers – x-ms-meta-*

Following is the CORS added to Blob Containers-

Finally we have Seller and Buyer app loading without any errors-

Next start populating Catalog, Products etc.

Hope this blog is useful for setting the OrderCloud Headstart setup the dockerway

Loading

OrderCloud Headstart Docker Setup – Install and Setup Account in Microsoft Azure Storage Explorer

Ensure Storage container is running we should be able to access the storage on certian ports and configure the CORS etc.

Install the Storage Explorer from here – https://azure.microsoft.com/en-us/products/storage/storage-explorer/

Connect to Local storage emulator

Connect to Azure Storage (local storage)

Once connected it should show in Emulator-

Create a Blob Container – ngx-translate and create new Virtual Directory i18n

Blob Container and folder name can be any other name. You need to configure this correctly in UI config. See this in later steps

Upload the translation file(optional)

Translation file should be created by Headstart Api while seeding the marketplace further in this blog. This is a test to check if the resource is available. I have attached en.json file here.

Copy URL of the file and check if this is accessible-

Looks like cannot access.

To resolve this error set public access level on Blob container “ngx-translate”

Select Public read access for container and blobs-

Now the resource should be accessible.

Similarly upload resources for fr and jp language.

The resource file should be available in following location – headstart\src\Middleware\src\Headstart.API\wwwroot\i18n

Loading