Welcome! This is my personal blog about Web technologies, software development, open source and other related topics
The ideas and opinions expressed here are solely mine and don't represent those of others, either individuals or companies.The code snippets or references to software products or analogous are to be used without any warranty of any kind. If you enjoy the content, feel free to share it and re-use it as long as you provide a link to the original post.
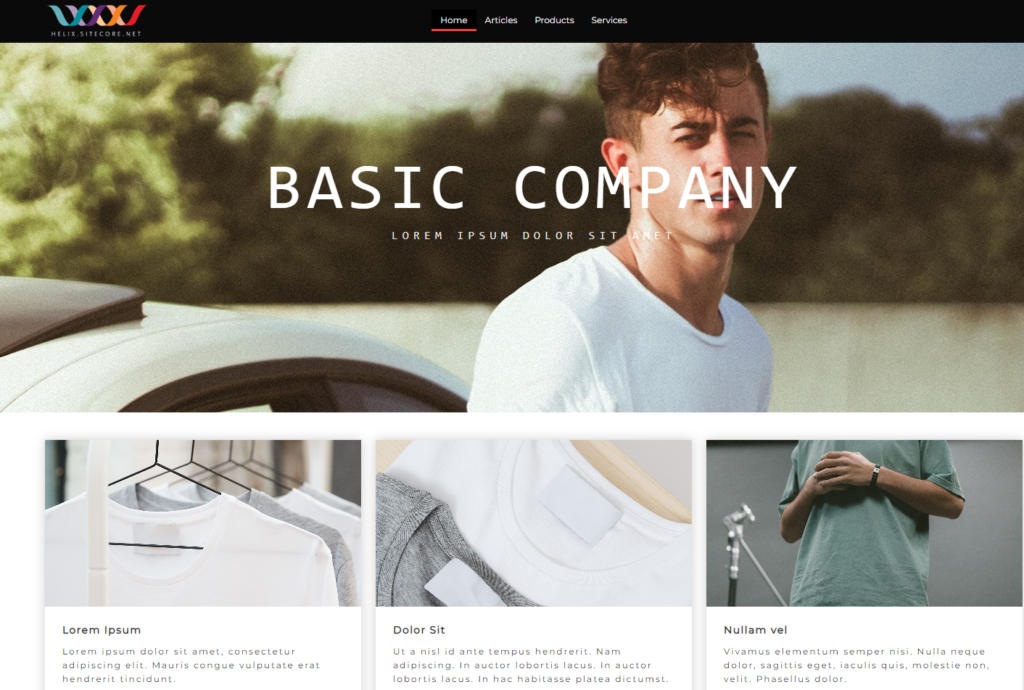
This blog will give a quick overview of setting development environment for Headless Development with ASP.Net Rendering SDK using the Helix Examples and the docker.
Although there are videos and blogs around same I will do a quick walk through on setting Helix Examples and any errors I faced whilst setting up the environment.
Refer the following for same – https://github.com/Sitecore/Helix.Examples/tree/master/examples/helix-basic-aspnetcore
Install .Net core 3.1 on your machine and this is required to create any rendering or platform projects later to extend the Helix Examples Solution or compiling the existing code.
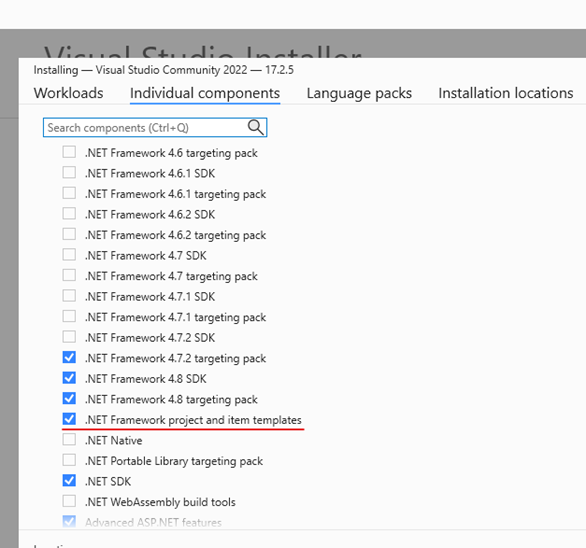
Whilst installing Visual Studio 2022 select the .Net Framework project and templates option as the platform projects uses .Net Framework 4.8 version. This will also help further if you want to extend the solution.
Step 4 – Setup the App Configuration either using appSettings or Azure App Configuration
Setup a App Configuration using appSettings.json
Use/Download the template here provided by Sitecore to setup the configuration
Create a json file on your local machine by copying the content in the template. In my case I have created OCHeadstartConfig.json. The template looks as below- Highlighted values are the minimum configuration required for Headstart project. Few of the configuration will come from the Seed step explained in Part-2 – Step 4 – Populate Ordercloud Markeplace with the seed request
Following configuration(highlighted) needs to be updated minimum to get the Headstart project working-
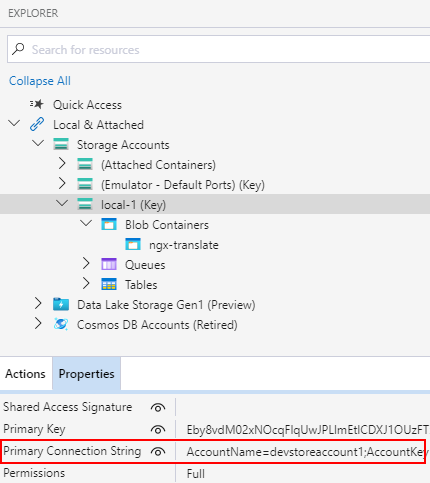
Get the StorageAccount.Settings.ConnectionString from Storage Explorer-
Create appSettings.json file and copy the above configuration in the file.
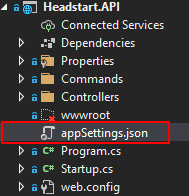
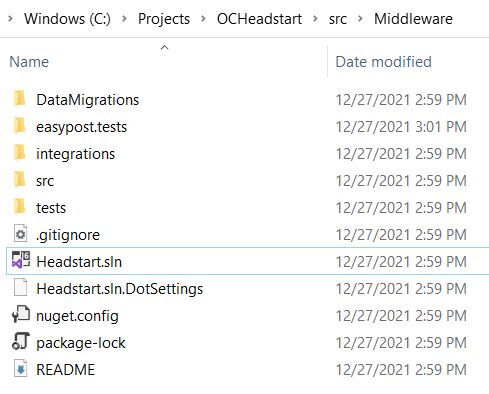
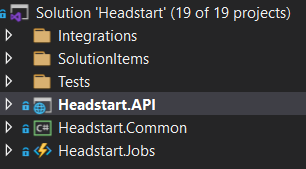
appSettings.json file should be in Headstart.API project-
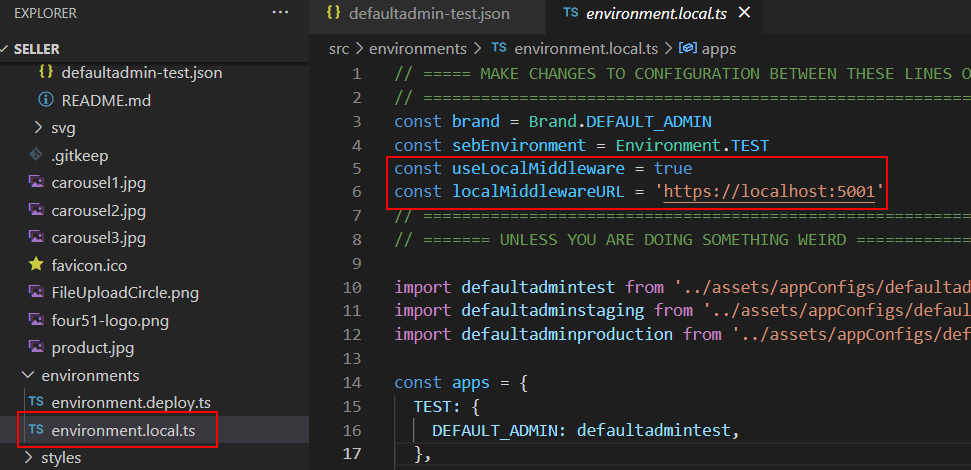
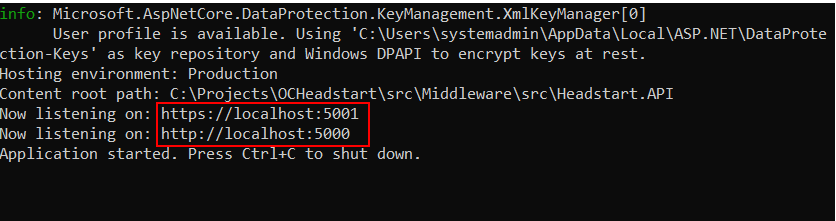
IMP – Check if the middleware applicaiton is running and listening to localhsot 5001 port. If not you should run the Headstart.Api before running UI application.
Setup a App Configuration using Azure App Configuration
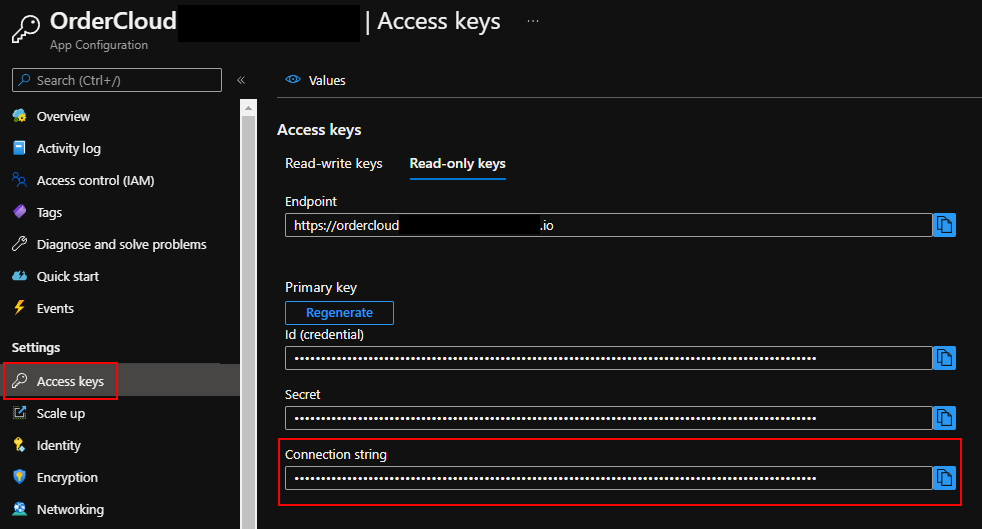
Get the configuration connection string
Goto the Access Keys – Read-only keys tab and copy the connection string
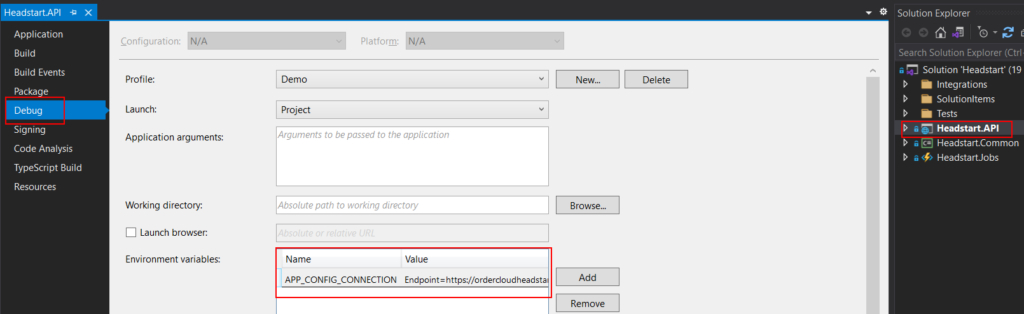
Add a new Environment Variable named – APP_CONFIG_CONNECTION and copy the connection string in the Value.
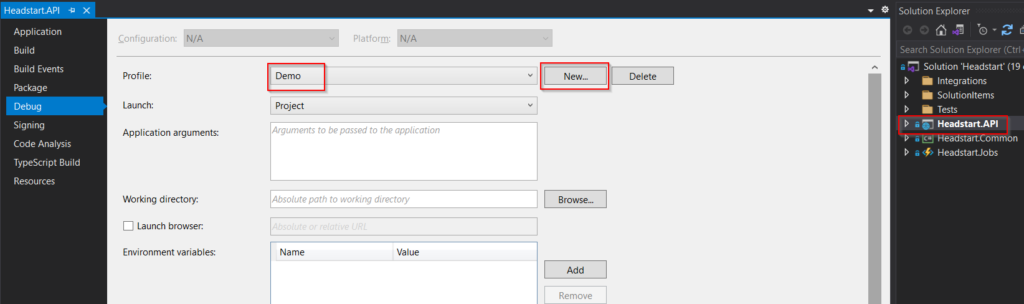
Run the middleware application with the Demo profile.
IMP – If you see compiler error’s whilst running the application. See this blog for the resolution.
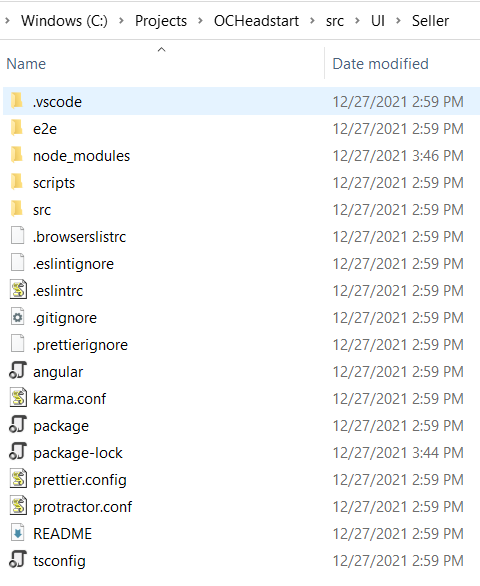
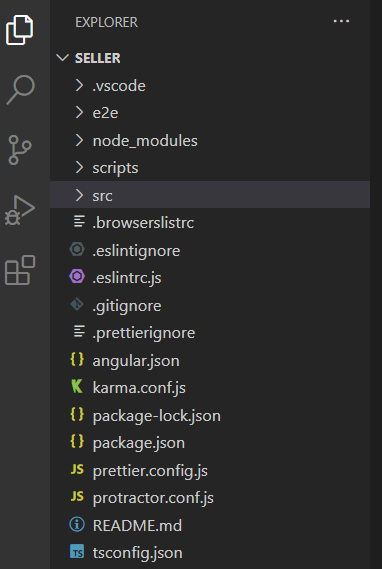
Step 5 – Run the Seller UI application
Now that we have all the required configuration checked and changed, time to run the Seller UI application
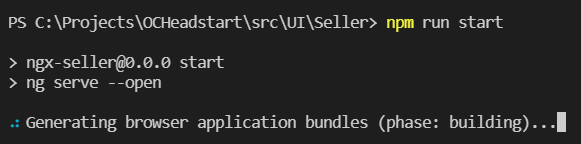
RUN – from the visual studio terminal or powershell
npm install
npm run start
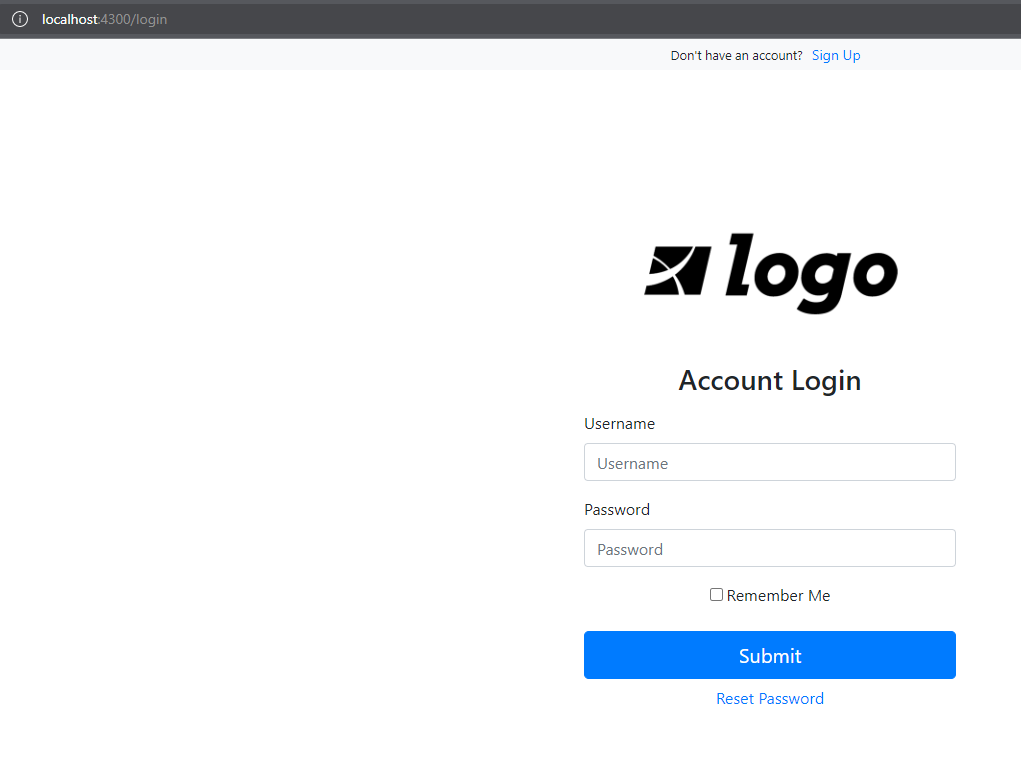
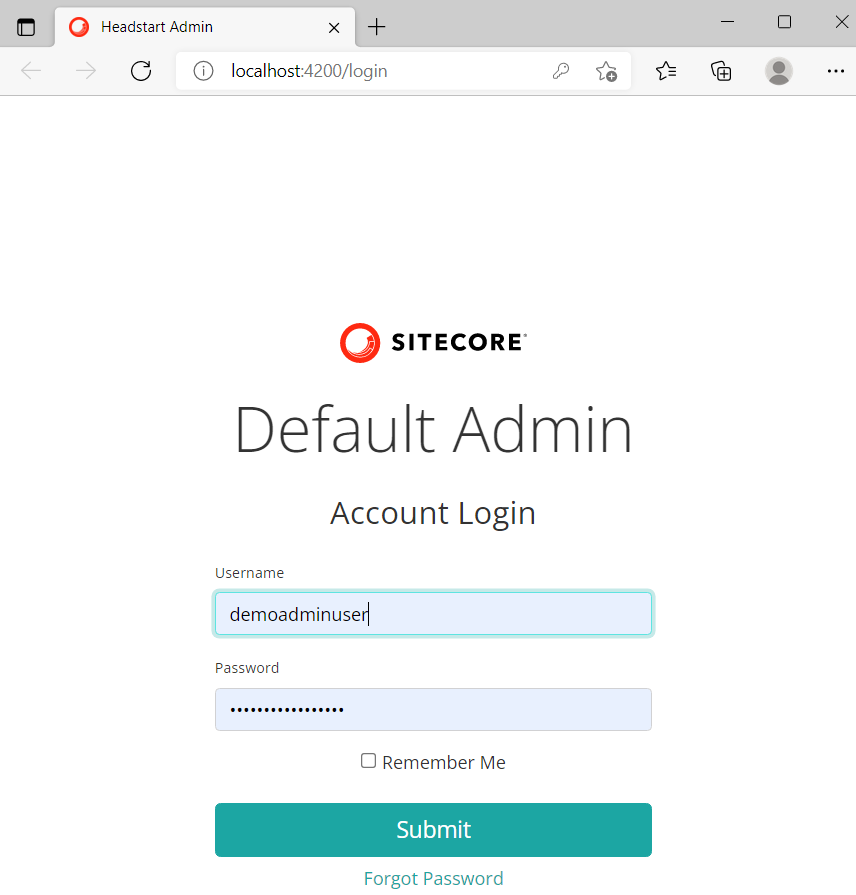
Now we have Seller application runing on localhost:4200 port
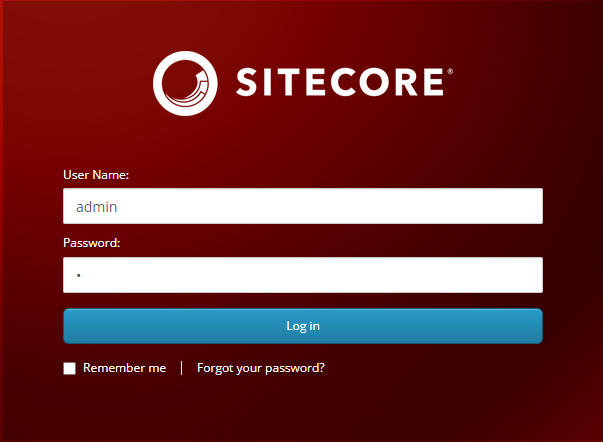
Provide Admin Username and Password as noted in Part -1 of the blog Step 3- Prepare Seed Request
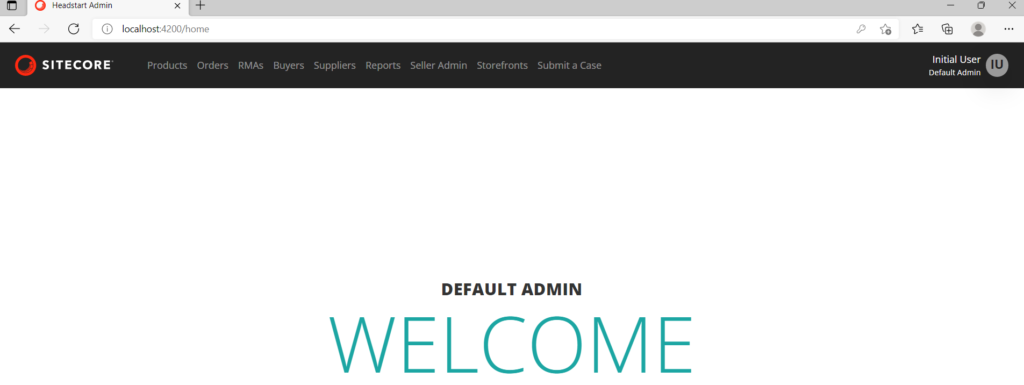
After successful login-
Also we can see the Seller Admin-
Hope you enjoyed setting Sitecore Ordercloud Headstart 🙂
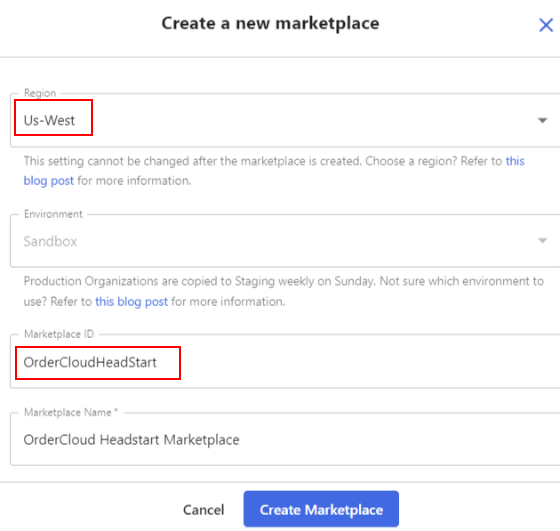
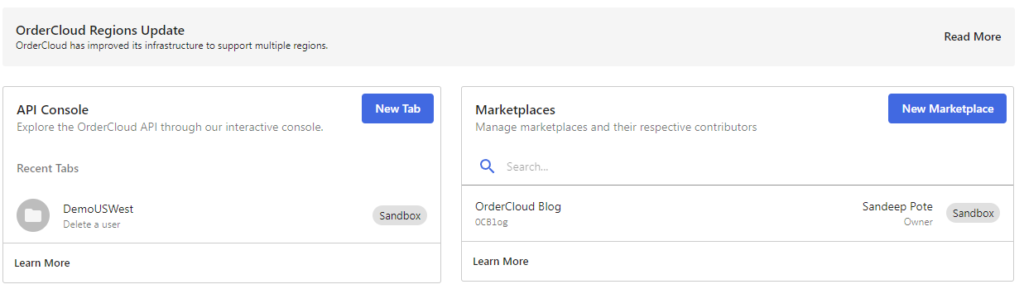
Create a new maketplace e.g.- OrderCloudHeadstart in Us-West region
IMP– At the time this blog was written looks like only Us-West region is supported when a seed request is sent. This may change in future but connect to OrderCloud team is you want this to be in region other than Us-West
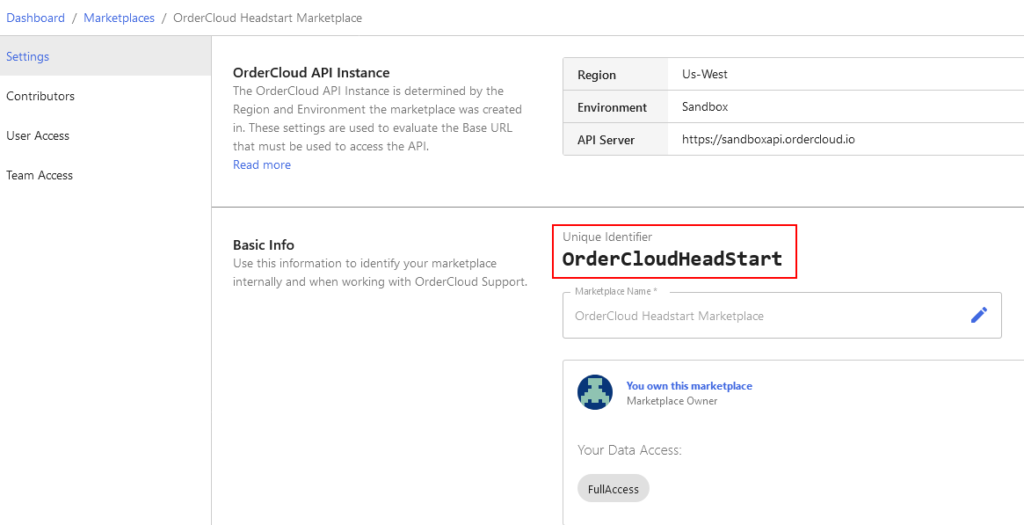
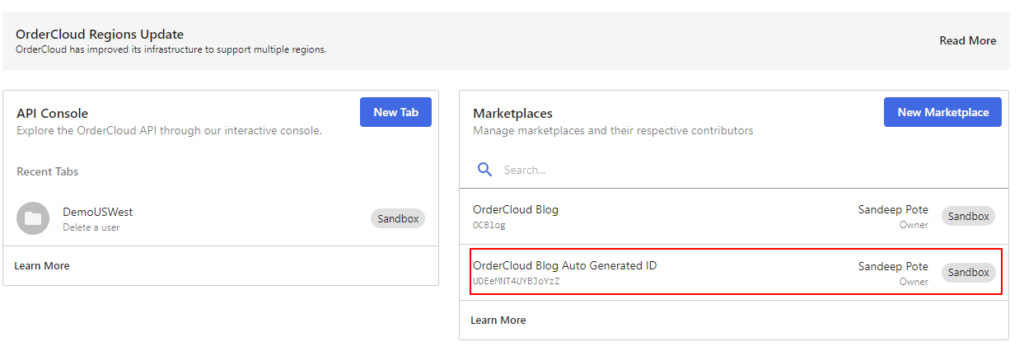
Note the newly created Marketplace ID – in my case it is – OrderCloudHeadstart
If you havent provided the Marketplace ID whilst creating the OrederCloud will create once for you. You can find the same in the Marketplace.
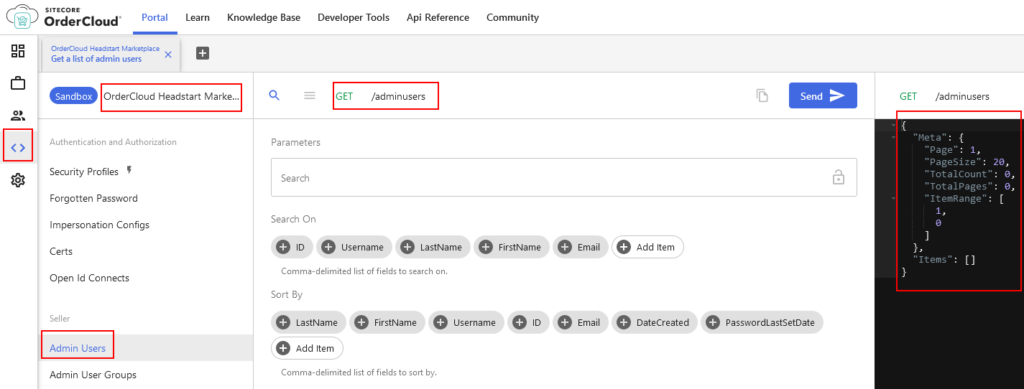
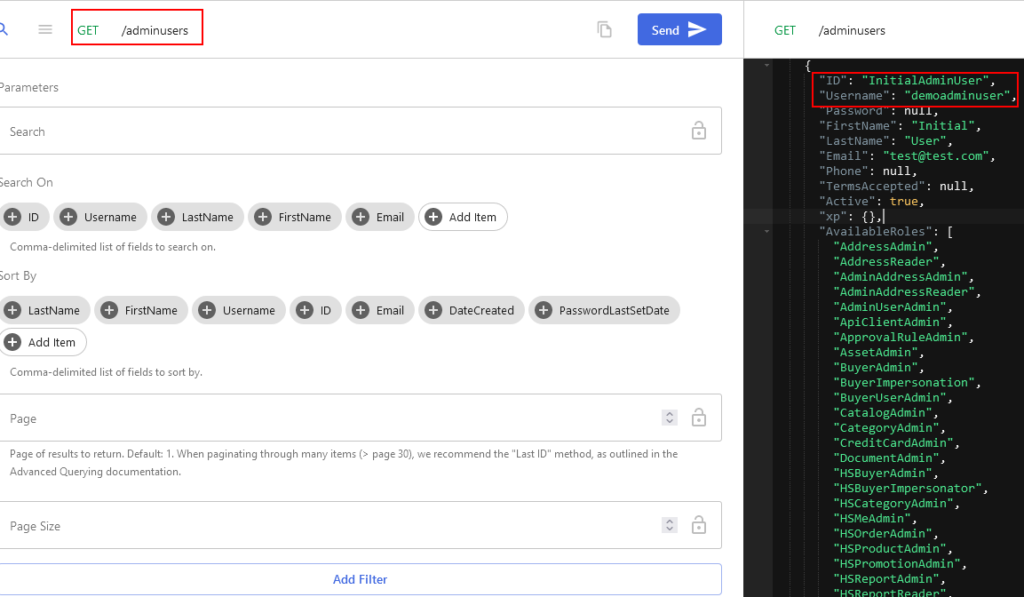
Navigate to API Console and Get the Admin User, as you see there are no Admin users. You may also check other endpoints.
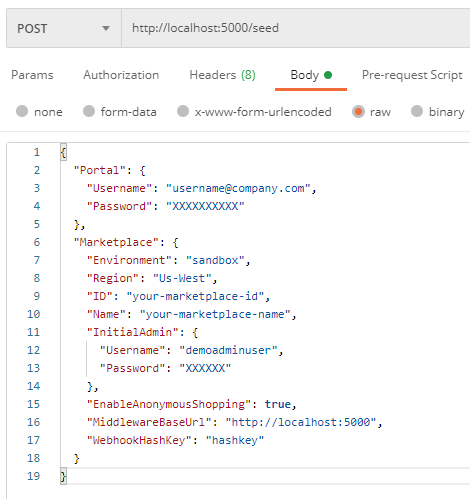
PortalUsername – enter the portal username you used to create a marketplace
PortalPassword – enter the portal password you used to create a marketplace
InitialAdminUsername – this request will create a admin user. Enter the admin username you wish to create
InitialAdminPassword – enter the admin password you want to set
MiddlewareBaseUrl – this is not required for local build
MarketplaceID – Enter the Marketplace ID you created in Step 1
Marketplace.Region– enter this to be sandbox in this case. For the other environments you might want to user different values for Staging and Production
WebhookHashKey – Set the webhook haskey to secure your webhook request.
Postman request should look like this –
STEP 4 – Setup a App Configuration using appSettings.json
Use/Download the template here provided by Sitecore to setup the configuration
Create a json file on your local machine by copying the content in the template. In my case I have created OCHeadstartConfig.json. The template looks as below- Highlighted values are the minimum configuration required for Headstart project.
Following configuration(highlighted) needs to be updated minimum to send the seed request working-
Get the StorageAccount.Settings.ConnectionString from Storage Explorer-
Create appSettings.json file and copy the above configuration in the file.
appSettings.json file should be in Headstart.API project-
IMP – Check if the middleware applicaiton is running and listening to localhsot 5001 port. If not you should run the Headstart.Api before running UI application.
Step 5 – Send the seed request to Ordercloud Markeplace
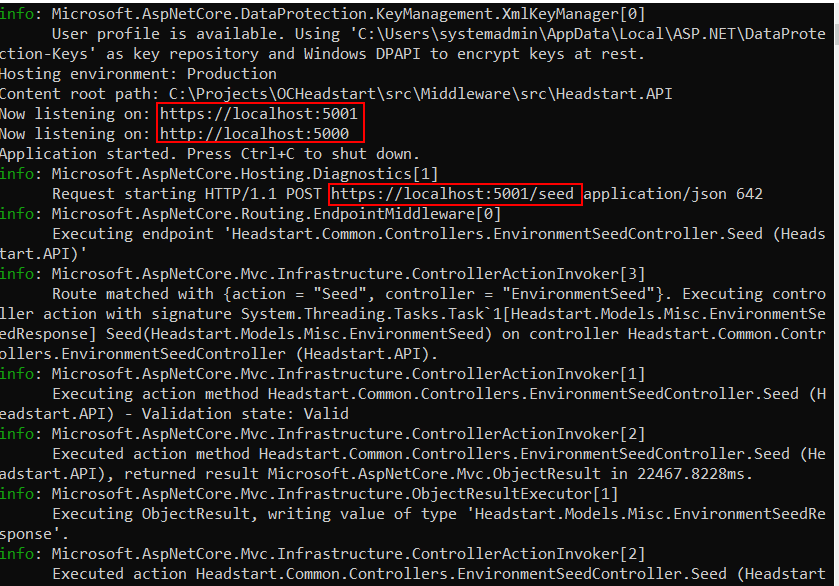
Ensure the Headstart Api is running and listening to 5001 port as mentioned in Step 2
Send the seed request
You can see the same in application that is listening to 5001 port the request was sent to-
If you have set the request correctly you should receive the success response-
IMP – Note the below response and the request that was sent specifically Admin Username and Password as this will be required later when configuring the UI application
{
    "Comments": "Success! Your environment is now seeded. The following clientIDs & secrets should be used to finalize the configuration of your application. The initial admin username and password can be used to sign into your admin application",
    "MarketplaceName": "ocdockertest",
    "MarketplaceID": "ocdockertest",
    "OrderCloudEnvironment": "Sandbox",
    "ApiClients": {
        "Middleware": {
            "ClientID": "1141E496-8517-4953-809B-XXXXXXXXX",
            "ClientSecret": "XXXXXXXXXXXXXXXXXXXXXXXXXXXXXXXXXXXX"
        },
        "Seller": {
            "ClientID": "6E98D7A1-35E9-4156-B60B-XXXXXXXXXX"
        },
        "Buyer": {
            "ClientID": "E1EBE13C-CC74-4021-B4A9-XXXXXXXXXX"
        }
    },
    "Success": true,
    "Exception": null
}
Comments – seed response comments
MarketplaceName – gets the Marketplace name that was configured in Step 1
MarketplaceID – UniqueId that was sent as part of request and the data seeded in this Marketplace
OrderCloudEnvironment – Environment where the request was sent
ApiClients.Middleware.ClientID – Note down Middleware ClientID
ApiClients.Middleware. ClientSecret – Note down Middleware ClientSecret
ApiClients.Seller.ClientID – Note down the Seller ClientID
ApiClients.Buyer.ClientID – Note down the Buyer ClientID
Step 5- Check the Marketplace for the data been puplated
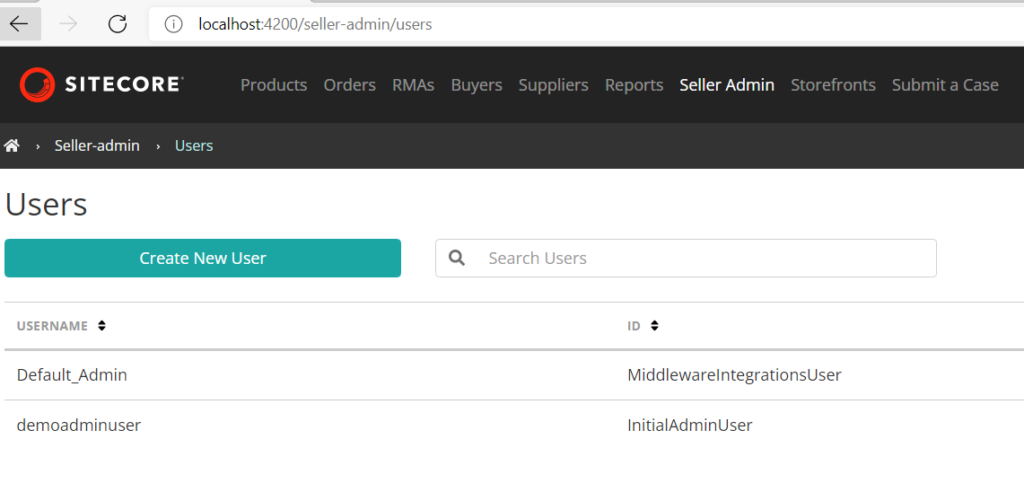
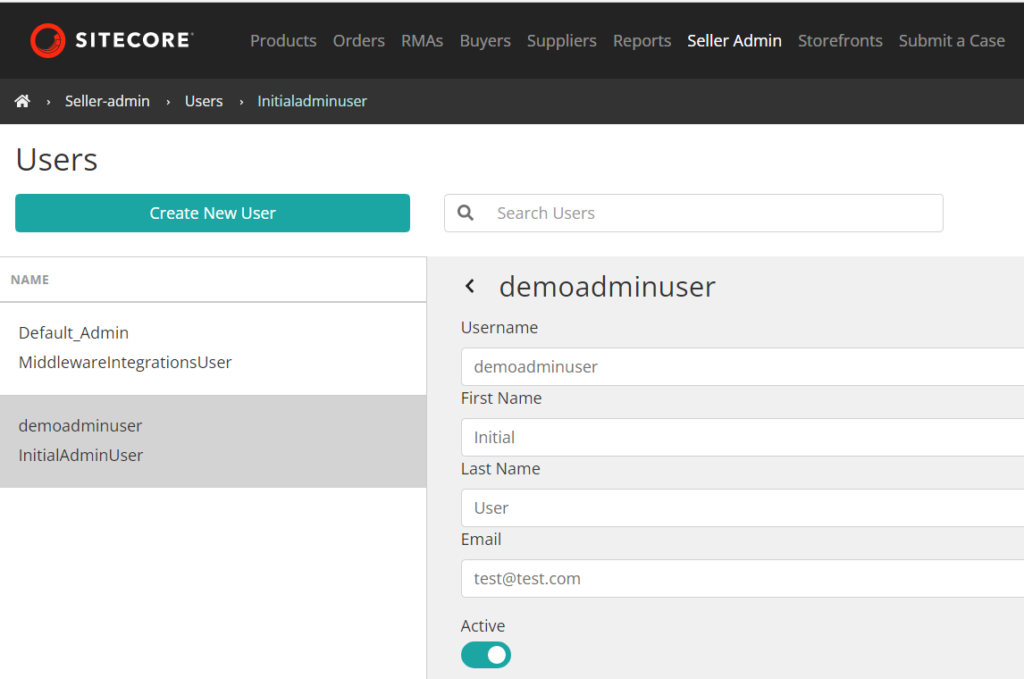
In Step 1- we saw there was not admin user created. After the seed request you can see the Admin User is created with the name mentioned in request.
Admin User
InitialAdminUser with the username provided in request is created
Also the MiddlewareIntegrationsUser is created
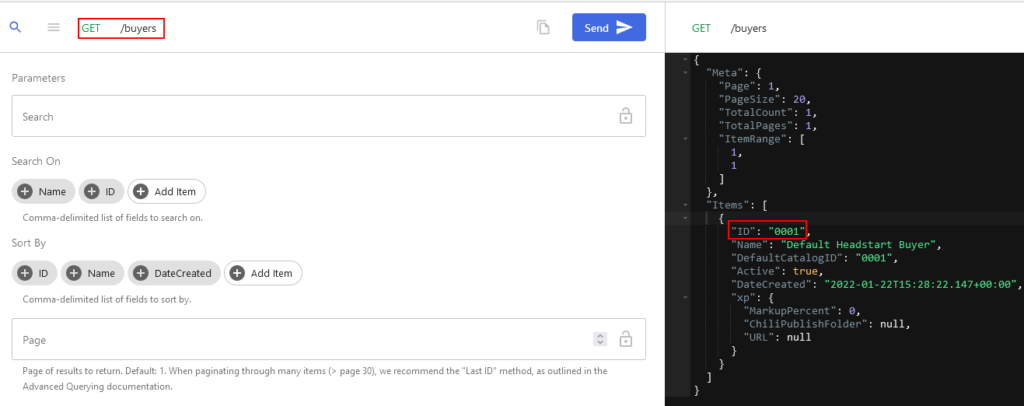
Buyer User
Buyer User is created-
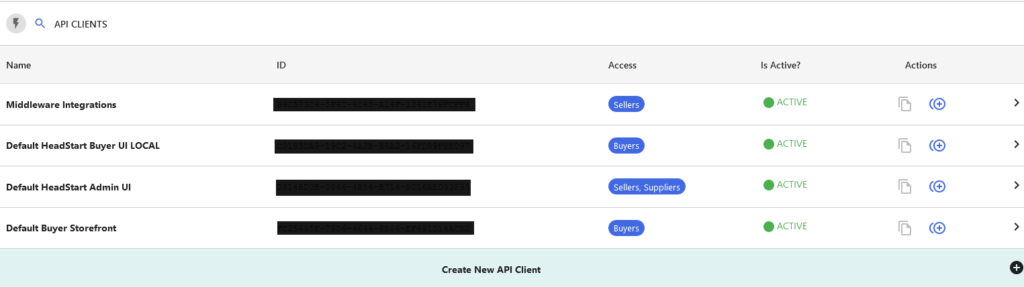
Api Clients
Api clients created and the same was sent as response. This is used so each client have a different Id’s that helps any application to connect.
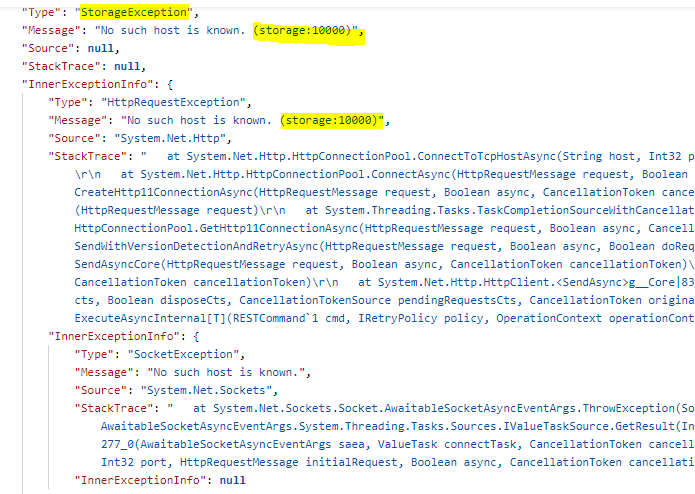
Errors-
Ensure the StorageAccountSettings:HostUrl and ConnectionString is configured correctly.
Thats it in this blog. Hope you are enjoying setting your Ordercloud Headstart project.
Since we will be now setup a backend application (i.e. admin etc) the Client IDs and Client Secret that was create in Step 5 needs to be secured. This can be condifured in Azure App Configuration. See the link on how to setup this.
Use/Download the template here provided by Sitecore to setup the configuration
Create a json file on your local machine by copying the content in the template. In my case I have created OCHeadstartConfig.json. The template looks as below-
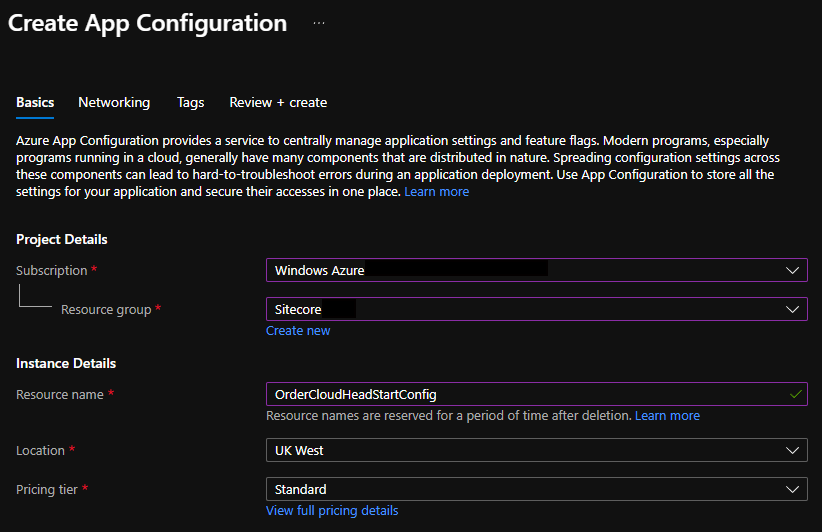
Provide the Resource name in this case I have used OrderCloudHeadStartConfig
Select Location and Pricing tier.
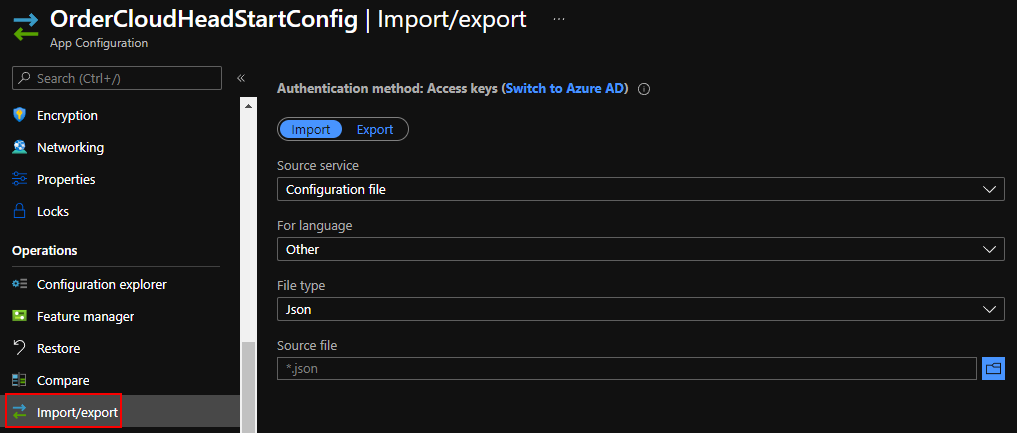
Once the resource is created in the Import/Export option select –
Source service – Configuration file
For language – Other
File type- Json
Source file – *.json (auto selected)
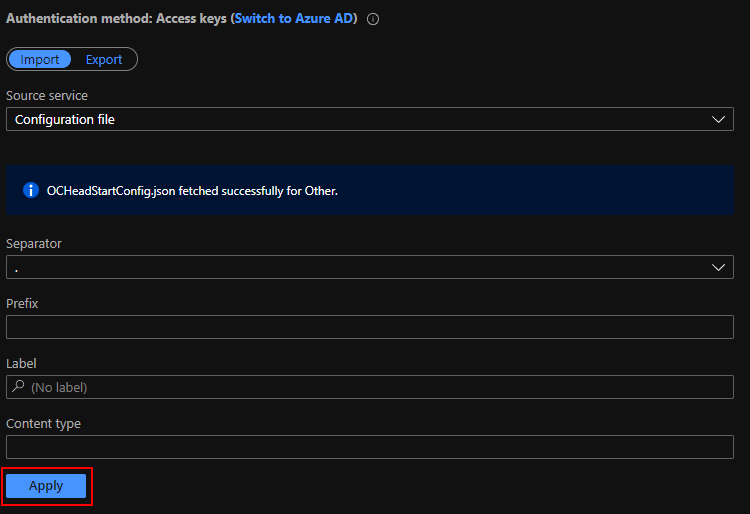
Select the folder icon in Source file option and click Apply to import the configuration.
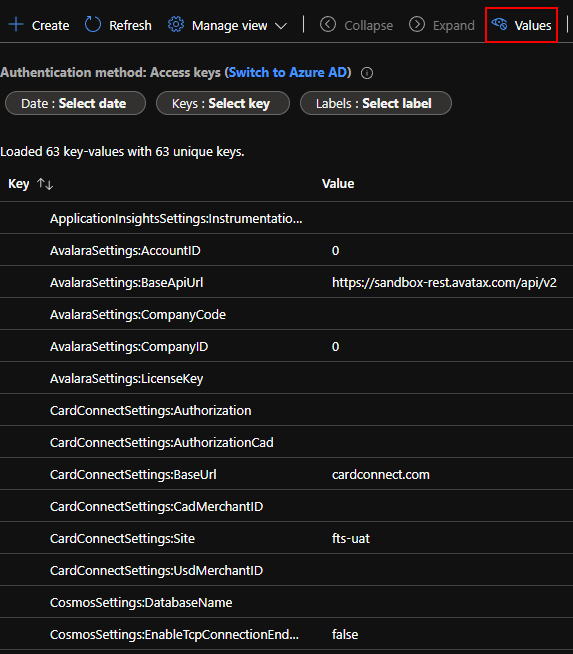
After the config file is imported navigate to “Configuration Explorer”. There are 63 config key values are imported but in template there are 64.
“SendgridSettings:OrderApprovalTemplateID”: “”, is not imported for due to some reason. Create a new manually if required. For the Demo this is not required.
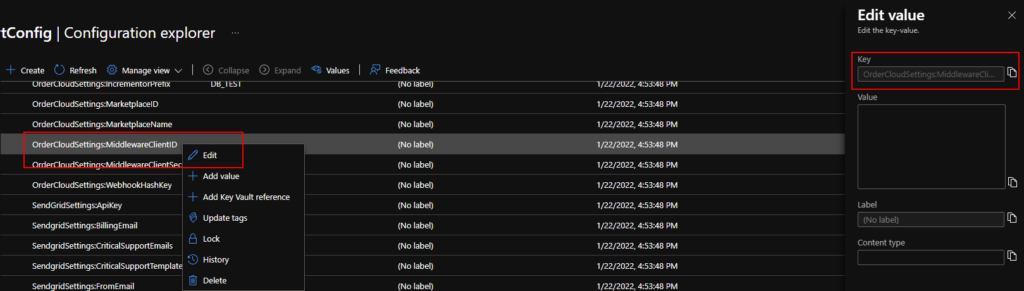
Click on the values to see the values of the key that was imported-
Set the following values by Right clicking the keys. Copy this from Step 4 where the response was received from seed request-
OrderCloudSettings:MiddlewareClientID
OrderCloudSettings:MiddlewareClientSecret
OrderCloudSettings:MarketplaceID
OrderCloudSettings:MarketplaceName
Continue updating config in next section for Storage Account.
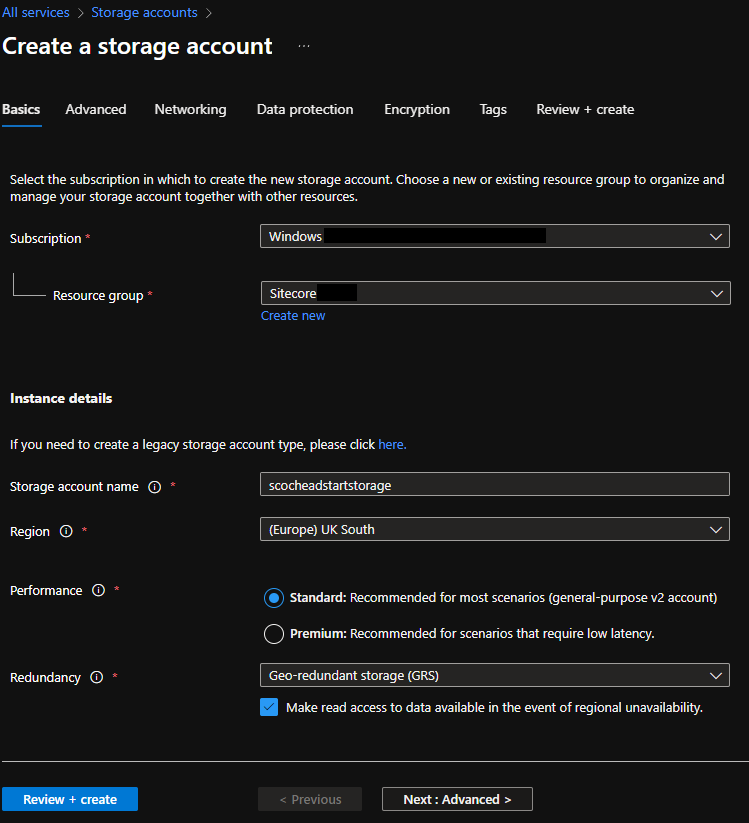
Step 2- Create a Azure Storage Account (if you already don’t have)
Create a Azure Storage Account
Follow the steps and set the configuration as per your requirements
Copy the storage account name and Storage connection string
Set StorageAccountSettings:BlobPrimaryEndpoint – https://yourstorageaccount.blob.core.windows.net/occontainer
Set StorageAccountSettings:ConnectionString
Thats in in this blog. In next blog will cover setting up the UI project.
Hope you are enjoying setting your Ordercloud Headstart project.
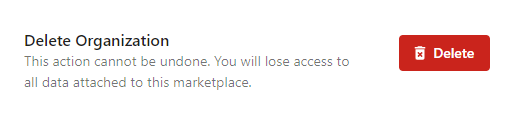
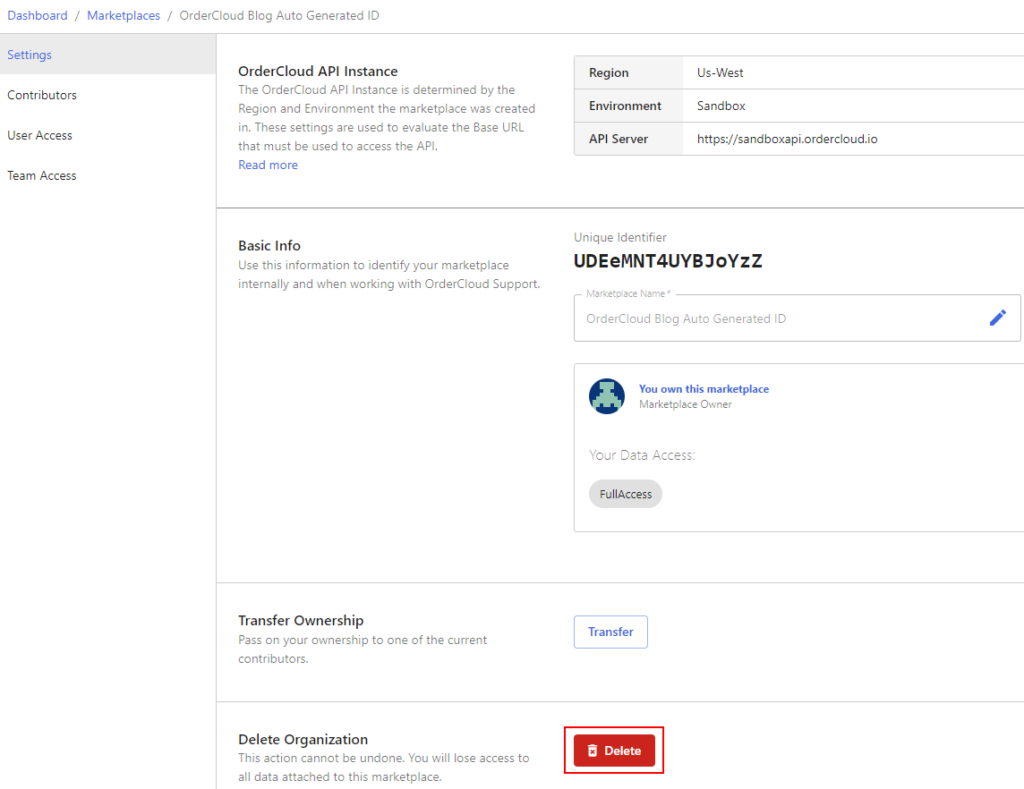
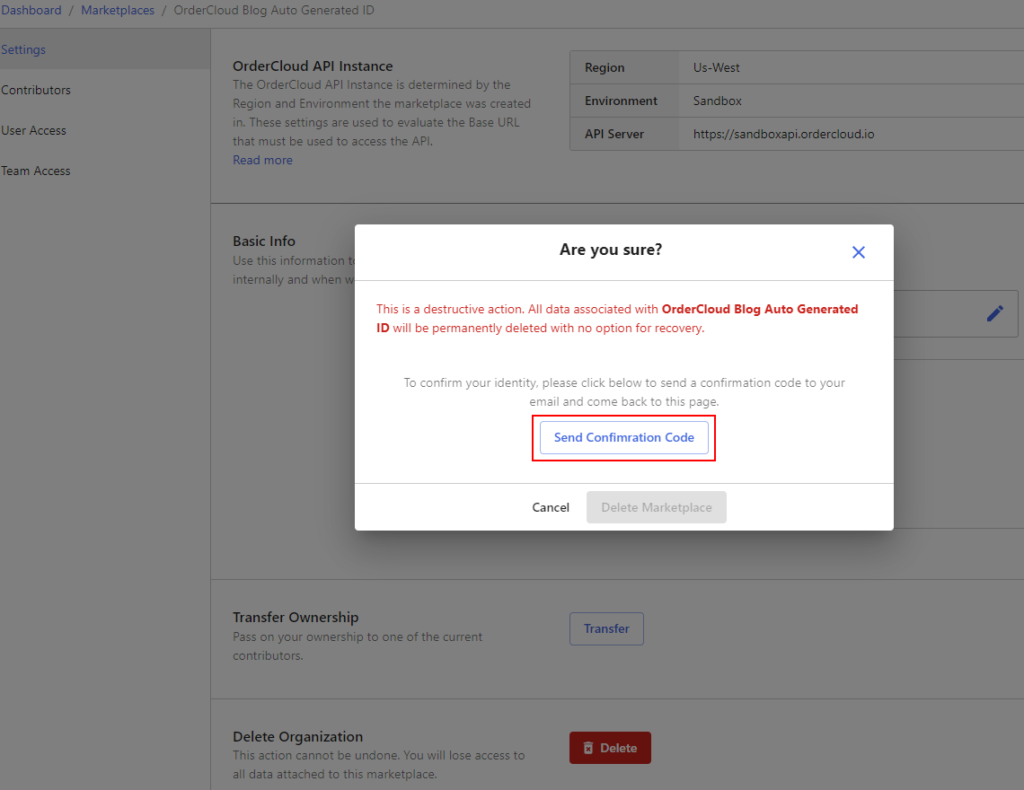
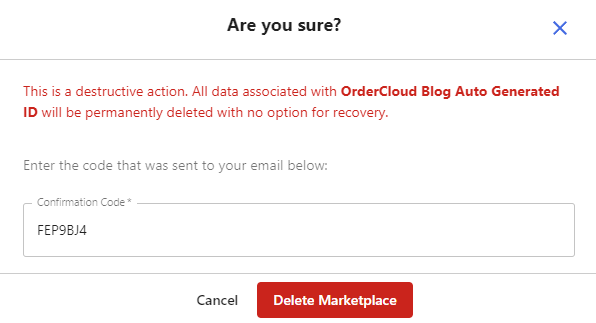
Admin User who created the Marketplace can delete and Transfer the Ownership of the Account. Where the ownership is transfered to the users cannot delete the Marketplace.
To delete the Marketplace you should have first created a Marketplace and login to the portal as Admin User having Full Access.
Follow below steps to configure Sitecore Ordercloud Headstart middlewarewithout having to provision Azure online resources. i.e. setup offline Azure resources
Install Azurite- Pre-requisite is to install node js
npm install -g azurite
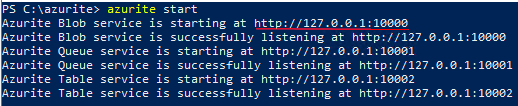
Run Azurite- Navigate to the folder where the supporting files should be deployed e.g.: c:\Azurite
azurite start

OR - if you want specfic folder and in debug mode

azurite --silent --location c:\azurite --debug c:\azurite\debug.log
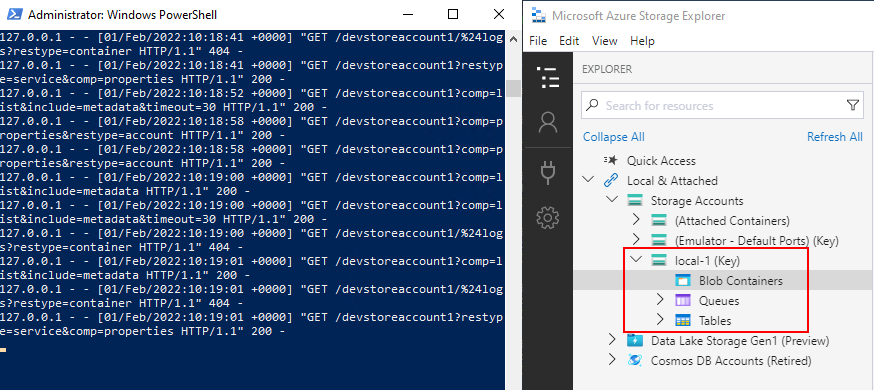
Blob service should listen to http://127.0.0.1:10000
Step 2 – Install Microsoft Azure Storage Explorer
Install Azure storage explorer. Download from here
Step 3 – Configure Blob Containers
Connect to Local Azure Storage
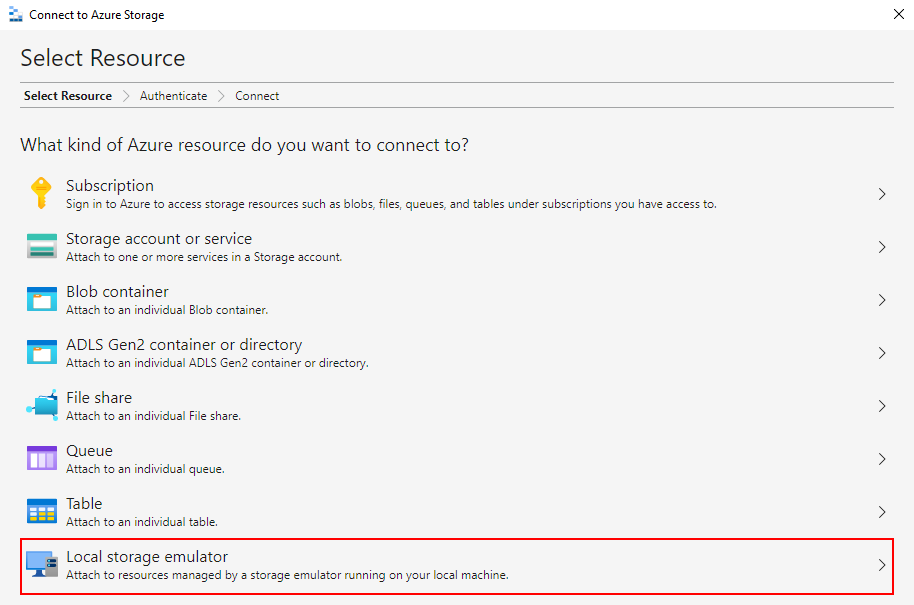
Click on the connect to open the connection dialog box
Select the Local storage emulator
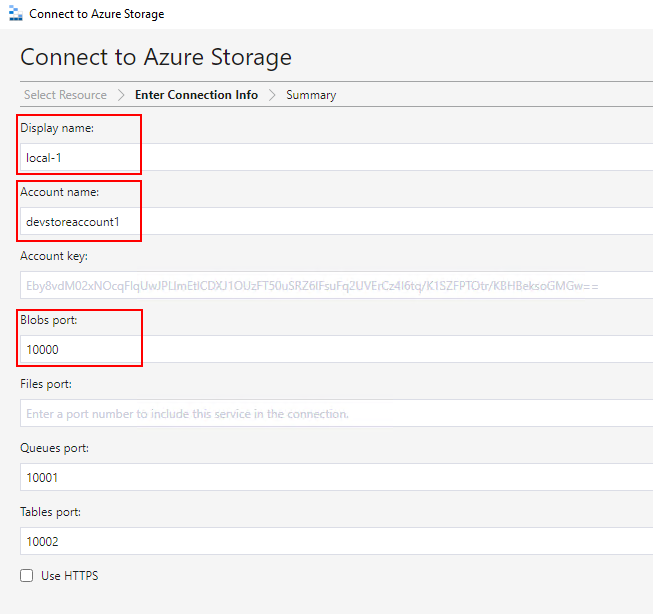
Fill in the required details
Display name
Account name – this wil be used to connect to the blob storage
Blobs port- port used to connect to the vlob storage
Queues and Tables port- port used to connect queues and tables respectively
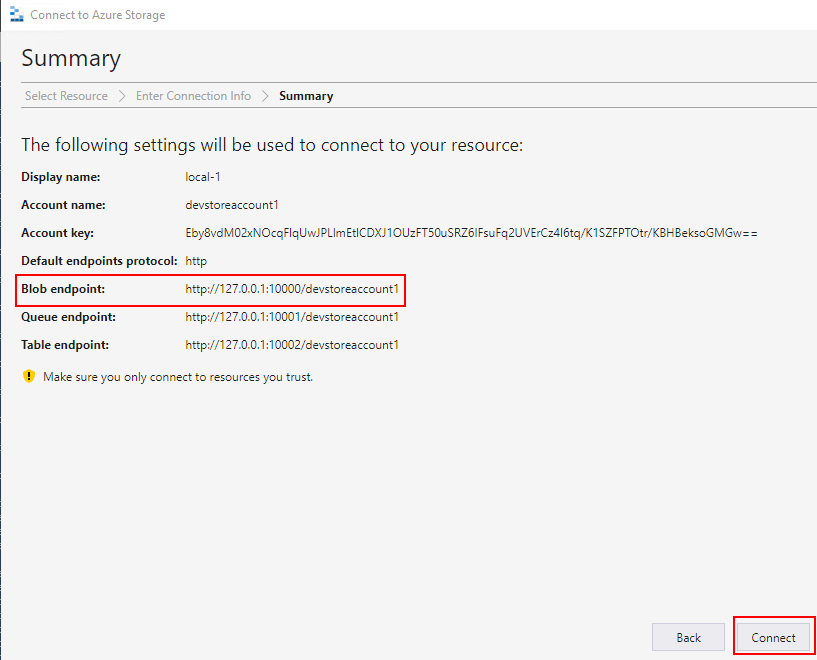
These are the connection information (you might have to note this)-
Local account is created-
Storage Explorer is now able to conect to Local Storage Emulator i.e. Azurite
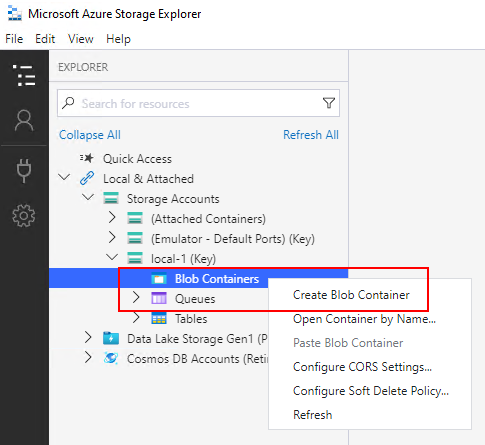
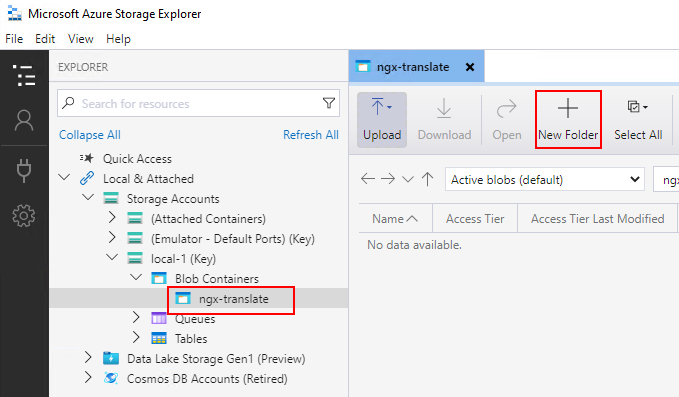
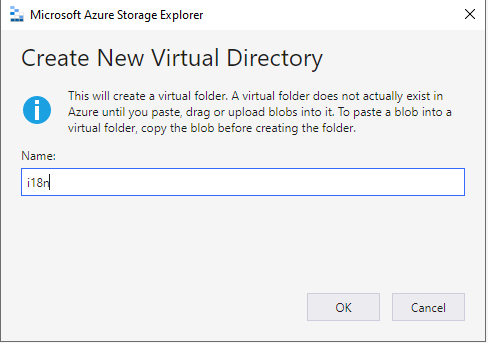
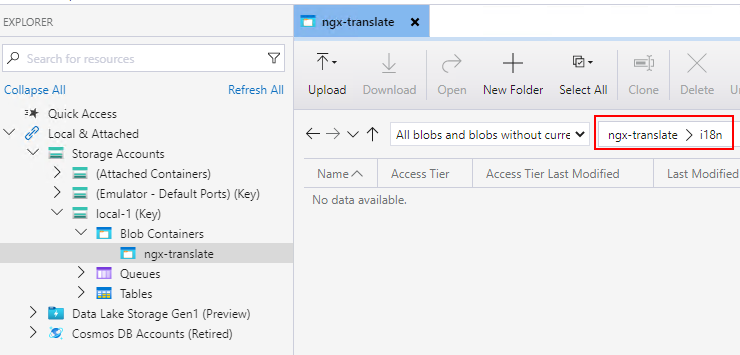
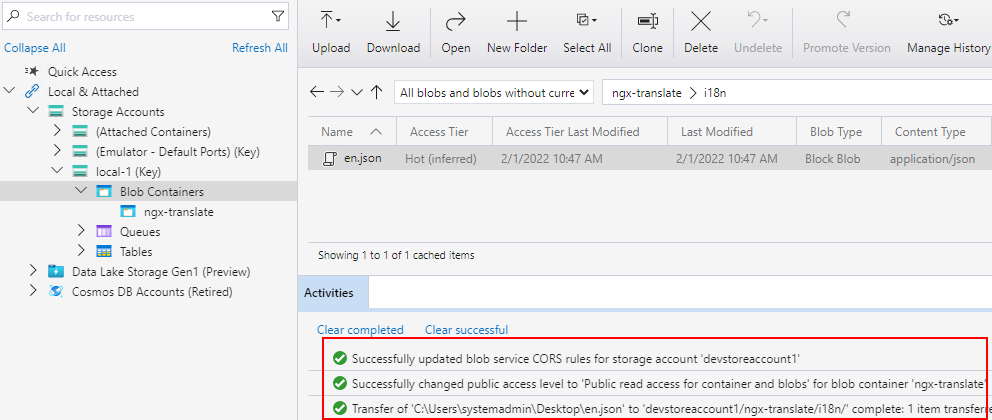
Create a Blob Container – ngx-translate and create new Virtual Directory i18n
Blob Container and folder name can be any other name. You need to configure this correctly in UI config.See this in later steps
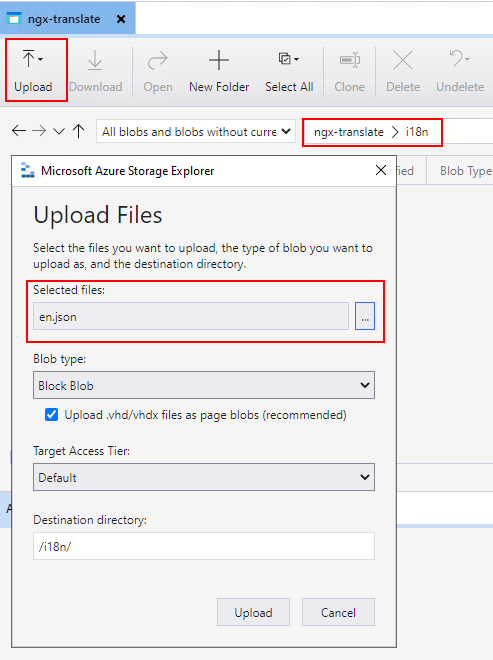
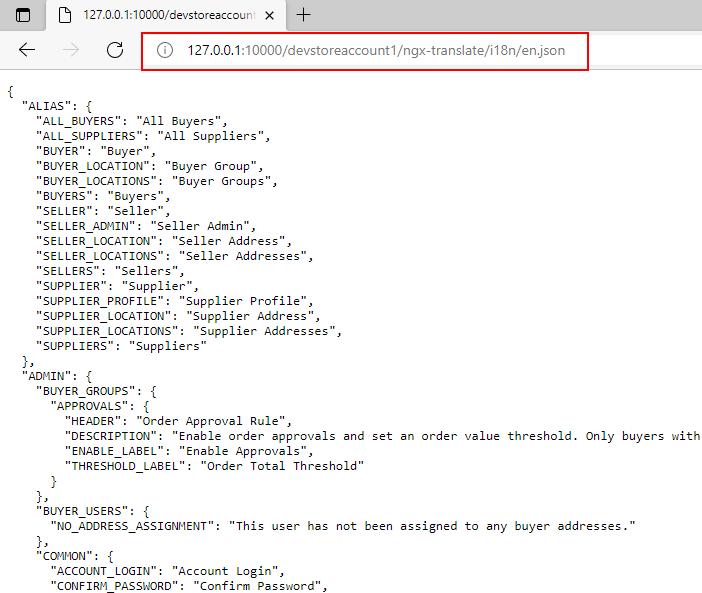
Upload the translation file
Ideally Container, Virtual Directory and trnslation file should be created by Headstart Api. I couldn’t make it work. Hence alternative this I have attached en.json file here.
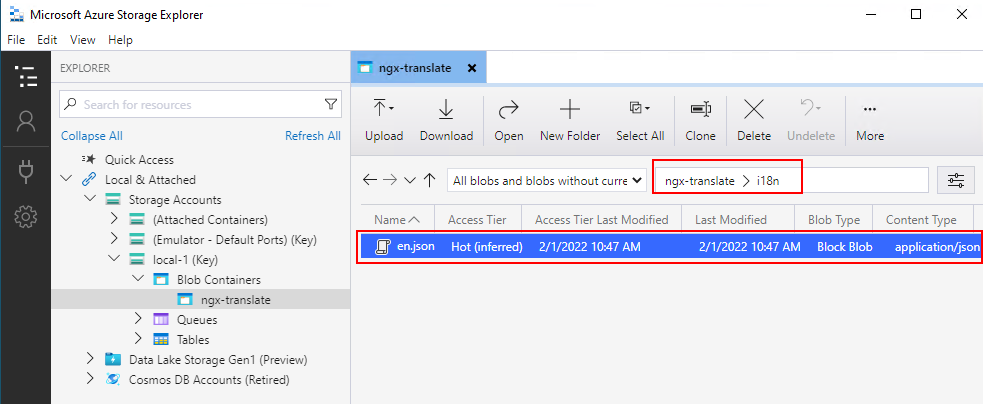
Once uploaded you should be able to see the uploaded file-
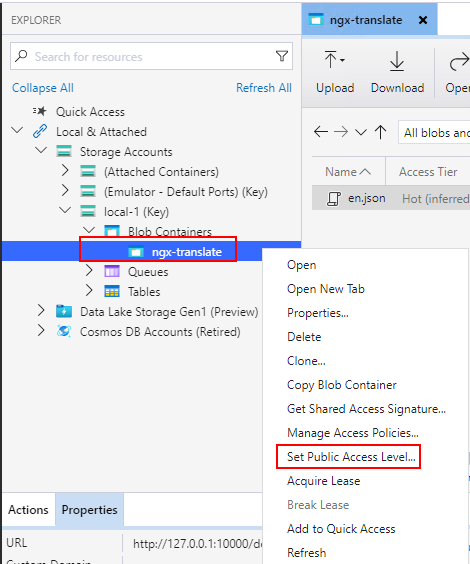
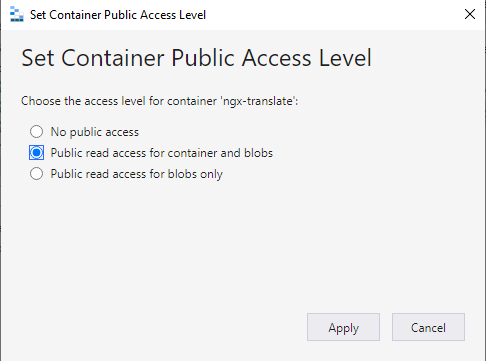
Set Public Access Level to Blob Container
Select the Public read access for containers and blobs
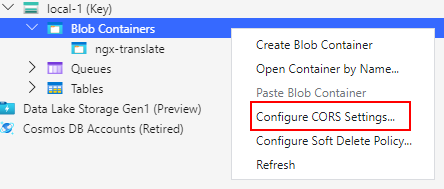
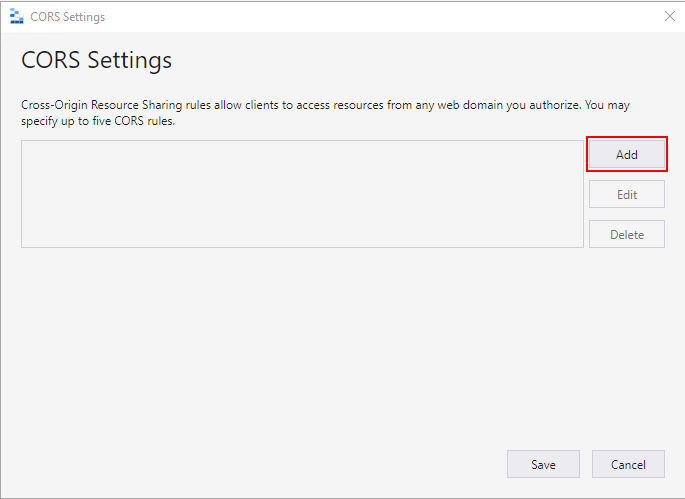
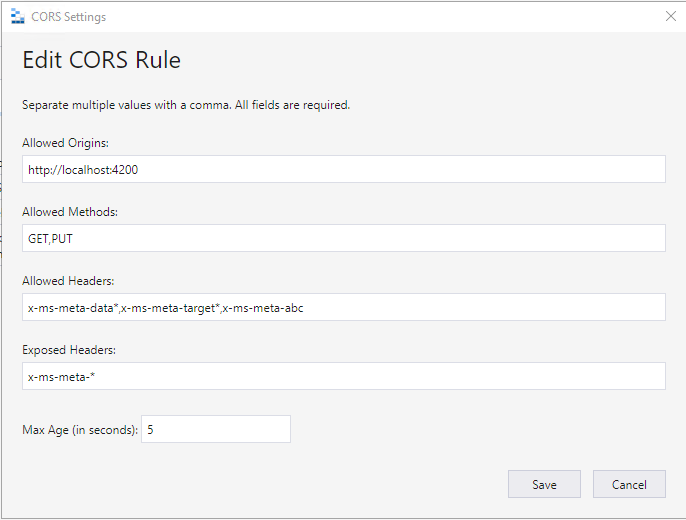
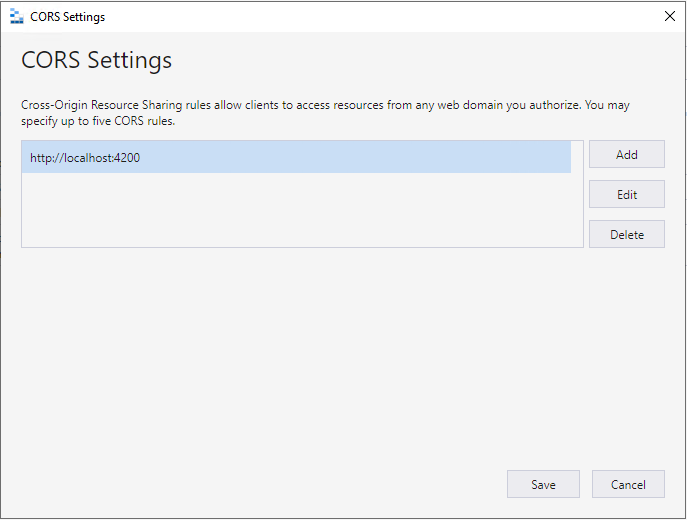
Configure CORS settings
CORS settings are required for accessing the en.json file to access from the local blob storage
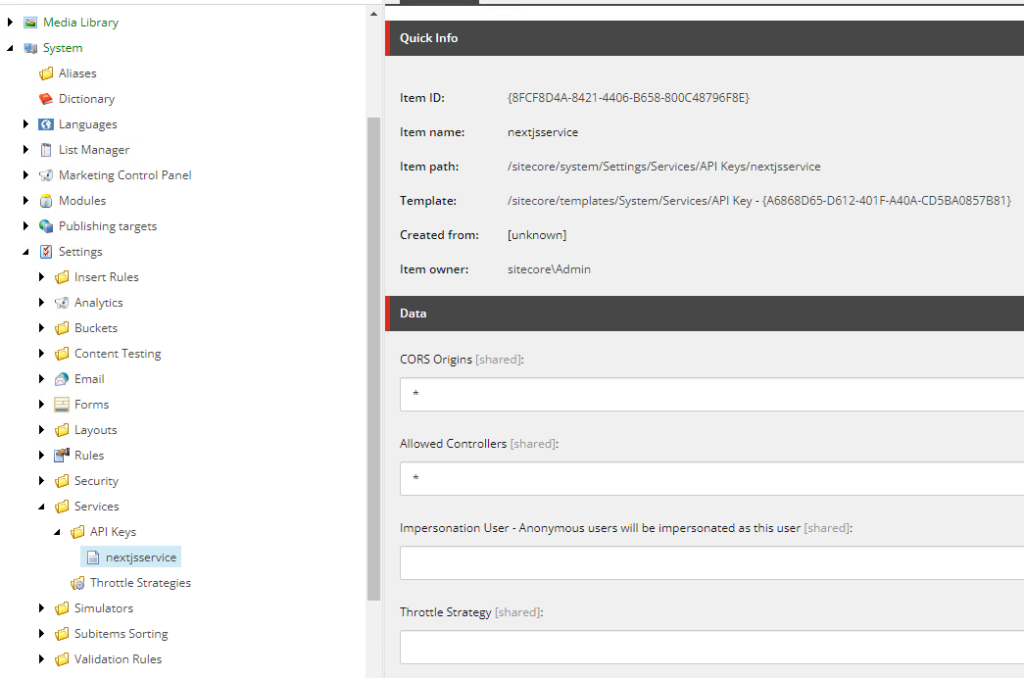
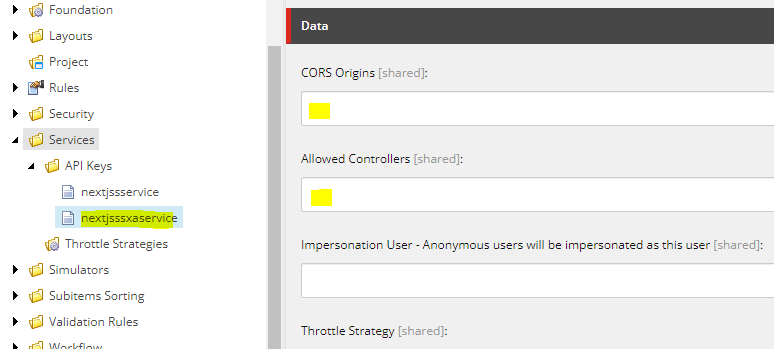
Navigate to – /sitecore/system/Settings/Services/API Keys
Create a new API Key e.g.:- nextjsservice
API key here is Item ID
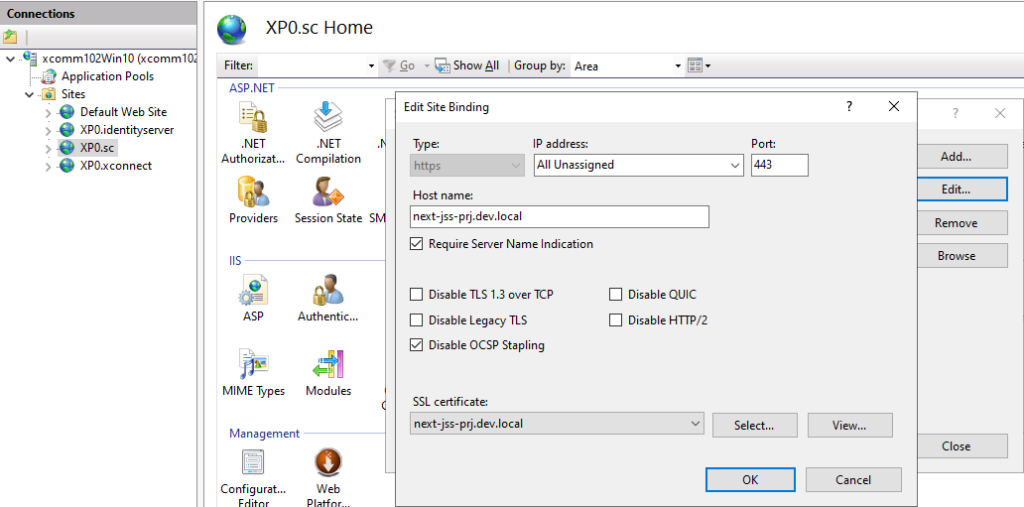
Create a custom binding-
For this create a self signed certificate with a custom domain name in this case – next-jss-prj.dev.local
New-SelfSignedCertificate -CertStoreLocation C:\certificates -DnsName "next-jss-prj.dev.local" -FriendlyName "My First Next JSS App" -NotAfter (Get-Date).AddYears(10)
Create a new https binding and assign the newly create SSL certificate
Add domain to the host file – next-jss-prj.dev.local
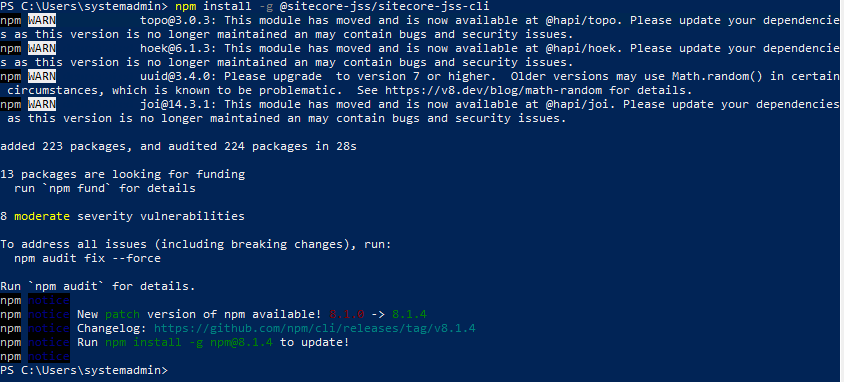
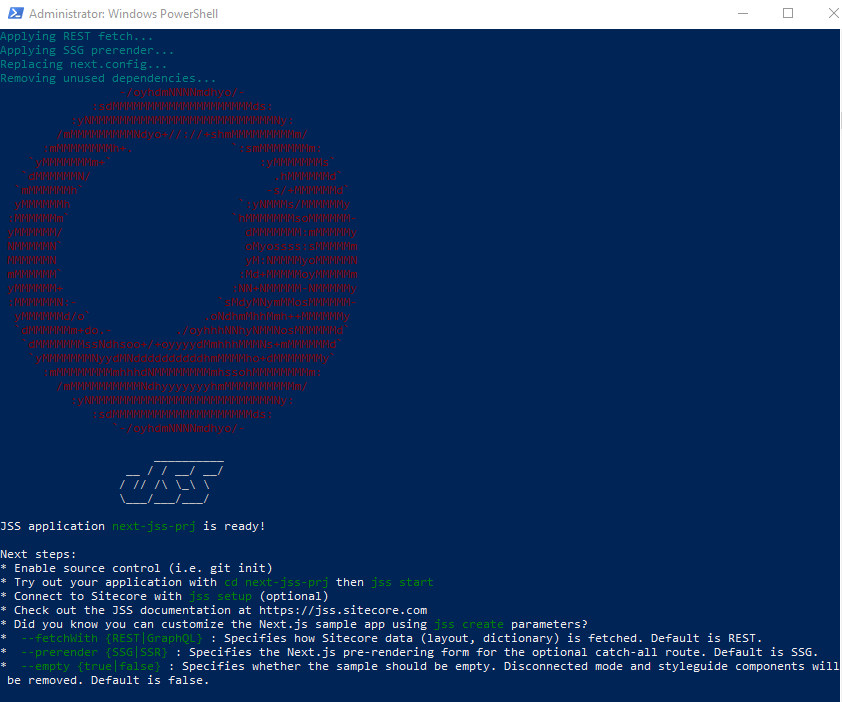
Inititate JSS
Run the command
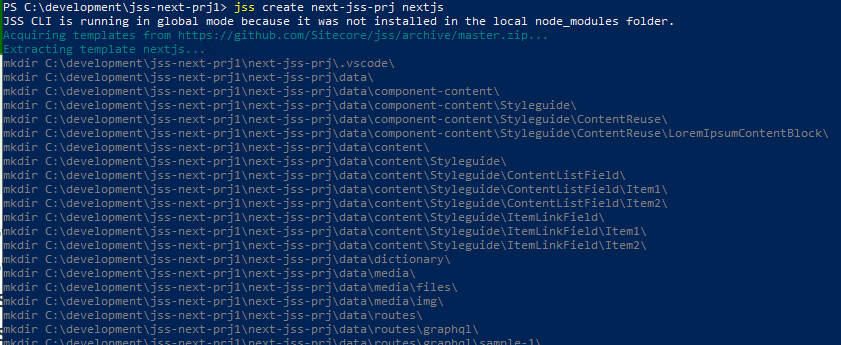
npm init sitecore-jss nextjs
Where would you like your new app created? C:\projects\nextjs Initializing ‘nextjs’… What is the name of your app? next-jss-prj.dev.local What is your Sitecore hostname (used if deployed to Sitecore)? next-jss-prj.dev.local How would you like to fetch Layout and Dictionary data? REST How would you like to prerender your application? SSG Would you like to include any add-on initializers? nextjs-styleguide – Includes example components and setup for working disconnected Initializing ‘nextjs-styleguide’… Which additional language do you want to support (en is already included and required)? da-DK
Setup JSS
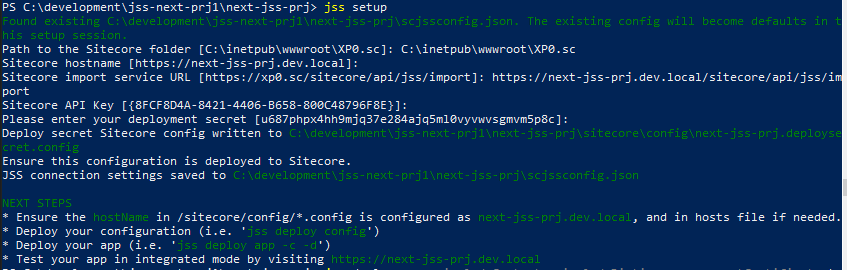
jss setup
Is your Sitecore instance on this machine or accessible via network share? [y/n]: y Path to the Sitecore folder (e.g. c:\inetpub\wwwroot\my.siteco.re): Invalid input. Path to the Sitecore folder (e.g. c:\inetpub\wwwroot\my.siteco.re): C:\inetpub\wwwroot\xp102sc.dev.local Sitecore hostname (e.g. http://myapp.local.siteco.re; see /sitecore/config; ensure added to hosts): next-jss-prj.dev.local Invalid input. Must start with http(s) Sitecore hostname (e.g. http://myapp.local.siteco.re; see /sitecore/config; ensure added to hosts): https://next-jss-prj.dev.local Sitecore import service URL [https://next-jss-prj.dev.local/sitecore/api/jss/import]: https://next-jss-prj.dev.local/sitecore/api/jss/import Sitecore API Key (ID of API key item): {2318A20A-6DF1-4AB8-B49E-F933A3B79160} Please enter your deployment secret (32+ random chars; or press enter to generate one):
Deployment secret– Leave this blank as this will generate new secret key
Deployment secret key is generate and stored in <<jss development folder>>\sitecore\config\next-jss-prj.deploysecret.config
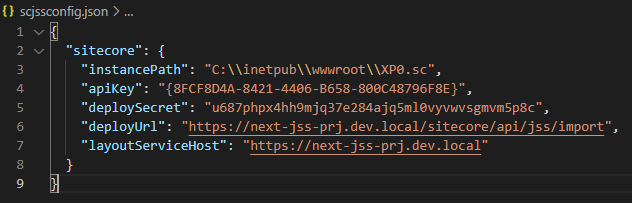
JSS connection settings saved to scjssconfig.json
Connection and the deployment secret is created, now this needs to be deployed to Sitecore instance so the JSS app is able to establish a connection with Sitecoore
To deploy the config setting deploy the config to Sitecore instance-
jss deploy config
Configs are copied to Sitecore instance App_Config\Include\zzz…
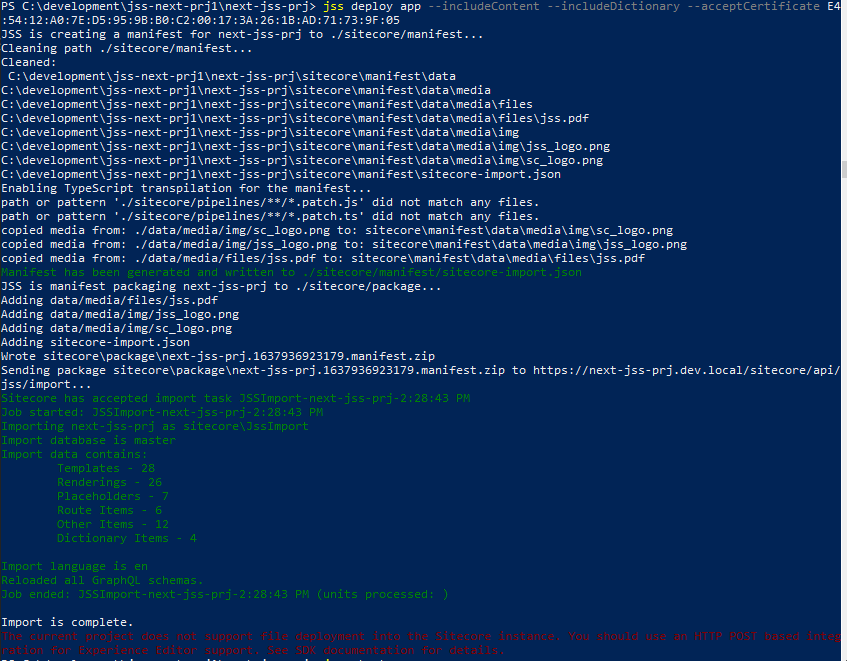
Deploy the artifacts to Sitecore instance-
Since we don’t know hte thumbprint use the below command with –acceptCertificate as test
jss deploy app –includeContent –includeDictionary –acceptCertificate test
This will provide the thumbprint. highllighted in red
if you see this error while importing – Message: An item name must satisfy the pattern: ^[\w*\$][\w\s-\$]*((\d{1,})){0,1}$ (controlled by the setting ItemNameValidation)
Change the ItemnameValidation to .* while importing and revert back to original in Sitecore.config file. Refer this –
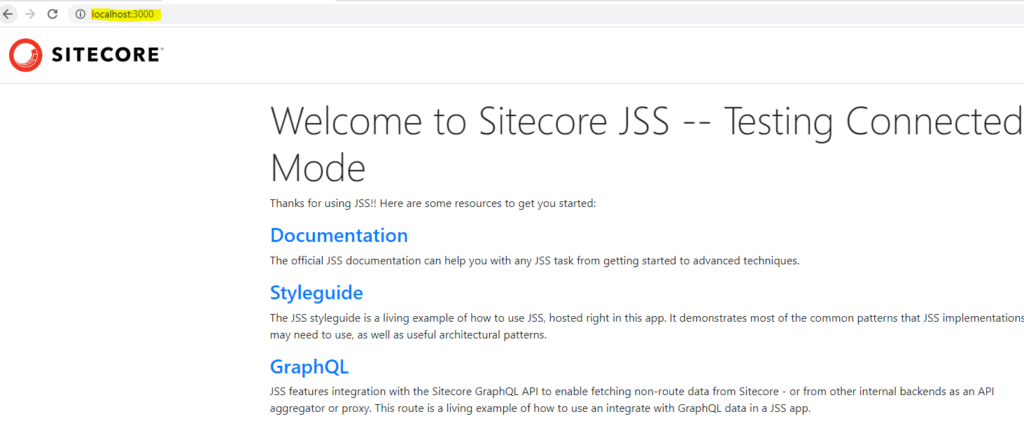
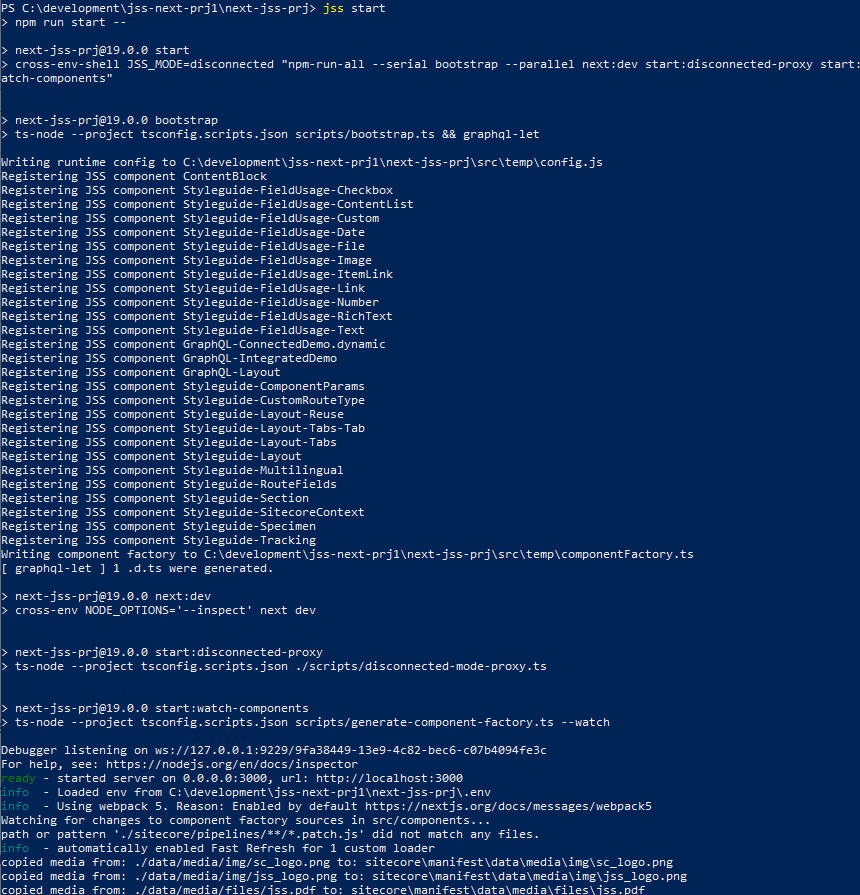
Execute following command to get this working on port 3000
$env:NODE_TLS_REJECT_UNAUTHORIZED=0
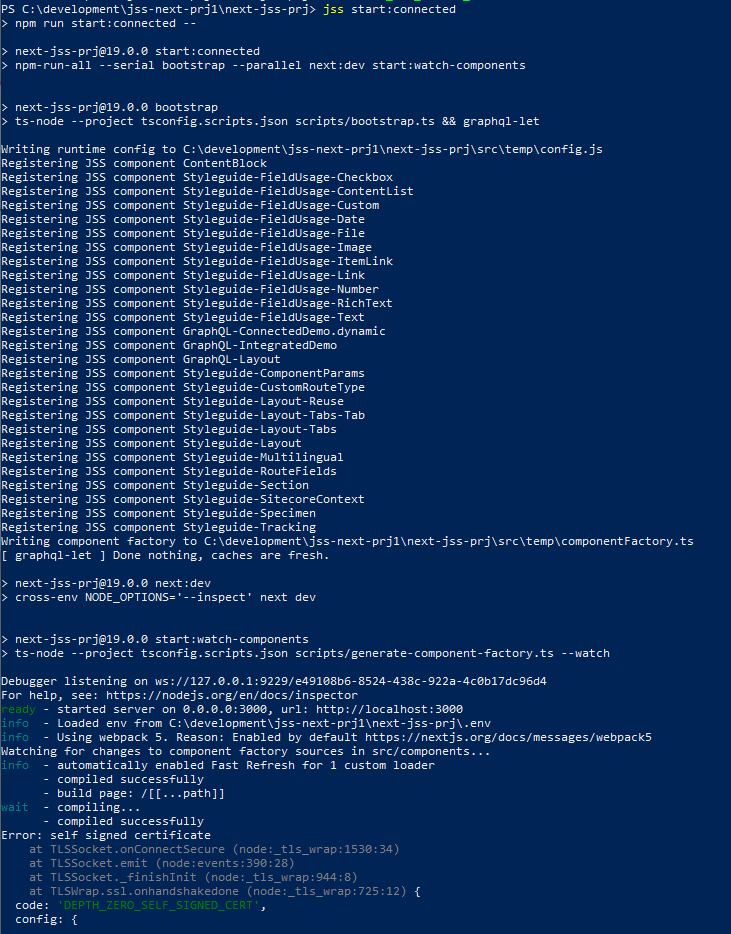
Execute JSS start again-
jss start:connected
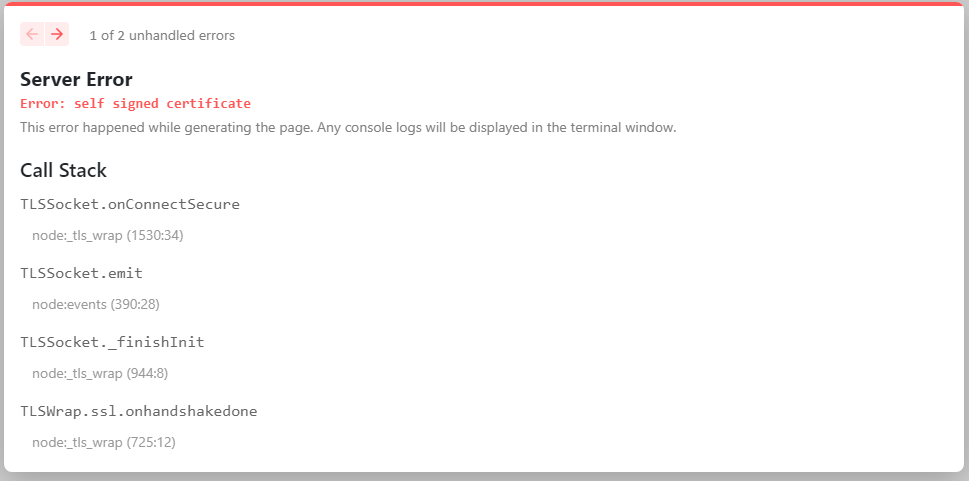
ERROR-
Connection to your rendering host failed with a Not Found error. Ensure the POST endpoint at URL http://localhost:3000/api/editing/render has been enabled.
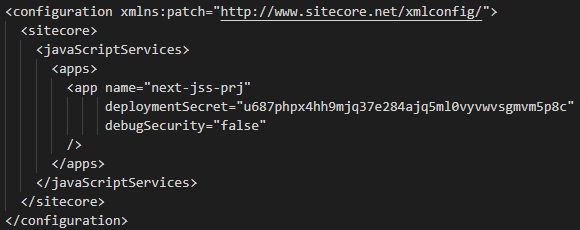
Copy the deploy secret and update the – value of setting of JavaScriptServices.ViewEngine.Http.JssEditingSecret in Sitecore.JavaScriptServices.ViewEngine.Http with the deploy secret.
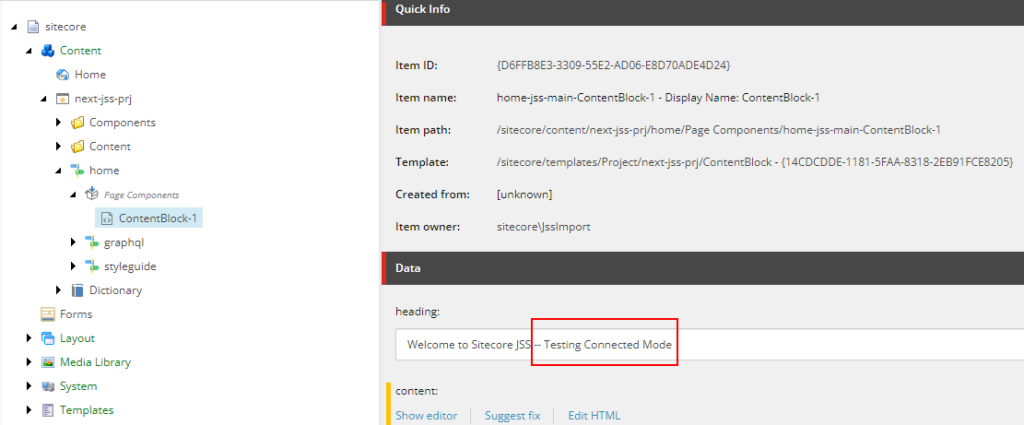
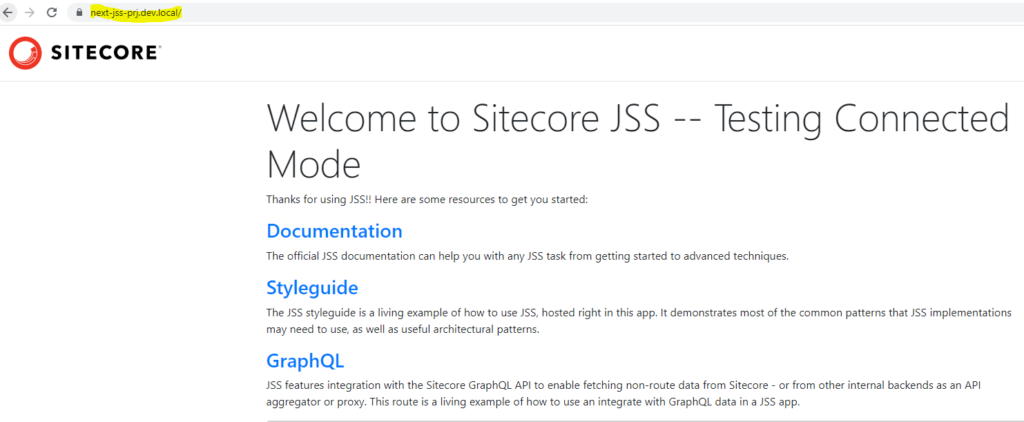
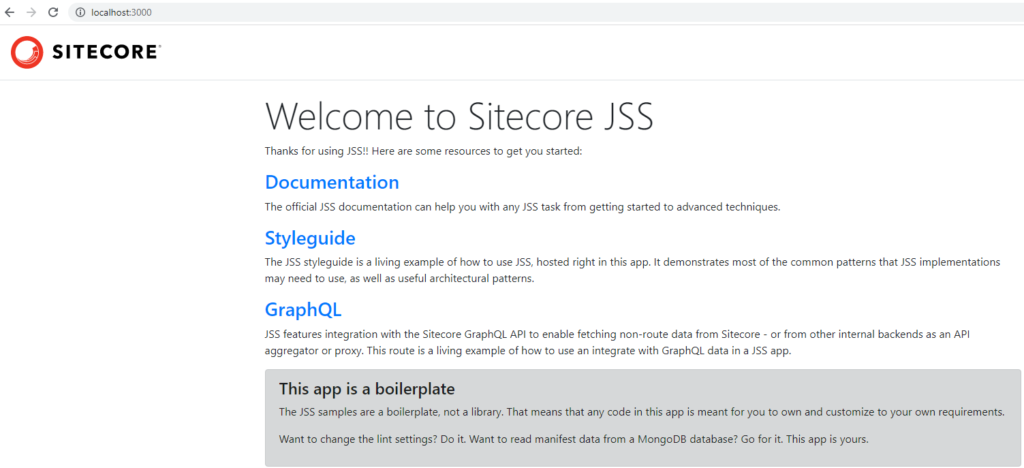
This now work in connected mode. Any content changes in Sitecore should reflect localhost:3000 and Sitecore instance (https://next-jss-prj.dev.local/)
Sitecore next js working in connected mode with SSL
Error-
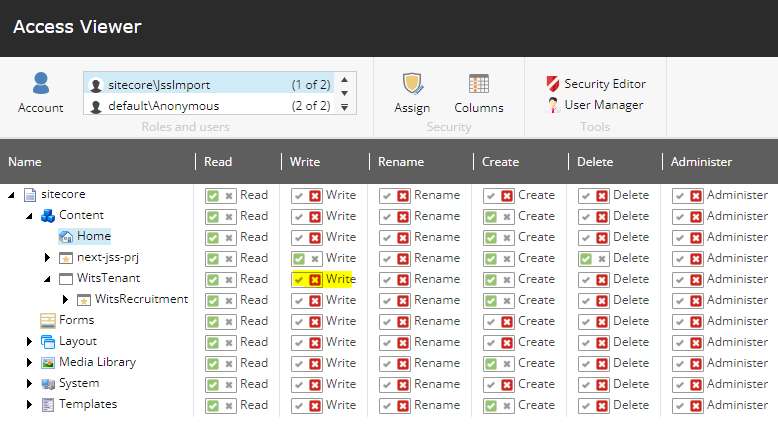
Exception thrown while importing JSS app Exception: System.UnauthorizedAccessException Message: The current user does not have write access to this item. User: sitecore\JssImport, Item: ContentBlock ({23CE8001-F405-5E50-AE61-AD3057660BBD}) Source: Sitecore.Kernel
Resolution-
Error-
Resolution-
Check if the API key is correct at the location – /sitecore/system/Settings/Services/API Keys
Also check if the CORS and Allowed Controllers are set correctly
For developement environment put * for both the highlighted fields