Welcome! This is my personal blog about Web technologies, software development, open source and other related topics
The ideas and opinions expressed here are solely mine and don't represent those of others, either individuals or companies.The code snippets or references to software products or analogous are to be used without any warranty of any kind. If you enjoy the content, feel free to share it and re-use it as long as you provide a link to the original post.
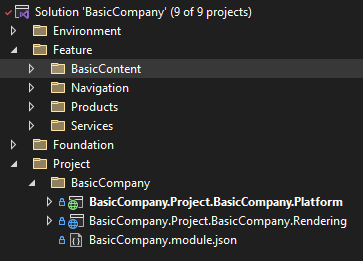
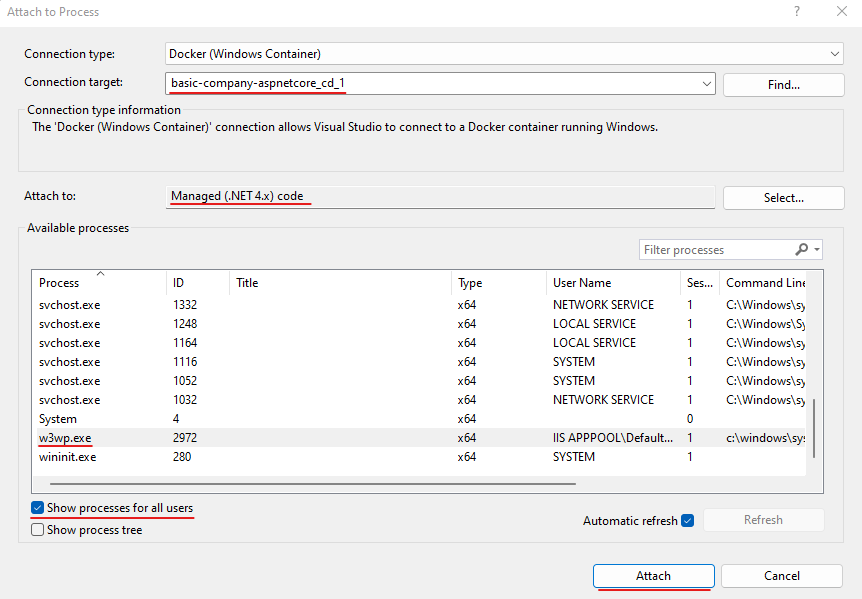
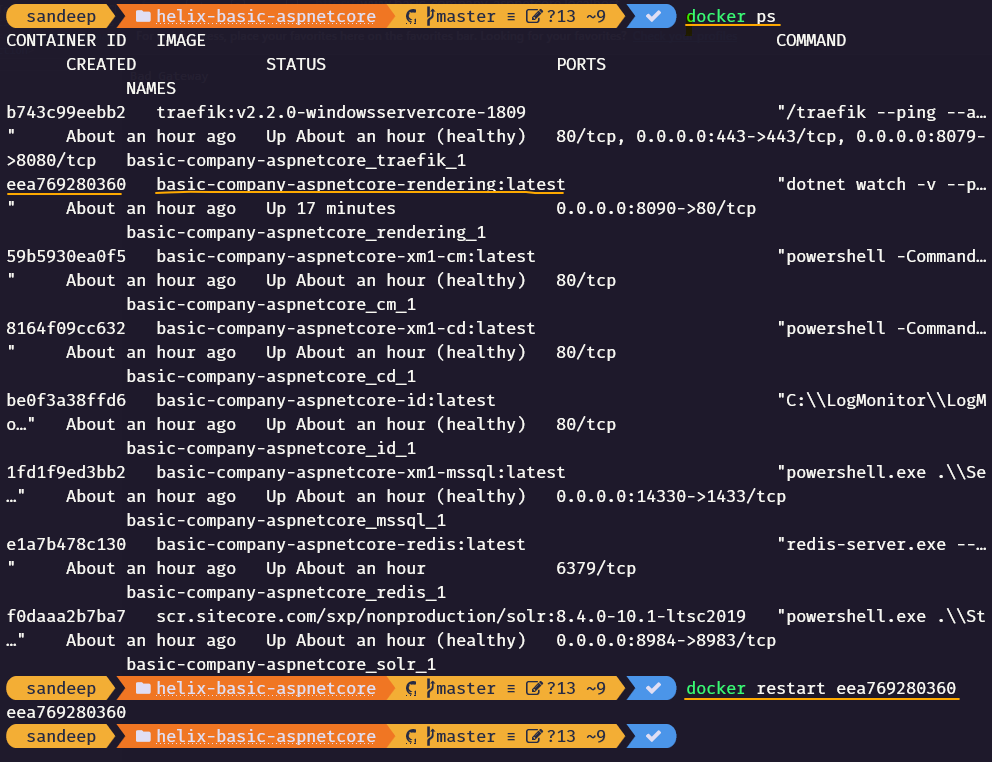
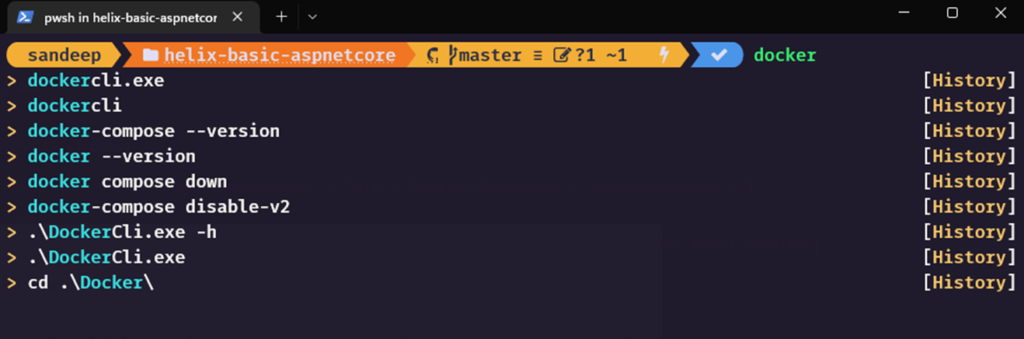
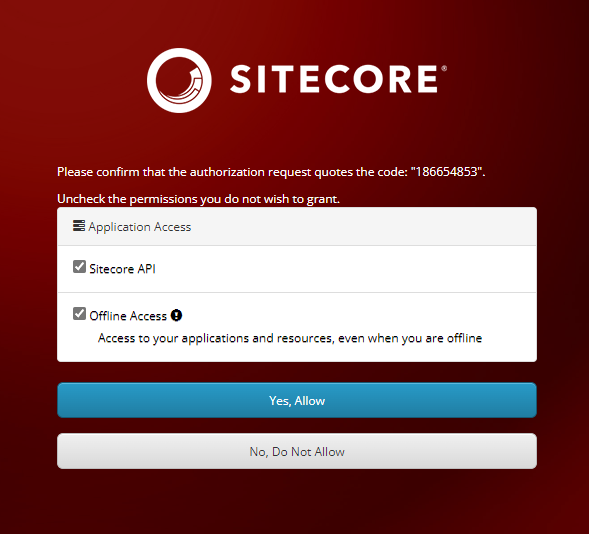
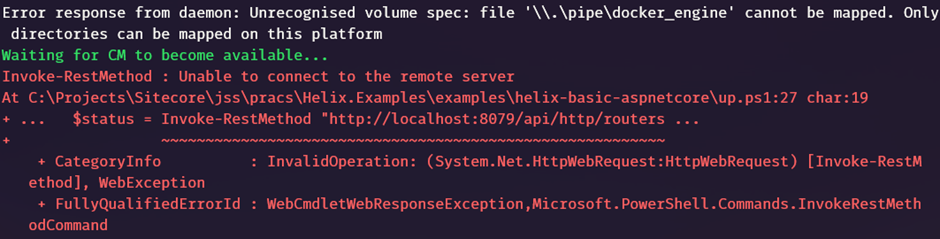
This blog will give a quick overview of setting development environment for Headless Development with ASP.Net Rendering SDK using the Helix Examples and the docker.
Although there are videos and blogs around same I will do a quick walk through on setting Helix Examples and any errors I faced whilst setting up the environment.
Refer the following for same – https://github.com/Sitecore/Helix.Examples/tree/master/examples/helix-basic-aspnetcore
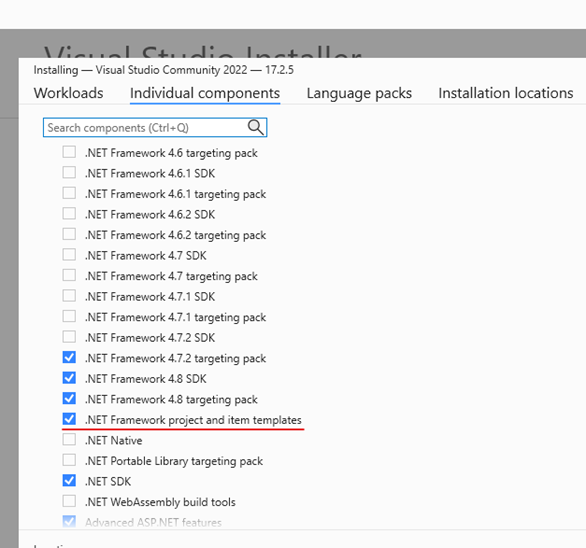
Install .Net core 3.1 on your machine and this is required to create any rendering or platform projects later to extend the Helix Examples Solution or compiling the existing code.
Whilst installing Visual Studio 2022 select the .Net Framework project and templates option as the platform projects uses .Net Framework 4.8 version. This will also help further if you want to extend the solution.
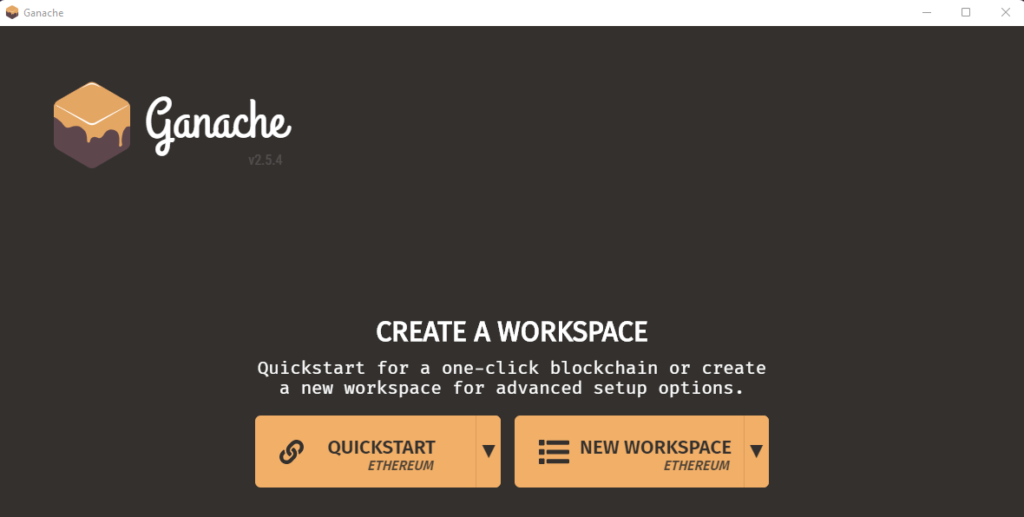
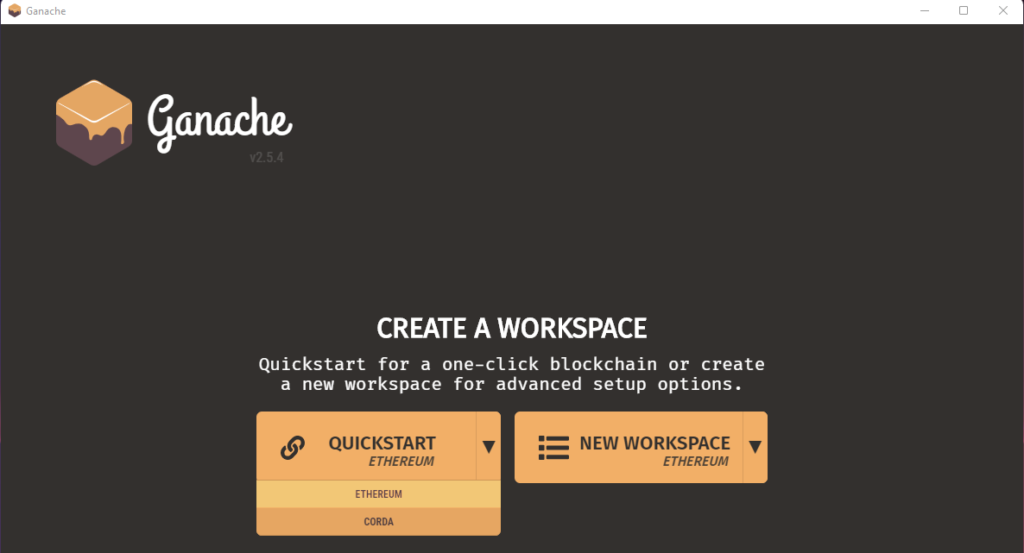
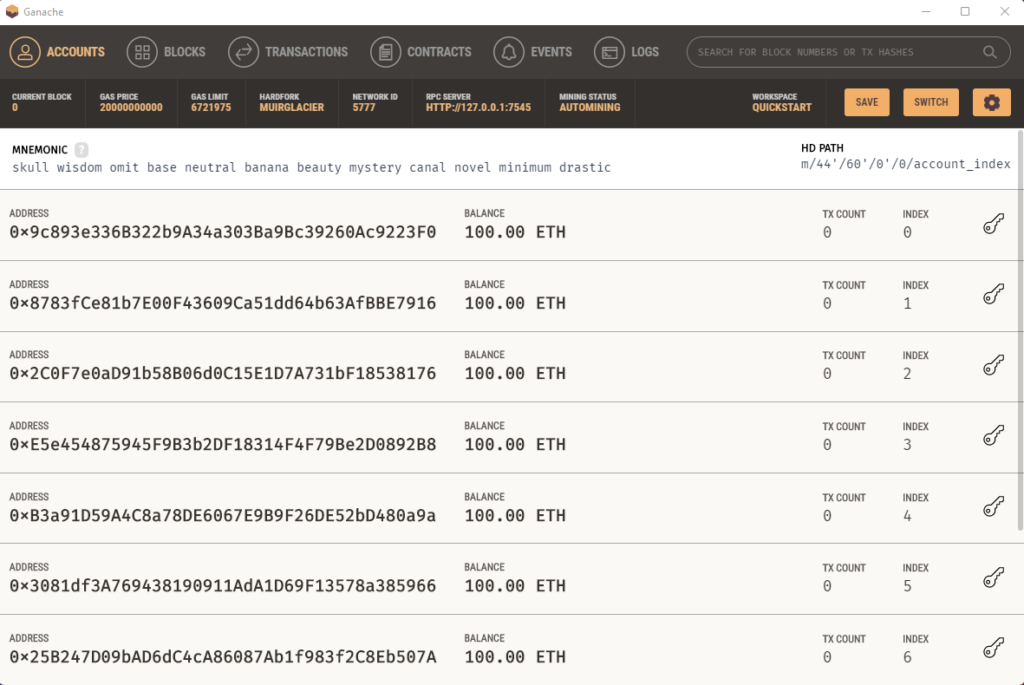
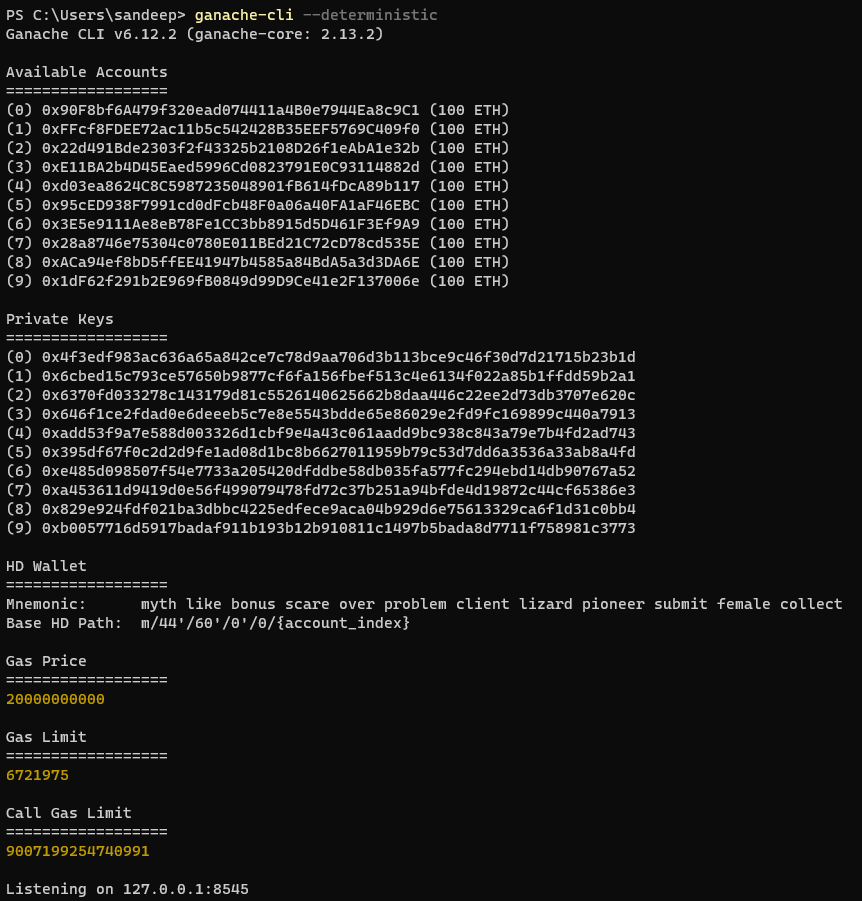
Ganache is the development tool used to run local blockchain for Ethereum development.
Ganache can be used to deploy the contract to local Blockchain. Its a simutated environemnt like Javascript VM when developing on Remix. It helps spin up a local Blockchain.
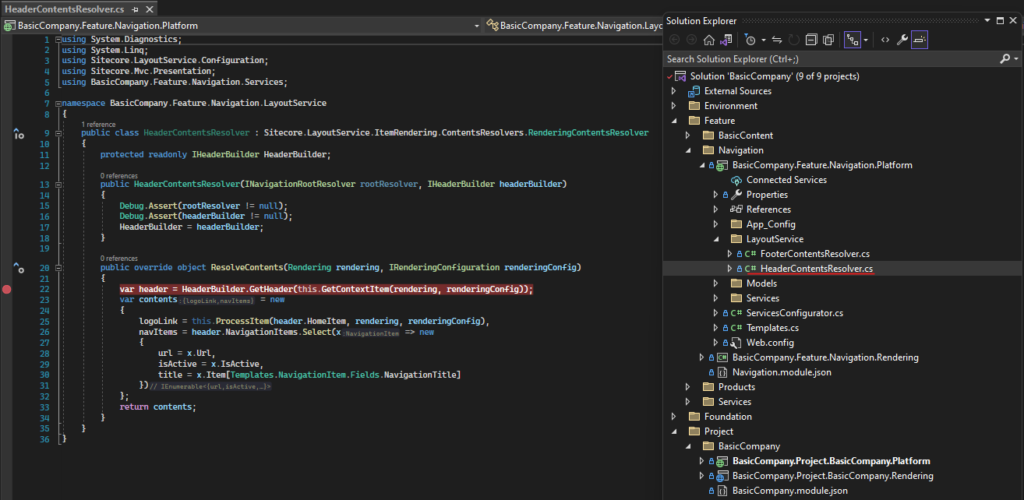
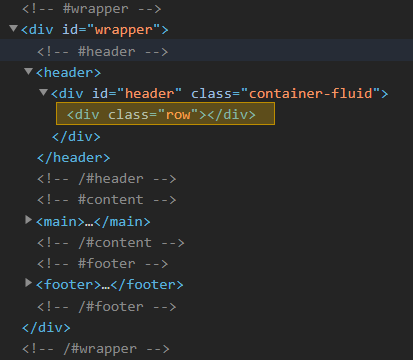
Sitecore uses placeholders to render components which allows to dynamically assemble the page layout. This allows the content editors to design specific pages.
When using MVC layout and BootStrap grid, SXA adds additional DIV when a placeholder is used.
For e.g. if you see the views/sxalayout/Bootstrap4Body.cshtml file. If has a placeholders header, main and footer.
Page is rendered with the header, main and footer tags having placeholders within.
These placeholders is wrapped with a div tag when rendered with class row.
Problem– Extra div tag with class row might not be required or if you don’t to have this as part of your markup. How to remove div tag?
Solution –
The configuration to exclude the placeholder wrappers is in Sitecore.XA.Foundation.Grid.config
Any custom or OOTB placeholders can be added to placeholderWrapper/exlcudedPlaceholders list
Best Practice – Never modify the OOTB config’s as this can be changed in the future releases and upgrades. Patch the config instead.
Patch file should look something like this-
Resulting to the entry added in excludePlaceholders list and the div been not rendered-
Business Tools is extensible using pluggable framework and can extend a UI using Entity Views. Although Business Tools offers a rich set of controls you might want to create your own custom control for the best business experience.
For this you need to first setup the development environment for business tools. Once the environment is setup you should be ready to develop custom control/customize the business tools.
Prerequisites
Instance of Commerce Engine deployed in development environment
NPM configuration to have NPM Packages from Sitecore public feed
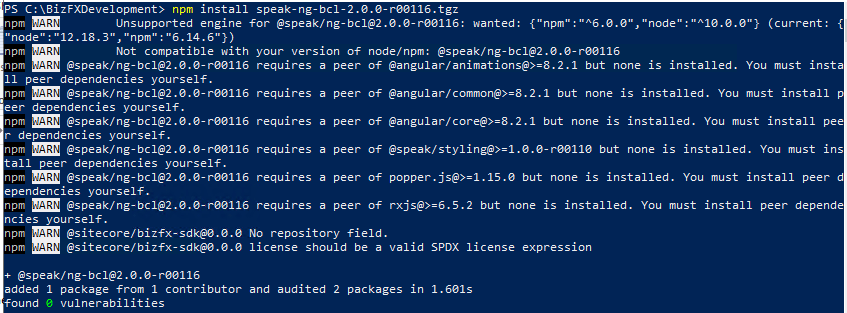
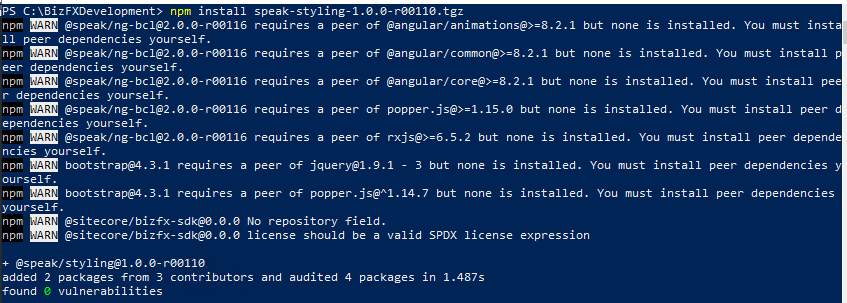
Sitecore BizFx SDK relies on NPM packages available on the Sitecore official public feed for NPM packages.
Open Poswershell as Administrator
Execute these 2 commands in powershell
npm config set @speak:registry=https://sitecore.myget.org/F/sc-npm-packages/npm/

npm config set @sitecore:registry=https://sitecore.myget.org/F/sc-npm-packages/npm/
This will add following line to–
C:\Users\[your user]\.npmrc
[Optional] – you may check if this lines are added
Update: Below is applicable for Sitecore Commerce 10.2. Change the SDK version accordingly.Ignore the step mention for Content Hub
Sitecore Experience Commerce 10 has come up with great new features like Dynamic Bundles, Free gift with Purchase promotion and a sample Sitecore DAM to Commerce connector.
Before you start looking into this, it is important to setup the development environment to debug and test the changes you are making to engine.
Main changes I could see compared to previous versions are integration with Content Hub and Configuring the Commerce Engine using environment variables which not only helps for on-premise installation of Commerce Instance but also helps setup the Docker technology where XC solution is running in containers.
In this post I will walk you through on how to setup the development environment. This post assumes you have Sitecore Commerce Engine along with Visual Studio 2019 installed on developer workstation. If Commerce not installed no worries see this post on how to install Sitecore XC 10 step-by-step.
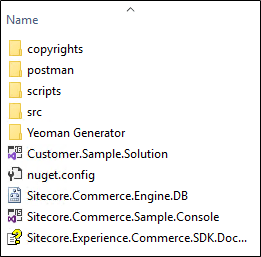
Copy the downloaded SDK Sitecore.Commerce.Engine.SDK.6.0.130.zip on your development folder. e.g: c:\development. Note– there is an update on 19th August where the external dependencies are removed. Download the package again if you have a version before this date.
Extract the commerce package and then extract Sitecore.Commerce.Engine.SDK.6.0.130.zip in your development folder
Step 2 – Setup Visual Studio Solution
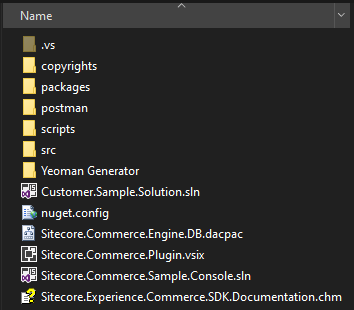
Open the Solution, by default this is Customer.Sample.Solution.sln
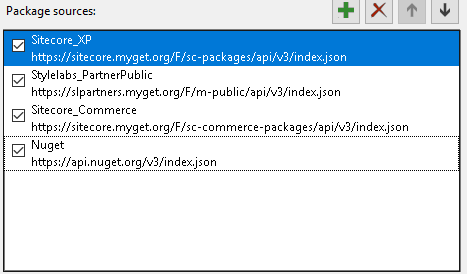
Ensure Package Source is configured for Commerce- https://sitecore.myget.org/F/sc-commerce-packages/api/v3/index.json
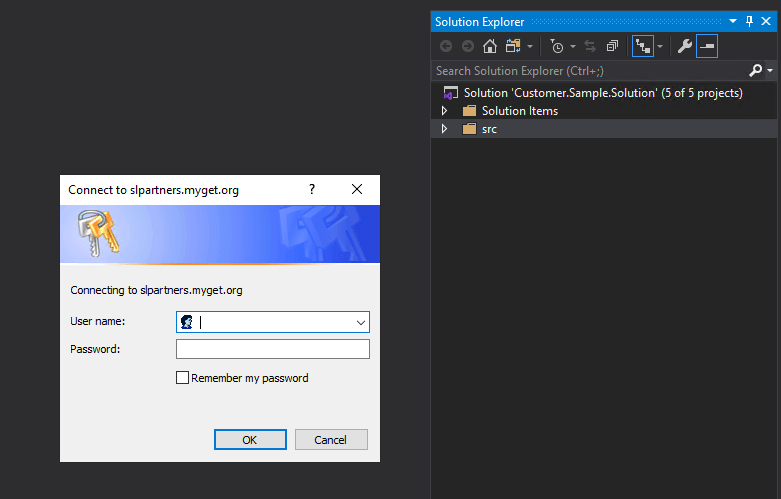
Whilst opening solution login from slpartners.myget.org will be prompted
Create an account on https://slpartner.myget.org/ and login here. You may unload Plugin.Sample.ContentHub project if you dont want to integrate ContentHub and the login should not require. Also note myget account has a trial for 14 days.
Build the Solution. It should restore the package and build successfully.
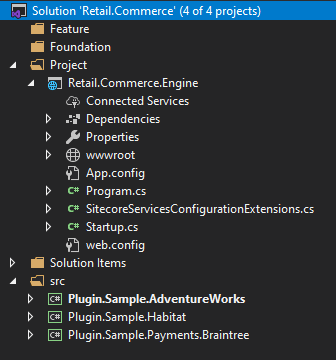
(optional)Rename the Solution name. In this case I have renamed to Retail.Commerce
(Optional) Create Foundation and Feature projects. Build the solution again.
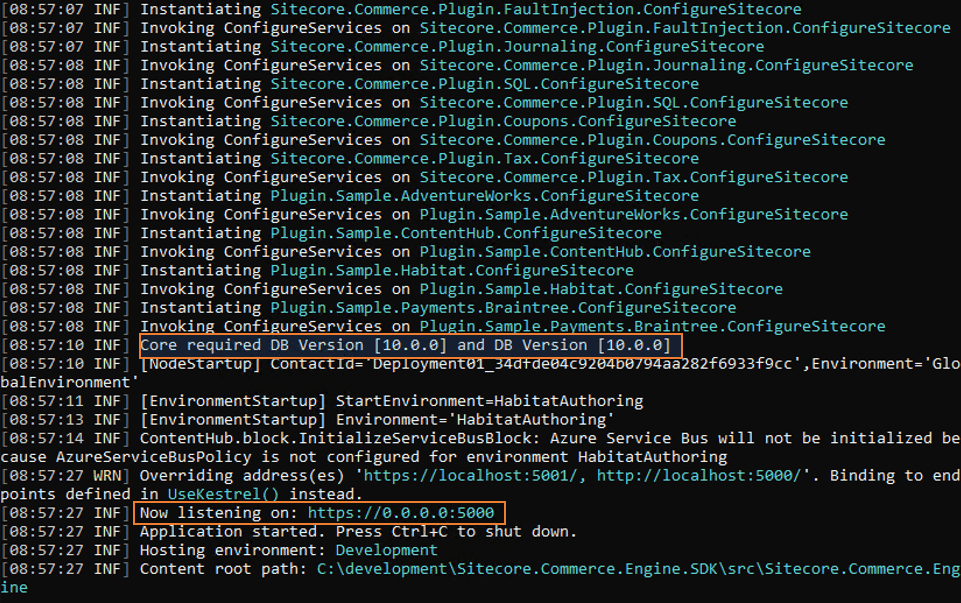
Step 3- Important – Commerce Engine configuration
Sitecore.Commerce.Engine project should have a config.json file in wwwroot folder. Open this file you will see the placeholders that needs to be filled in.
Instead updating config file, you should update the launchSettings.json and the placeholders in config.json will be updated on launch on commerce engine.
Similarly Global.json you can find this in wwwroot/bootstrap folder of your Sitecore.Commerce.Engine project. Again this file has the Placeholders that will be populated from launchSettings.json,
You need to update mainly following variables in launchSettings.json file for both config and global json. There are other variables apart from listed below, you may need to update those based on your site instance name etc.-
In my last post, I have described the steps to set up the Sitecore Commerce development environment. In this post, I will describe how to create a custom plugin in Sitecore Commerce. I was working on version 9.3 but these steps should work with all versions of 9 series.
Sitecore Commerce provides an extensible framework which can be extended using plugins. A plugin is an independently publishable extension to the Sitecore Commerce Engine. Generally, you will find the following contained in a plugin and are used to extend the platform.
Entities
Components
Entity Views
Pipeline
Policies etc.
You can extend the platform or add more features using the plugins. Let’s get started and look into the steps to create a new plugin in Sitecore Commerce 9.3. If you have already set up your commerce development environment, please skip to step 2
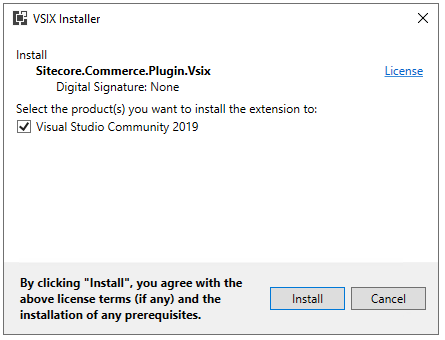
Step 2 – Install Visual Studio Extension for creating plugin
Go to solution root folder or SDK folder and run the Sitecore.Commerce.Plugin.vsix file. Close the Visual Studio solution if open.
This should install extension on selected Visual Studio Version
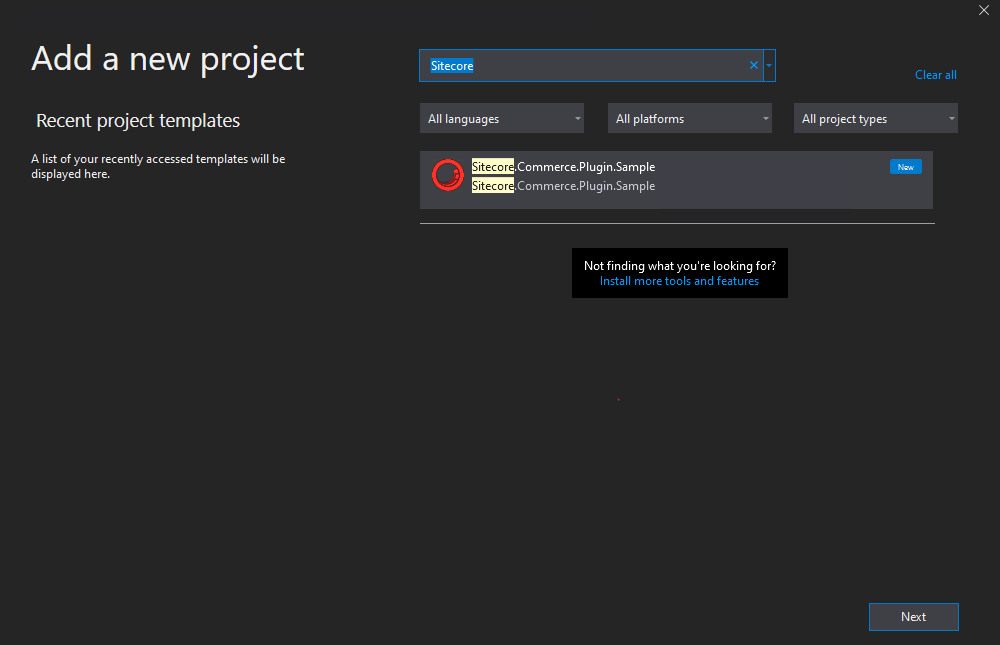
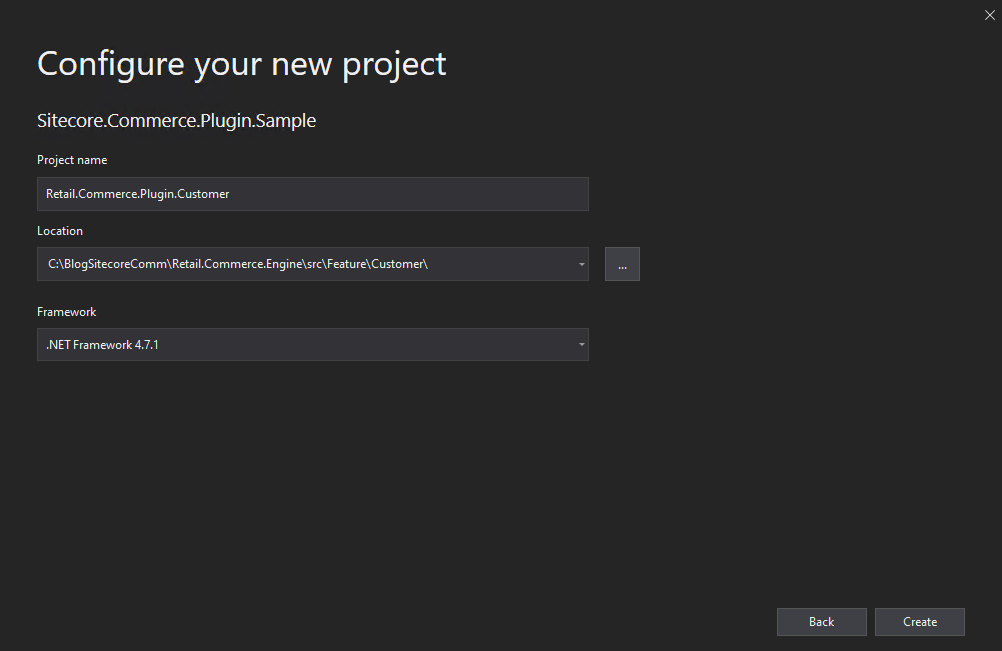
Step 3 – Create a plugin
Open your solution. Create a Feature solution folder, just to follow Helix best practice. Right click solution folder to create a new project
Search Sitecore.Commerce.Plugin. Select project type and click next.
Give the project name, location and select .Net Framework 4.7.1. Create a Project.
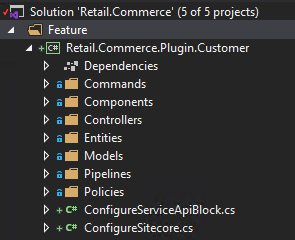
Sample Folder and Files for Commands, Components, Controller etc shall be added.
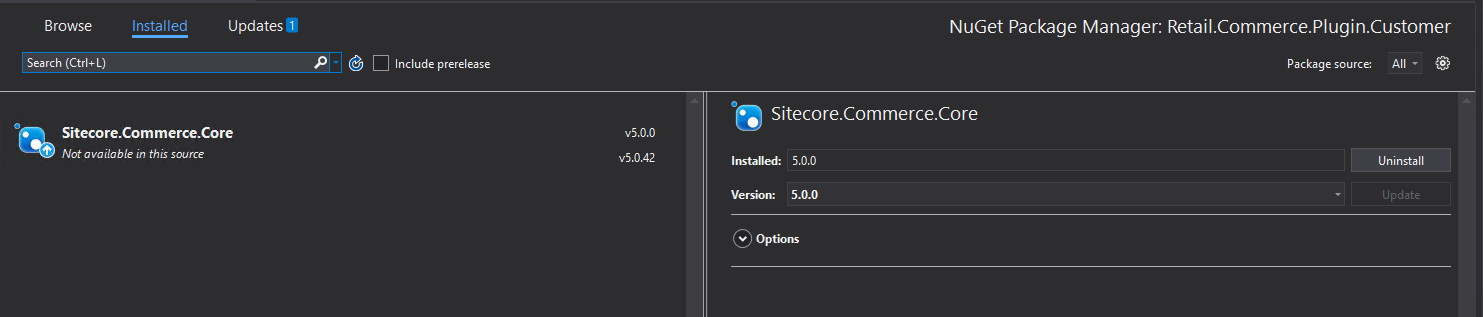
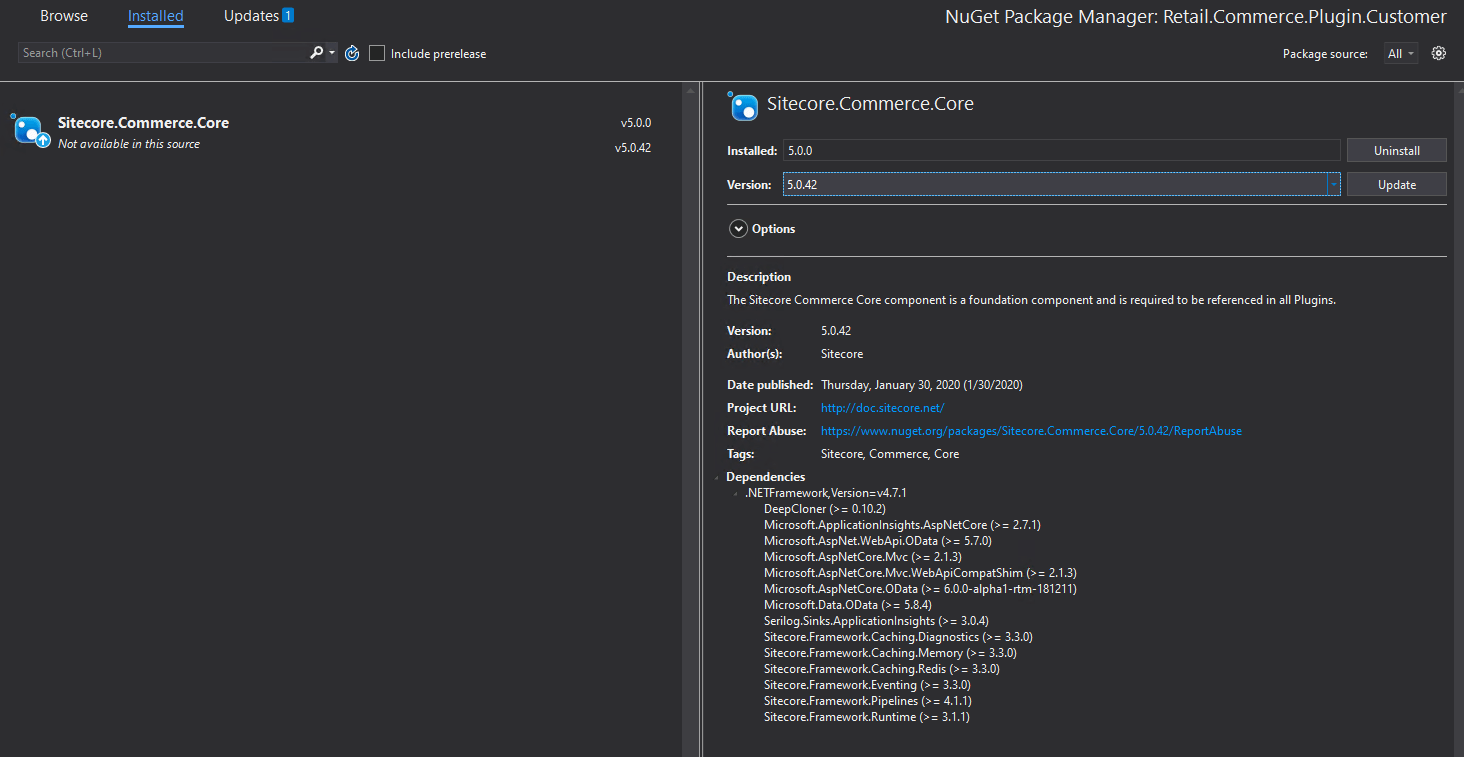
Update the Sitecore Commerce Core from 5.0.0 to 5.0.4
4. Build the project. There shouldn’t be any reason the build should fail.
Step 4 – Reference project and run engine
Add Plugin project reference to your Commerce.Engine Project
Run the Engine. You should be able to see the newly created plugin is now registered in Engine.
This should allow to start customizing commerce and truly use plug-gable and extendable feature of Sitecore Commerce.
We intentionally didn’t add any code to this plugin to keep this simple. In the next blog, we will cover the anatomy of the newly created plugin and show how to inject this plugin into Commerce Pipelines and execute some custom code.
On a XC installed instance you might want to customize the XC by adding your own Entities, Components, Entity Views etc. In this topic I will describe how to setup your development environment to add your custom plugin.
This topic assumes a Sitecore CMS and Commerce engine version 9.3 are running under IIS. I am using Visual Studio 2019.
Steps to setup-
Step 1- Extract Commerce Engine SDK
Copy the downloaded SDK Sitecore.Commerce.Engine.SDK.5.0.76.zip on your development folder.
Extract the commerce package and then extract Sitecore.Commerce.Engine.SDK.5.0.76.zip
Step 2 – Setup Visual Studio Solution
Open the Solution, by default this is Customer.Sample.Solution.sln
Ensure Package Source is configured for Commerce- https://sitecore.myget.org/F/sc-commerce-packages/api/v3/index.json
Build the Solution. It should restore the package and build successfully.
(optional)Rename the Solution name. In this case I have renamed to Retail.Commerce
(Optional) Create a solution folder “Project” and move Sitecore.Commerce.Engine project
(Optional) Rename “Sitecore.Commerce.Engine” project to “Retail.Commerce.Engine”. Re reference AdventureWorks, Habitat and BrainTree projects if required. Adjust/rename namespace in classes.
(Optional) Create Foundation and Feature projects. Build the solution again.
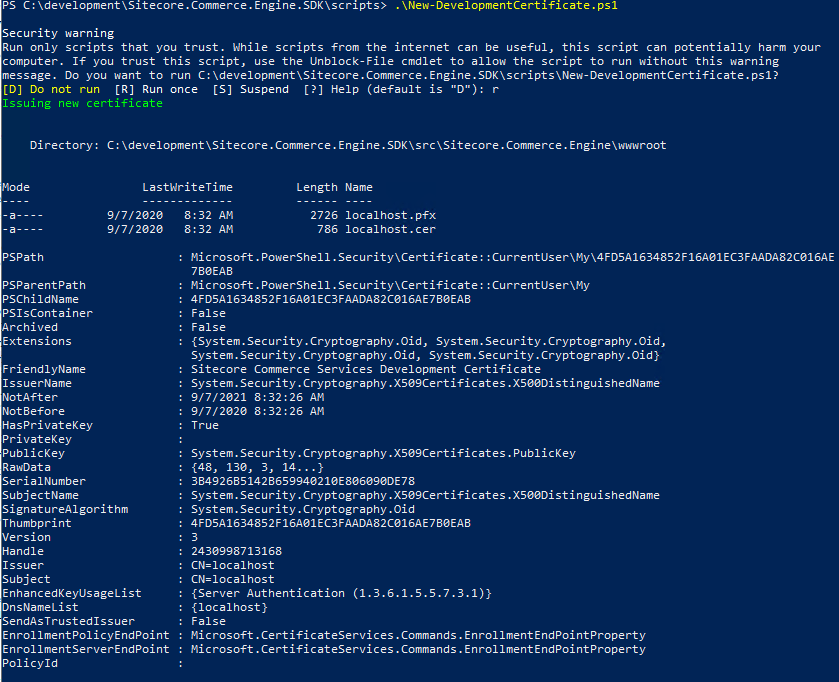
Step 3 – Generate Development Certificate
Generate development certificate using script “New-DevelopmentCertificate”, so the localhost runs on SSL(https)
Open powershell script and navigate to scripts folder.
Execute New-DevelopmentCertificate script
Change the Path($certificateOutputDirectory) if required. Certificate should be copied to \src\Project\Engine\code\wwwroot
Step 4 – Update configuration
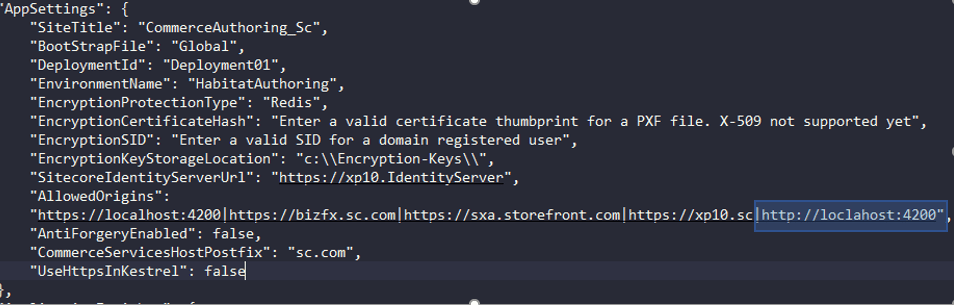
Change environment in Engine project/wwwroot/config.json file to HabitatAuthoring
Add the site name in AllowedOrigins in config.json
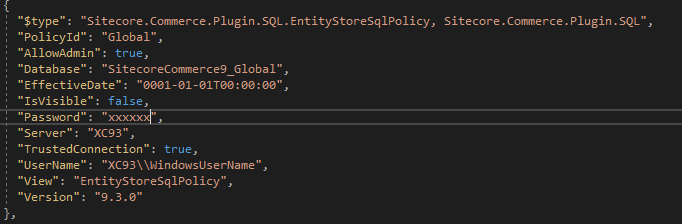
Open Global.json in wwwroot/bootstrap folder in Engine project
Update SQL Server, UserName and Password in EntityStoreSqlPolicy
Check the database name
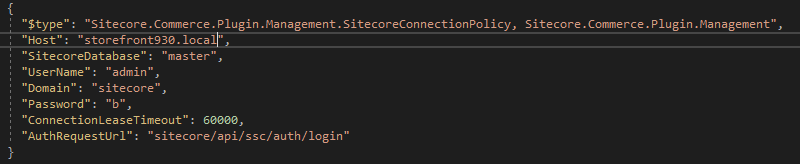
7. Update Host to your site host name in SitecoreConnectionPolicy
Note: You may copy the config.json and gloal.json file from Authoring Site hosted in IIS to your project, but to better understand the changes required I have noted the changes.
Step 5 – Update allowed origins in Identity Site
Open Sitecore.Commerce.IdentityServer.Host.xml file. Should be in /config/production/Sitecore.Commerce.IdentityServer.Host.xml
Navigate to section <CommerceEngineConnectClient><AllowedCorsOrigins>
Add https://localhost:5000 to the
Step 6 – Ready for running the Engine
Set Engine as your Startup Project
Change the debug profile to “Engine” instead of “IIS Express”
In IIS stop Authoring site. i.e. for your default instance it might be CommerceAuthoring_sc930 site
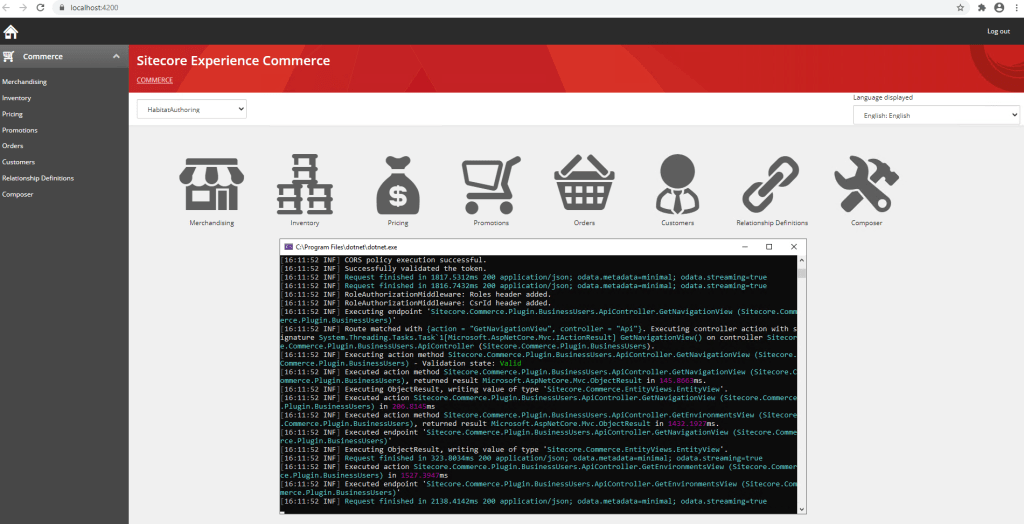
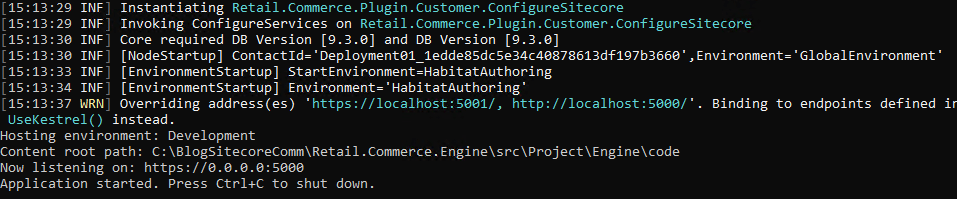
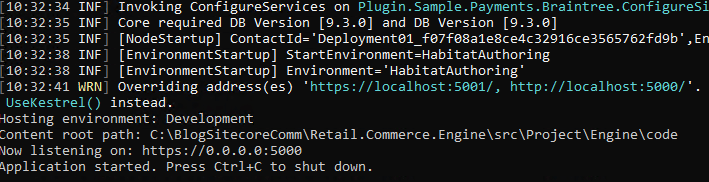
Run the Engine from Visual Studio. This will open the console.
Once the plugins are instantiated, it should listen to 5000 port. At this point you have configured Engine to run/debug from Visual Studio. Any calls from the business tool should be received by engine and console should be able to show the request that’s been received.
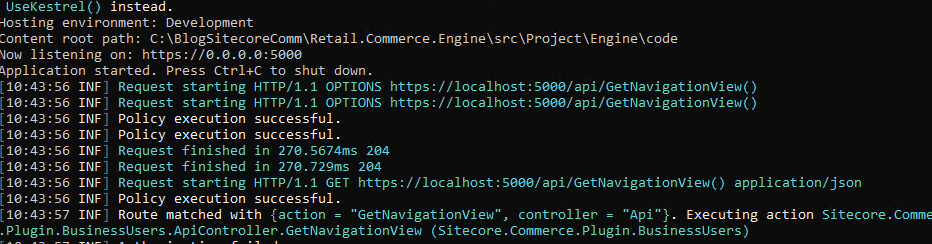
And here we have business tool sending request to engine running on Visual Studio, see GetNavigationView() been called in console-
Ctrl + T – Find anything in Visual Studio Solution
Fastest way to find files in your visual studio solution. Press this shortcut and start typing the keyword to navigate to your desired file.
Ctrl E + C – Code Cleanup
Re-sharper allows to clean code based on the defined tasks. Configure the tasks for C#, Html , CSS, Javascript etc. and follow the action after pressing this shortcut.
Ctrl R + R – Rename
The Rename refactoring allows you to rename any symbol, including: namespaces, types, methods, parameters, local variables, properties, fields, and events. It automatically finds and corrects all references to the symbol. The Rename refactoring can be invoked directly from the editor and sometimes from other views (Class View, Object Browser).
Ctrl + Alt + D – Todo explorer
Although nobody likes tech debt but there are instances when on an agile projects few tasks are to be pushed back to the future sprint. In such cases a TODO comments are applied. Re-sharper gives a feature to view such TODO items and a best practice its good to fix the TODO items before a production code is ready. Please this shortcut to view all the TODO items in your solution/project
Alt + Enter + Enter
Shortcut helps to rename the file same as the class name. These instances might come after the file (e.g.: .cs) is created and you decide to change the
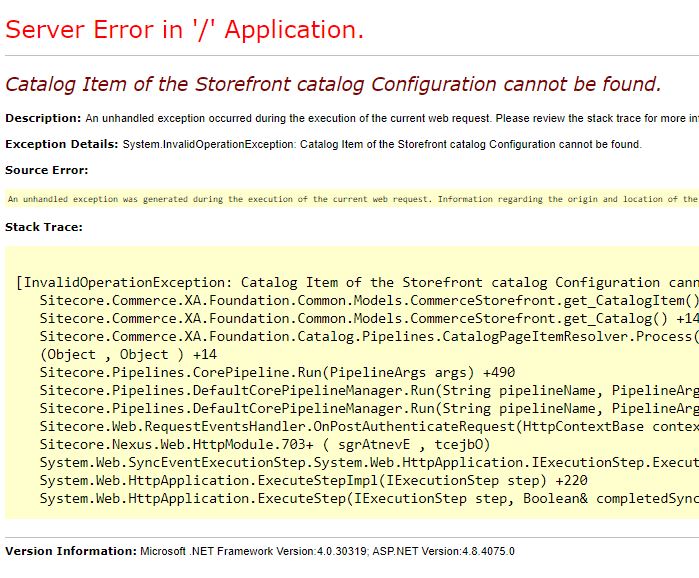
Sitecore Storefront can have multiple catalogs, but only one catalog can be used to each Storefront.
At times whilst development you might have to switch between the Authoring site and Visual Studio Commerce Engine Solution for debugging. I have seen sometimes the Catalog for the Storefront is reset during the switch which results in error – No catalog data available.
This message is shown on the menu as seen in the screenshot-
Solution-
Login to Sitecore Client and follow these steps-
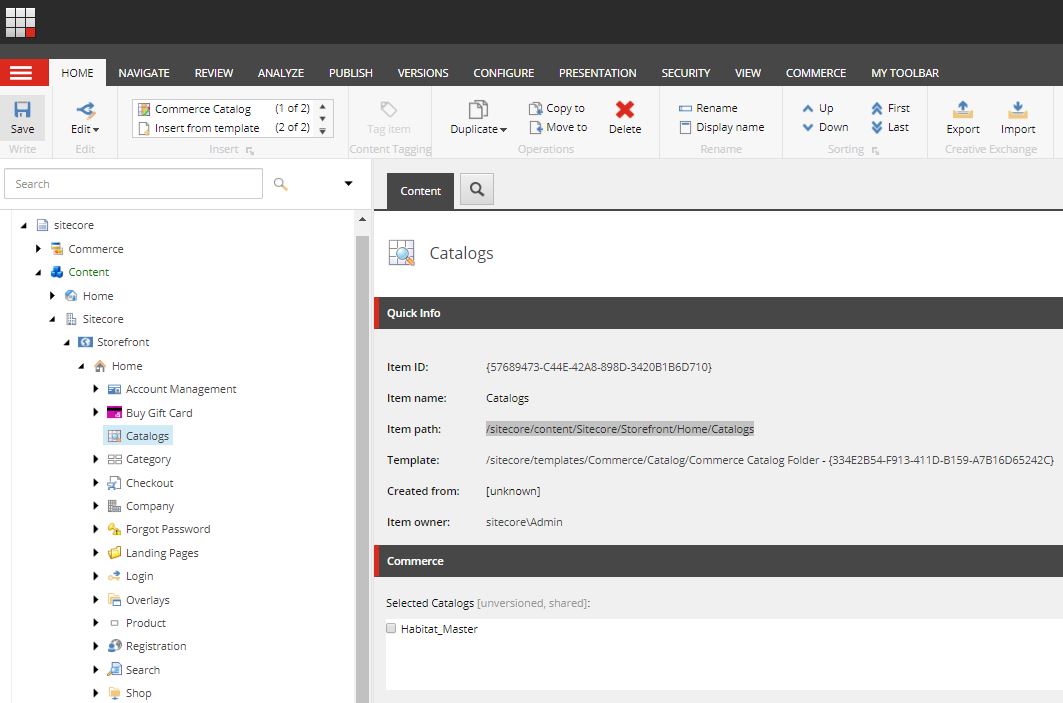
Navigate to following location in Content Editor- /sitecore/content/Sitecore/Storefront/Home/Catalogs
If none of the Catalog is selected, please select the Catalog and Save. In this case Habitat_Master
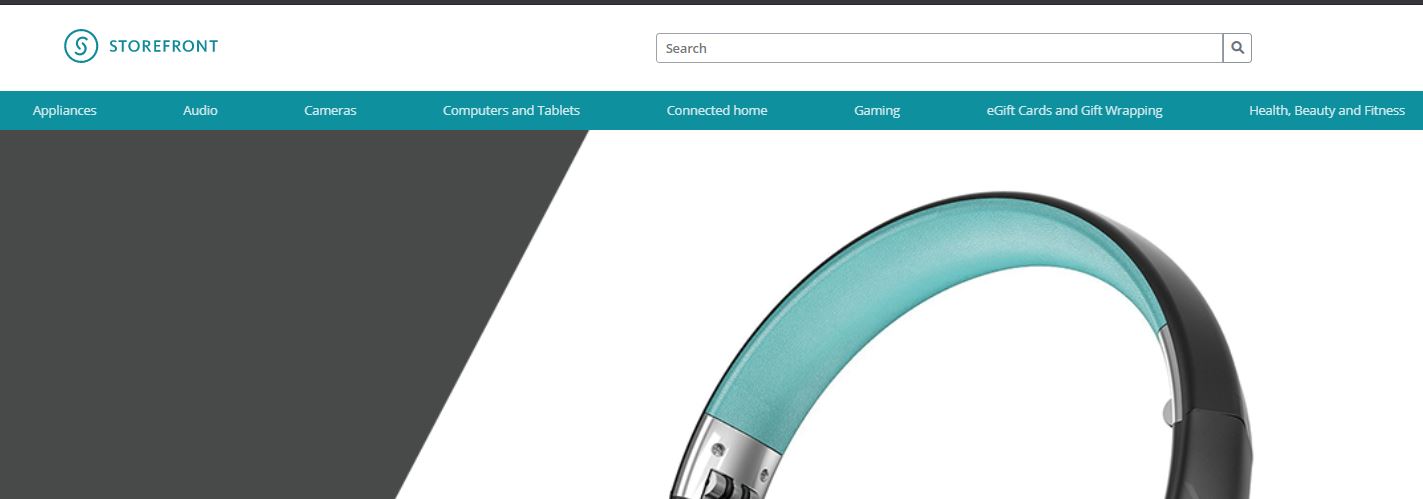
Should now display the menu as the Catalog details are now setup
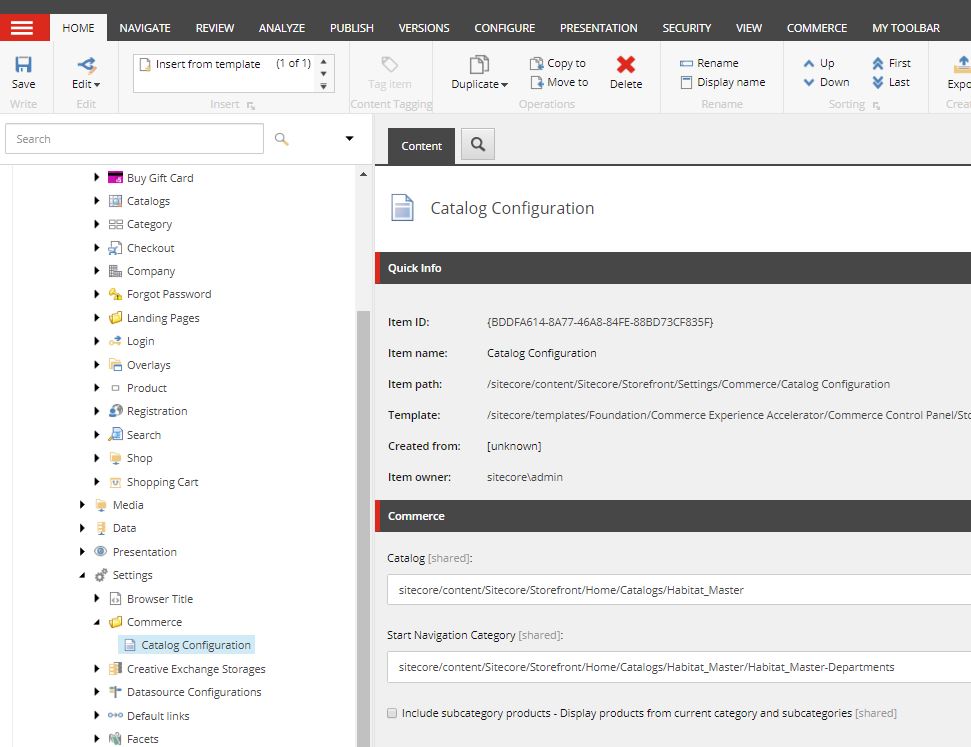
You also might need to consider checking Catalog Configuration here – /sitecore/content/Sitecore/Storefront/Settings/Commerce/Catalog Configuration