Welcome! This is my personal blog about Web technologies, software development, open source and other related topics
The ideas and opinions expressed here are solely mine and don't represent those of others, either individuals or companies.The code snippets or references to software products or analogous are to be used without any warranty of any kind. If you enjoy the content, feel free to share it and re-use it as long as you provide a link to the original post.
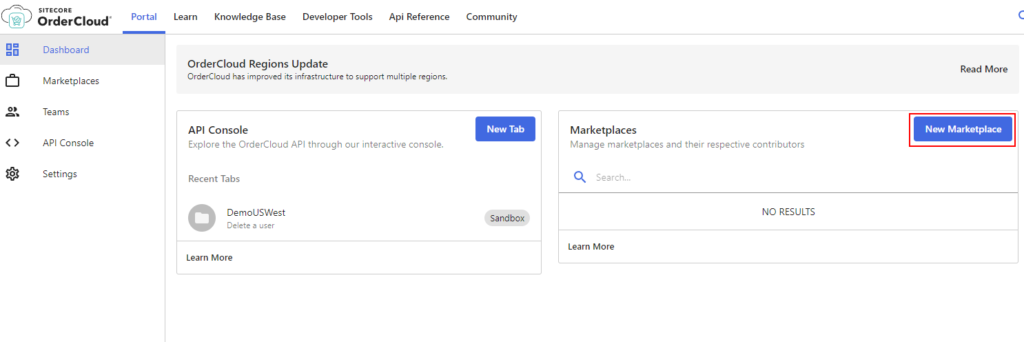
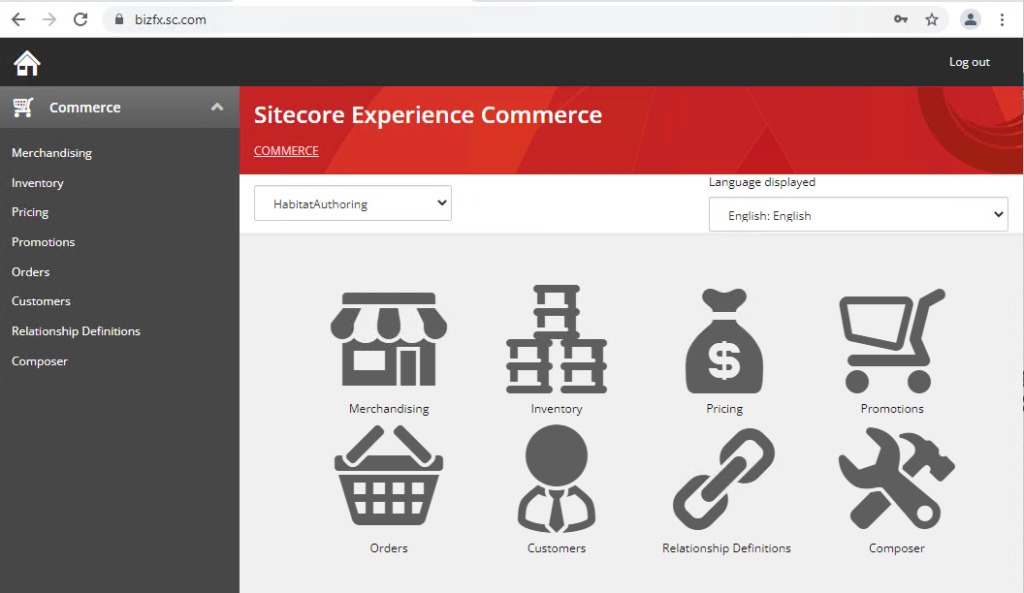
You will be shown the Dashboard and an option to create New Sitecore OrderCloud Marketplace
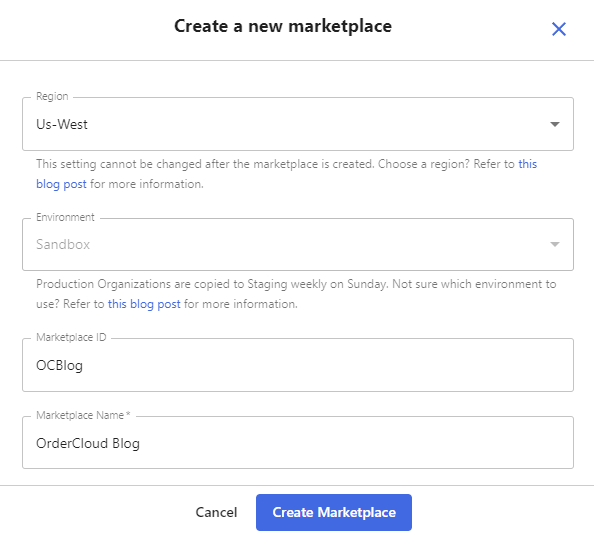
Step 1 – Select Region
While writing this blog there are 4 Regions avaialble for you to select. As per the document you should create Marketplace in Us-West region by default so as to seed using headstart. If you want to use regions other than Us-West you might have to request this to OrderCloud team.
Select region Us-West from the region option.
Step 2 – Autoselected Environment
By default the Sandbox environment is selected for you to try the OrderCloud. If you want to access Staging or Production contact OrderCloud team.
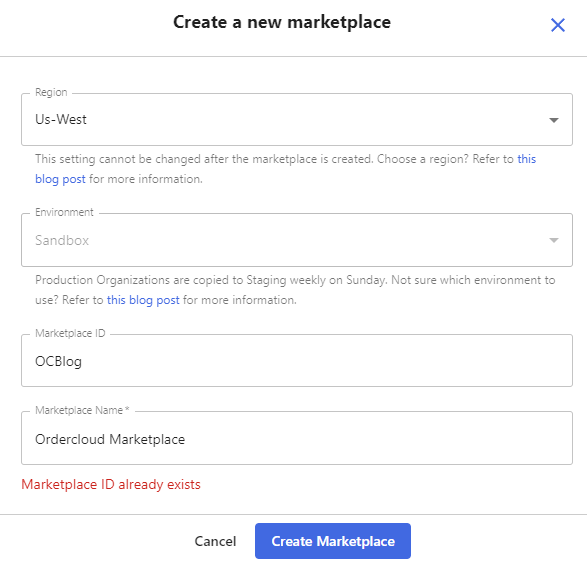
Step 3 – Provide Mareketplace ID [optional]
Provide the Marketplace Id if you want to have your own name. Id’s are Writable i.e. if you chose your ID OrderCloud will generate the same for you or you may let the OrderCloud auto generate the ID.
Chose the Marketplace ID
Step 4 – Provide Marketplace Name
Provide Marketplace name or description here. Click on Create Marketplace.
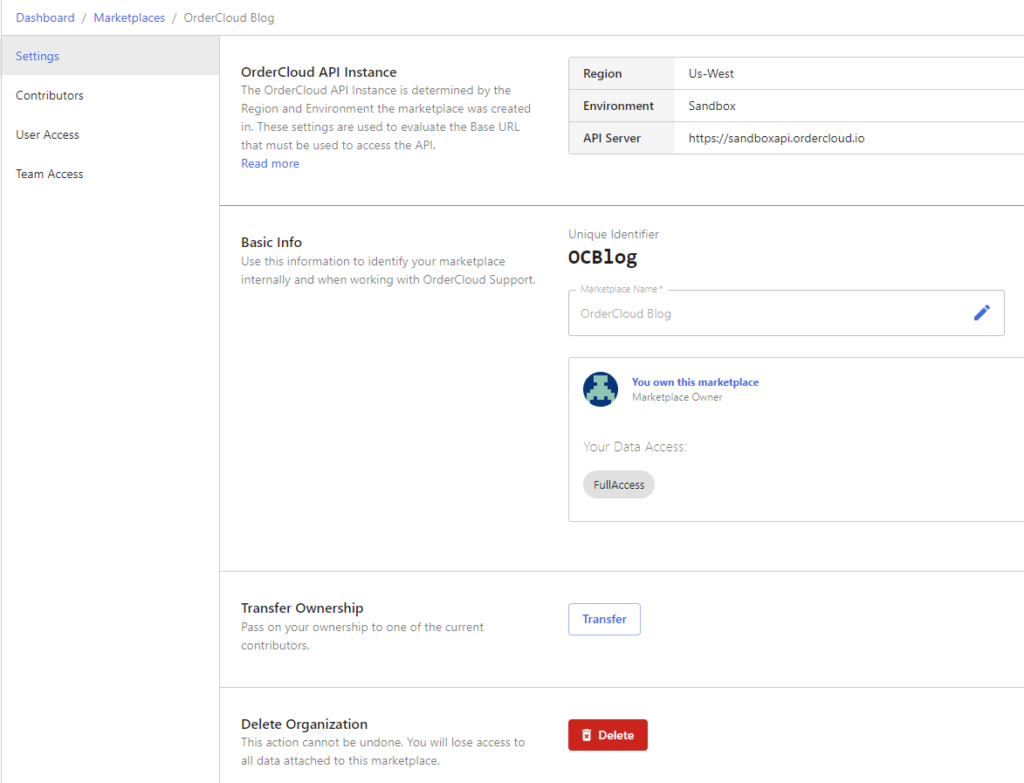
A new Marketplace will be created and you will be redirected to the Settings tab of the Marketplace with Instance details and other Basic info.
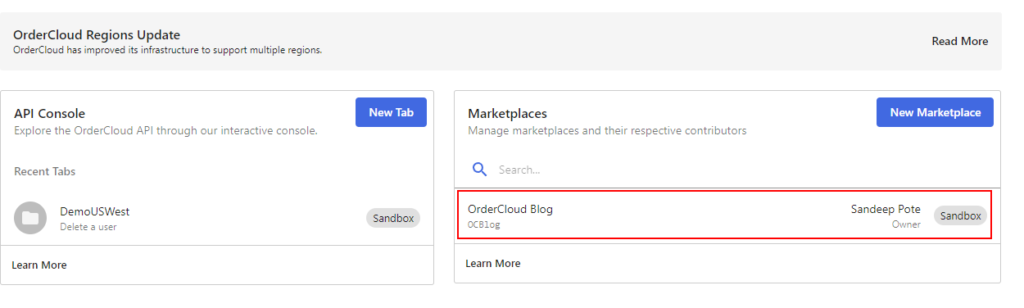
You should also see your newly created Marketplace in Dashboard
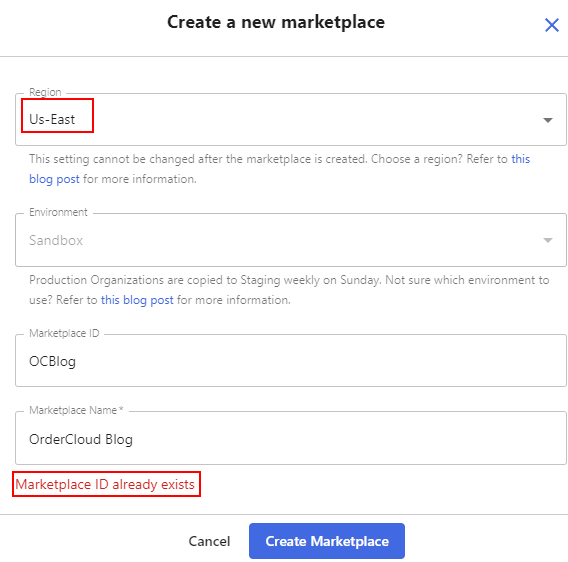
Now lets try creating a Marketplace with the same name in the same region i.e. Us-West
You can see OderCloud doesn’t allow to create a new Maretplace with the same name
If you also try creating a Marketplace with the same name in different region it wont allow-
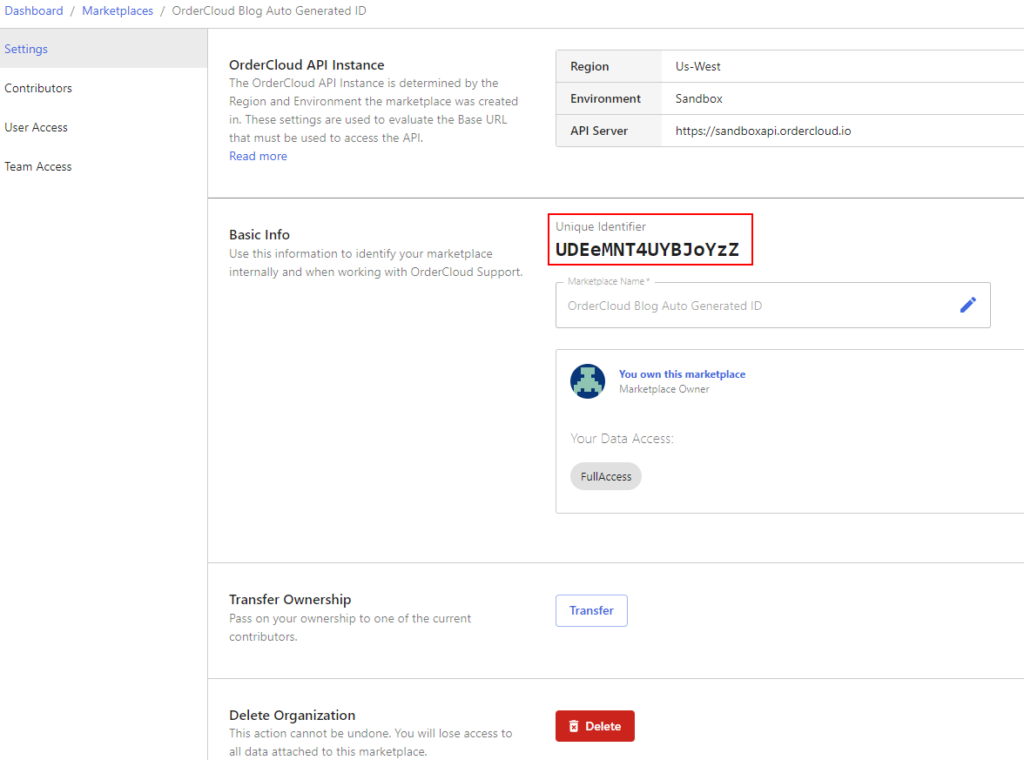
Create a new Marketplace without providing the ID
A new Marketplace is created and OrderCloud gave it a Unique ID
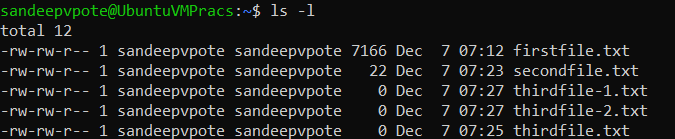
To create a new file, use touch command followed by the name of the file-
This should create a empty file.
touch thirdfile.txt
To create multiple files using touch command-
touch thirdfile-1.txt thirdfile-2.txt
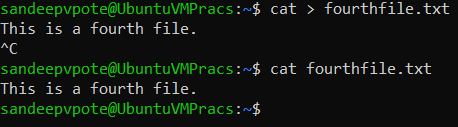
Create a file with cat command
To create a new file with cat command use redirection operator followd by file name.
This will allow to add content to the file
cat > fourthfile.txt
Cratea a file using echo command
To create a new file using echo command use redirection operator followed by file name will create empty file or add content before redirection operator to add content while creating a file.
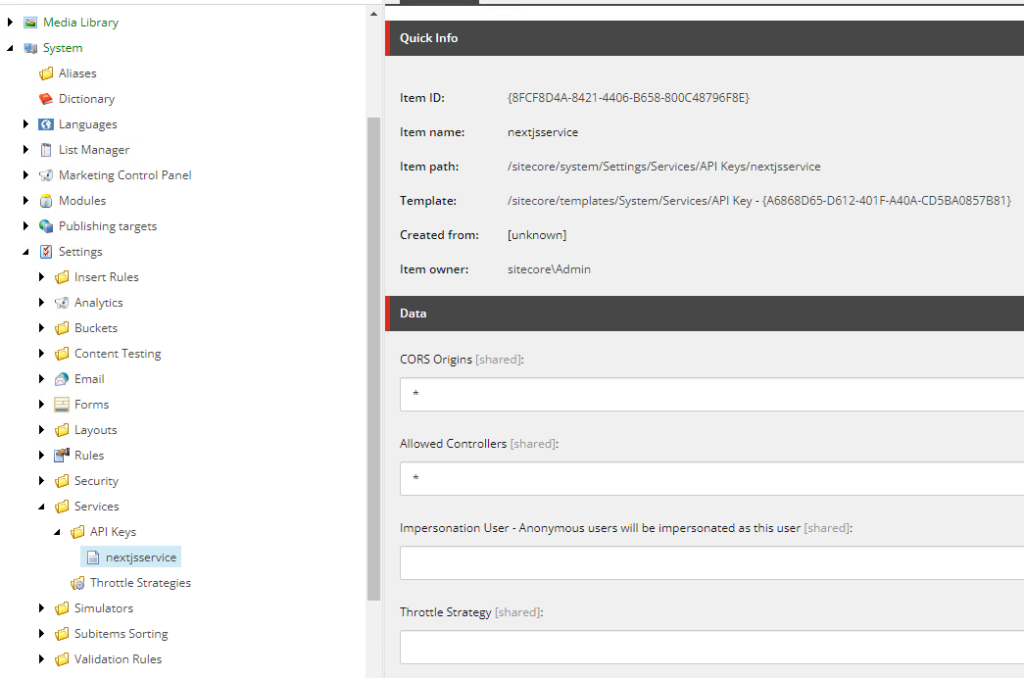
Navigate to – /sitecore/system/Settings/Services/API Keys
Create a new API Key e.g.:- nextjsservice
API key here is Item ID
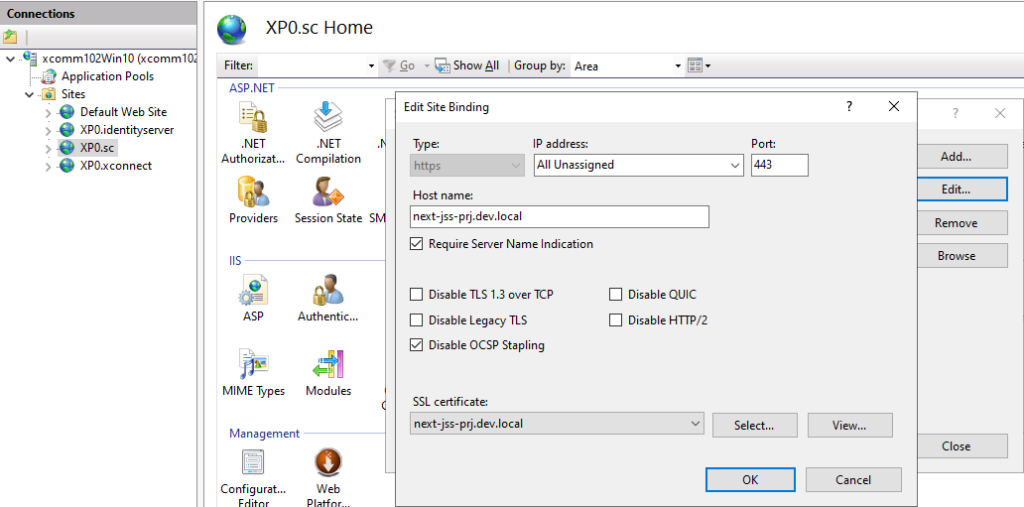
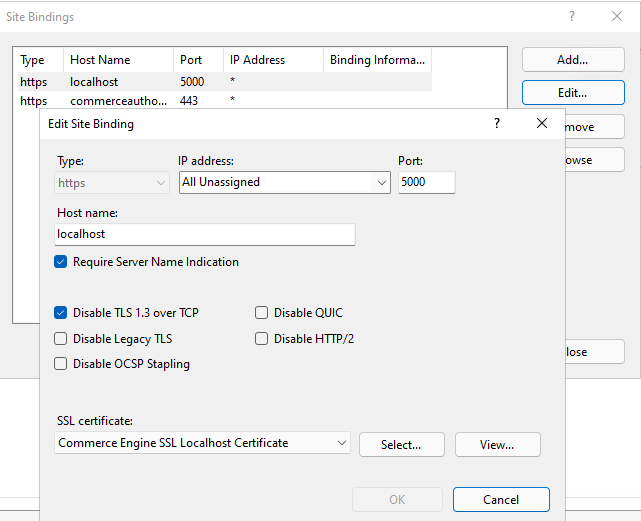
Create a custom binding-
For this create a self signed certificate with a custom domain name in this case – next-jss-prj.dev.local
New-SelfSignedCertificate -CertStoreLocation C:\certificates -DnsName "next-jss-prj.dev.local" -FriendlyName "My First Next JSS App" -NotAfter (Get-Date).AddYears(10)
Create a new https binding and assign the newly create SSL certificate
Add domain to the host file – next-jss-prj.dev.local
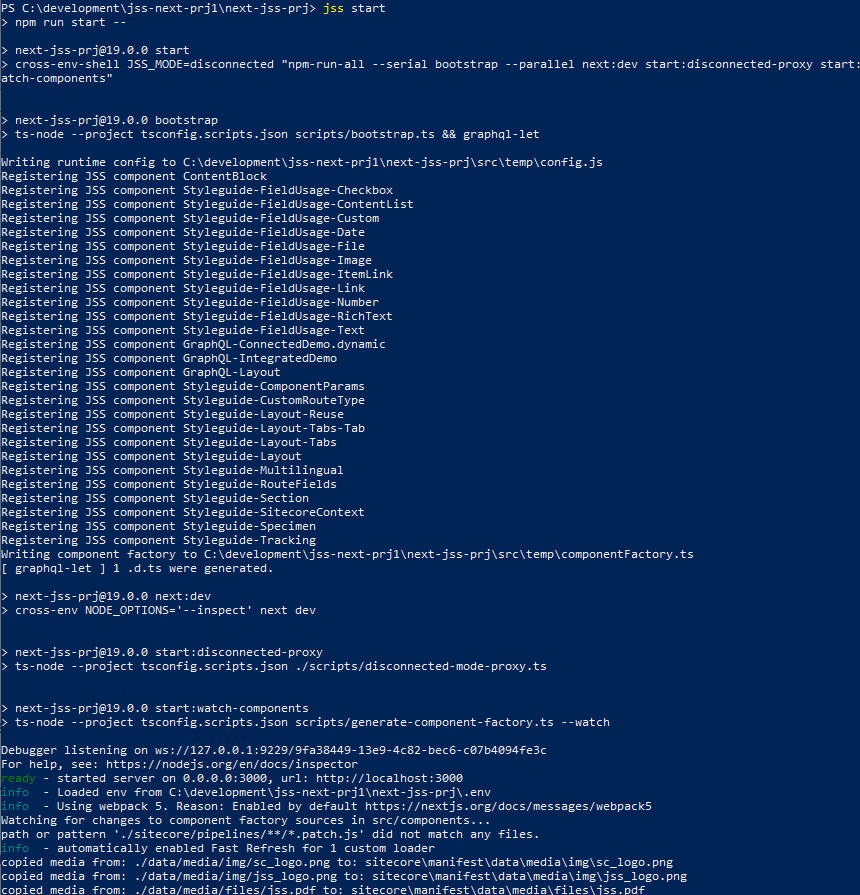
Inititate JSS
Run the command
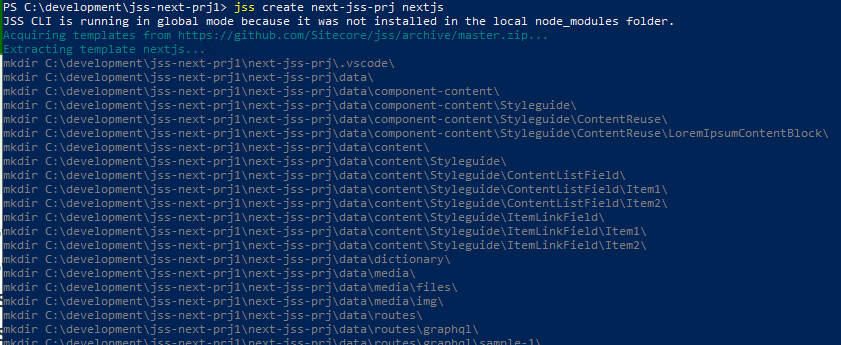
npm init sitecore-jss nextjs
Where would you like your new app created? C:\projects\nextjs Initializing ‘nextjs’… What is the name of your app? next-jss-prj.dev.local What is your Sitecore hostname (used if deployed to Sitecore)? next-jss-prj.dev.local How would you like to fetch Layout and Dictionary data? REST How would you like to prerender your application? SSG Would you like to include any add-on initializers? nextjs-styleguide – Includes example components and setup for working disconnected Initializing ‘nextjs-styleguide’… Which additional language do you want to support (en is already included and required)? da-DK
Setup JSS
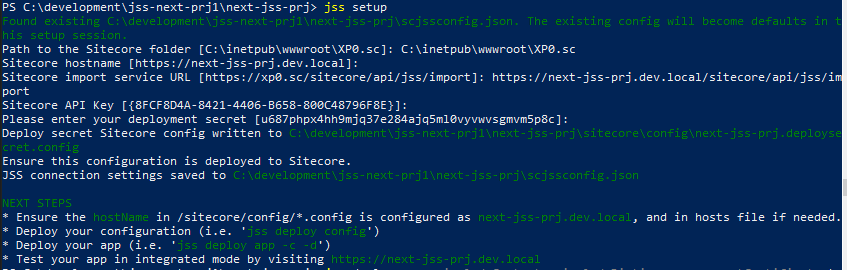
jss setup
Is your Sitecore instance on this machine or accessible via network share? [y/n]: y Path to the Sitecore folder (e.g. c:\inetpub\wwwroot\my.siteco.re): Invalid input. Path to the Sitecore folder (e.g. c:\inetpub\wwwroot\my.siteco.re): C:\inetpub\wwwroot\xp102sc.dev.local Sitecore hostname (e.g. http://myapp.local.siteco.re; see /sitecore/config; ensure added to hosts): next-jss-prj.dev.local Invalid input. Must start with http(s) Sitecore hostname (e.g. http://myapp.local.siteco.re; see /sitecore/config; ensure added to hosts): https://next-jss-prj.dev.local Sitecore import service URL [https://next-jss-prj.dev.local/sitecore/api/jss/import]: https://next-jss-prj.dev.local/sitecore/api/jss/import Sitecore API Key (ID of API key item): {2318A20A-6DF1-4AB8-B49E-F933A3B79160} Please enter your deployment secret (32+ random chars; or press enter to generate one):
Deployment secret– Leave this blank as this will generate new secret key
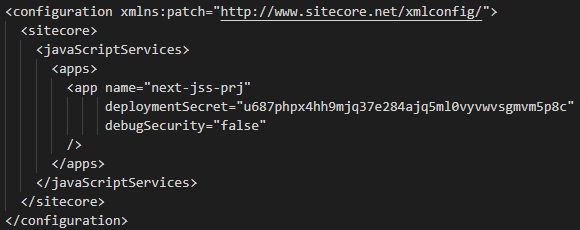
Deployment secret key is generate and stored in <<jss development folder>>\sitecore\config\next-jss-prj.deploysecret.config
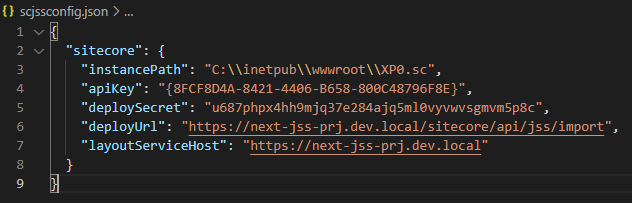
JSS connection settings saved to scjssconfig.json
Connection and the deployment secret is created, now this needs to be deployed to Sitecore instance so the JSS app is able to establish a connection with Sitecoore
To deploy the config setting deploy the config to Sitecore instance-
jss deploy config
Configs are copied to Sitecore instance App_Config\Include\zzz…
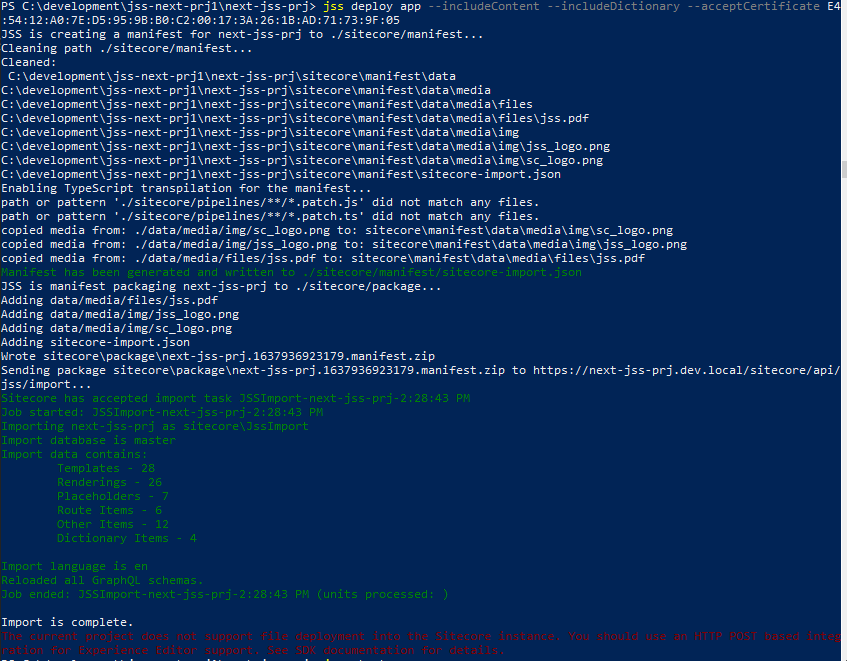
Deploy the artifacts to Sitecore instance-
Since we don’t know hte thumbprint use the below command with –acceptCertificate as test
jss deploy app –includeContent –includeDictionary –acceptCertificate test
This will provide the thumbprint. highllighted in red
if you see this error while importing – Message: An item name must satisfy the pattern: ^[\w*\$][\w\s-\$]*((\d{1,})){0,1}$ (controlled by the setting ItemNameValidation)
Change the ItemnameValidation to .* while importing and revert back to original in Sitecore.config file. Refer this –
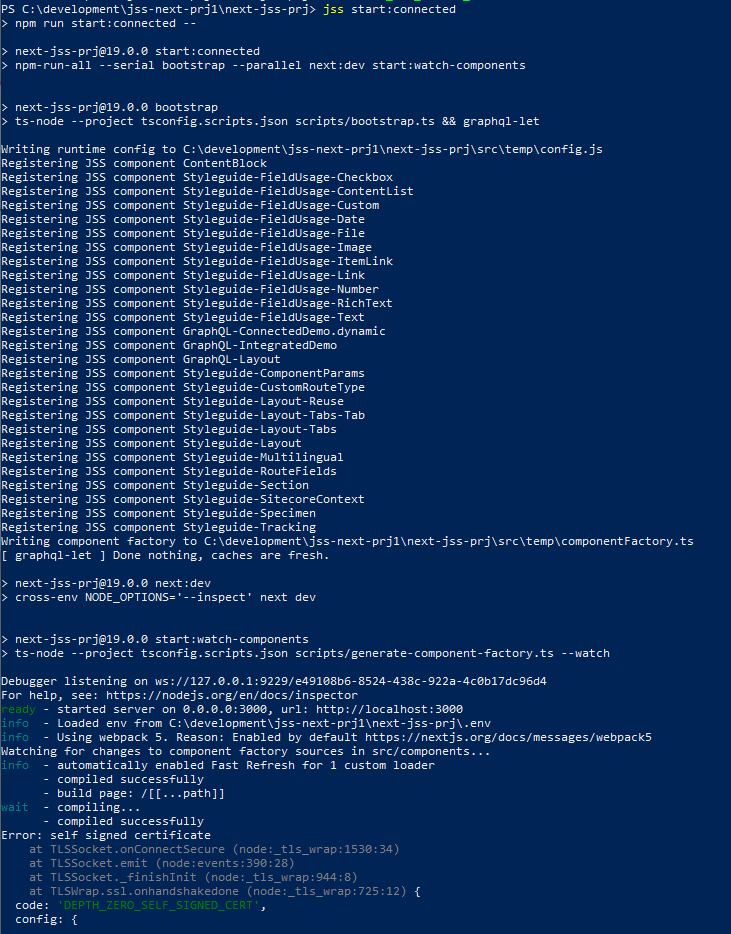
Execute following command to get this working on port 3000
$env:NODE_TLS_REJECT_UNAUTHORIZED=0
Execute JSS start again-
jss start:connected
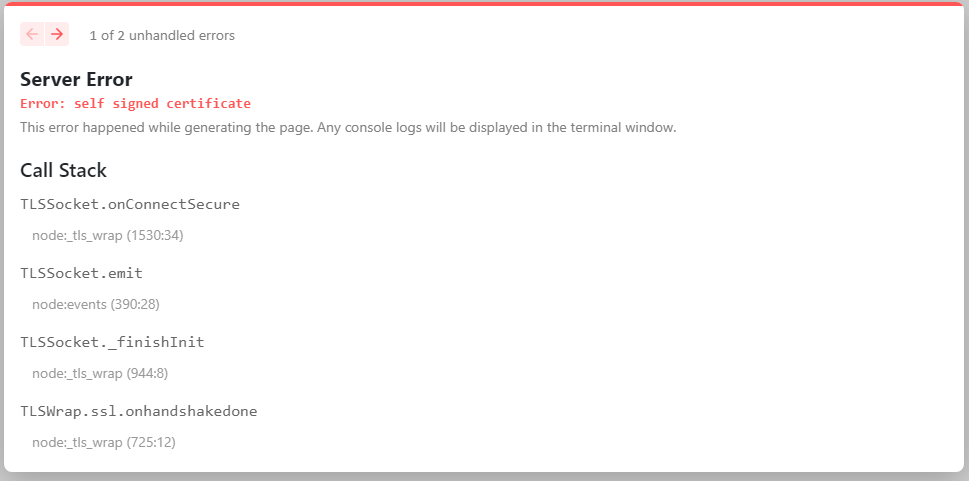
ERROR-
Connection to your rendering host failed with a Not Found error. Ensure the POST endpoint at URL http://localhost:3000/api/editing/render has been enabled.
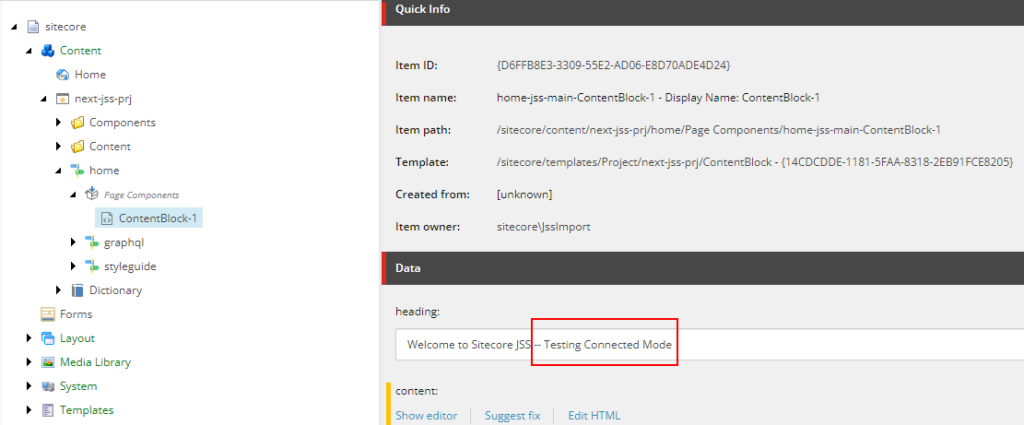
Copy the deploy secret and update the – value of setting of JavaScriptServices.ViewEngine.Http.JssEditingSecret in Sitecore.JavaScriptServices.ViewEngine.Http with the deploy secret.
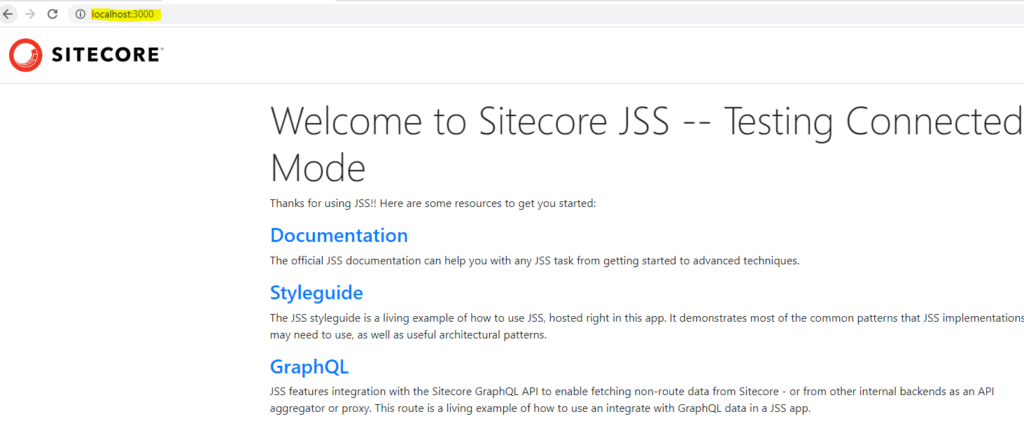
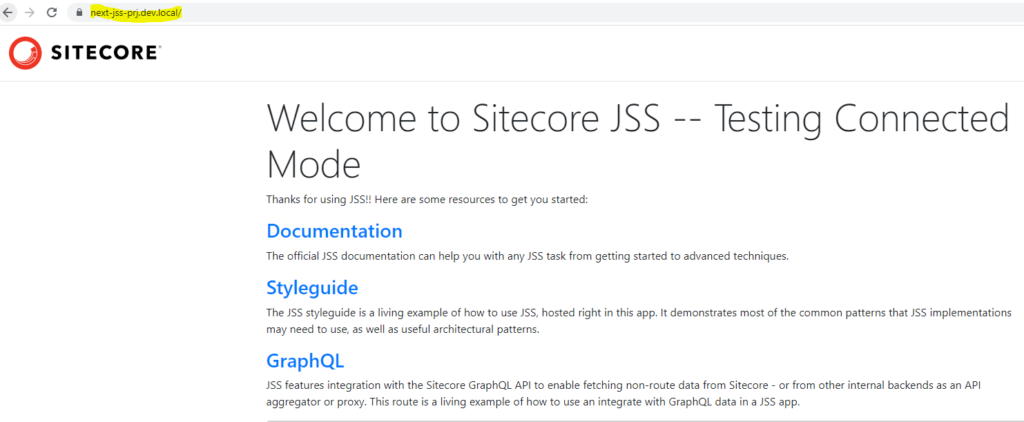
This now work in connected mode. Any content changes in Sitecore should reflect localhost:3000 and Sitecore instance (https://next-jss-prj.dev.local/)
Sitecore next js working in connected mode with SSL
Error-
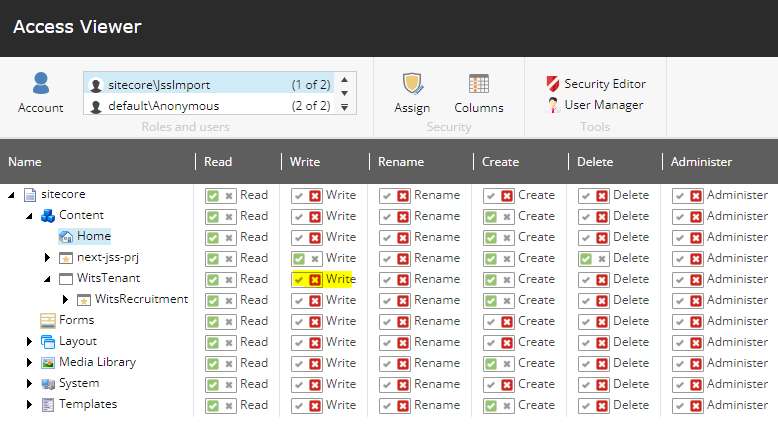
Exception thrown while importing JSS app Exception: System.UnauthorizedAccessException Message: The current user does not have write access to this item. User: sitecore\JssImport, Item: ContentBlock ({23CE8001-F405-5E50-AE61-AD3057660BBD}) Source: Sitecore.Kernel
Resolution-
Error-
Resolution-
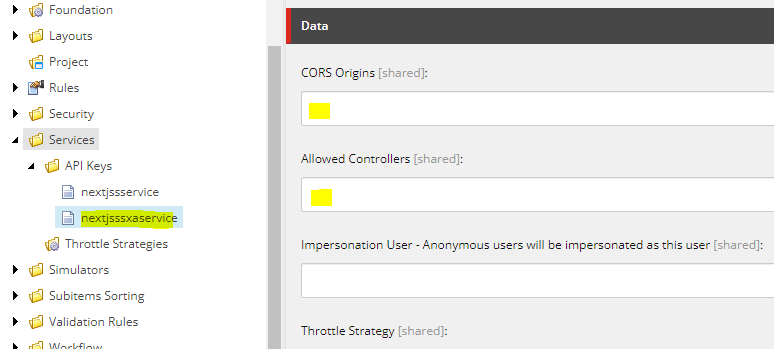
Check if the API key is correct at the location – /sitecore/system/Settings/Services/API Keys
Also check if the CORS and Allowed Controllers are set correctly
For developement environment put * for both the highlighted fields
The deployment of SXA has been removed from the Commerce installation, and instead installed as a Platform pre-requisite before installing Commerce packages.