Welcome! This is my personal blog about Web technologies, software development, open source and other related topics
The ideas and opinions expressed here are solely mine and don't represent those of others, either individuals or companies.The code snippets or references to software products or analogous are to be used without any warranty of any kind. If you enjoy the content, feel free to share it and re-use it as long as you provide a link to the original post.
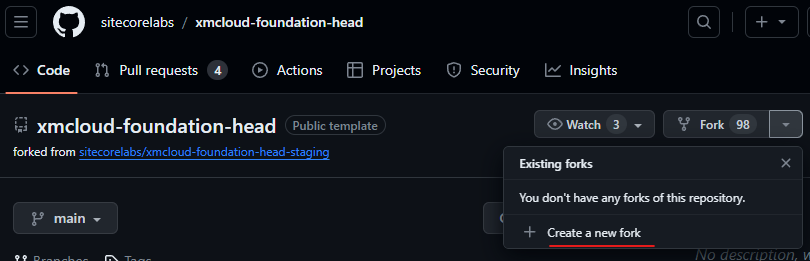
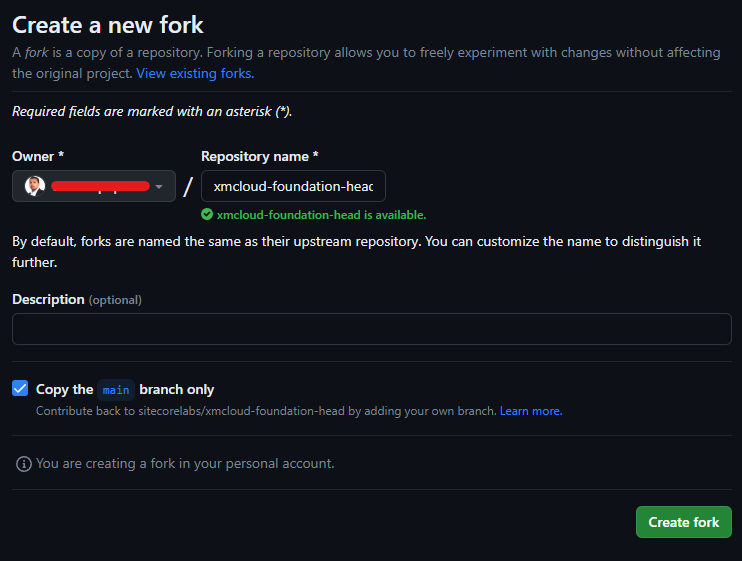
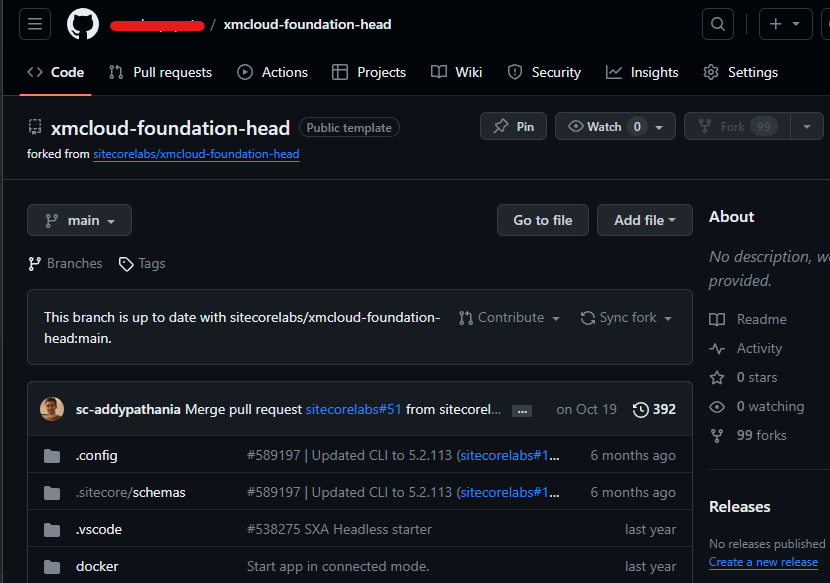
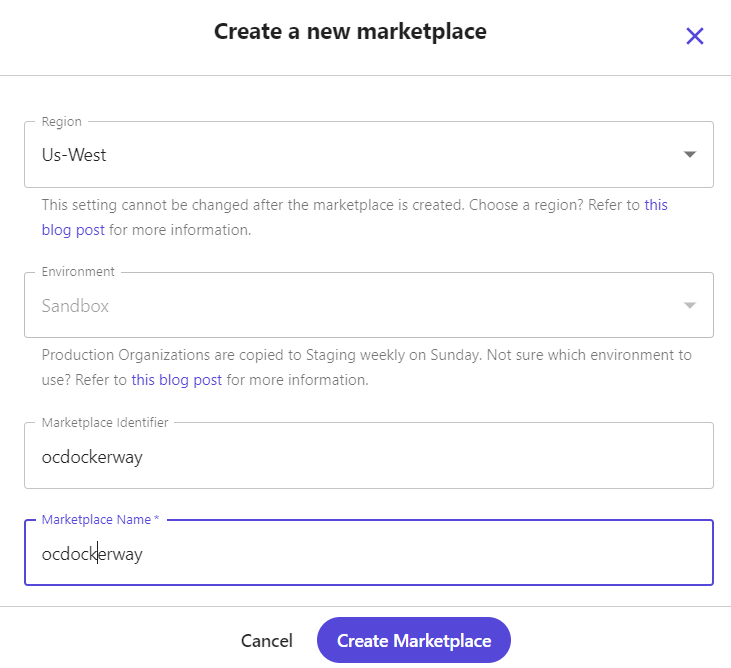
This is first part for setting up the XM Cloud local environment. As a part of this we will first fork the foundation template from reporsitory. This will help you setup sitecore local instance and head your own copy without affecting the Foundation head from Sitecore labs. Note this repo keeps updating and the steps below may differ after any updates.
This post refers following documentation is you want to do your own way-
Working on Linux system after been worked on Windows for 2 decades is always fun.
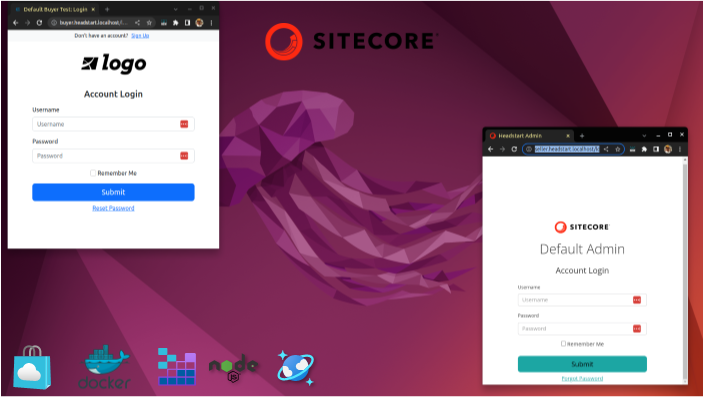
This blog post is to setup the Sitecore OrderCloud Headstart on Ubuntu the Docker way. As all the images used for the Headstart is are Linux based, this I didn’t find major difference how this is been setup in Windows system apart from few changes while installing Storage Explorer and few other erros which I have noted in this blog post.
Note – use sudo for each command or “sudo i”to run as root.
Lets start composing and solve errros that might come ourr way-
sudo docker-compose up -d
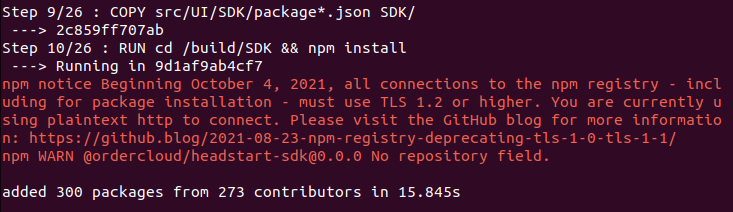
npm needs TLS1.2
npm notice Beginning October 4, 2021, all connections to the npm registry – including for package installation – must use TLS 1.2 or higher. You are currently using plaintext http to connect. Please visit the GitHub blog for more information: https://github.blog/2021-08-23-npm-registry-deprecating-tls-1-0-tls-1-1/ npm WARN @ordercloud/headstart-sdk@0.0.0 No repository field.
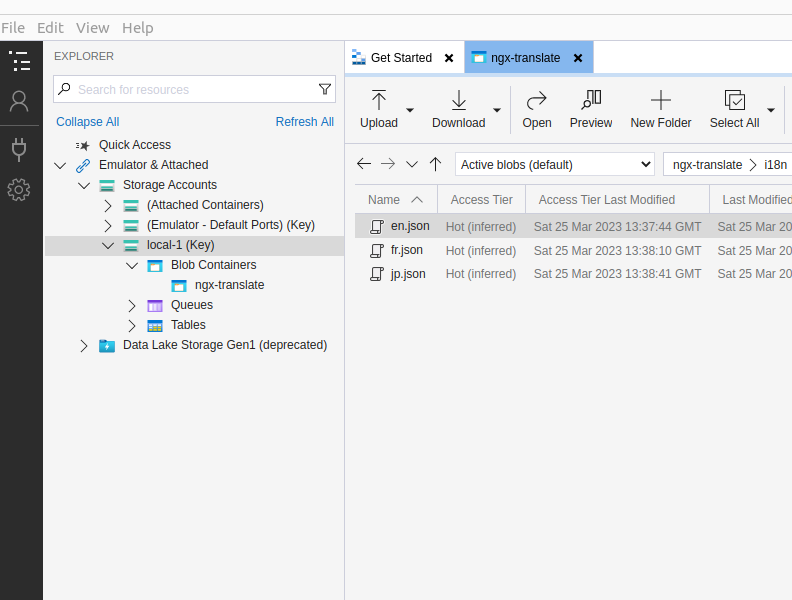
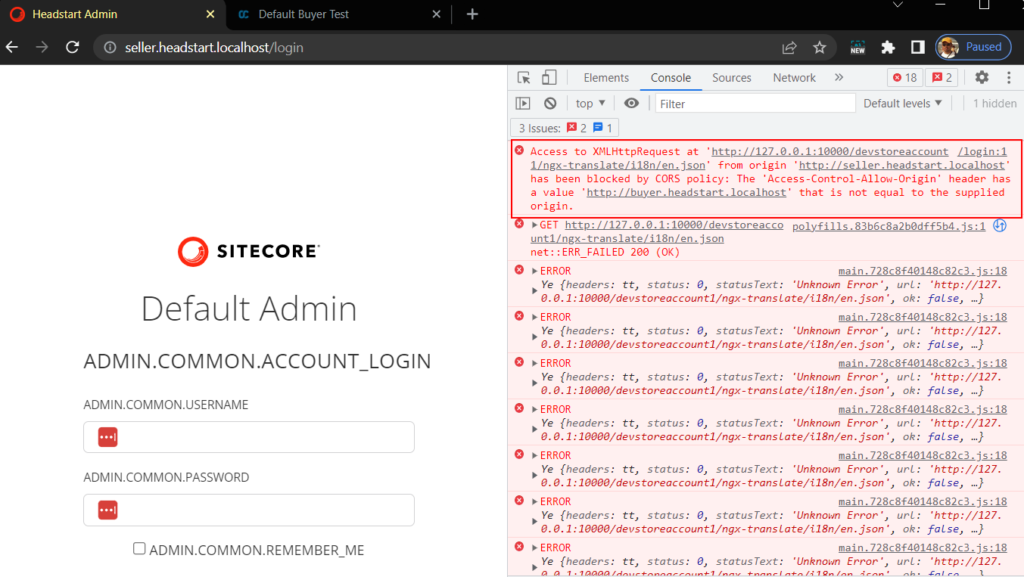
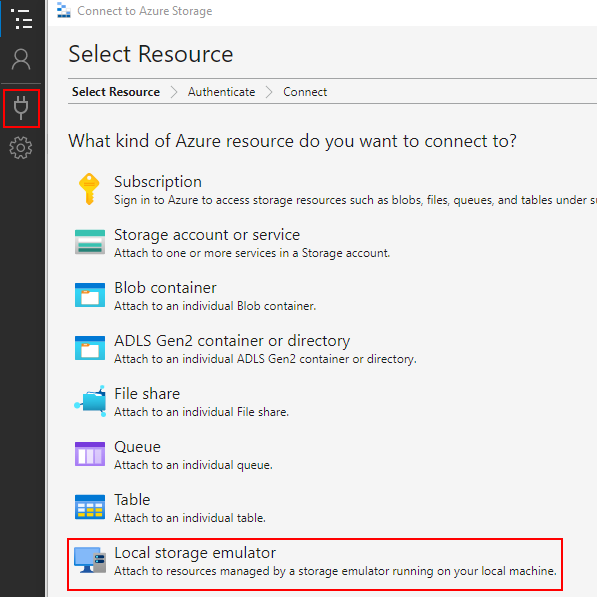
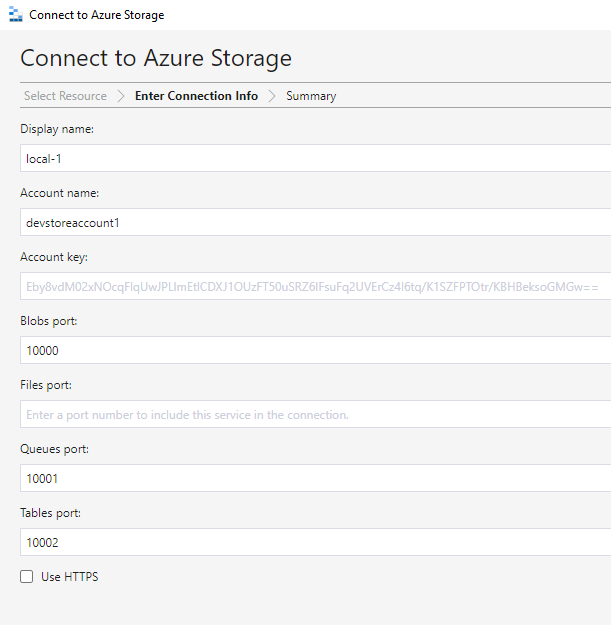
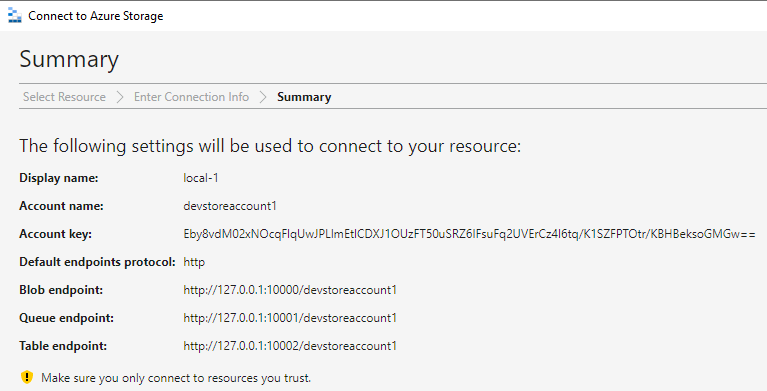
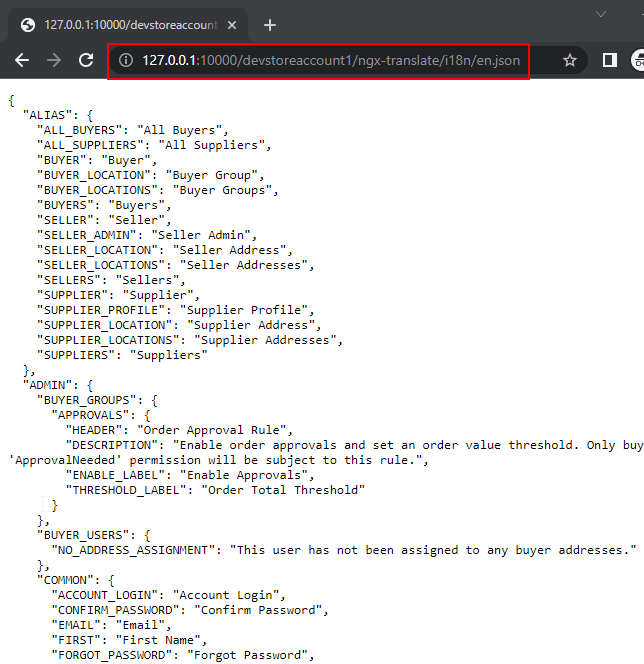
Once you have followed and applied the settings mentioned in the blog, should be able to see the translation files in local storage and able to access the file.
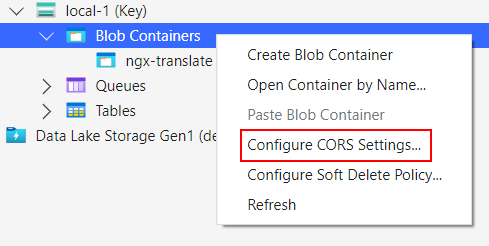
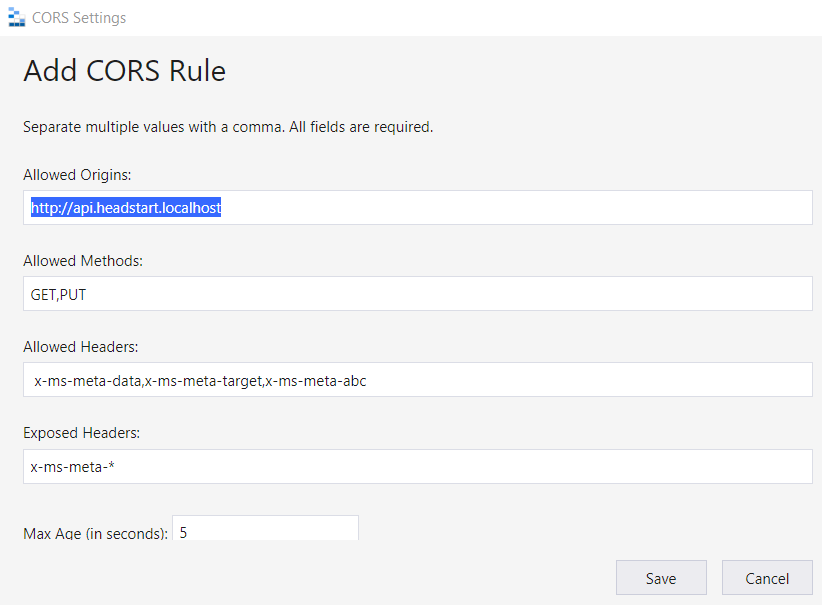
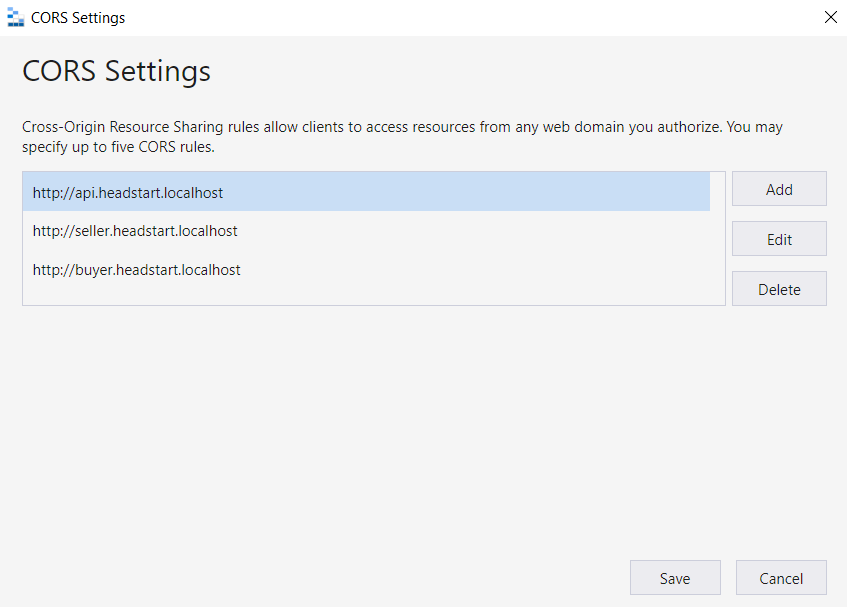
We also have to set CQRS for blob container – lets do this later.
Middleware exited with errors-
Error –
See the resolution to this issue here – section – Unable to start Middleware container due to erros
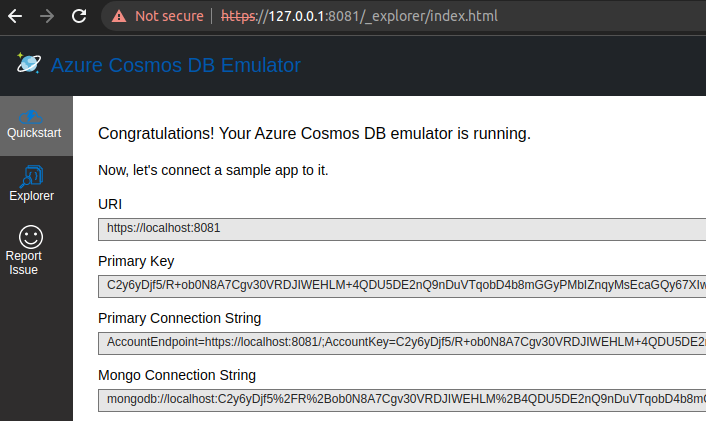
Error – Connection refused (127.0.0.1:8081)
System.AggregateException: One or more errors occurred. (Connection refused (127.0.0.1:8081))
       ---> System.Net.Http.HttpRequestException: Connection refused (127.0.0.1:8081)
See the resolution to this issue here – section – Connection to Comos DB is failing
Error- Unsupported platform
0 18.52 npm ERR! code EBADPLATFORM
#0 18.53 npm ERR! notsup Unsupported platform for fsevents@2.3.2: wanted {"os":"darwin","arch":"any"} (current: {"os":"linux","arch":"x64"})
#0 18.53 npm ERR! notsup Valid OS:    darwin
#0 18.53 npm ERR! notsup Valid Arch:  any
#0 18.53 npm ERR! notsup Actual OS:   linux
#0 18.53 npm ERR! notsup Actual Arch: x64
Error 2- Package installation must use TLS 1.2 or higher and Cannot read properties of null (reading ‘pickAlgorithm’)
0 47.60 npm notice Beginning October 4, 2021, all connections to the npm registry - including for package installation - must use TLS 1.2 or higher. You are currently using plaintext http to connect. Please visit the GitHub blog for more information: https://github.blog/2021-08-23-npm-registry-deprecating-tls-1-0-tls-1-1/

0 114.7 npm ERR! Cannot read properties of null (reading 'pickAlgorithm')
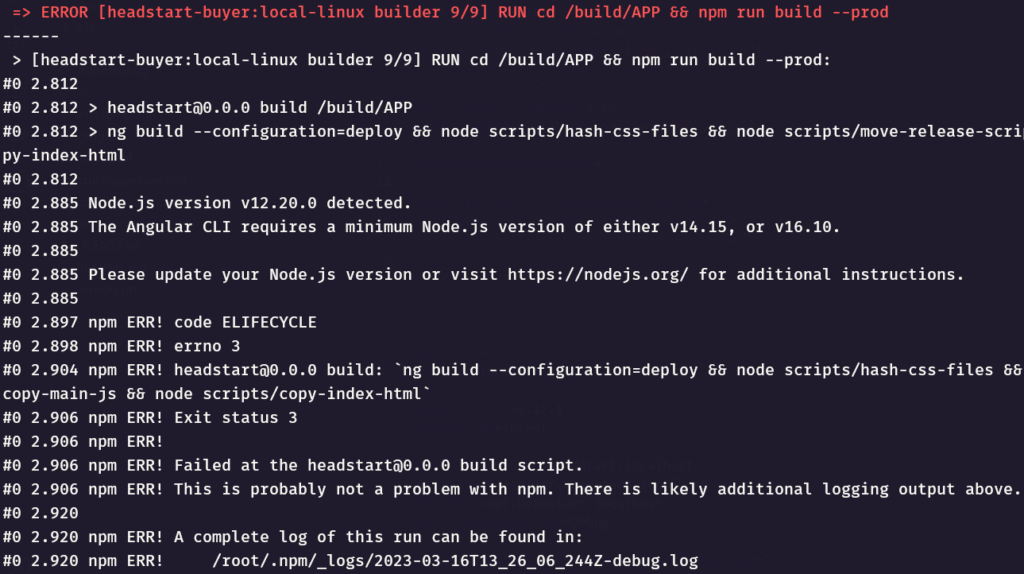
#0 2.885 Node.js version v12.20.0 detected.
#0 2.885 The Angular CLI requires a minimum Node.js version of either v14.15, or v16.10.
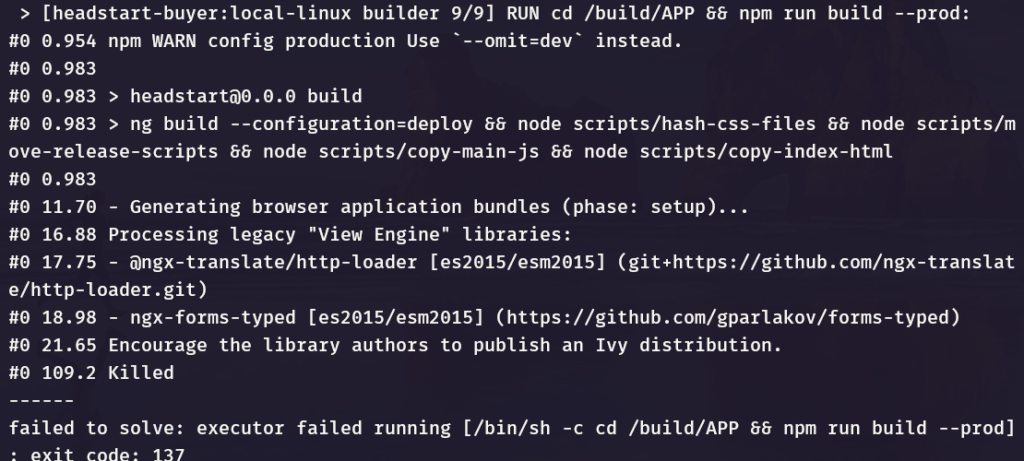
> [headstart-buyer:local-linux builder 9/9] RUN cd /build/APP && npm run build --prod:
#0 0.954 npm WARN config production Use `--omit=dev` instead.
#0 0.983
#0 0.983 > headstart@0.0.0 build
#0 0.983 > ng build --configuration=deploy && node scripts/hash-css-files && node scripts/move-release-scripts && node scripts/copy-main-js && node scripts/copy-index-html
#0 0.983
#0 11.70 - Generating browser application bundles (phase: setup)...
#0 16.88 Processing legacy "View Engine" libraries:
#0 17.75 - @ngx-translate/http-loader [es2015/esm2015] (git+https://github.com/ngx-translate/http-loader.git)
#0 18.98 - ngx-forms-typed [es2015/esm2015] (https://github.com/gparlakov/forms-typed)
#0 21.65 Encourage the library authors to publish an Ivy distribution.
#0 109.2 Killed
------
failed to solve: executor failed running [/bin/sh -c cd /build/APP && npm run build --prod]: exit code: 137
Not sure why this error but I ran following command instead-
docker-compose build --no-cache
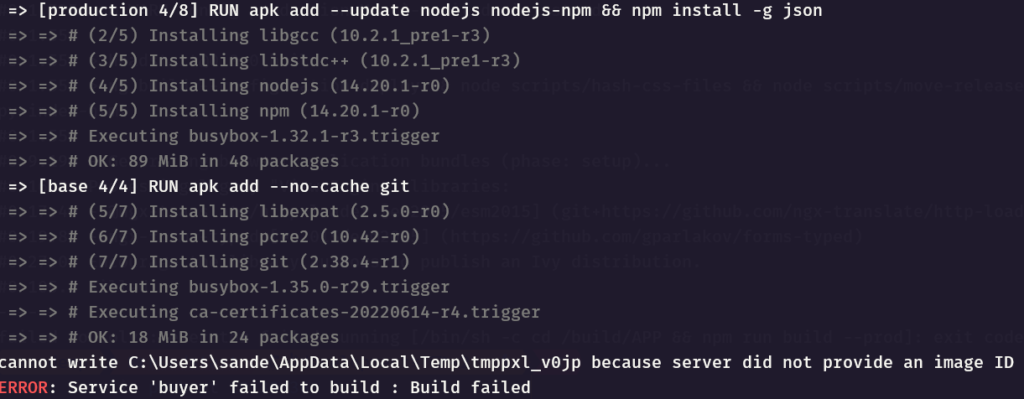
Error 4 –
cannot write C:\Users\sande\AppData\Local\Temp\tmppxl_v0jp because server did not provide an image ID
ERROR: Service 'buyer' failed to build : Build failed
Solution-
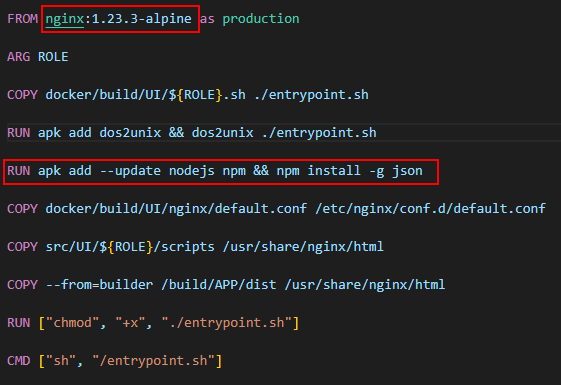
Set the latest nginx alpine base image in the Dockerfile as nginx:1.23.3-alpine. See the latest availabel bae image here – https://hub.docker.com/_/nginx
Change Dockerfile in this location headstart\docker\build\UI
Update nodejs-npm to just npm in the Dockerfile
Dockerfile should look like this-
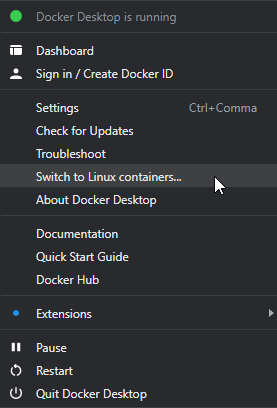
Sometimes you may have to restart Docker Desktop
Error 5-
Error response from daemon: Ports are not available: exposing port TCP 0.0.0.0:80 -> 0.0.0.0:0: listen tcp 0.0.0.0:80: bind: An attempt was made to access a socket in a way forbidden by its
The said port might be in use. This is mostly when IIS is running. Stop IIS.
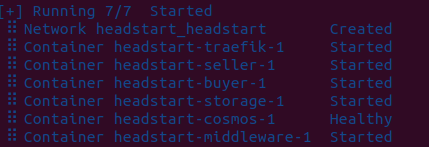
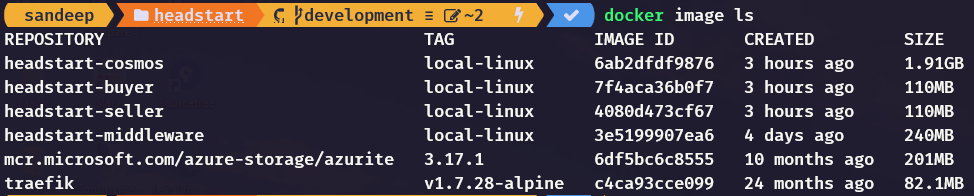
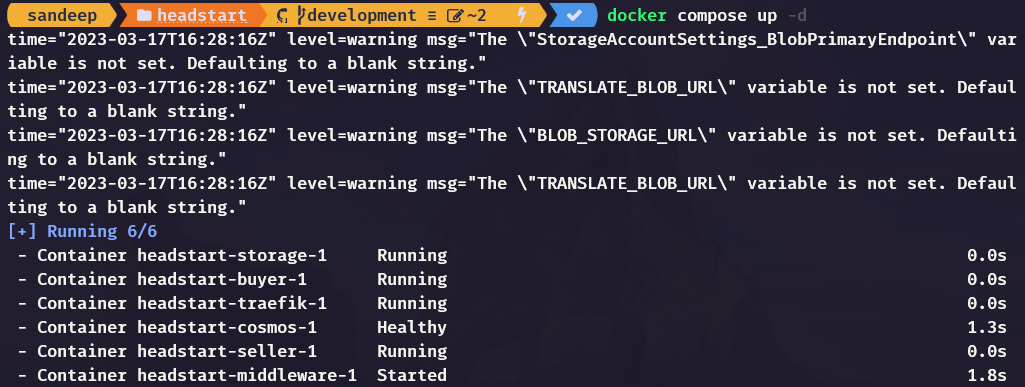
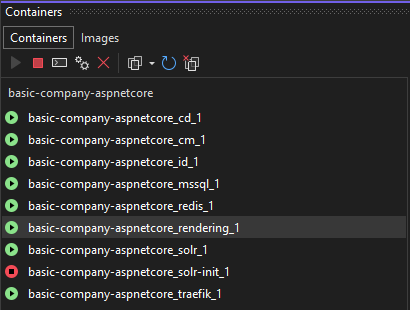
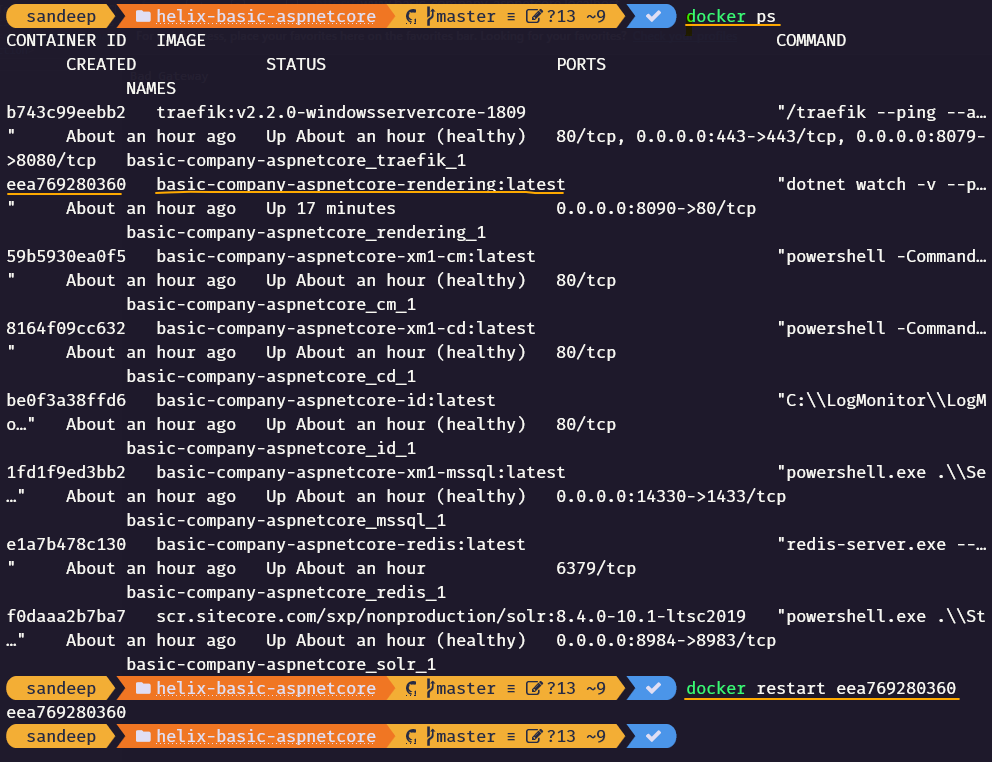
Once you get thhrough these errors, should have following images downloaded and containers created-
Here you can see the warnings compalining few env variable values not set. This is next we are going to setup.
For any environment changes use “docker compose down” and then “docker compose up -d”
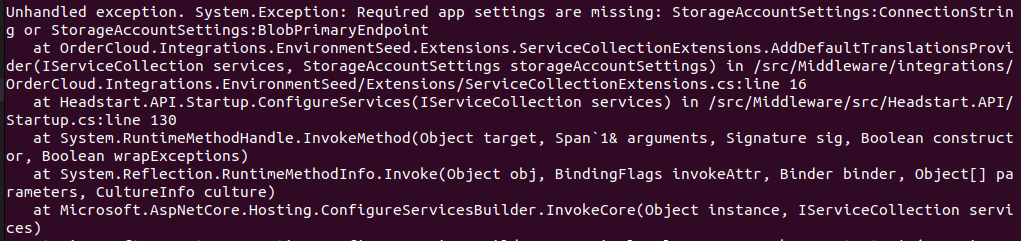
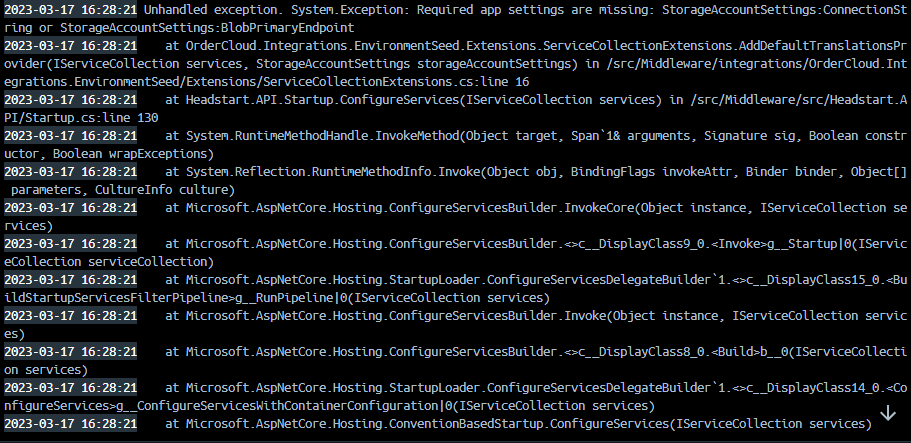
Compile/Build the Headstart.sln
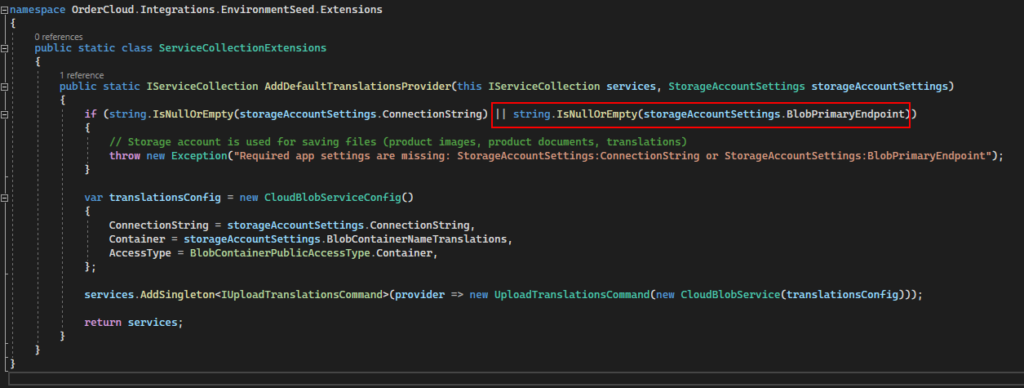
In the ServiceCollectionExtensions.cs file in OrderCloud.Integrations.EnvironmentSeed project
remove the condition for checking the BlobPrimaryEndpoint as it is not used and hence not required.
Same way if you are not using ExchangeRates, Tax Provider, payment Provider etc remove the values from .env file to avoid such errors. Following I have removed, you can add this later as and when required. Make the values for this variables empty
Recreate the middleware and container again. Delete the middleware image as the code is changes. We dont have the volume mounted hence for setup this way 🙂
docker rmi <<middleware image id>>

docker compose up -d
More errors-
Connection to Comos DB is failing-
2023-03-17 18:16:43 Application startup exception: System.AggregateException: One or more errors occurred. (Connection refused (127.0.0.1:8081))
2023-03-17 18:16:43  ---> System.Net.Http.HttpRequestException: Connection refused (127.0.0.1:8081)
2023-03-17 18:16:43  ---> System.Net.Sockets.SocketException (111): Connection refused
Change CosmosSettings_EndpointUri in .env from “http://127.0.0.1:8081” to use localhost i.e.- change to –
Address not available (localhost:8081) – Cosmos DB address not available
2023-03-17 18:22:34 Application startup exception: System.AggregateException: One or more errors occurred. (Address not available (localhost:8081))
2023-03-17 18:22:34  ---> System.Net.Http.HttpRequestException: Address not available (localhost:8081)
2023-03-17 18:22:34  ---> System.Net.Sockets.SocketException (99): Address not available
Solution-
Change following in entrypoing.sh file located at – headstart\docker\build\middleware
i.e. instead of using $CosmosSettings_EndpointUri use $CosmosEndpointURI
this varaible contains the IP address of the comos db hosted. This can change everytime the container is created.
Change this -
-e "this['CosmosSettings:EndpointUri']='$CosmosSettings_EndpointUri'"
to
-e "this['CosmosSettings:EndpointUri']='$CosmosEndpointURI'"
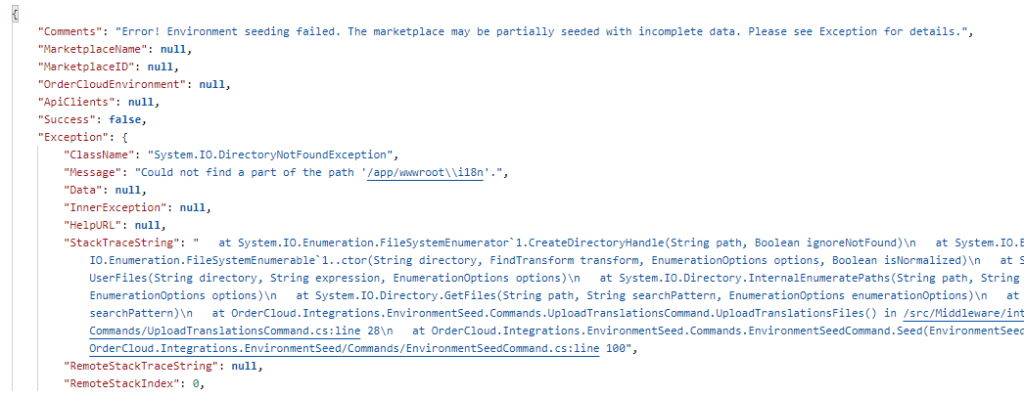
Error- “Message”: “Could not find a part of the path ‘/app/wwwroot\\i18n’.”,
Tried to debug this and seems some how the path is not correctly formed to upload the translations from /app/wwwroot\\i18n folder in container. Changed this to /app/wwwroot/i18n and the files are now uploaded to storage.
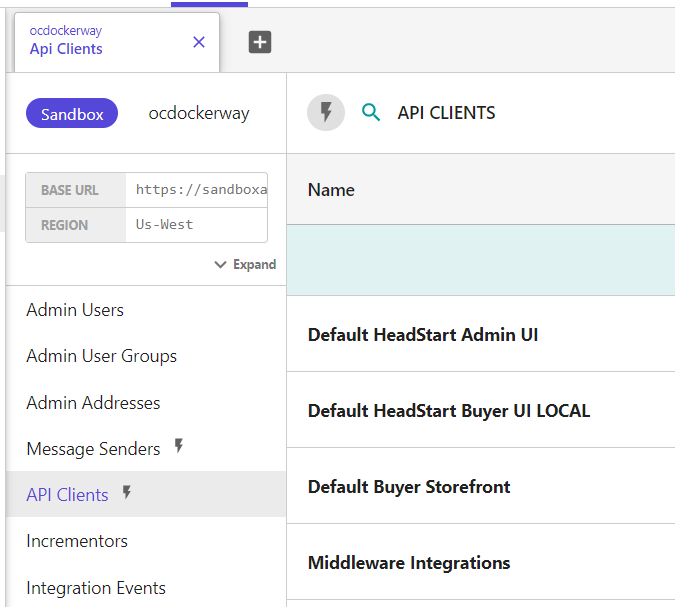
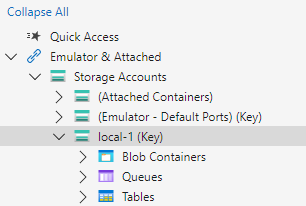
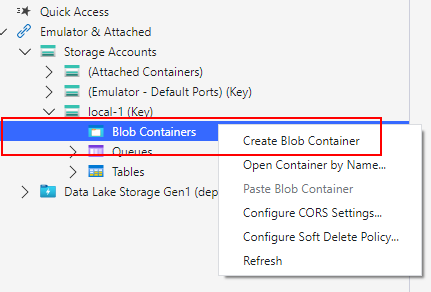
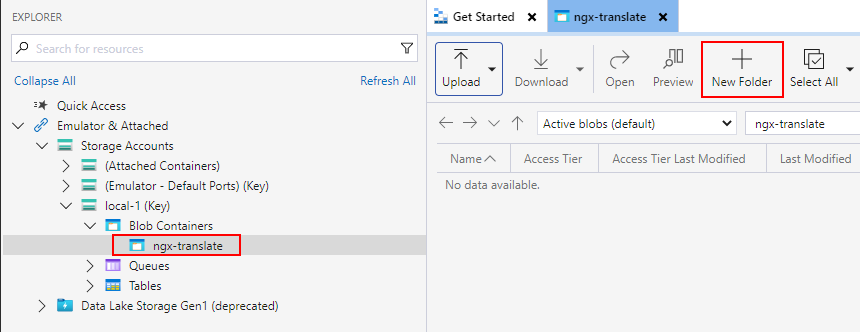
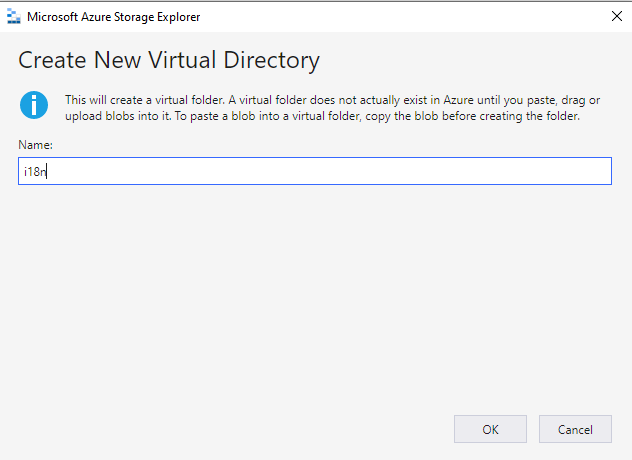
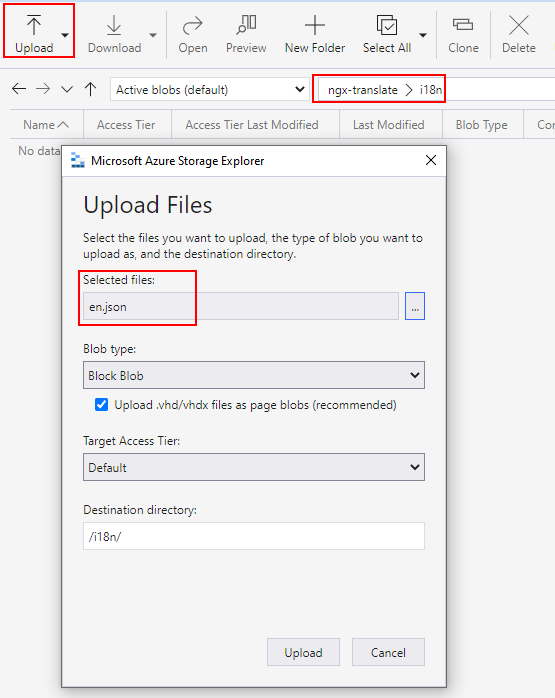
Create a Blob Container – ngx-translate and create new Virtual Directory i18n
Blob Container and folder name can be any other name. You need to configure this correctly in UI config.See this in later steps
Upload the translation file(optional)
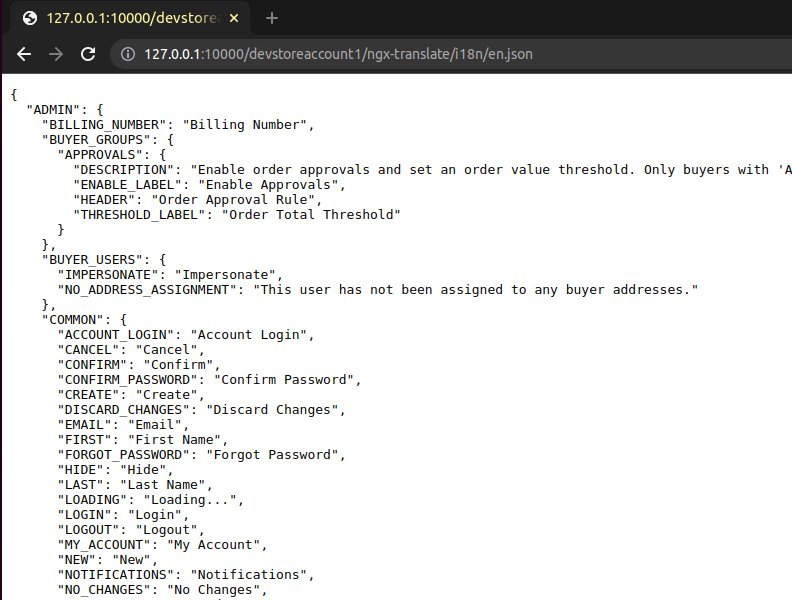
Translation file should be created by Headstart Api while seeding the marketplace further in this blog. This is a test to check if the resource is available. I have attached en.json file here.
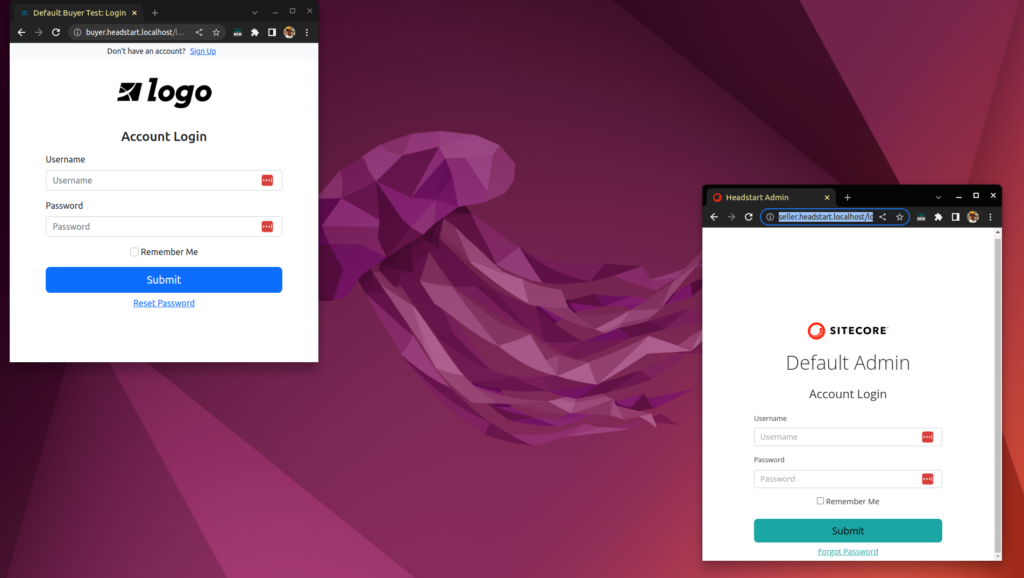
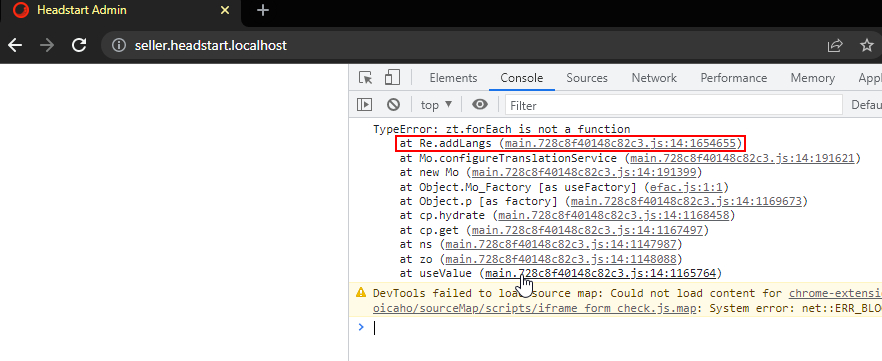
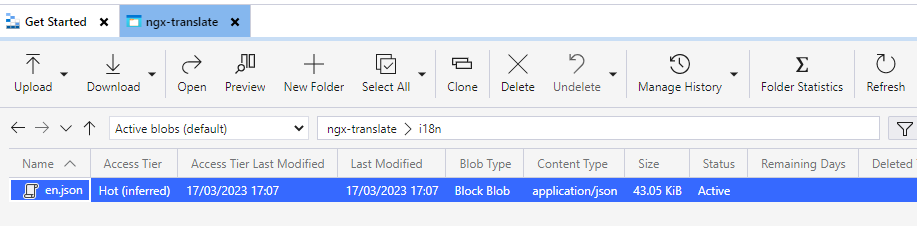
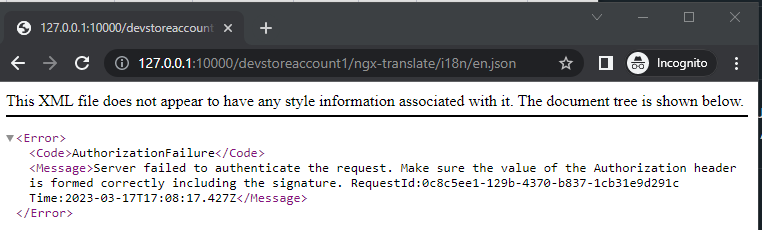
Copy URL of the file and check if this is accessible-
Looks like cannot access.
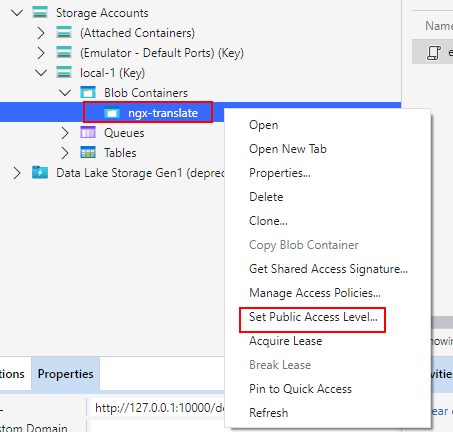
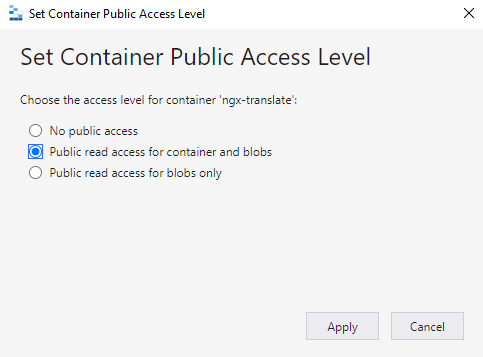
To resolve this error set public access level on Blob container “ngx-translate”
Select Public read access for container and blobs-
Now the resource should be accessible.
Similarly upload resources for fr and jp language.
The resource file should be available in following location – headstart\src\Middleware\src\Headstart.API\wwwroot\i18n
0 2.885 The Angular CLI requires a minimum Node.js version of either v14.15, or v16.10.
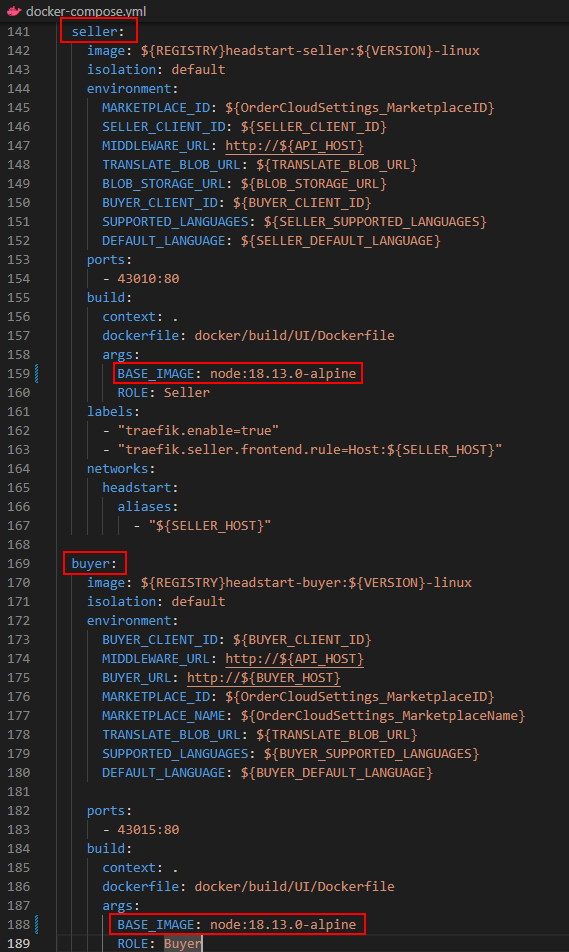
It looks like in docker compose file for buyer and seller node version configured are old.
Update the following in docker-compose.yml. At the time of writing this blog the node version is 18.13.0. See here for latest- https://hub.docker.com/_/node
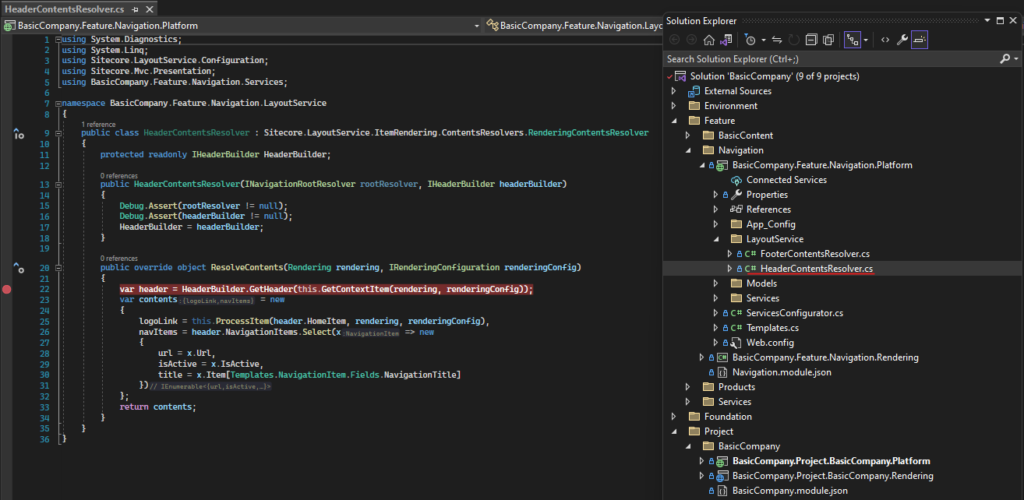
In my previous post we saw how to create a simple rendering with data source.
For creating rendering using content resolver first follow the blog <<enter blog url here>>
Content resolvers help provice more complex data beyond the serialization of a component data source.
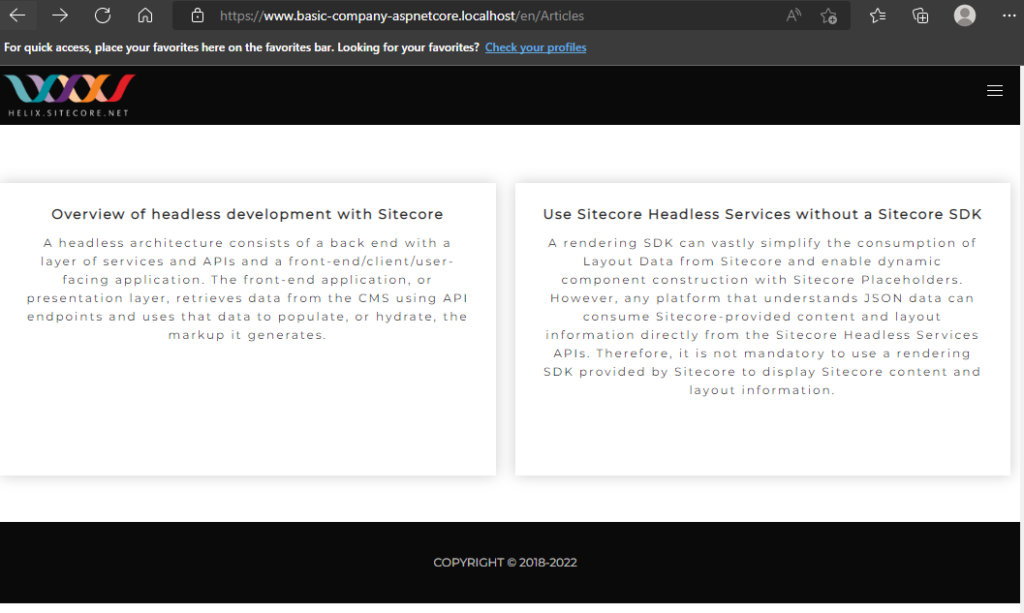
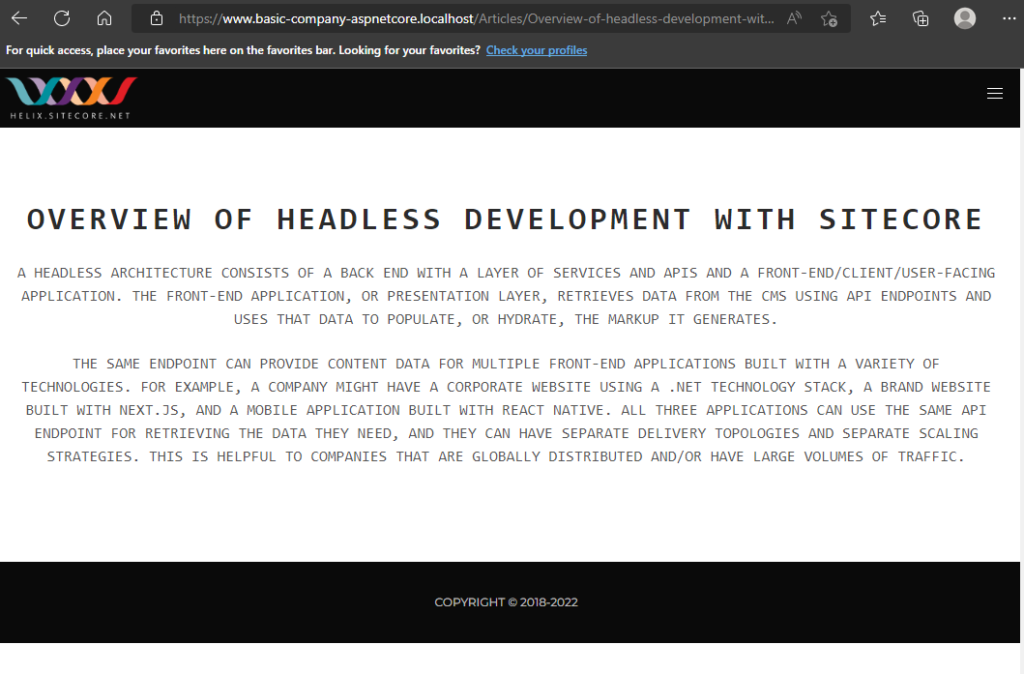
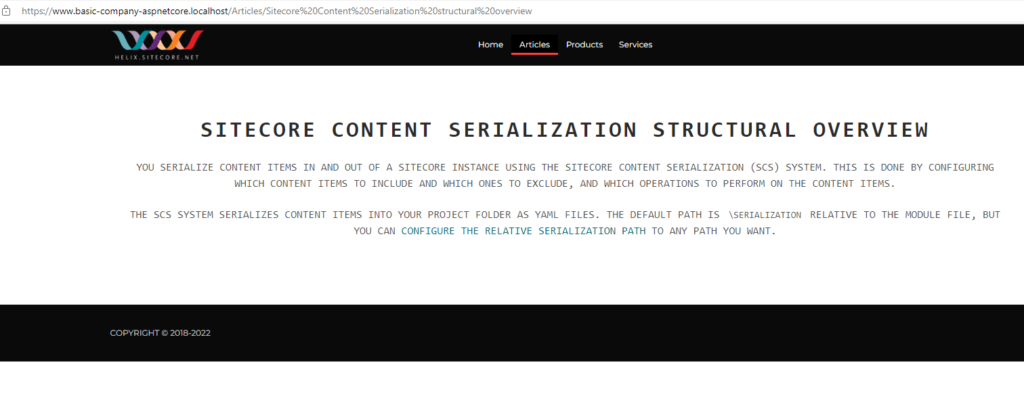
In this blog will list all the Articles on the page which are marked as Featured Article.
The custom logic for filtering will go in Content resolver.
Craete a project for Content Resolver(.net framework 4.8) . This framework is used just to follow with the exisitng content resolvers provided by Helix Examples Solution.
Instead of creating new poroject I will copy the project from Navigation/Platform folder and rename it to BasicCompany.Feature.Articles.Platform.
Delete all the files from this project as it relates to Navigation. You may also want to change the AssemblyName and the AssemblyInfo file.
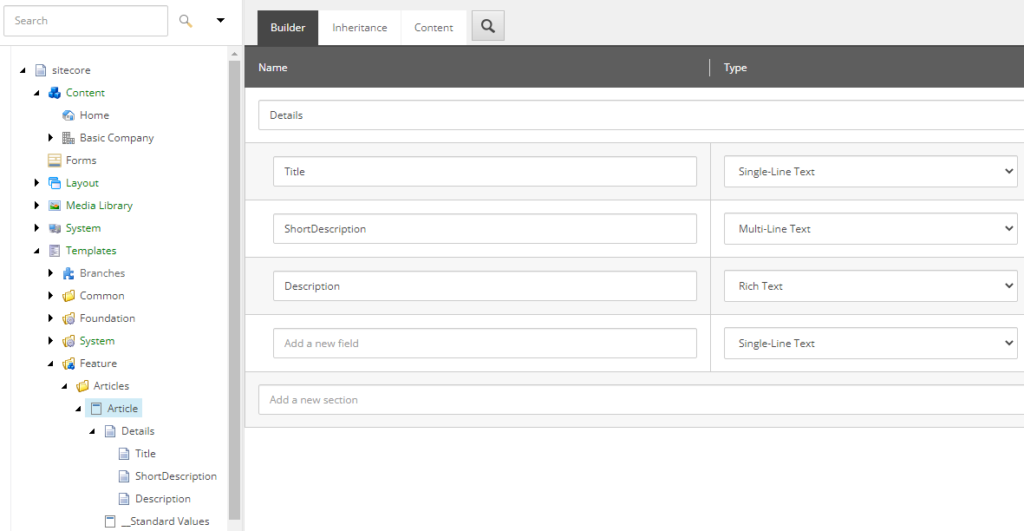
Create Models for Articles and Article
Create Models Folder and add below models
Articles.cs
using Sitecore.Data.Items;
using System.Collections.Generic;

namespace BasicCompany.Feature.Articles.Models
{
    public class Articles
    {
        public Item ArticlesPage { get; set; }

        public IList<Article> ArticleItems { get; set; }
    }
}
Article.cs
using Sitecore.Data.Items;

namespace BasicCompany.Feature.Articles.Models
{
    public class Article
    {
        public Item Item { get; set; }

        public Item ItemData { get; set; }
        public string Url { get; set; }
    }
}
Create Service for ArticleBuilder and ArticleRootResolver
Create a new folder Services and following-
//IArticleBuilder
 public interface IArticleBuilder
    {
        Articles.Models.Articles GetArticles(Item contextItem);
    }
//ArticleBuilder

 public class ArticleBuilder : IArticleBuilder
    {
        private readonly IArticleRootResolver _articleRootResolver;
        private readonly BaseLinkManager _linkManager;

        public ArticleBuilder(BaseLinkManager linkManager, IArticleRootResolver articleRootResolver)
        {
            _articleRootResolver = articleRootResolver;
            _linkManager = linkManager;
        }

        public Articles.Models.Articles GetArticles(Item contextItem)
        {
            var articleRoot = _articleRootResolver.GetArticleRoot(contextItem);
            if (articleRoot == null)
            {
                return new Articles.Models.Articles();
            }

            return new Articles.Models.Articles()
            {
                ArticlesPage = articleRoot,
                ArticleItems = GetArticleItems(articleRoot, contextItem)
            };
        }

        private IList<Article> GetArticleItems(Item articleRoot, Item contextItem)
        {
            var items = new List<Item>();

            items.AddRange(articleRoot.Children.Where(item => item.DescendsFrom(Templates.ArticleItem.Id)));

            var articleItems = items.Select(item => new Article()
            {
                Item = item,
                ItemData = item.Axes.GetDescendants().FirstOrDefault(itemData => itemData.DescendsFrom(Templates.ArticleItemData.Id)),
                Url = _linkManager.GetItemUrl(item)
            }).ToList();

            return articleItems;
        }
    }
//IArticleRootResolver

 public interface IArticleRootResolver
    {
        Item GetArticleRoot(Item contextItem);
    }

namespace BasicCompany.Feature.Articles.Services
{
    public class ArticleRootResolver : IArticleRootResolver
    {
        public Item GetArticleRoot(Item contextItem)
        {
            if (contextItem == null)
            {
                return null;
            }
            return contextItem.DescendsFrom(Templates.ArticleRoot.Id)
                ? contextItem
                : contextItem.Axes.GetAncestors().LastOrDefault(x => x.DescendsFrom(Templates.ArticleRoot.Id));
        }
    }
}
Create Layout Service i.e. content resolver class
Create new folder LayoutServices and add following-
namespace BasicCompany.Feature.Articles.LayoutService
{
    public class ArticleContentResolver : Sitecore.LayoutService.ItemRendering.ContentsResolvers.RenderingContentsResolver
    {
        private readonly IArticleBuilder _articleBuilder;

        public ArticleContentResolver(IArticleBuilder articleBuilder)
        {
            _articleBuilder = articleBuilder;
        }

        public override object ResolveContents(Rendering rendering, IRenderingConfiguration renderingConfig)
        {
            var articles = _articleBuilder.GetArticles(this.GetContextItem(rendering, renderingConfig));

            var contents = new
            {
                ArticleItems = articles.ArticleItems.Select(item => new
                {
                    Item = item.Item,
                    ItemData = item.ItemData,
                    Serialized = base.ProcessItem(item.ItemData, rendering, renderingConfig)
                }).Select(article => new
                {
                    Url = LinkManager.GetItemUrl(article.Item),
                    Id = article.Item.ID,
                    Fields = new
                    {
                        Title = article.Serialized[article.ItemData.Fields["Title"].Name],
                        Description = article.Serialized[article.ItemData.Fields["Description"].Name],
                        ShortDescription = article.Serialized[article.ItemData.Fields["ShortDescription"].Name],
                    }
                })
            };

            return contents;
        }
    }
}
Create Service Configurator to register the services-
namespace BasicCompany.Feature.Articles
{
    public class ServicesConfigurator : IServicesConfigurator
    {
        public void Configure(IServiceCollection serviceCollection)
        {
            serviceCollection.AddTransient<Services.IArticleBuilder, Services.ArticleBuilder>();
            serviceCollection.AddTransient<Services.IArticleRootResolver, Services.ArticleRootResolver>();
        }
    }
}
Create Template Class
Change the Item ID’s as per your Sitecore Instance
namespace BasicCompany.Feature.Articles
{
  public static class Templates
  {
        public static class ArticleItem
        {
            public static readonly ID Id = new ID("{EE5CE126-890D-4F01-9DD5-3D81FC397A91}"); //
        }

        public static class ArticleItemData
        {
            public static readonly ID Id = new ID("{8AA19CA1-99A6-4588-B1D7-3FA9A8F6756A}"); //
        }

        public static class ArticleRoot
        {
            public static readonly ID Id = new ID("{A46A11C6-C7F9-4F61-BF0C-FFF060F0FECC}"); //
        }
  }
}
Create App Config to register the ServiceConfigurator-
Create Feature.Articles.config file in App_Config/Include/Feature folder
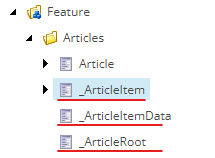
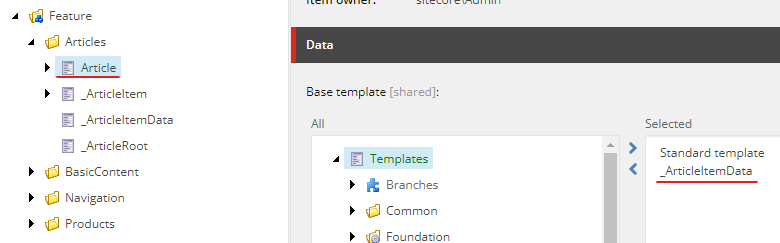
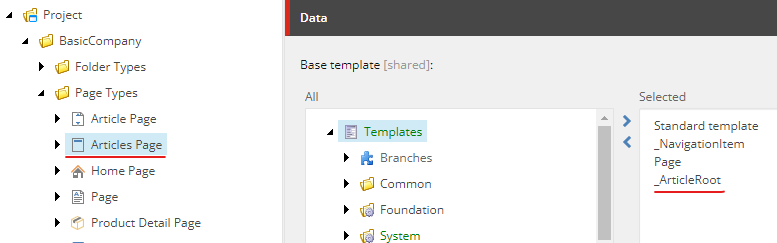
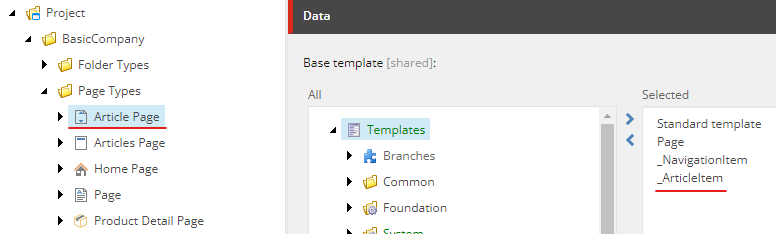
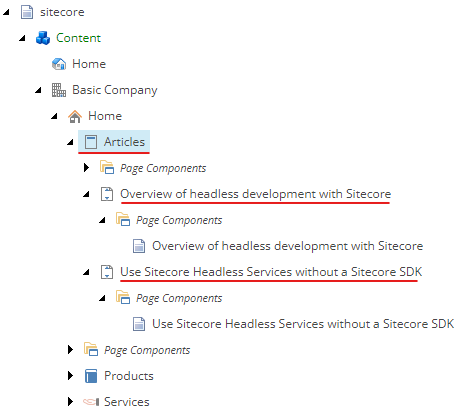
These templates are used to indicate the different level s of Article. i..e Article Page- will inherit from _ArticleRoot, ArticlePage will inherit from _ArticleItem and Article Content will inherit from _ArticleItemData
Sitecore Items
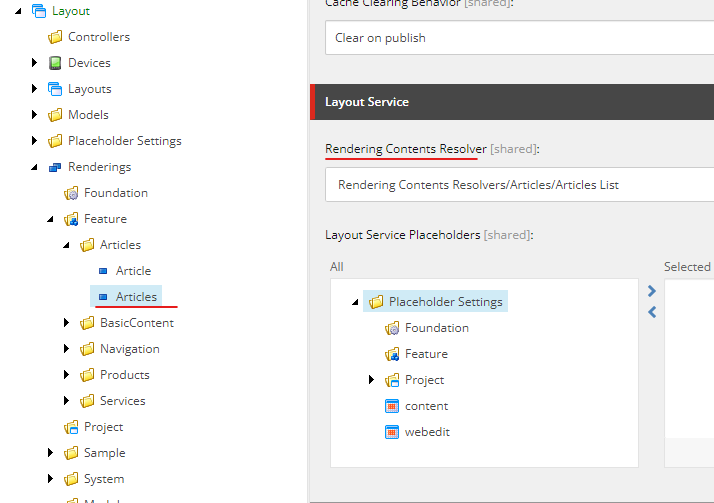
Create Rendering Content Resolver
Create a New “Rendering Contents Resolvers Folder” in /sitecore/system/Modules/Layout Service
Craete a New “Rendering Contents Resolver” in this folder.
Provide the type – BasicCompany.Feature.Articles.LayoutService.ArticleContentResolver, BasicCompany.Feature.Articles
Create Articles Json Rendering
Craete a neJson rendering name “Articles” and newly created content resolver in the “Rendering Contents Resolver” field.
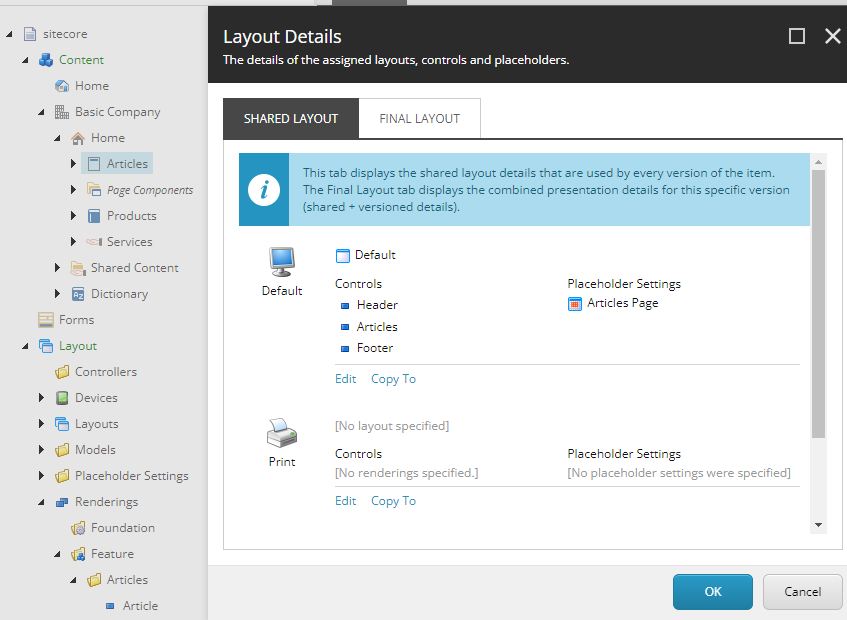
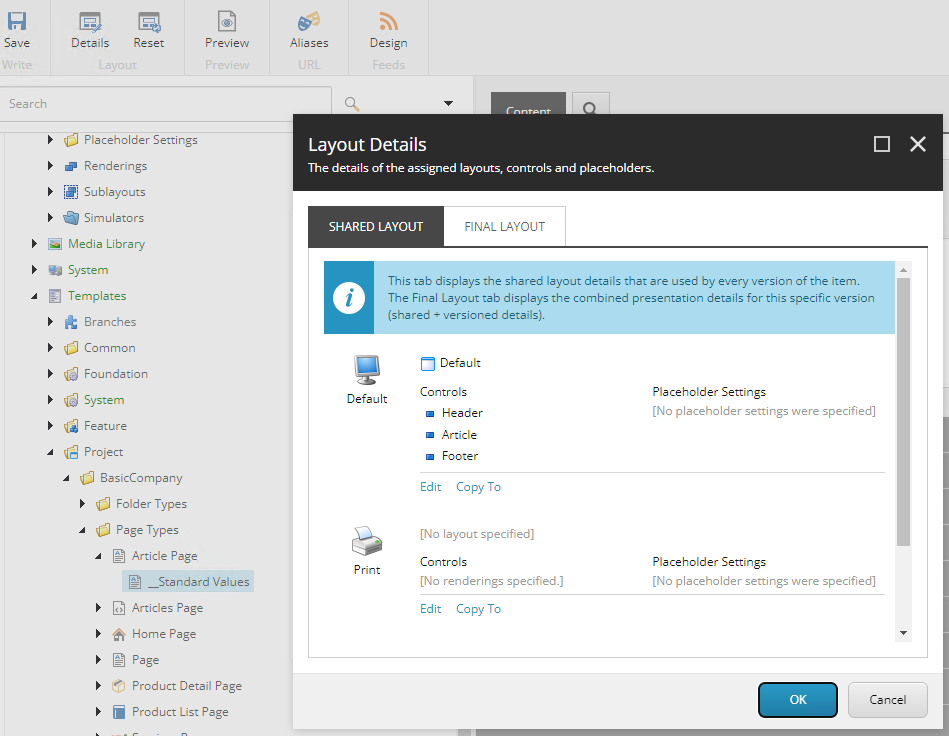
Add the new rendering to the page
Publish items
Rendering Project
Create Models Articles.cs
using Sitecore.AspNet.RenderingEngine.Binding.Attributes;
using Sitecore.LayoutService.Client.Response.Model.Fields;

namespace BasicCompany.Feature.Articles.Models
{
    public class Articles
    {
        [SitecoreComponentField]
        public ContentListField<Article> ArticleItems { get; set; }
    }
}
Create new view Articles.cshtml in /Views/Shared/Components/SitecoreComponent
In this blog will creata a new component name Article in the Helix Examples Solution to demonstrate how to configure and use Sitecore Content Serlialization (SCS).
Assuming the Sitecore CLI is installed along with Sitecore.DevEx.Extensibility.Serialization, Sitecore.DevEx.Extensibility.Publishing plugins are installed.
For more details on the plugin installation please see this link- https://doc.sitecore.com/xp/en/developers/101/developer-tools/install-sitecore-command-line-interface.html
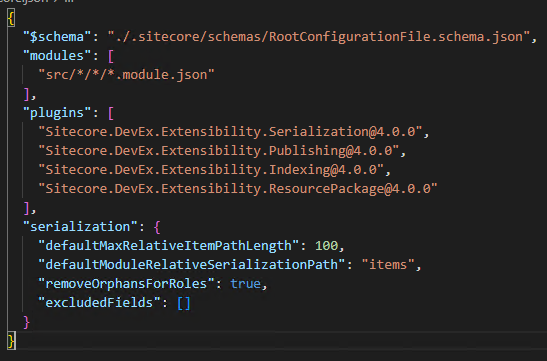
Open the helix-basic-aspnetcore folder in Visual Studio and see Sitecore.json file. This file has the configuration settings for SCS.
modules – willl look into the src folder for *.module.json file for any component specific configuration the items that need to be serialized.
So lets create a new module or rendering feature named “Articles”. Just a folder and not a project itself
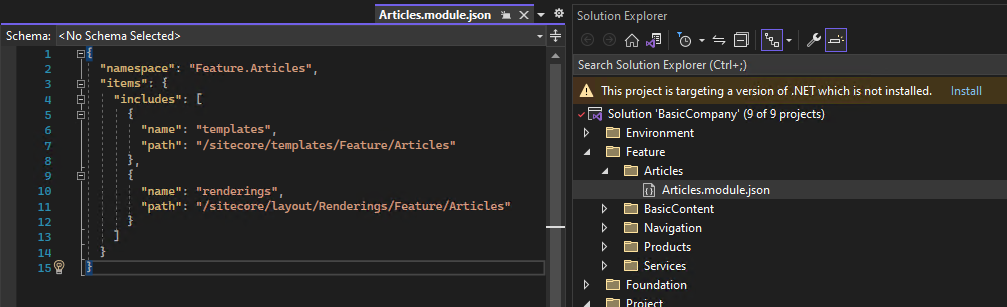
1. Create a module json for serlialization configuration
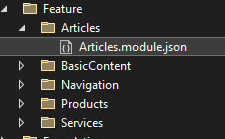
IMP – Create Articles.module.json file in the project root folder
Here the items that will be serliazed are templates and rendering from the given path in Sitecore to the local Solution Folder configured in Sitecore.json file the path mentioned in defaultModuleRelativeSerializationPath property. See step 1
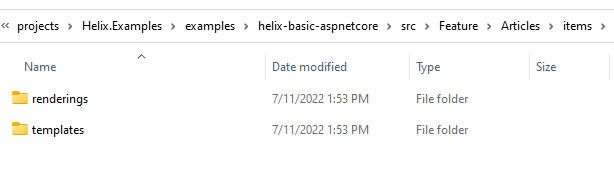
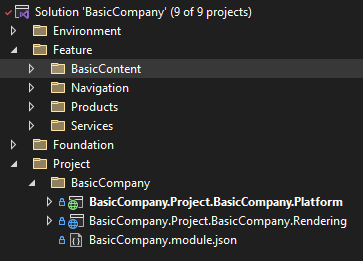
IMP- Ensure the module file is in Articles folder. Your project folder should looks like this-
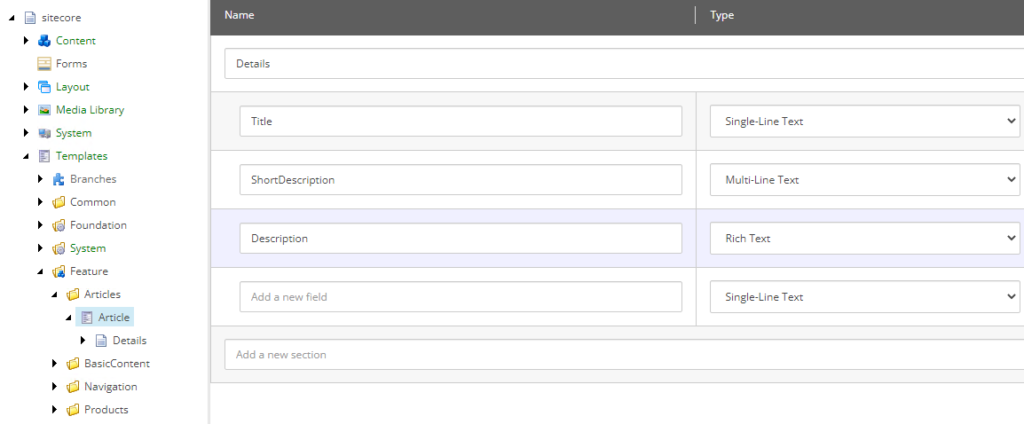
2. Create a Sitecore Template and Rendering for Articles
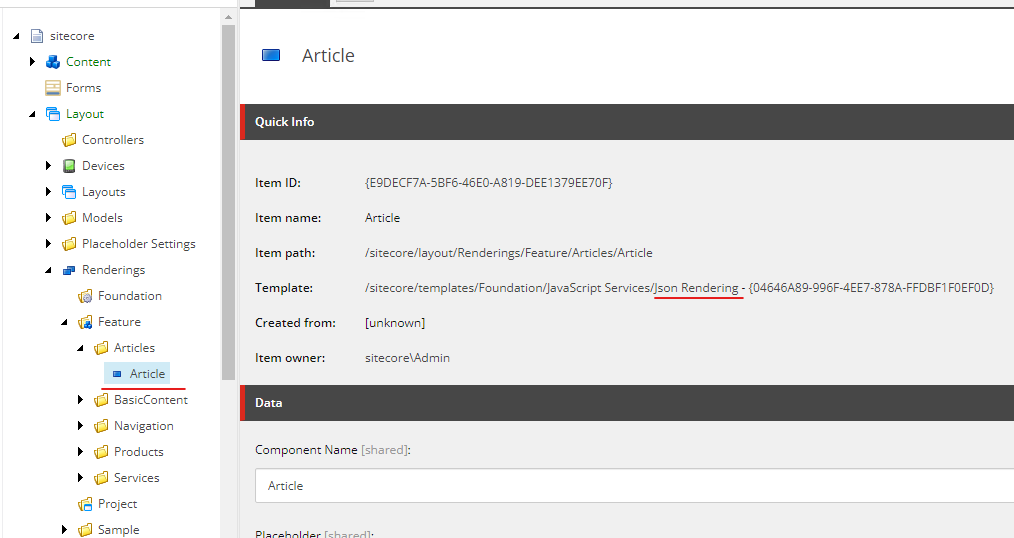
Create a Json Rendering for now(fill in the details later)
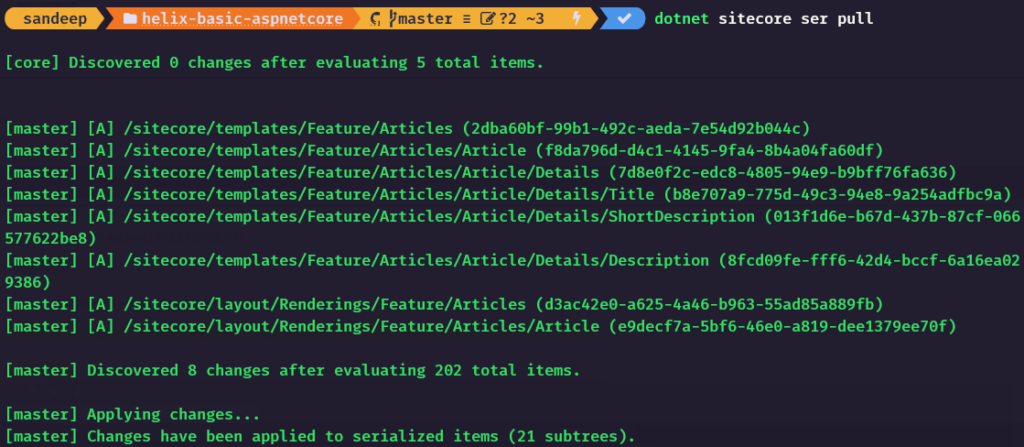
3. Sync the items(manual)
Execute following command to serlaize the items for Articles-
dotnet sitecore ser pull
Project folder should now have items folder with templates and rendering-
Thats it any Templates and rendering created for Articles (new component) should be serliazed.
Refer BasicCompany.module.json for any placeholders, layouts etc serlization at the project level.
In this blog will create a simple rendering uing Asp.Net Rendering SDK in Helix Examples Solution
Please refer the blog to create a rendering folder and configure the SCS before proceeding this blog.
So lets create a new module or rendering feature named “Articles”.
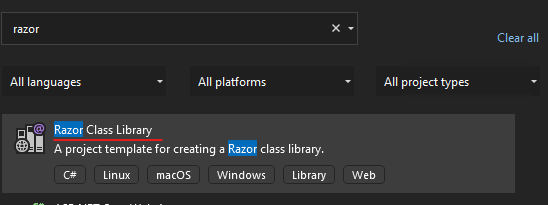
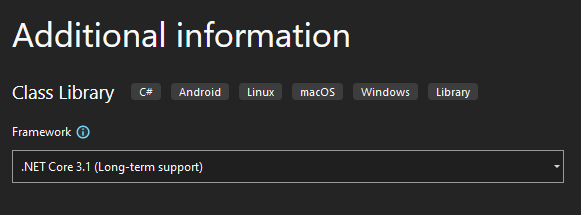
1. Create a Feature project using Razor Class Library
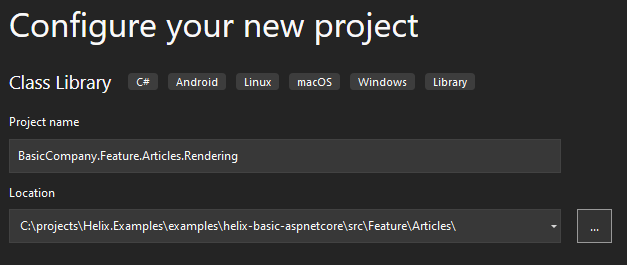
Project Name – BasicCompany.Feature.Articles.Rendering
Notice the project path
Choose .Net Core 3.1 Framework-
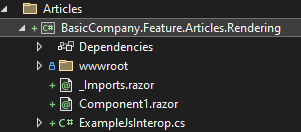
Delete any exisitng files and folders under this project-
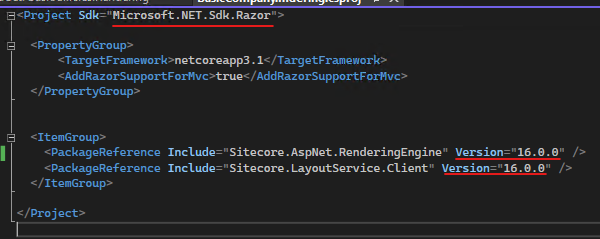
Edit the project to use netcoreapp3.1 and AddRazorSupportForMvc to true
Rename helix-basic-aspnetcore\src\Feature\Articles\BasicCompany.Feature.Articles.Rendering to rendering. Just to follow other feature fodler structure.
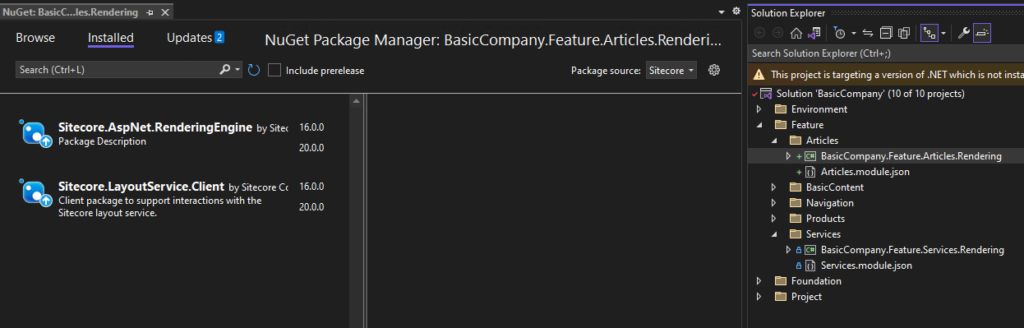
2. Install Sitecore packages
Sitecore.AspNet.RenderingEngine
Sitecore.LayoutService.Client
I have installed verions 16 just to be in sync with other projects. You may install the latest.
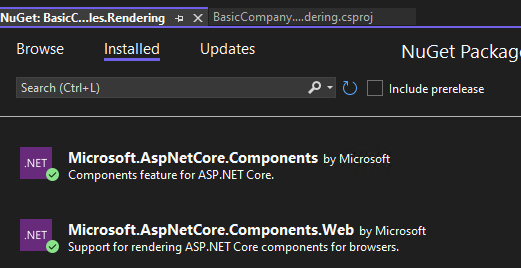
New rendering project should have these packages installed-
Remove these packages as this may be not required at thi point of time or downgrade this to 3.1.1
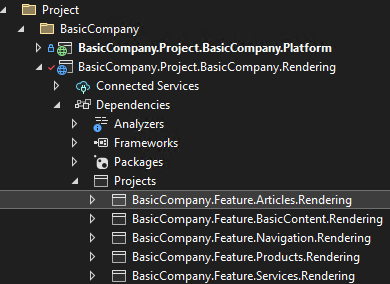
Refer the new created rendering project to BasicCompany.Project.BasicCompany.Rendering
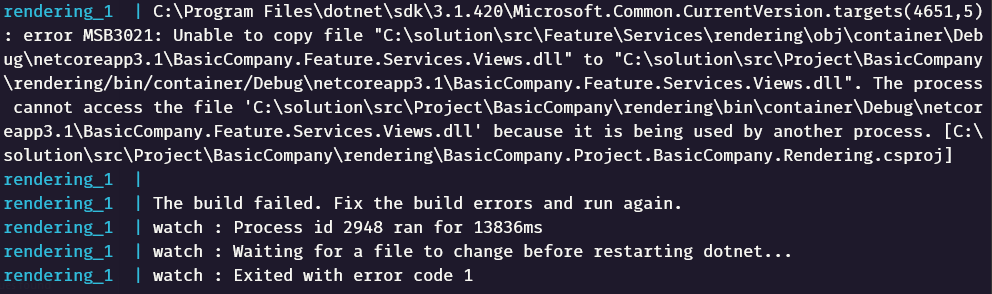
When the solution is build you may see this error-
Severity Code Description Project File Line Suppression State Error The package reference ‘Sitecore.AspNet.RenderingEngine’ should not specify a version. Please specify the version in ‘C:\projects\Helix.Examples\examples\helix-basic-aspnetcore\Packages.props’ or set VersionOverride to override the centrally defined version. BasicCompany.Feature.Articles.Rendering C:\projects\Helix.Examples\examples\helix-basic-aspnetcore\src\Feature\Articles\rendering\BasicCompany.Feature.Articles.Rendering.csproj
Solution– Remove the version for the plugin fropm project file
Edit the project file and remove version from the PackageReference-
Solution should build successully.
3. Ensure Articles.modules.json file in Feature folder
Please see this blog <<Enter blog url here>> how to create a module.json file to serliaze the Sitecore items for new Feature.
4. Create required Sitecore Templates, content, renderings and Placeholder Settings
Template – Article in following path- /sitecore/templates/Feature/Articles
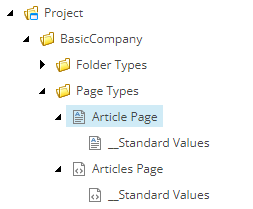
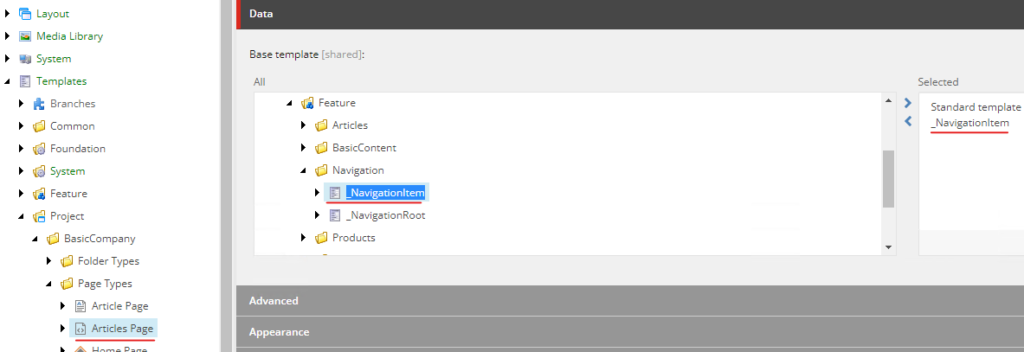
Page Type Template – Create 2 page type templates “Articles” and “Article” page as below.
Add any required Insert Options where necessary.
IMP- inherit from _NavigationItem to display the Articles as Navigation option
Enter Navigation Title for Articles page-
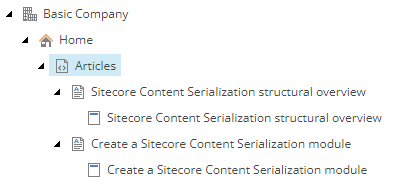
Content
Create content in Home page based on the Article templates created.
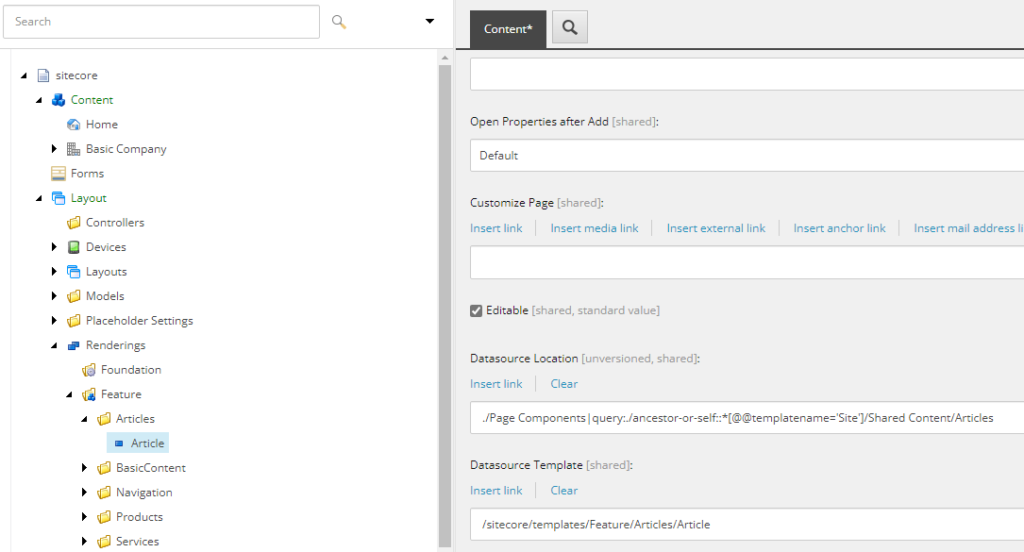
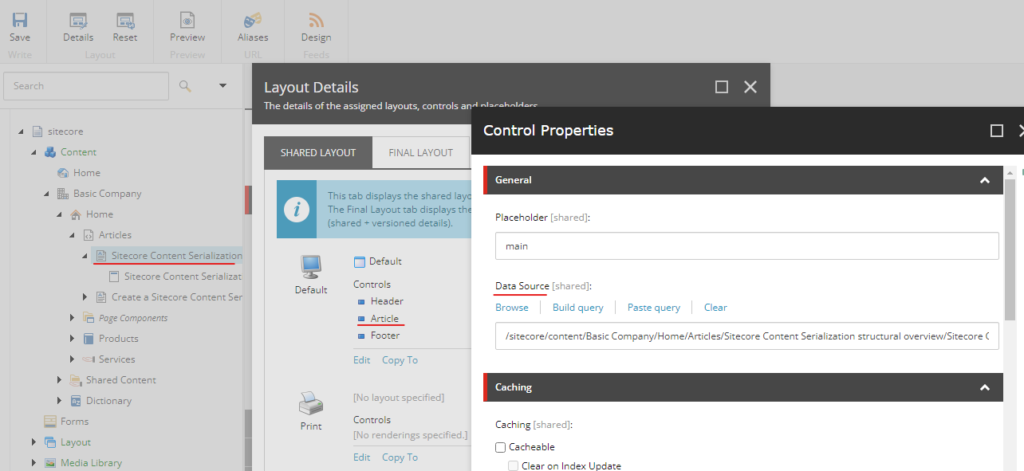
Rendering
Create a new Json Rendering Article. See previous post
Set Datasource Location- ./Page Components|query:./ancestor-or-self::*[@@templatename=’Site’]/Shared Content/Articles
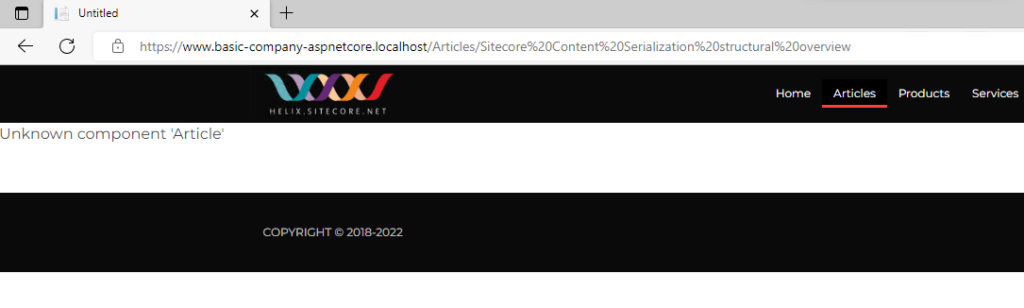
There is a error – “Unknown component ‘Article'”. This is because we havent yet created view for this component.
Create Model in BasicCompany.Feature.Articles.Rendering project for rendering Article component
Note the propeties are using Sitecore.LayoutService.Client.Response.Model.Fields
using Sitecore.LayoutService.Client.Response.Model.Fields;
using System;
using System.Collections.Generic;
using System.Text;

namespace BasicCompany.Feature.Articles.Rendering.Models
{
    public class Article
    {
        public TextField Title { get; set; }

        public RichTextField Description { get; set; }

        public TextField ShortDescription { get; set; }
    }
}
Create View in BasicCompany.Feature.Articles.Rendering project for rendering Article component
Create Article.cshtml file under Views/Shared/Components/SitecoreComponent
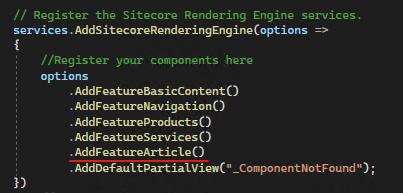
Add Extensions for registering the ModelBoundView. This is a static class and will be used in Project Rendering on application startup (BasicCompany.Project.BasicCompany.Rendering).
using BasicCompany.Feature.Articles.Rendering.Models;
using Sitecore.AspNet.RenderingEngine.Configuration;
using Sitecore.AspNet.RenderingEngine.Extensions;

namespace BasicCompany.Feature.Articles.Extensions
{
    public  static class RenderingEngineOptionsExtensions
    {
        public static RenderingEngineOptions AddFeatureArticle(this RenderingEngineOptions options)
        {
            options
                .AddModelBoundView<Article>("Article");
            return options;
        }
    }
}
In BasicCompany.Project.BasicCompany.Rendering project, Startup.cs register the component-
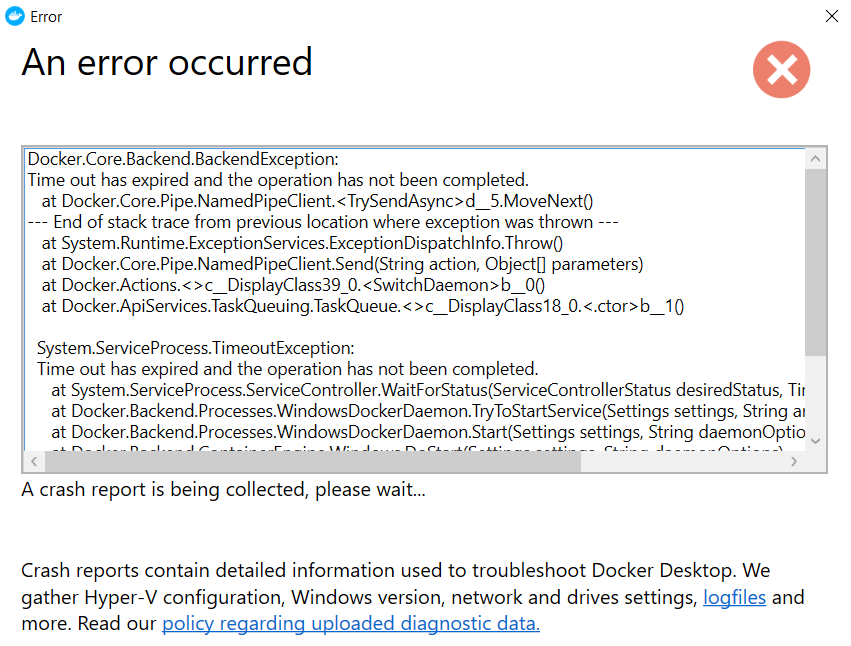
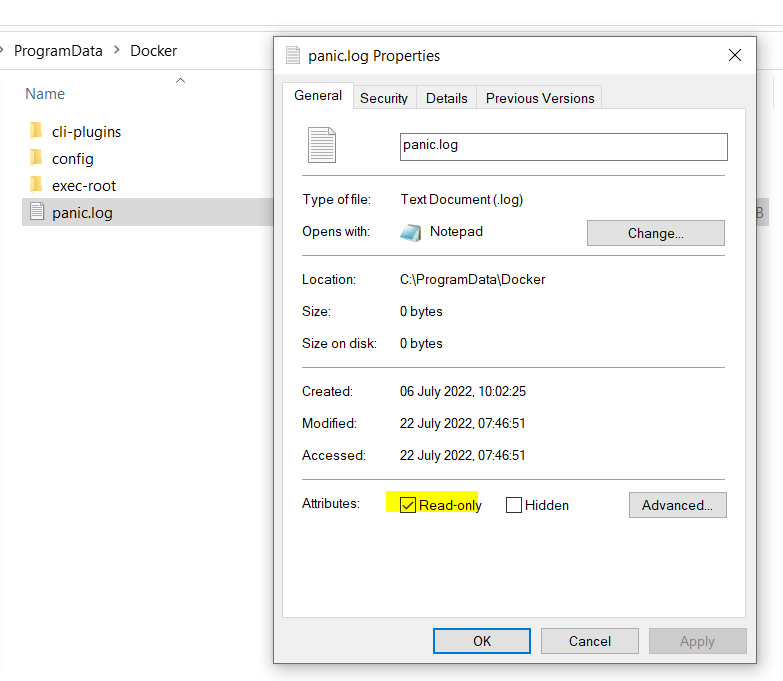
Time out error when switching to Docker Desktop Windows Containers.
Solution-
If you see this error whilst switching to the Windows Continaners. Head to the C:\ProgramData\Docker folder and remove the readonly access of panic.log file.