Working on Linux system after been worked on Windows for 2 decades is always fun.
This blog post is to setup the Sitecore OrderCloud Headstart on Ubuntu the Docker way. As all the images used for the Headstart is are Linux based, this I didn’t find major difference how this is been setup in Windows system apart from few changes while installing Storage Explorer and few other erros which I have noted in this blog post.
Note – use sudo for each command or “sudo i”to run as root.
Ensure node js is installed
This might be required for your local build.
sudo apt update

sudo apt install nodejs
Ensure npm is installed
sudo apt install npmEnsure docker and docker -compose is installed
See this blog post Install Docker on Linux
sudo snap install docker

sudo apt install docker-compose
Docker Compose
Lets start composing and solve errros that might come ourr way-
sudo docker-compose up -dnpm needs TLS1.2
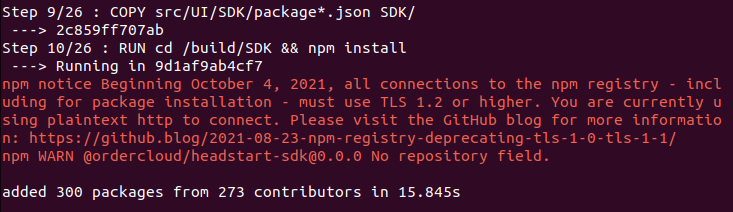
npm notice Beginning October 4, 2021, all connections to the npm registry – including for package installation – must use TLS 1.2 or higher. You are currently using plaintext http to connect. Please visit the GitHub blog for more information: https://github.blog/2021-08-23-npm-registry-deprecating-tls-1-0-tls-1-1/
npm WARN @ordercloud/headstart-sdk@0.0.0 No repository field.
npm cache clear --force

npm set registry=https://registry.npmjs.org/

npm install -g https://tls-test.npmjs.com/tls-test-1.0.0.tgz
Install .Net SDK
Middleware runs on .Net. So this neds to be installed.
https://learn.microsoft.com/en-us/dotnet/core/install/linux-ubuntu
https://devblogs.microsoft.com/dotnet/dotnet-6-is-now-in-ubuntu-2204/
sudo apt-get update && \
sudo apt-get install -y dotnet-sdk-6.0
sudo apt-get update && \
sudo apt-get install -y aspnetcore-runtime-6.0sudo apt install dotnet6I found difficulties installing .Net on Ubuntu. You may have todo few restarts.
docker compose up -d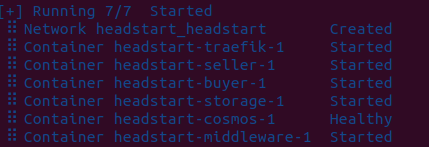
This should start all the containers. Note- cosmos container takes time to start till then middleware waits and starts when comos is ready.
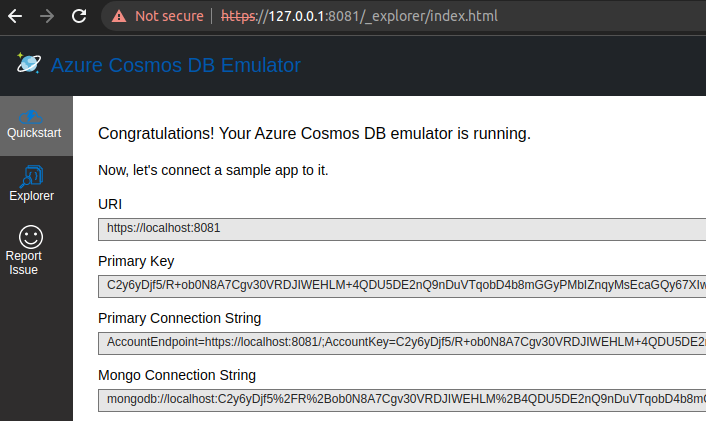
Comos should be available now –
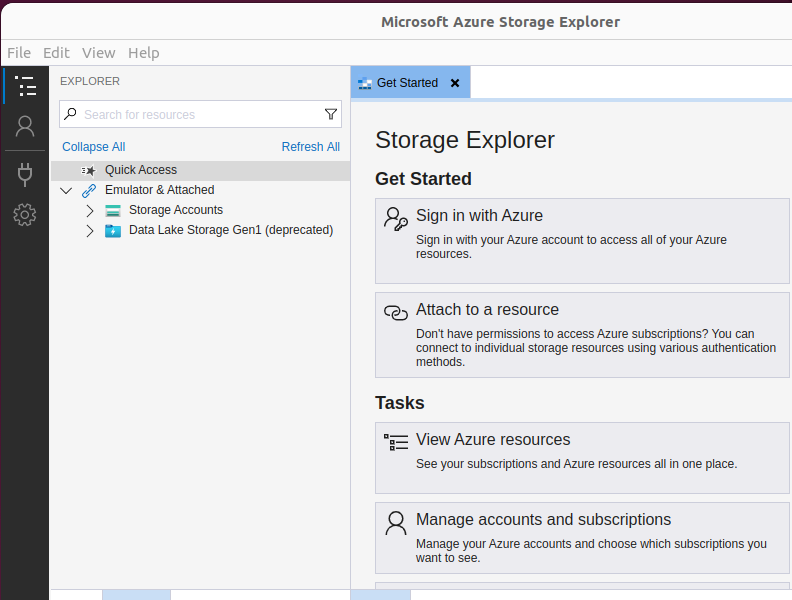
Install Azure Storage- Explorer
Install Storage explorer in Ubuntu-
snapd should be already installed if you are using Ubuntu 16.04 LTS or later, you may have to update.
sudo apt update
sudo apt install snapd
Install Storage Explorer
sudo snap install storage-explorer
Open Azure Storage Explorer and follow the steps here –
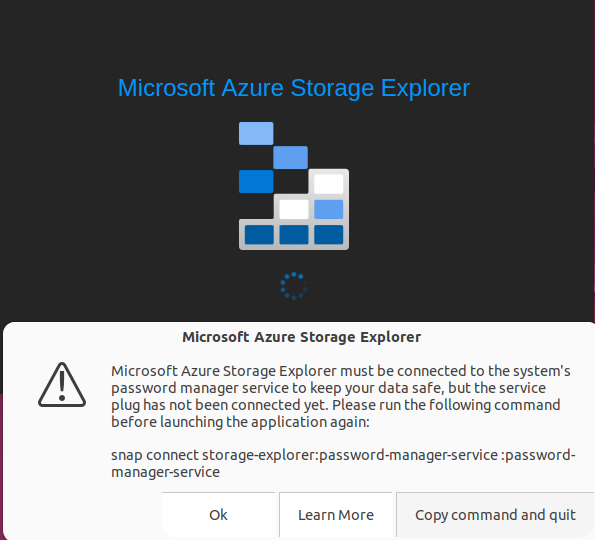
Execute the command-
snap connect storage-explorer:password-manager-service :password-manager-serviceAzure Storage Explorer should be able to open with above command.
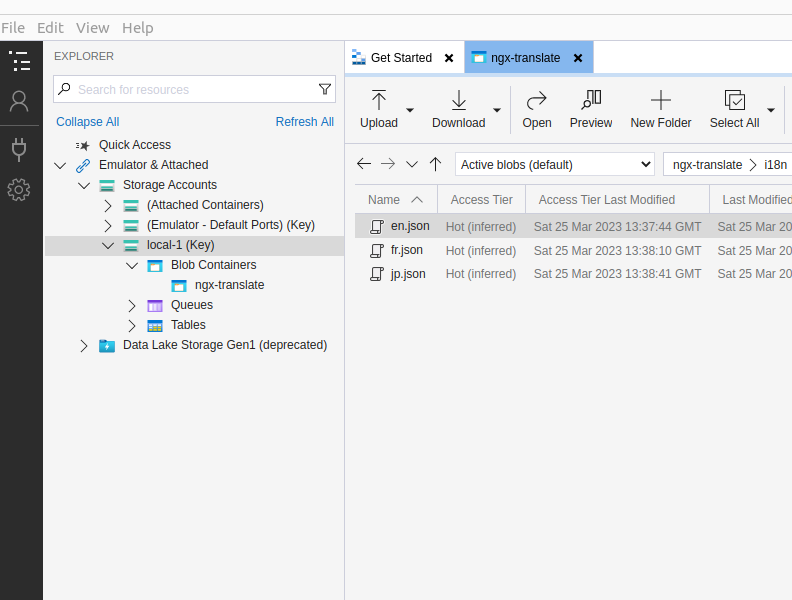
Apply the same settings mentioned in this blog
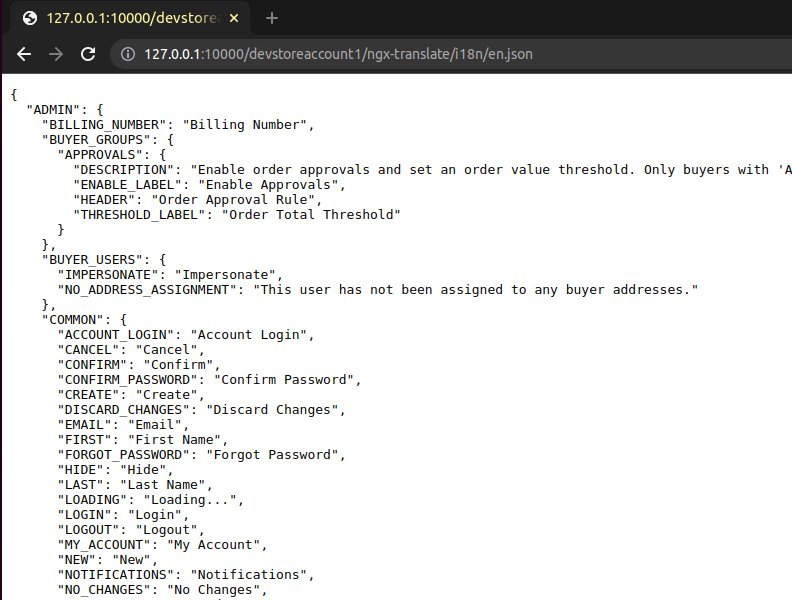
Once you have followed and applied the settings mentioned in the blog, should be able to see the translation files in local storage and able to access the file.
We also have to set CQRS for blob container – lets do this later.
Middleware exited with errors-
Error –
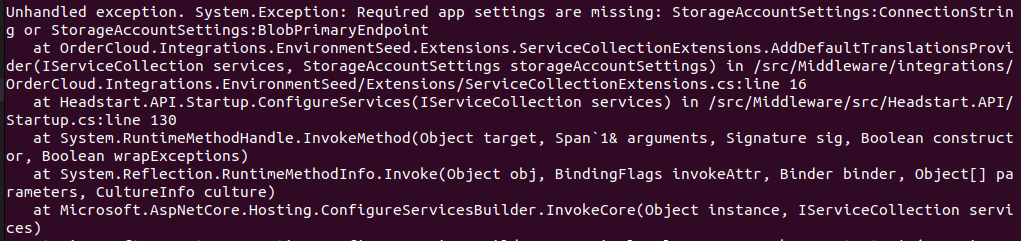
See the resolution to this issue here – section – Unable to start Middleware container due to erros
Error – Connection refused (127.0.0.1:8081)
System.AggregateException: One or more errors occurred. (Connection refused (127.0.0.1:8081))
       ---> System.Net.Http.HttpRequestException: Connection refused (127.0.0.1:8081)
See the resolution to this issue here – section – Connection to Comos DB is failing
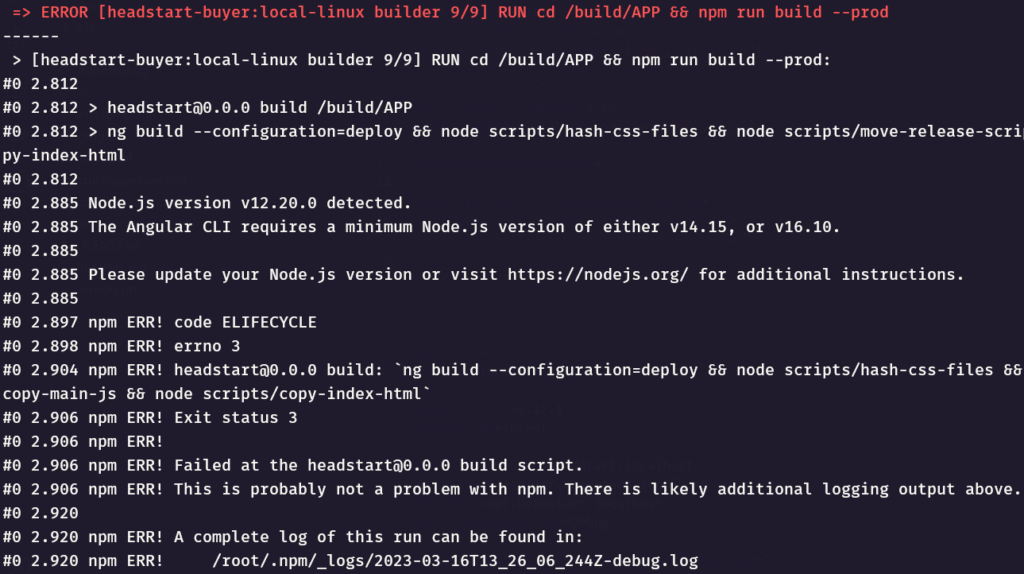
Error- Unsupported platform
0 18.52 npm ERR! code EBADPLATFORM
#0 18.53 npm ERR! notsup Unsupported platform for fsevents@2.3.2: wanted {"os":"darwin","arch":"any"} (current: {"os":"linux","arch":"x64"})
#0 18.53 npm ERR! notsup Valid OS:    darwin
#0 18.53 npm ERR! notsup Valid Arch:  any
#0 18.53 npm ERR! notsup Actual OS:   linux
#0 18.53 npm ERR! notsup Actual Arch: x64

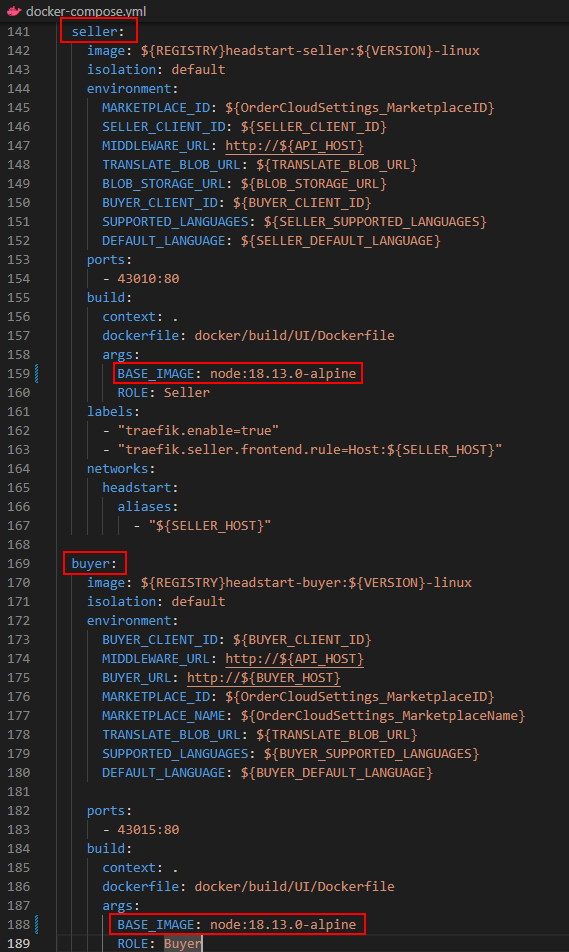
Changed the node version- see the blog here
Also changed the nginx version – see Error 4 here
=> ERROR [headstart-seller:local-linux production 4/8] RUN apk add --update nodejs nodejs-npm && npm install -g json 1.0s
see Error 4 here
Change from this  -
RUN apk add --update nodejs nodejs-npm && npm install -g json

to-
RUN apk add --update nodejs npm && npm install -g json
#0 51.97 npm ERR! npm ERR! Cannot read properties of null (reading 'pickAlgorithm')See the resolution to this error here
Now you should have all containers up and running with
sudo docker compose up -dIf you see this error-
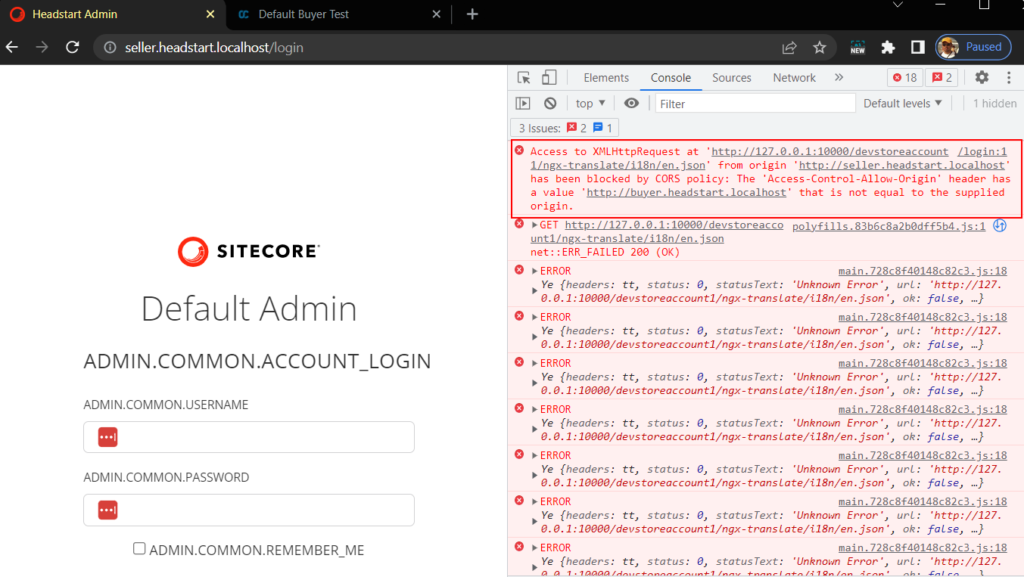
Check for Configure CORS to Blob Containers in this blog post
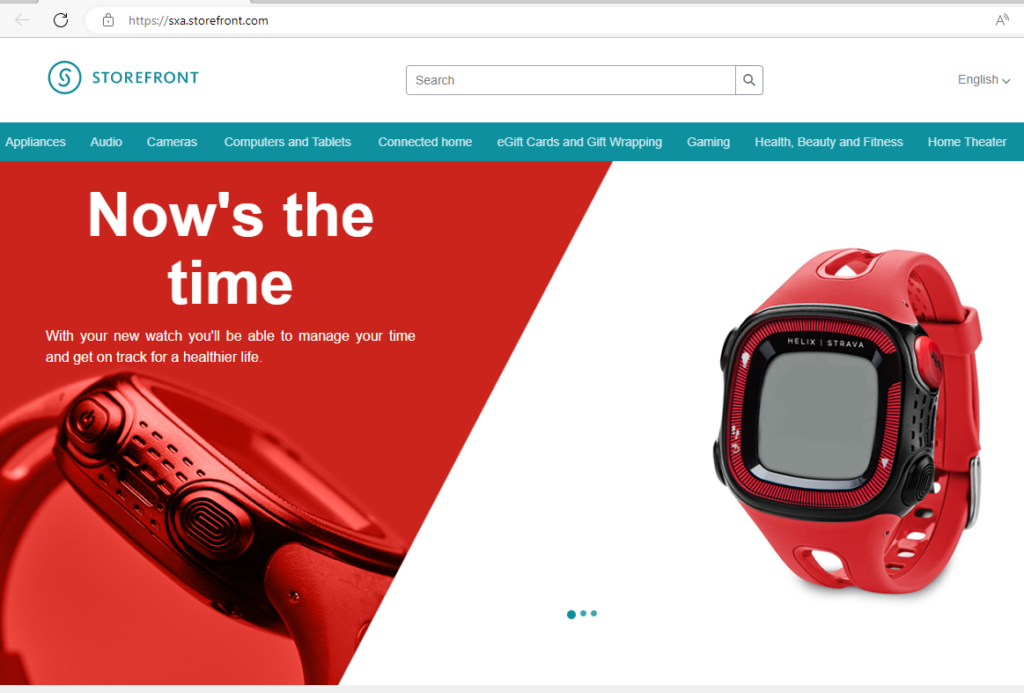
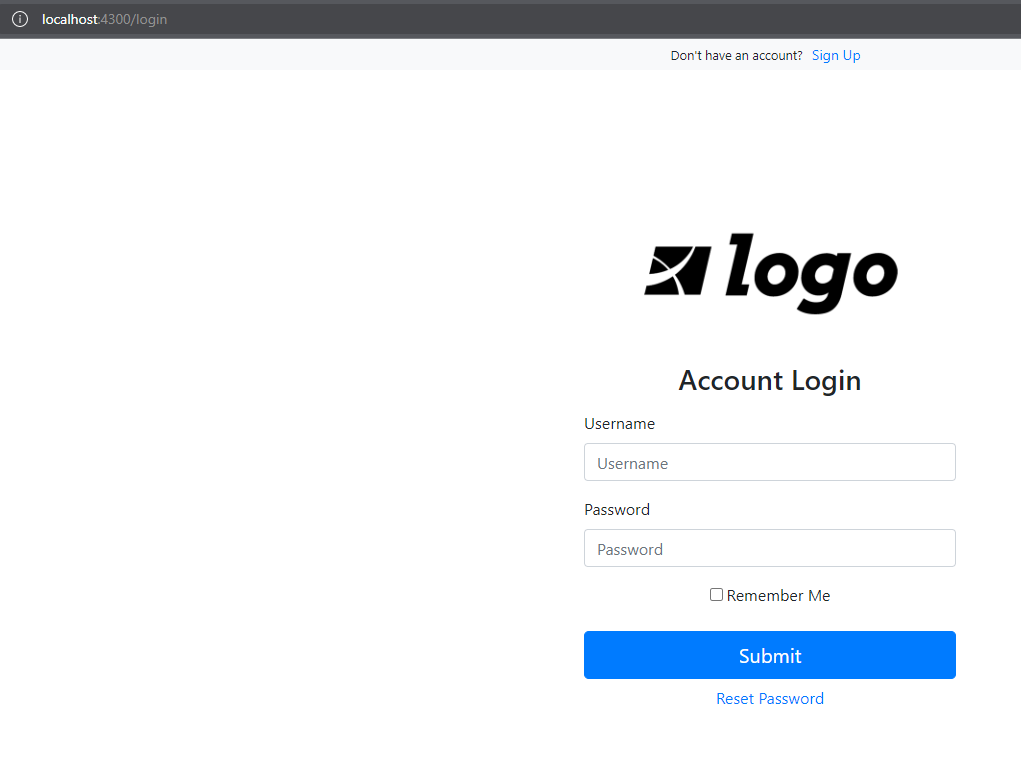
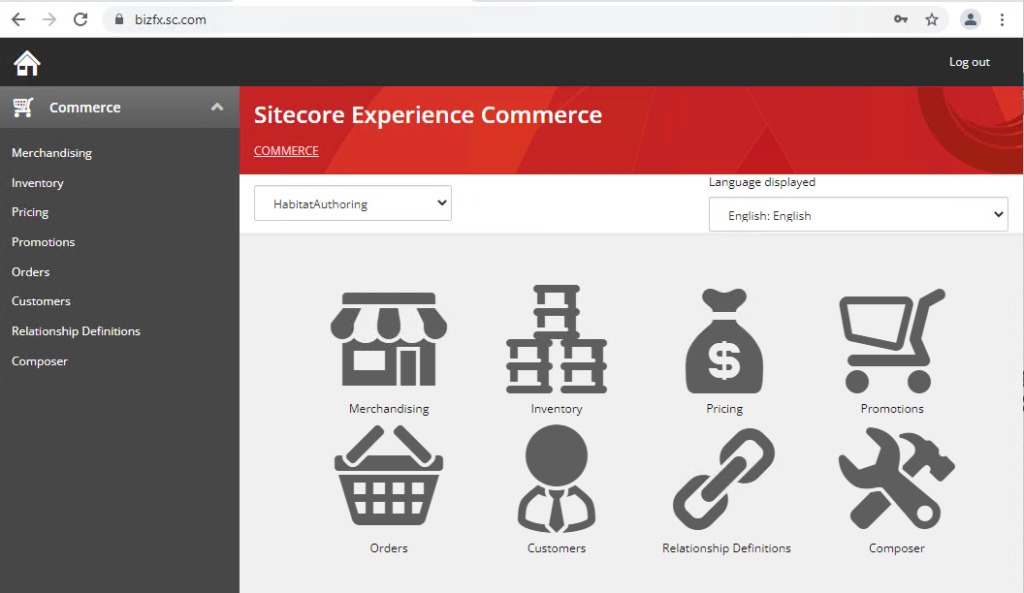
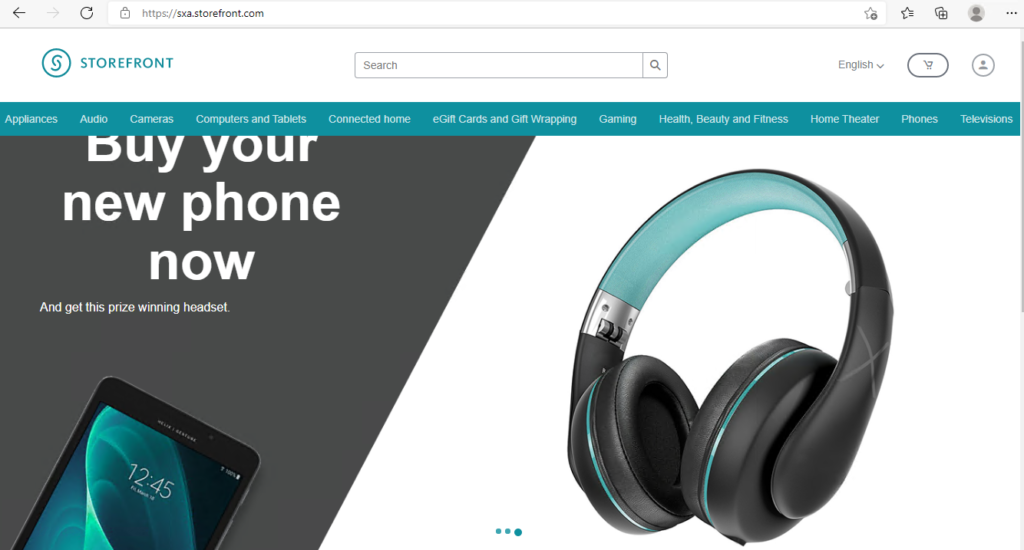
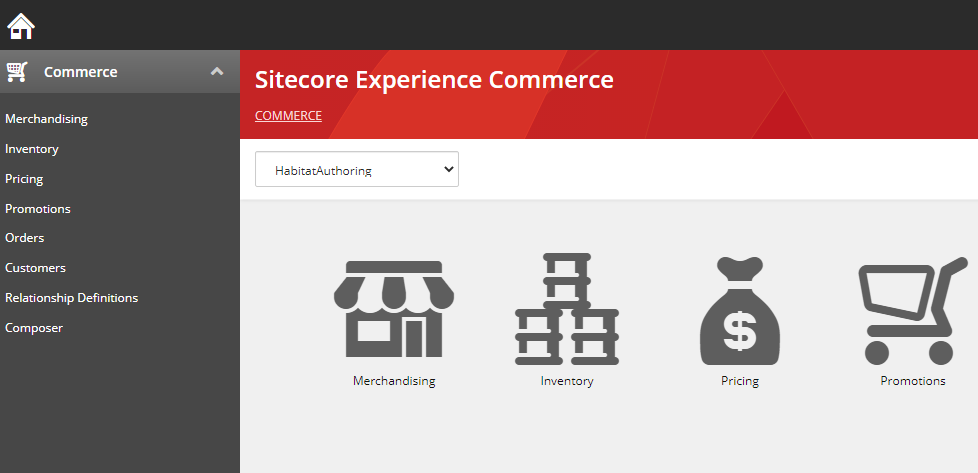
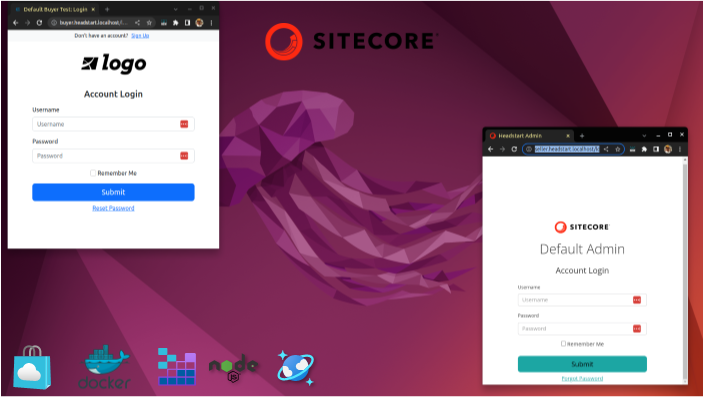
And here I have Seller, buyer and middleware working on Ubuntu system-
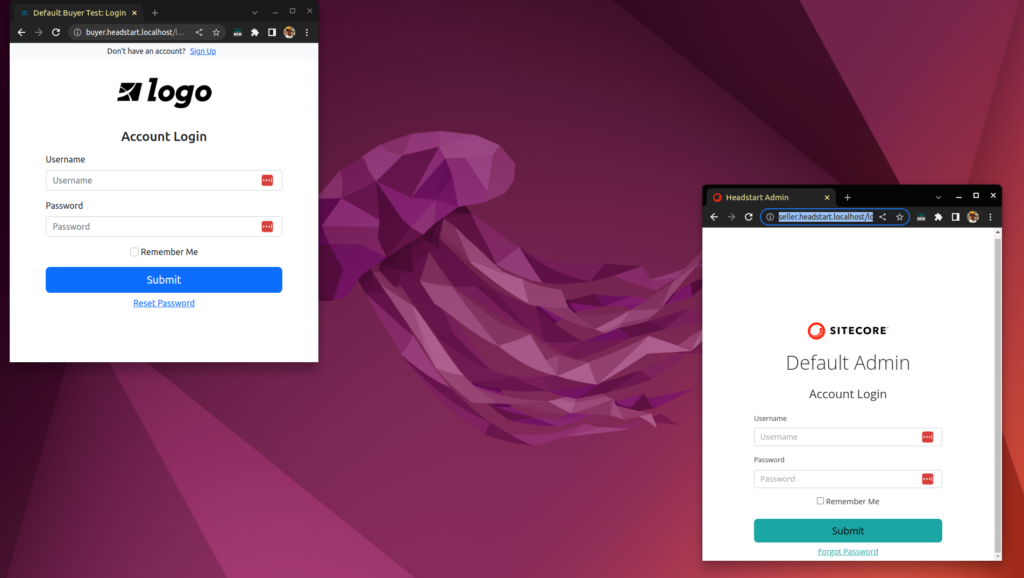
This has really opened the horizon to develop, deploy and maintain OrderCloud solution on a technology agnostic platform.
![]()