Welcome! This is my personal blog about Web technologies, software development, open source and other related topics
The ideas and opinions expressed here are solely mine and don't represent those of others, either individuals or companies.The code snippets or references to software products or analogous are to be used without any warranty of any kind. If you enjoy the content, feel free to share it and re-use it as long as you provide a link to the original post.
You can force close event to test Abandon Cart. This works only in non-prod environments.
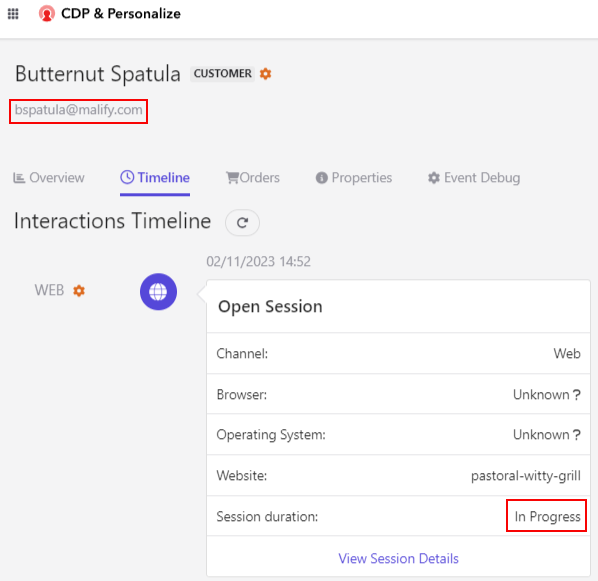
Assumption- An identified guest which is active and has added products in cart.
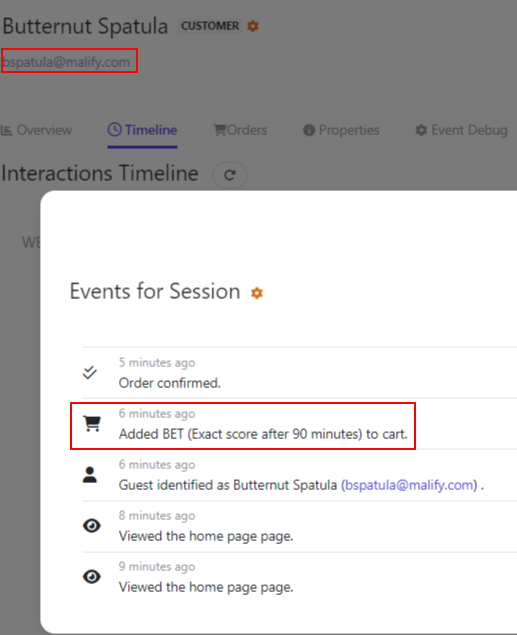
If you are corectly tracking you should see in the timeline Session and event a Product been added.
So whilst developing if you want to force close this session, since you might not want to wait for 20 minutes for session to expire or whatever time is set to expire the session, you can force close the session to see or perform the next steps if the cart is been abandoned.
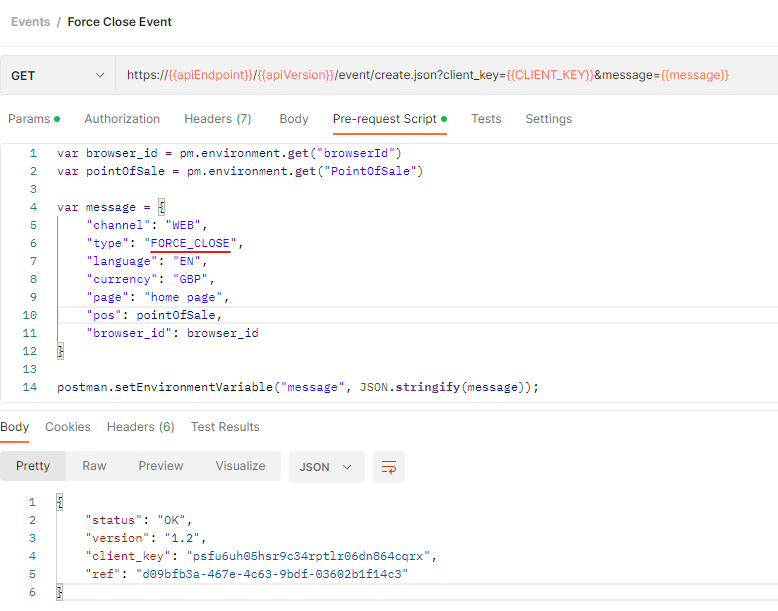
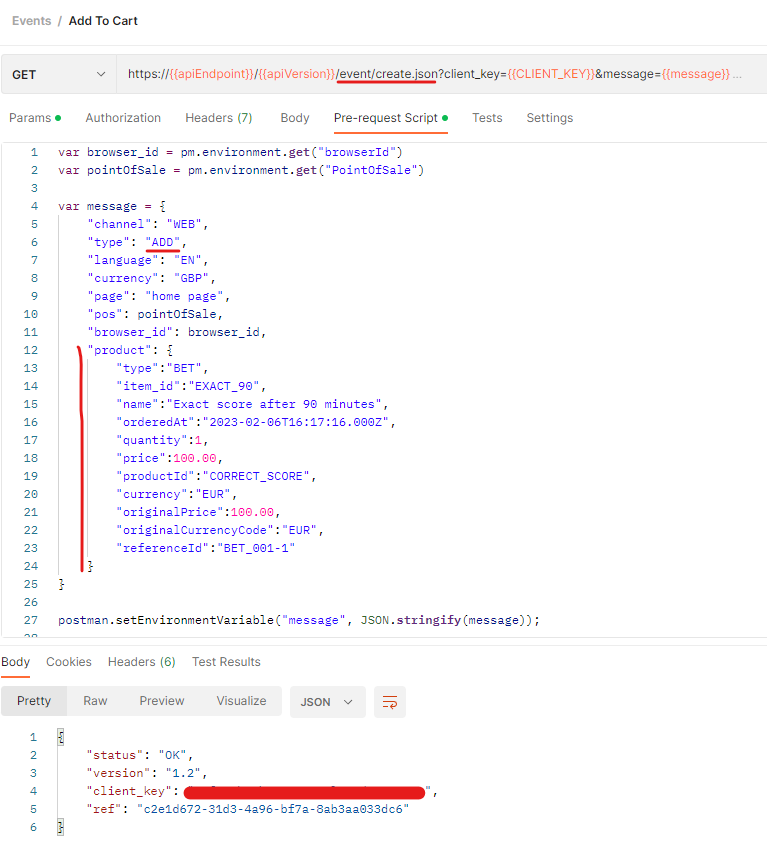
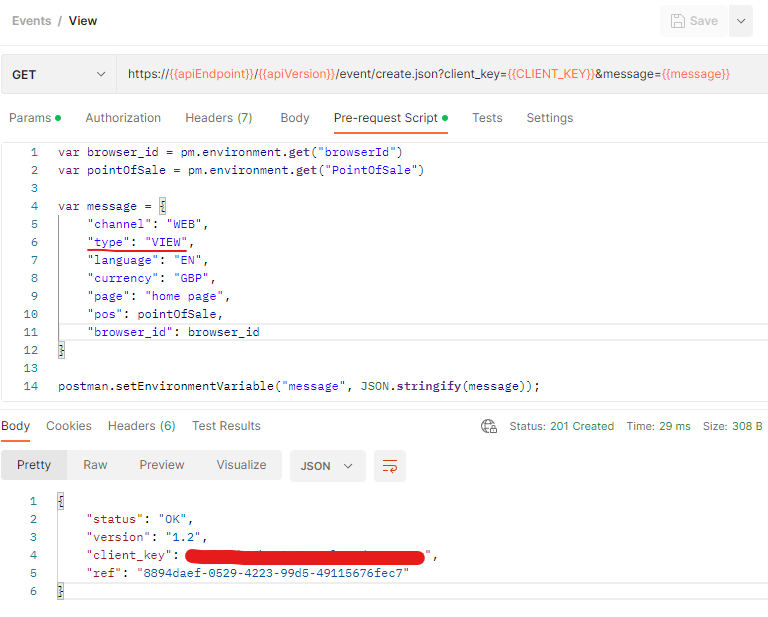
The force close event can be triggered by providing message type as FORCE_CLOSE in the payload.
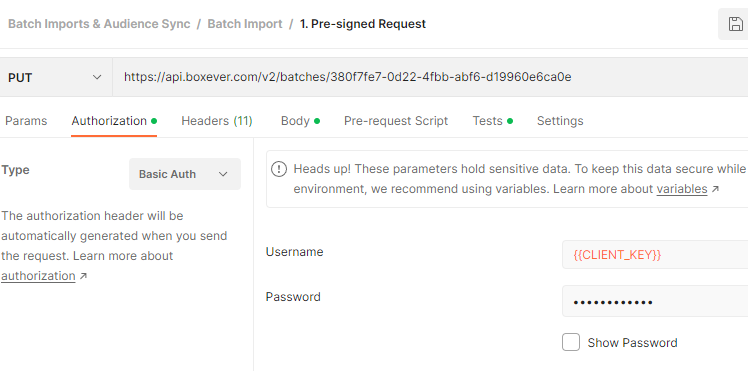
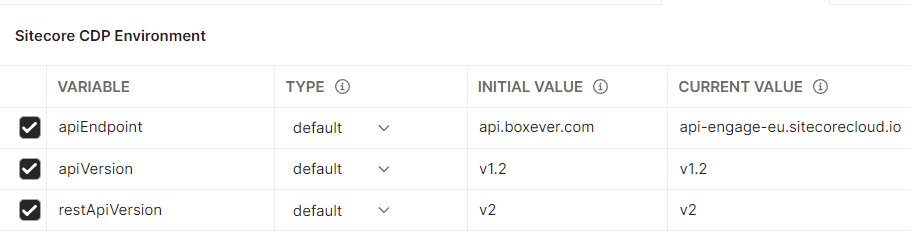
Send the payload to this endpoint. For more details on what should be the apiEndpoint and client key see this blog
var browser_id = pm.environment.get("browserId") -- browser id
var pointOfSale = pm.environment.get("PointOfSale") -- point of sale

var message = {
    "channel": "WEB",
    "type": "FORCE_CLOSE",
    "language": "EN",
    "currency": "GBP",
    "page": "home page",
    "pos": pointOfSale,
    "browser_id": browser_id
}

postman.setEnvironmentVariable("message", JSON.stringify(message));
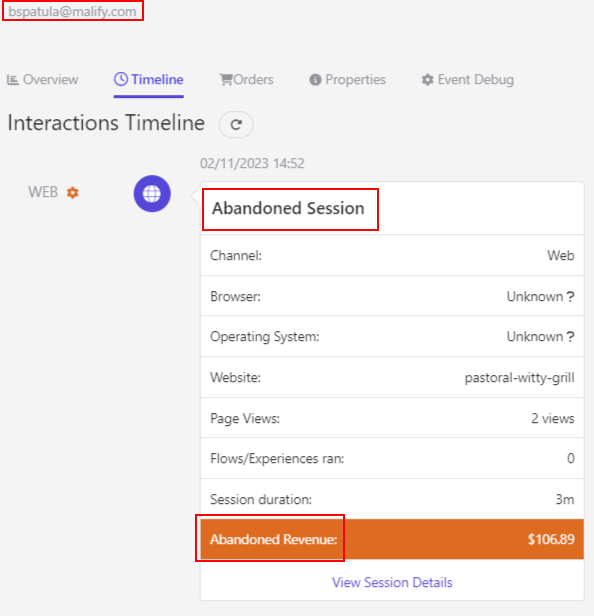
Since the session is now closed we can see the Abandoned Revenue. Further reminder mails can be sent to user to complete the purchase on the abandoned cart.
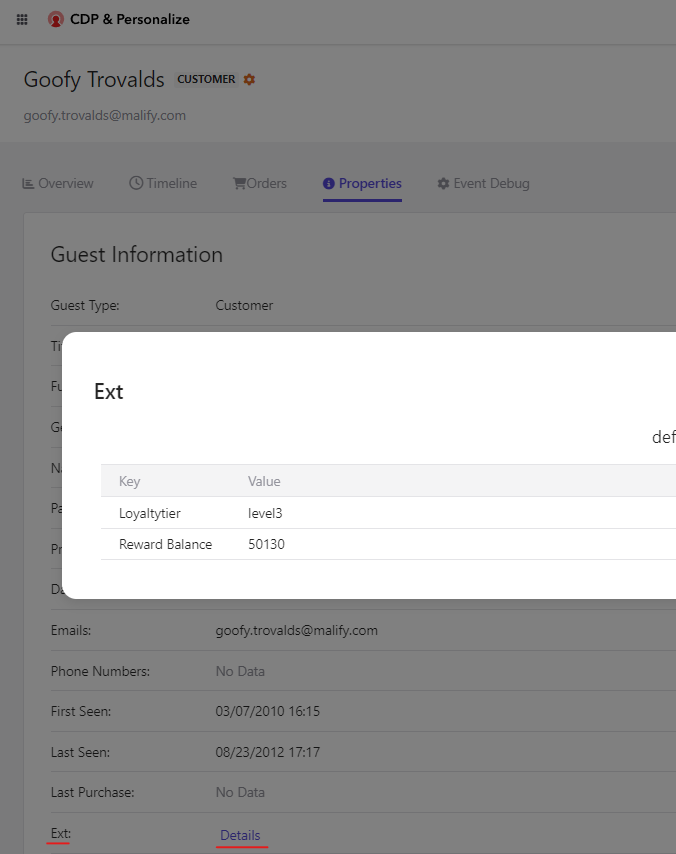
Load the data in json file. Note that the above is a single row in a json and repeat the rows to upload multiple guets. This is not a json formatted file and should not have “,” to seperate rows as normally json file has. Highlighted email is important to identify the customer and add/update the extended data. This depends on the rule setup for your environment to identify the customer.
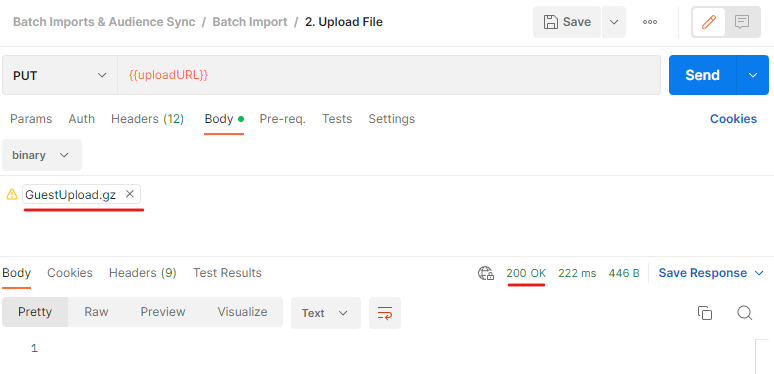
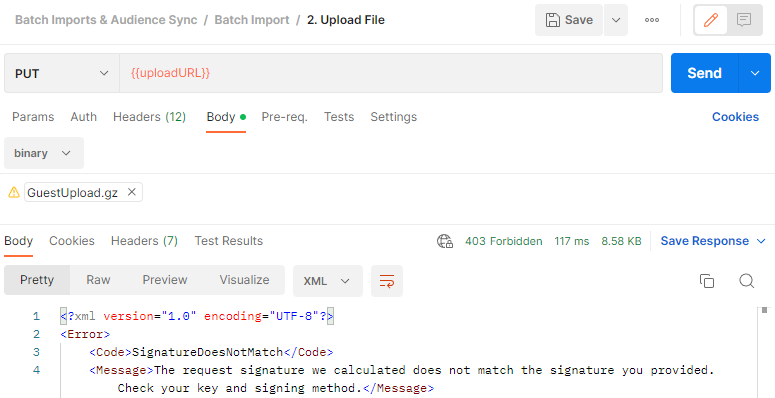
gzip the json file to upload
Example-
tar -czvf guest-upload.gz .\guest-upload.json
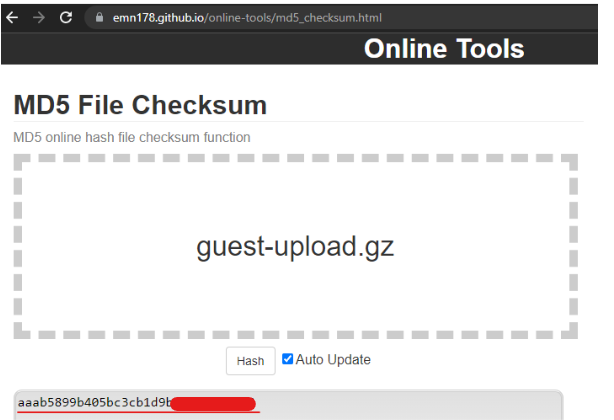
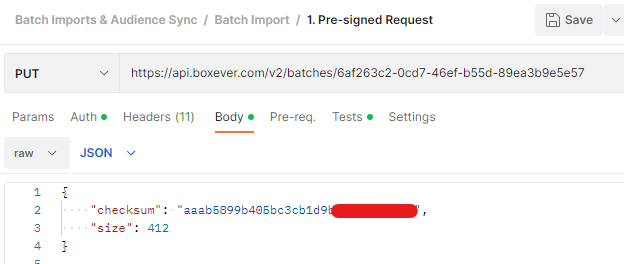
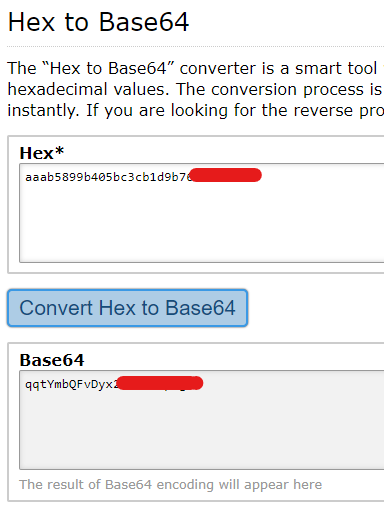
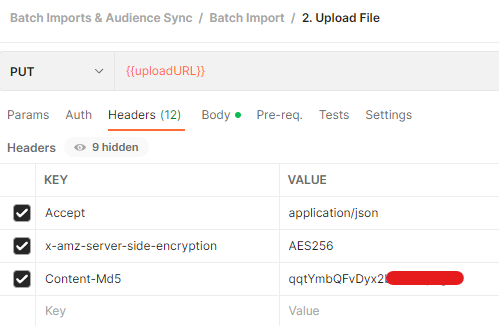
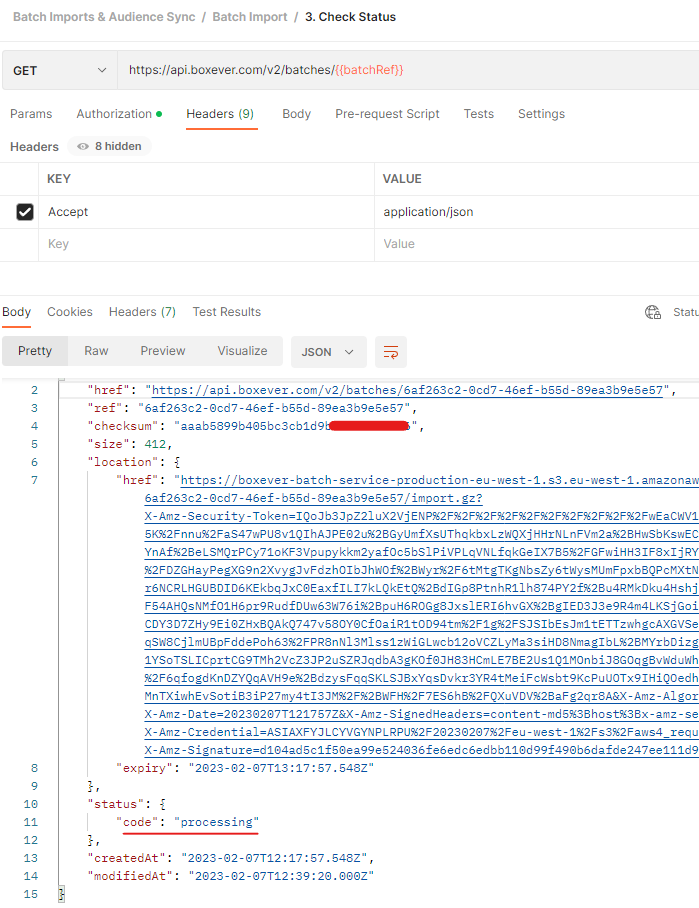
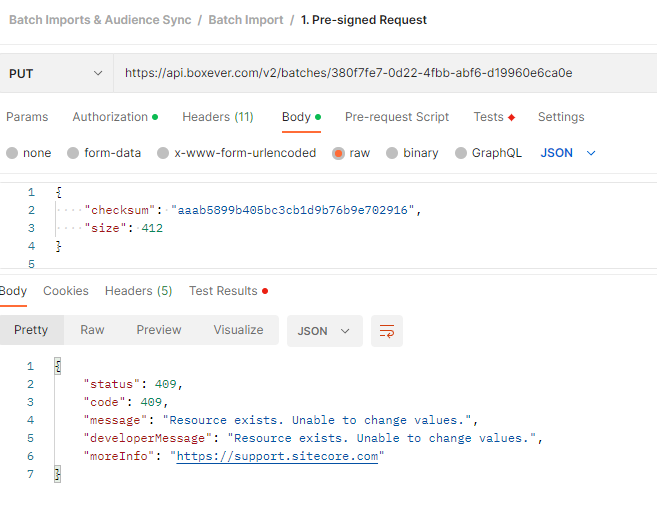
Generate MD5 File Checksum
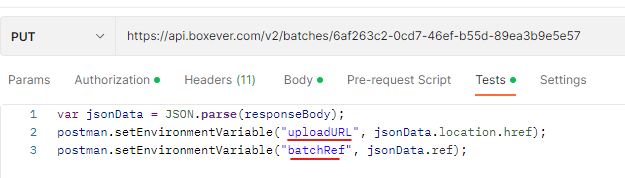
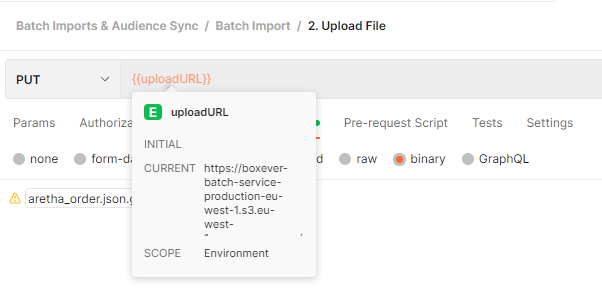
Upload the gzip file to generate the check sum on this url –
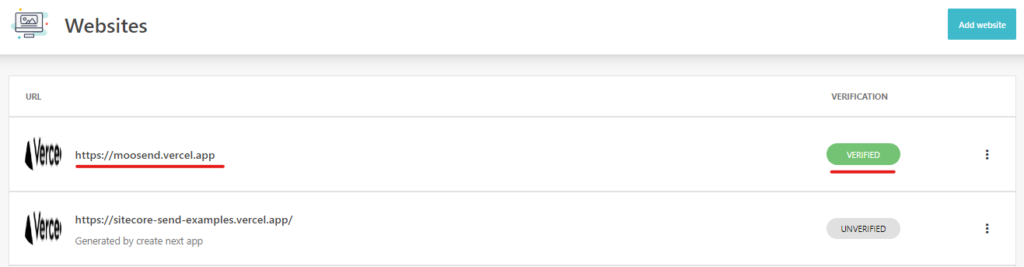
Ensure the website is configured and verified before using the automation. See this blog. For this blog post I am using – https://moosend.vercel.app/
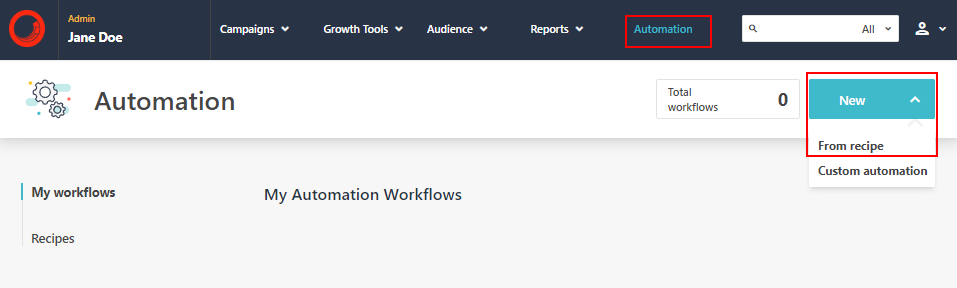
Create automation using Abandoned Cart automation recipe
Navigate to Automation link and create new automation using recipe-
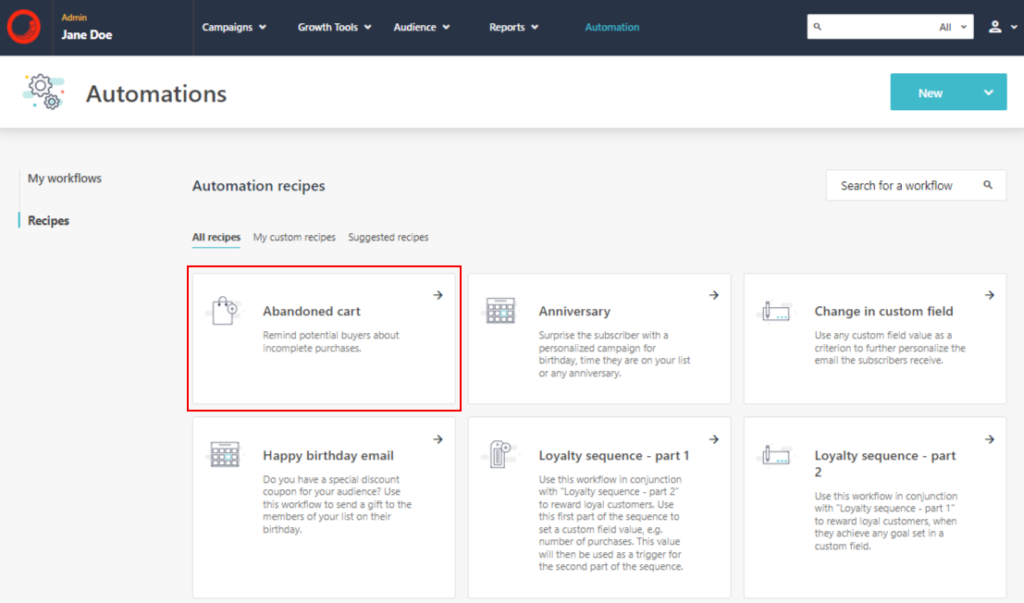
Select Abandoned cart recipes-
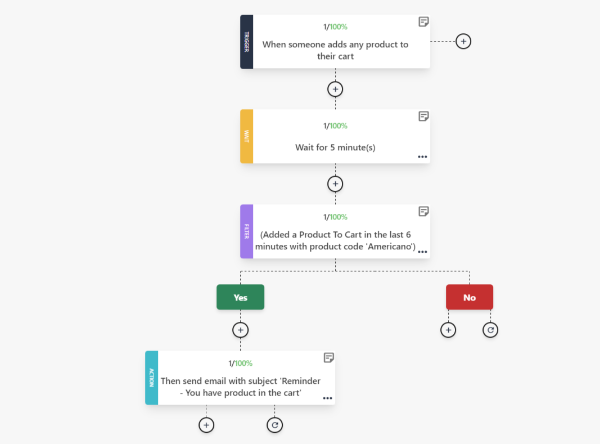
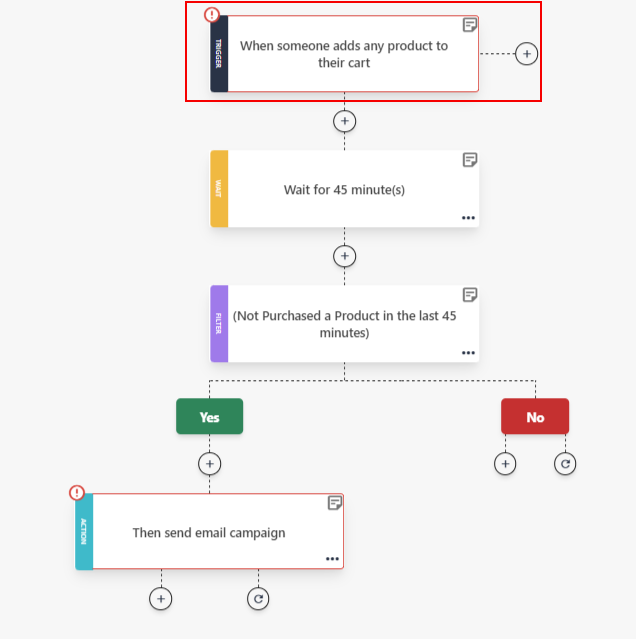
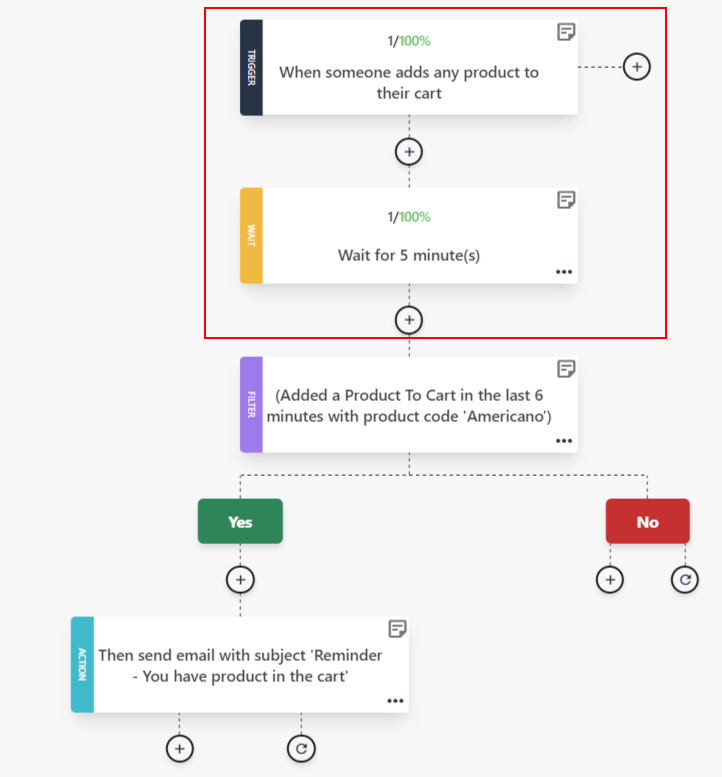
Will be shown the Abandoned Cart Workflow-
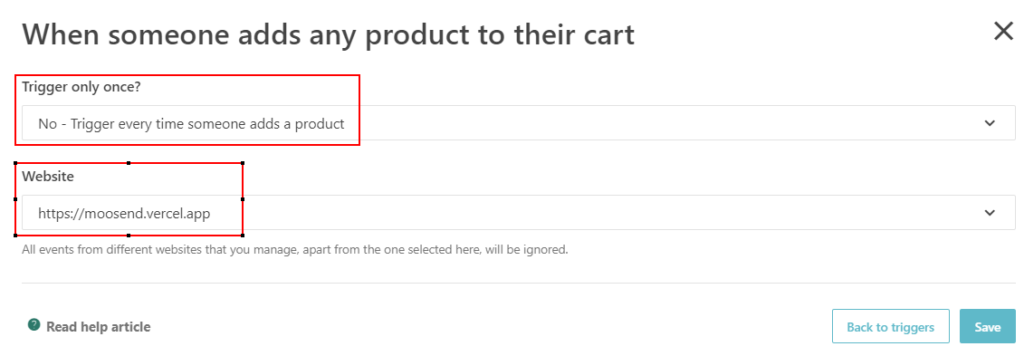
Choose Trigger option-
Select- Trigger every time option
Select your website from dropdown and Save. Only verified website will be visible here. You may also choose all sites.
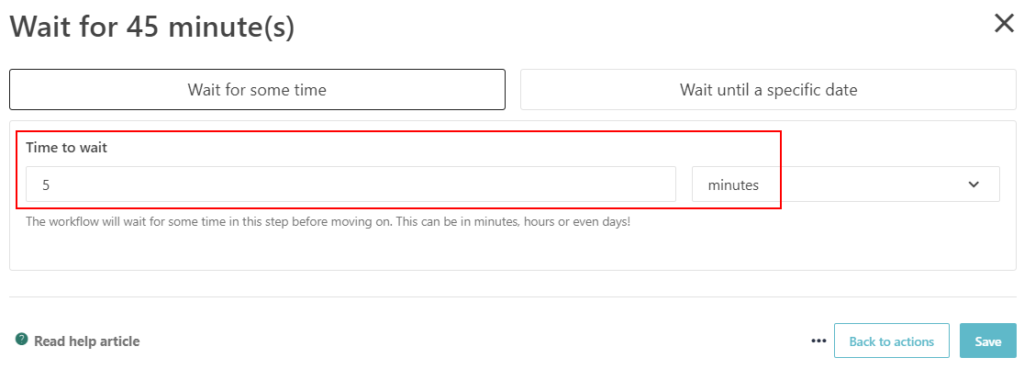
Open wait operation-
For testing I have selected 5 minutes. Ideally this can be few hours/days as per the requirement or enter specific date. By default it is 45 minutes. Enter the wait time and Save.
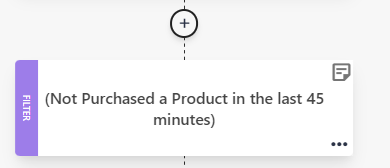
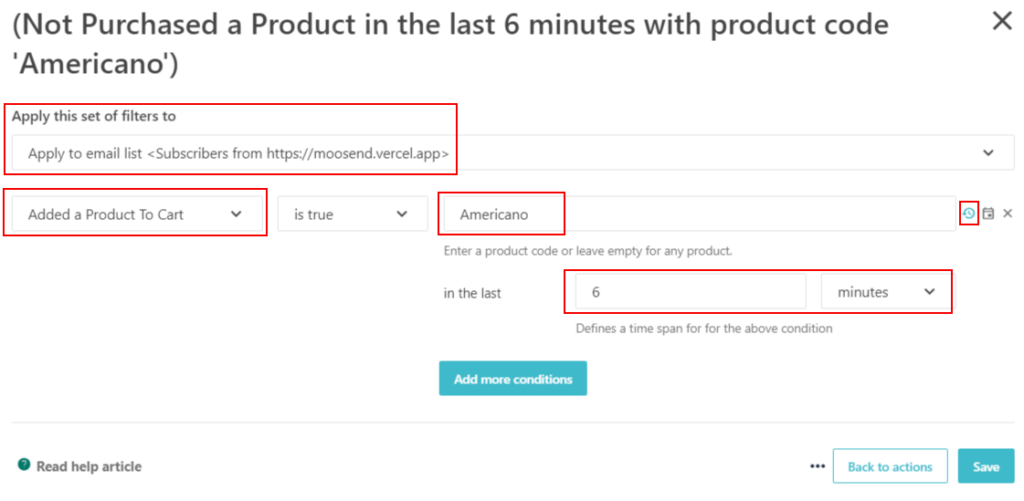
Setup the filter
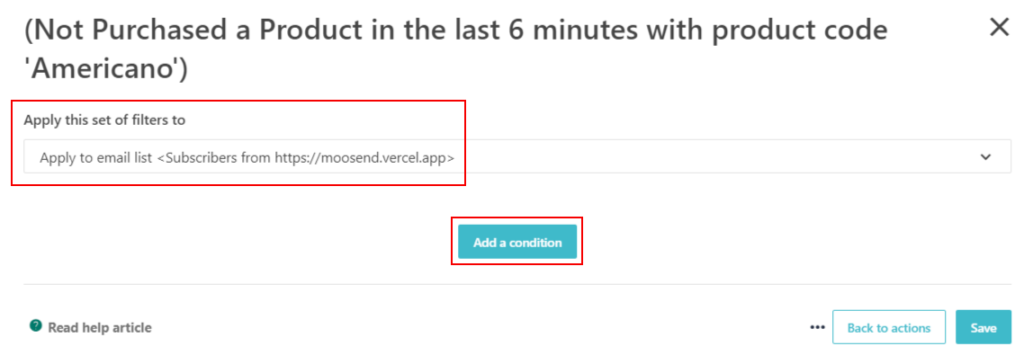
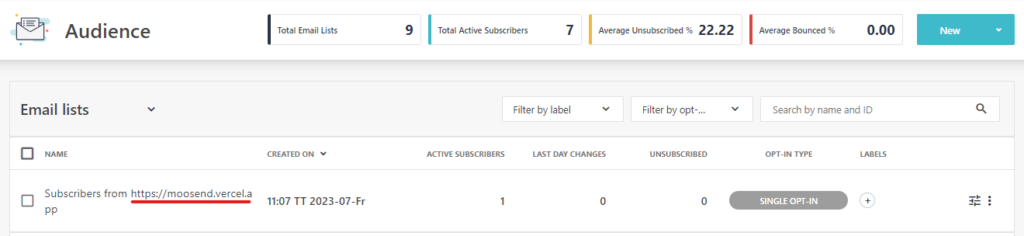
Select apply this filter to mailing list. I have selected the email list of the site, you may select different list.
Enter the product if you wish to or leave empty.
Click on “Add a collection”.
Select the time if the product is not purchased for certain time. I have entered 6 minutes. Enter the details and Save.
Select “Added a Product To Cart” and filter value. In this I have added product “Americano”.
Select timer and enter the wait time to 6 minutes and Save
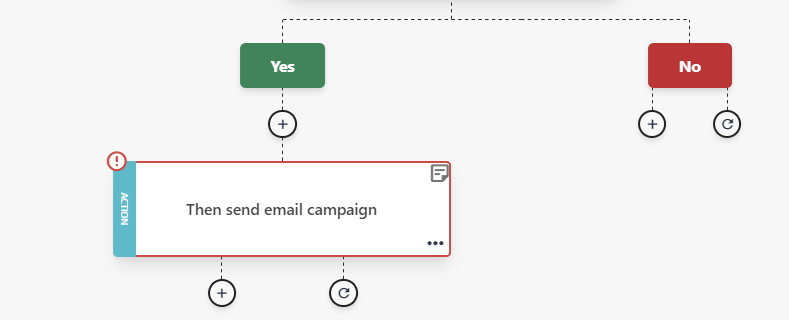
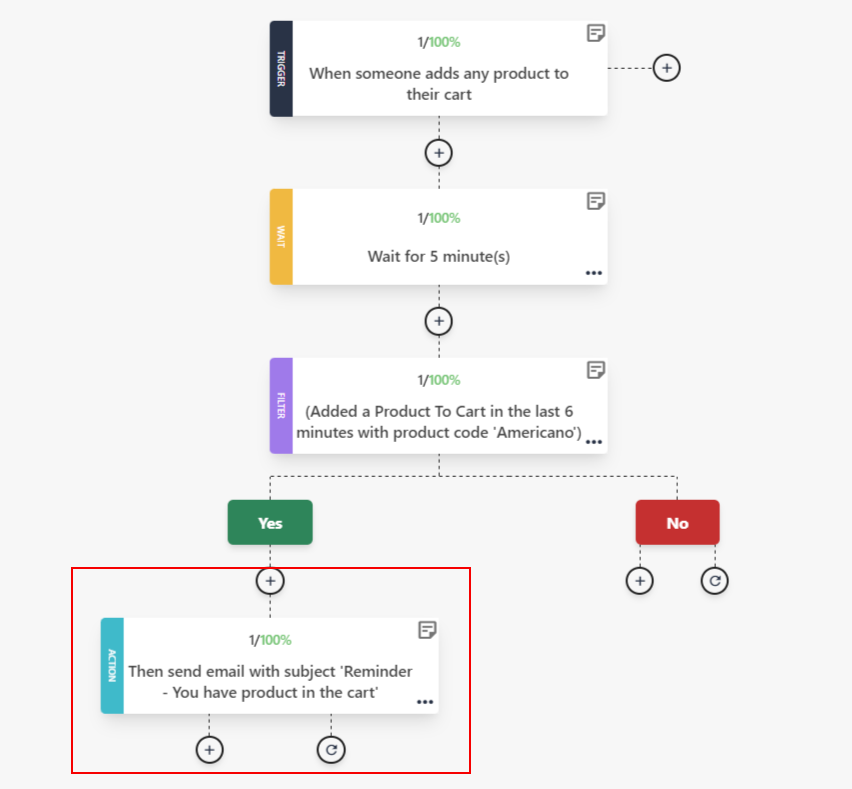
Select the action
In this case Send the mail to user if the product is not purchased in selected time.
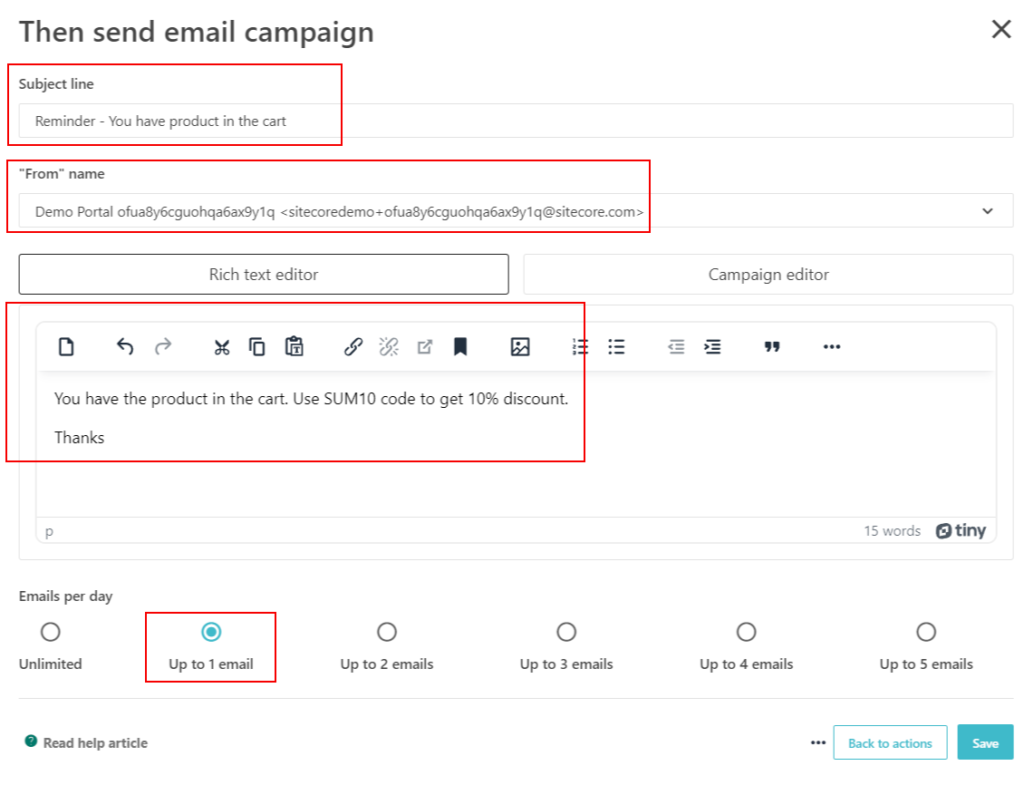
Select Send Mail campaign-
Enter the subject, From address, mail body. Select Emails per day. Save once this option is filled.
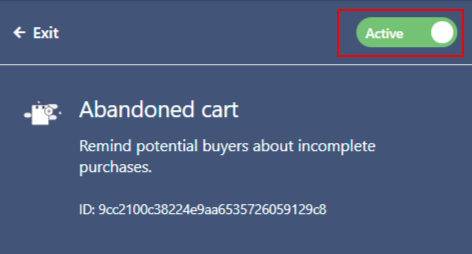
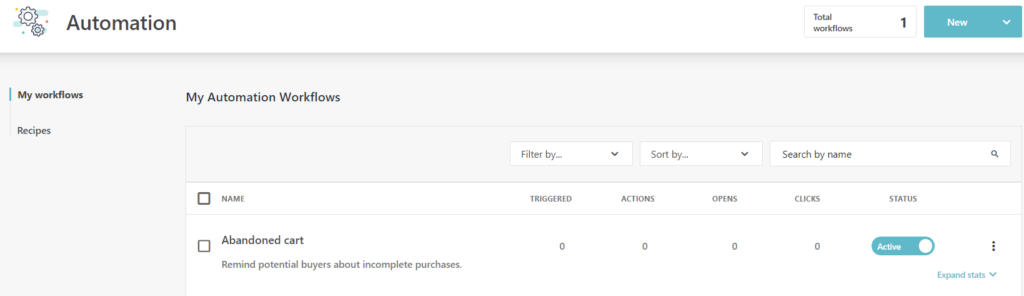
Activate the “Abandoned Cart” automation-
Automation List with activated
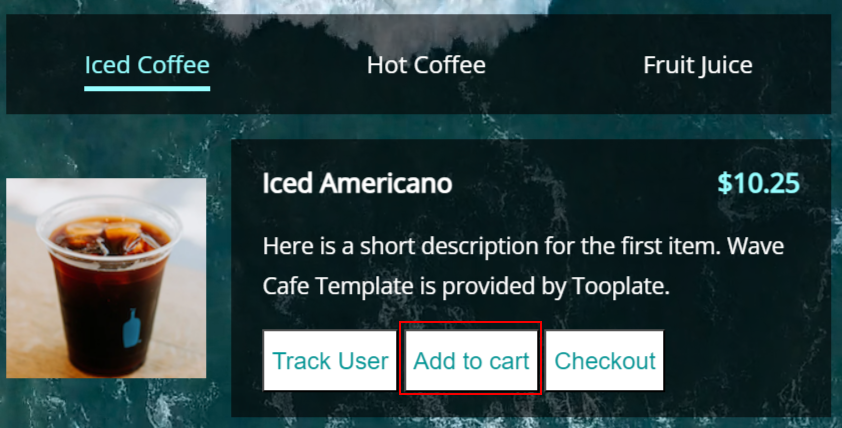
Once the automation configuration is complete will now add product to cart. the product name here is “Americano” as selected in filter.
In the installation script you can find the details on how to add the product to cart.
function addToCart(){
// mandatory - a unique code for the product, like its SKU
var itemCode = 'Americano';
// mandatory - the name / title of this product
var itemName = 'Iced Americano';
// mandatory - the image url of this product
var itemImage = 'http://your.store/product-color-blue.jpg';
// mandatory - the price of this product
var itemPrice = 10.25;
// mandatory - the url to get to the relevant product page
var itemUrl = 'http://your.store/product-101';
// mandatory
var itemQuantity = 1;
// mandatory - the total price for purchasing the given quantity of this product
var itemTotalPrice = 10.25;
// optional - the category of this product
var itemCategory = 'Drinks';
// optional - the manufacturer, brand name or company / owner of this product (if any)
var itemManufacturer = 'Acme Co';
// optional - the supplier of this product (if any)
var itemSupplier = 'Supplier Co';
// you can add custom properies and later use them in segmentations or automations
// You can track things like the color or the sze of the t-shirt in this case
var extraProps = {'flavor': 'Chocolate', 'type': 'Iced'};
// Tracking add to cart events with mandatory arguments
mootrack('trackAddToOrder', itemCode, itemPrice, itemUrl, itemQuantity, itemTotalPrice);
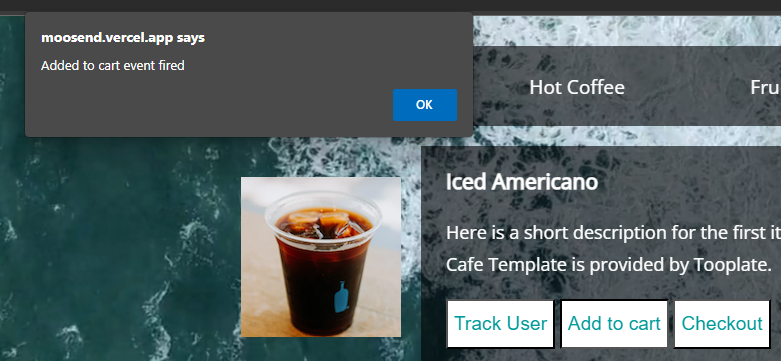
alert("Added to cart event fired");
}
Hook the Add to cart to button-
<button class="button" onclick="addToCart()">Add to cart</button>
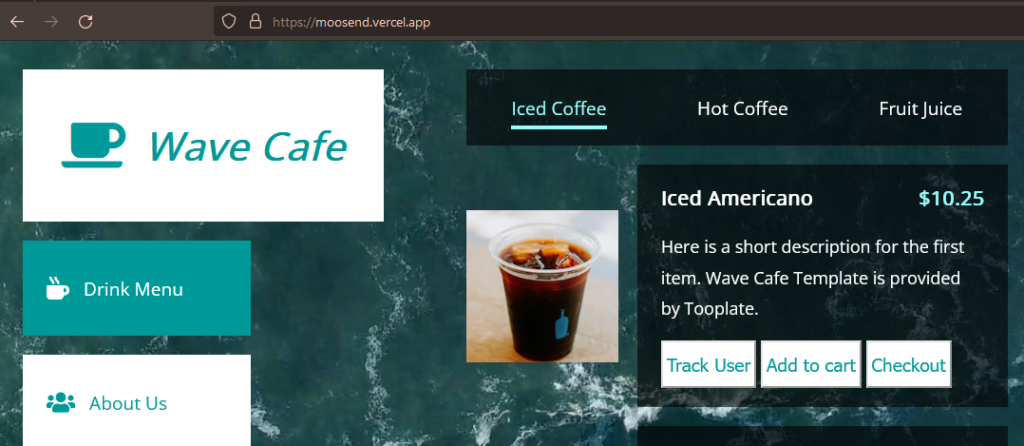
The site looks like this with the “Add To Cart” button
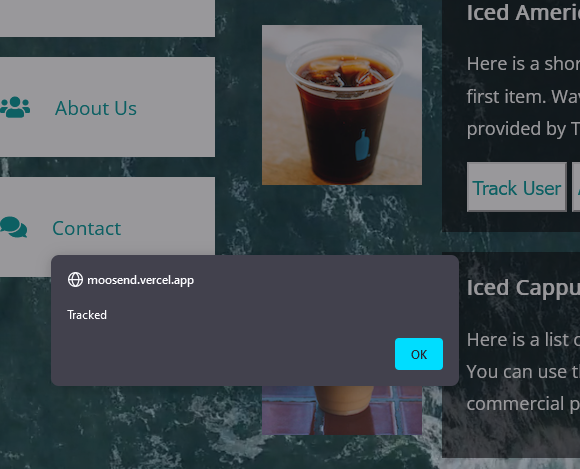
Website confirm the event was triggered.
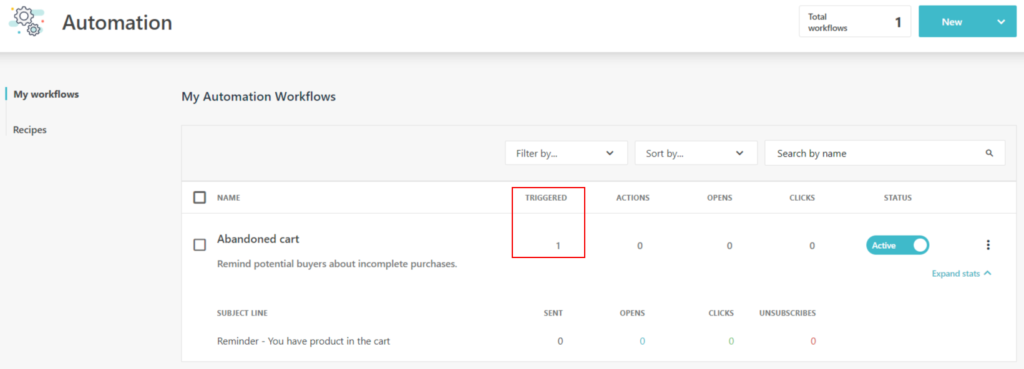
In the automation list you can see the automation been Triggerd-
Once this is triggered you can see the next operation Wait for 5 minutes-
A mail should be triggerd after 6 minutes. Since the product is still in cart and not purchased.
After 5 minutes all the actions should be triggered.
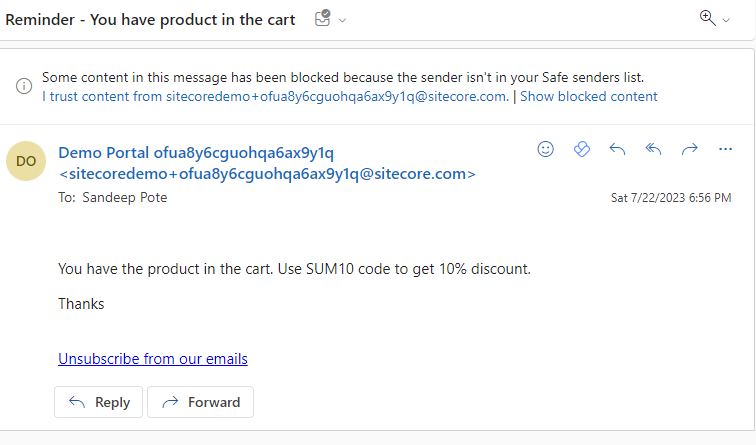
Once all the actions are triggered should receive the mail-
Thats it for this blog. We have managed to trigger a automation event and send themail to the users who have product in the cart and not purchased e.e. Abandoned Cart.
This installation is performed on freshly installed Ubuntu system.
sudo apt update
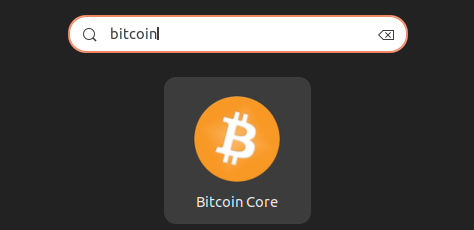
snap install bitcoin-core
This should install Bitcoin Core on Ubuntu machine-
But lets not use GUI for this and setup test node using Bitcoin Daemon.
Bitcoin daemon should be installed in root folder and the executable can be found on this path- /snap/bitcoin-core/141/bin
Use below command to find the version of the daemon-
bitcoin-core.daemon --version
Run command –
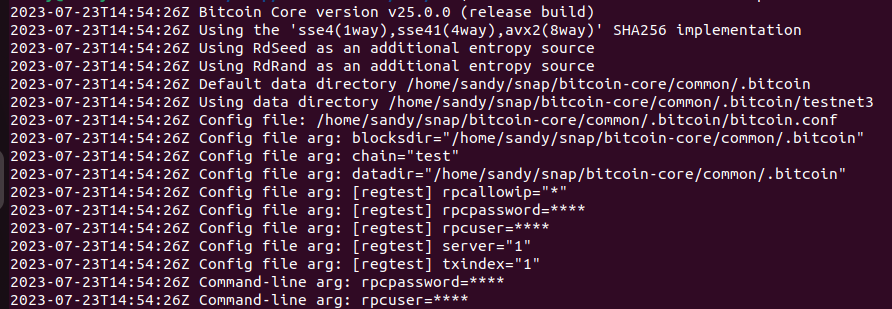
bitcoin-core.daemon
Here the last line its expecting a bitcoin.conf file in location- /home/sandy/snap/bitcoin-core/common/.bitcoin/bitcoin.conf. This oath might be different for you.
Create a bitcoin.conf file at this location and paste in following to configure bitcoin daemon to run in test node.
Set the chain=test
set path to blocksdir and datadir
set txindex=1 to index the transaction
Set rpcuser and rpcpassword to use JSON rpc api
server=1 tells Bitcoin-QT to accept JSON-RPC commands.
# [chain]
# Test Network.
chain=test

# [core]
# Specify a non-default location to store blockchain data.
blocksdir=/home/sandy/snap/bitcoin-core/common/.bitcoin
# Specify a non-default location to store blockchain and other data.
datadir=/home/sandy/snap/bitcoin-core/common/.bitcoin

# Options only for mainnet
[main]

# Options only for testnet
[test]

# Options only for regtest
[regtest]

txindex=1

server=1

rpcuser=your_rpc_user
rpcpassword=your_rpc_pwd

rpcallowip=*
-txindex Maintain a full transaction index, used by the getrawtransaction rpc call (default: 0)
-rpcpassword= Password for JSON-RPC connections
-rpcuser= Username for JSON-RPC connections
Run following command to run the daemon in test node. This will download the data which is around 29gb at the time of writing this blog.
This should now start the daemon and will check if the data is available, if not this should start download the blocks.
First it wll pre-Synchronize the block headers and then start Synchronizing headers. At the time of writing this blog there are around 2428000 blocks in test node.
Once synchronizing is complete it should start downloading and indexing blocks-
Here the height is the block it has synchronised and the progress. When the progress is near to 1 it will come to completion of synchronising the node.
In the above example 0000000000002f4ee789f0bd19066bccd78172ca71995505996fbff1a3341eac is a block hash
progress when near to 1 means it about to complete synchronising all blocks.
A new folder called testnet3 will be created in .bitcoin folder – This should be in user folder and not root folder.
For me it took less than 2 hours to sync all blocks.
2023-07-23T16:55:23Z UpdateTip: new best=0000000000000022020dfc2655e4489eb54a8ae306080a47d1fa0be46e0c43a8 height=2443382 version=0x31636000 log2_work=75.416383 tx=66092181 date='2023-07-23T16:40:35Z' progress=0.999999 cache=479.2MiB(3458766txo)
2023-07-23T16:56:04Z New outbound peer connected: version: 70015, blocks=2443382, peer=76 (block-relay-only)
2023-07-23T17:00:42Z Saw new header hash=0000000000001019c41ee044adf1c02d347ed52d875eefeb8e629f0a5baa4a8b height=2443383
2023-07-23T17:00:42Z [net] Saw new cmpctblock header hash=0000000000001019c41ee044adf1c02d347ed52d875eefeb8e629f0a5baa4a8b peer=3
2023-07-23T17:00:42Z UpdateTip: new best=0000000000001019c41ee044adf1c02d347ed52d875eefeb8e629f0a5baa4a8b height=2443383 version=0x29e7a000 log2_work=75.416383 tx=66092225 date='2023-07-23T17:00:37Z' progress=1.000000 cache=479.2MiB(3458790txo)
The last block to sync was 2443382
It also listens to any new block been created on chain- 2443383 which happened after 5 minutes. See highlighted.
This confirms that the blocks are indexed as the getrawtransaction looks for node and not your own wallet transaction.
How to get transaction details will put that in another blog.
Hope this helps to configure full test node on your system.
Performance–
To run the daemon blockonly option –
bitcoind -daemon -blocksonly
.By default, bitcoind relays transactions while you’re syncing and using -blocksonly turns that off. It probably won’t make a huge difference but should save you some bandwidth.
Increase dbcache
-dbcache= The default for this is 450. If you have 8GB of RAM, you could set this to 4096
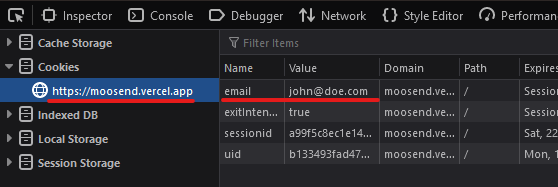
Sitecore Send website tracking service enables to collect data and makes it available for users. It uses cookie-based technology to track data on end-user page visits, product view, add to cart and purchase.
Add website to Sitecore Send
Pre-requisite-
You need to have a website up and running. this can be a simple HTML site or you can choose any other web techology with any Fronetend framework like nextjs, react or jquery etc.
I have created a simple site and hosted using vercel – e.g.:- https://moosend.vercel.app/
To add a website to Sitecore Send –
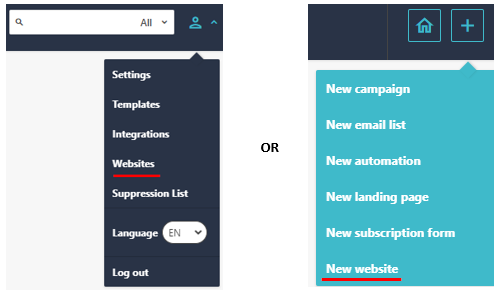
Navigate to Account –> Websites or New Website option
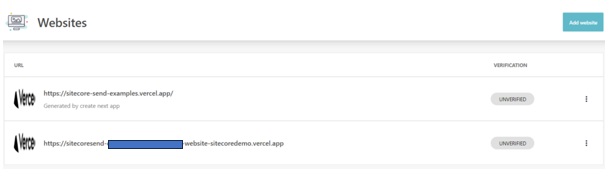
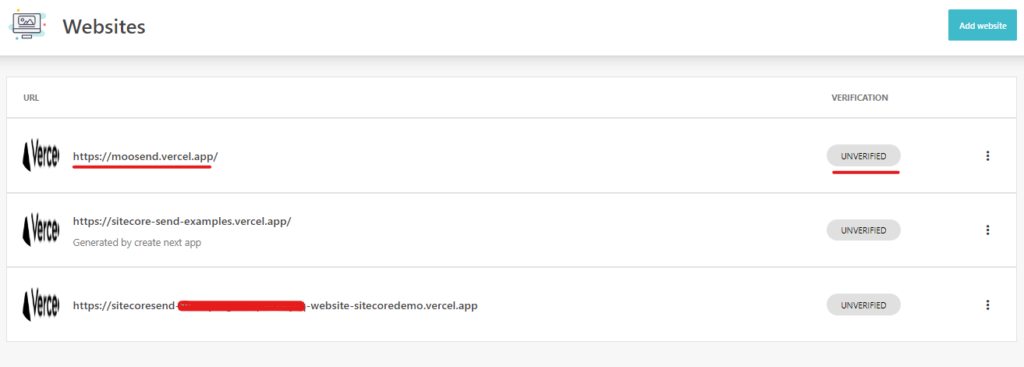
List of Websites-
Should display list of Websites already configured and if its verified.
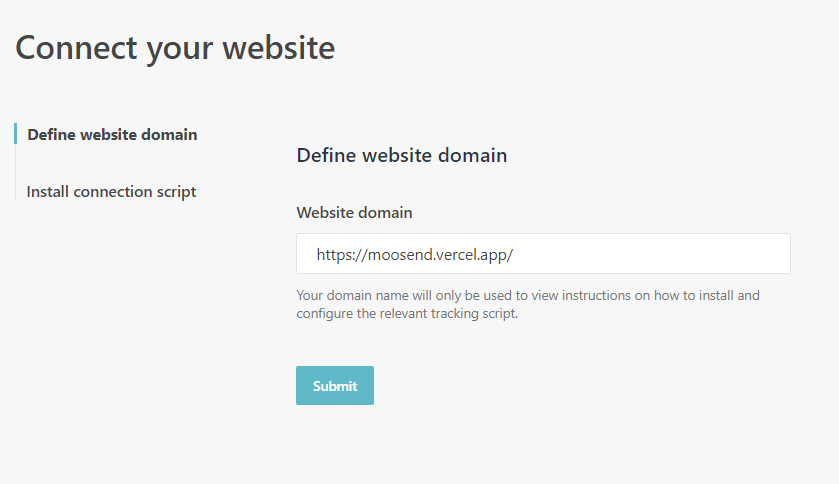
Add Website-
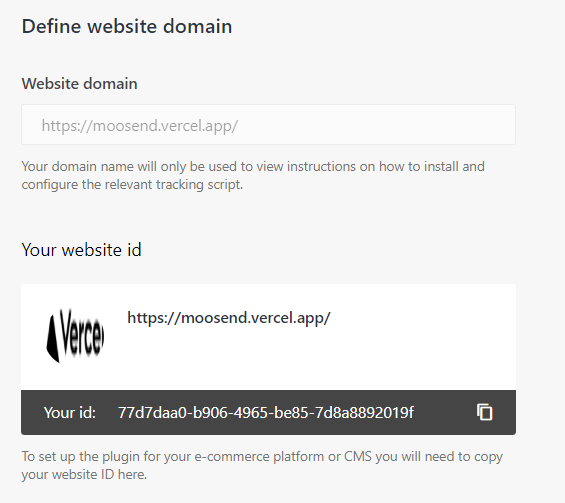
On this page enter your website url- https://moosend.vercel.app/
Once this is submitted it should show the Website Id alond with Connection Script. Website Id is required to add this in script to start tracking.
The website list should show the newly added website which should be in unverfied state-
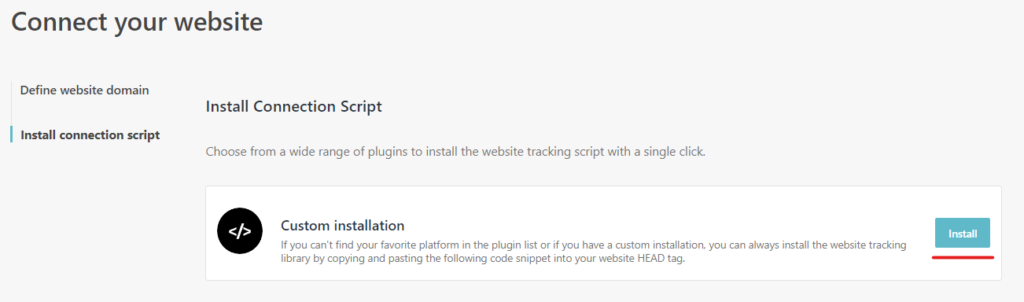
Connect Website
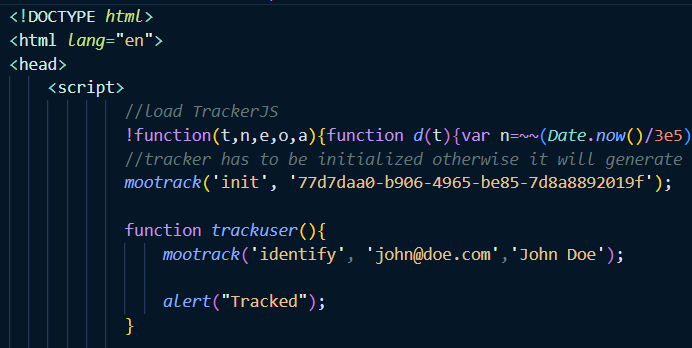
Navigate to Install connection script option. Install button should show the script that is require to add to your website
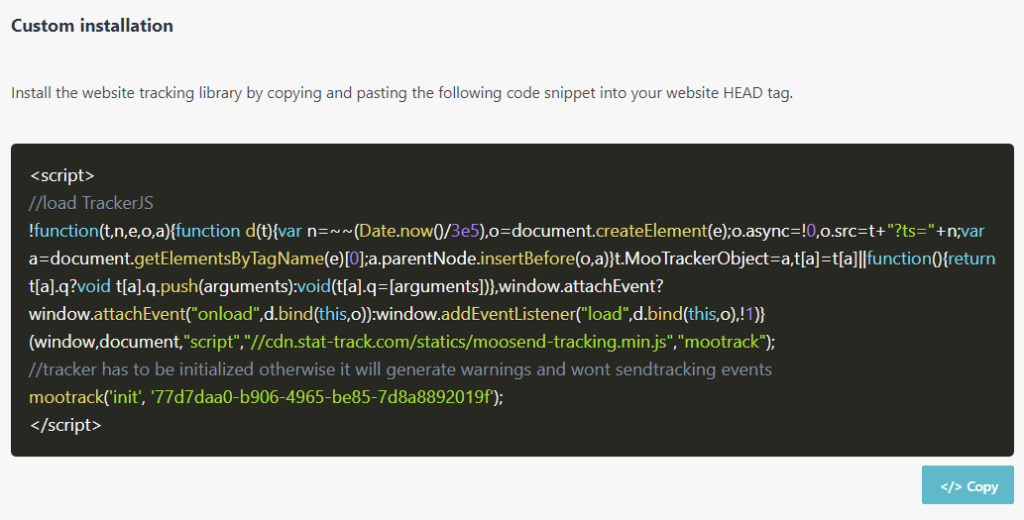
Copy this script to you website head section, this may be different for you site –
Add the Product details the user must have added in cart and send the below request to Sitecore CDP.
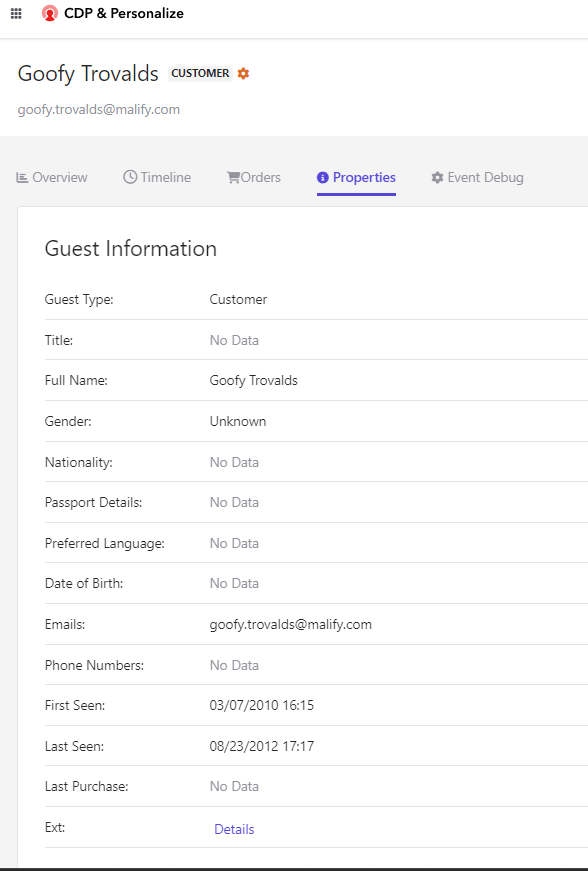
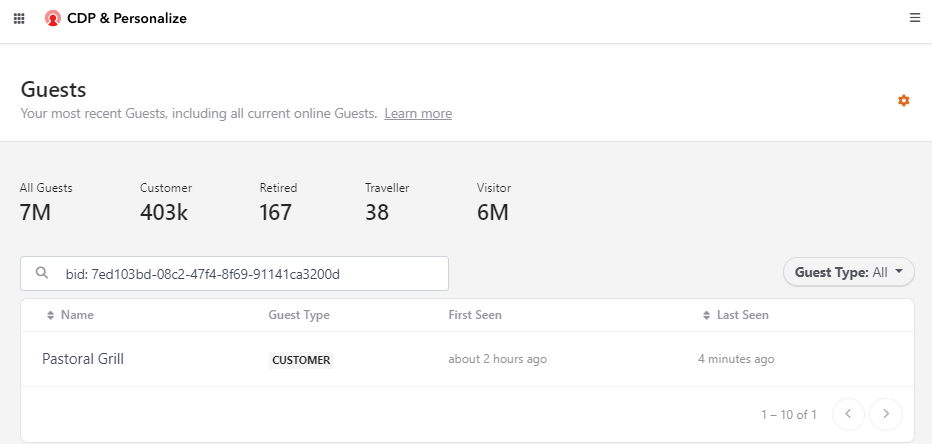
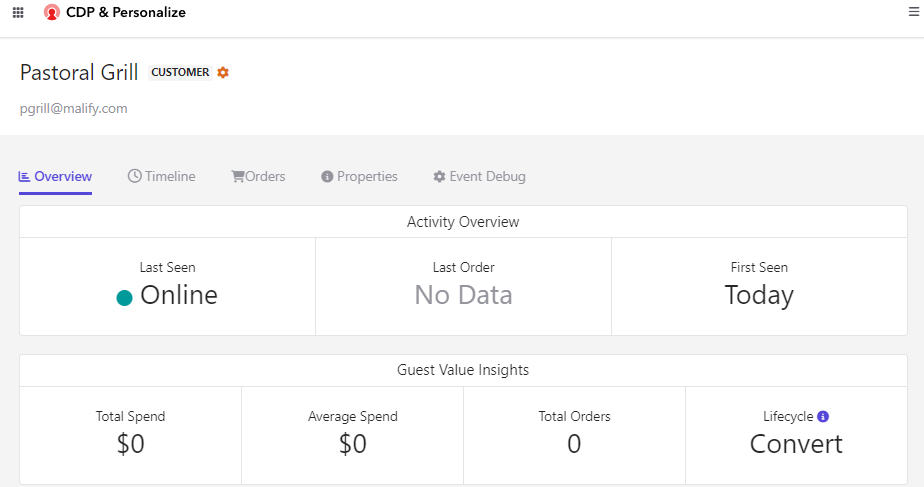
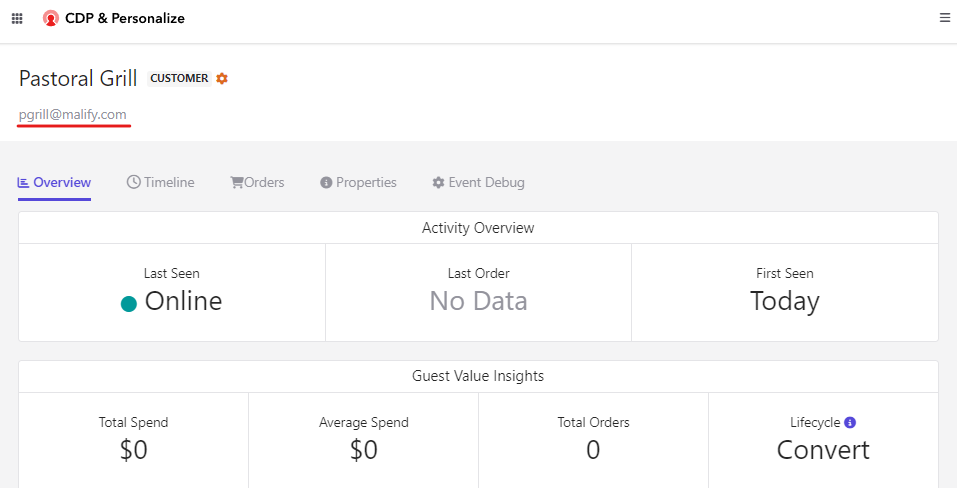
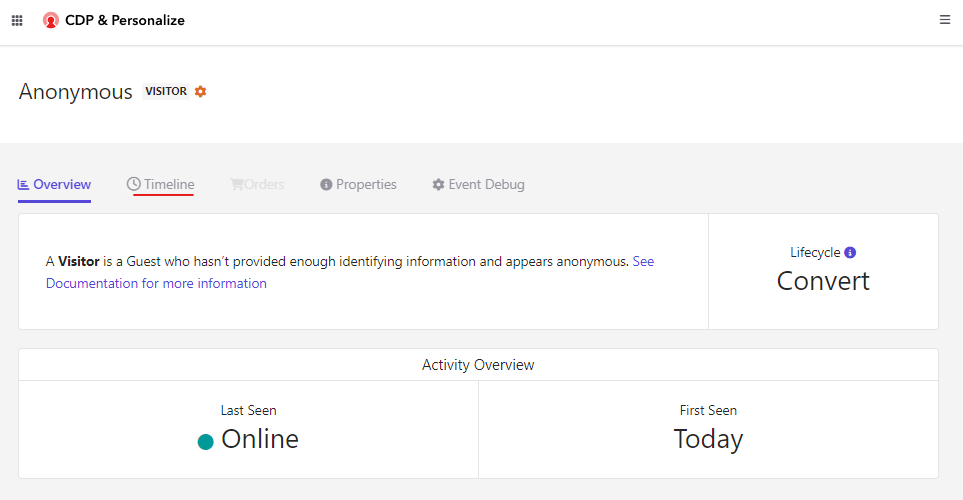
At this point the Guest must have been identified as the Customer. Search Customer by browserid or Name.
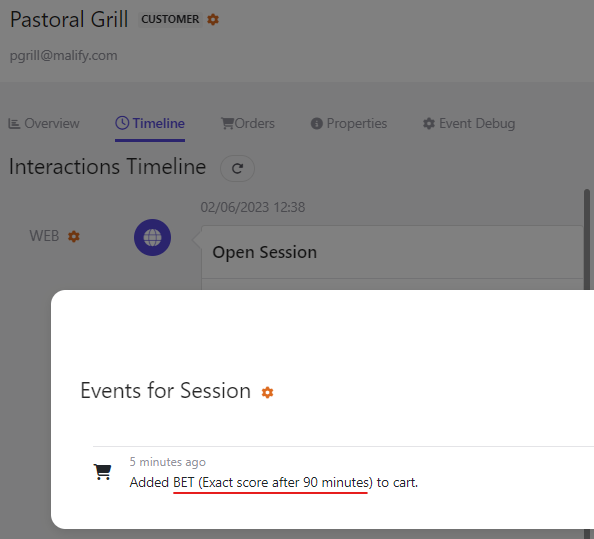
Should the current activity of the customer.
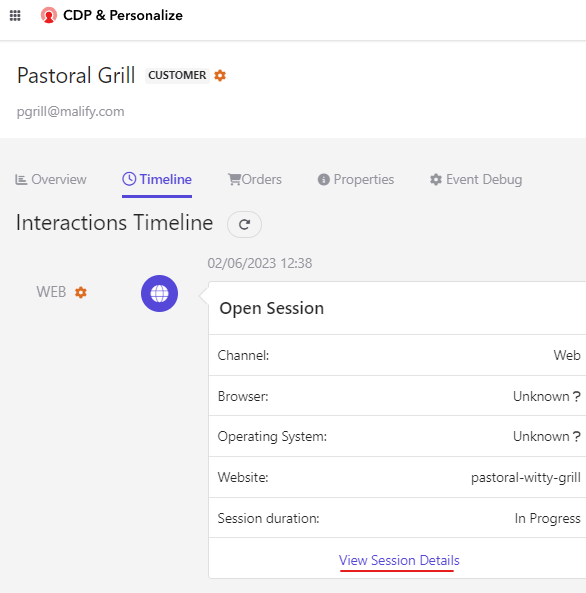
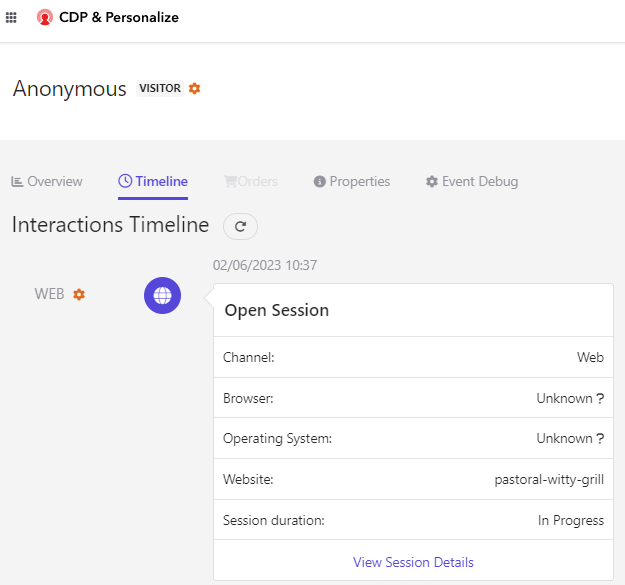
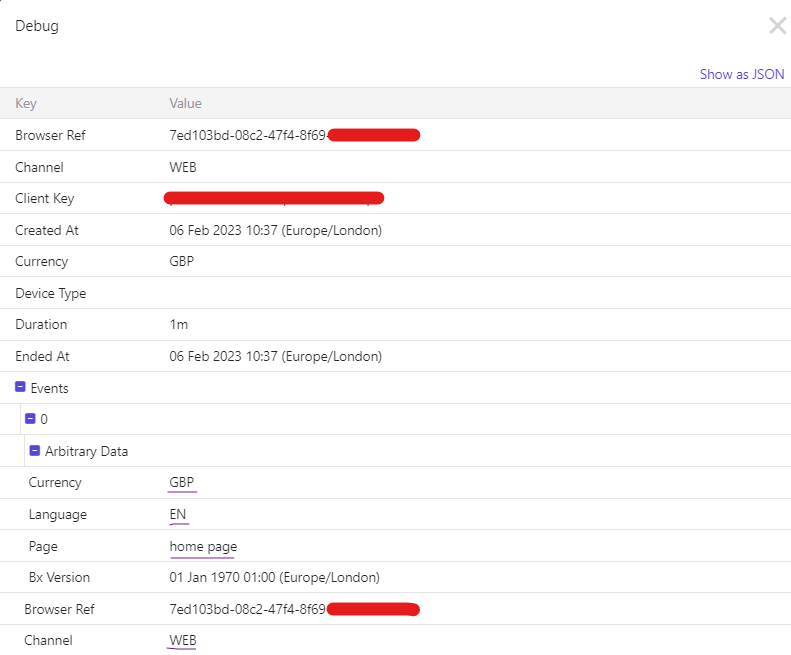
Click on Timeline and View Session details
The session should show the product been added to the cart. Based on this if the product remains in cart for certain time and the user doen’t checkout you may provision to trigger abandon cart event.
cURL code snippet-
curl --location -g --request GET 'https://api.boxever.com/v1.2/event/create.json?client_key=<<Client Key>>&message={"channel":"WEB","type":"CONFIRM","language":"EN","currency":"GBP","page":"home page","pos":"pastoral-witty-grill","browser_id":"7ed103bd-08c2-47f4-8f69-91141ca3200d","product":[{"item_id":"EXACT_90"}]}'
C# code snippet-
var client = new RestClient("https://api.boxever.com/v1.2/event/create.json?client_key=<<Client Key>>&message={\"channel\":\"WEB\",\"type\":\"CONFIRM\",\"language\":\"EN\",\"currency\":\"GBP\",\"page\":\"home page\",\"pos\":\"pastoral-witty-grill\",\"browser_id\":\"7ed103bd-08c2-47f4-8f69-91141ca3200d\",\"product\":[{\"item_id\":\"EXACT_90\"}]}");
client.Timeout = -1;
var request = new RestRequest(Method.GET);
IRestResponse response = client.Execute(request);
Console.WriteLine(response.Content);
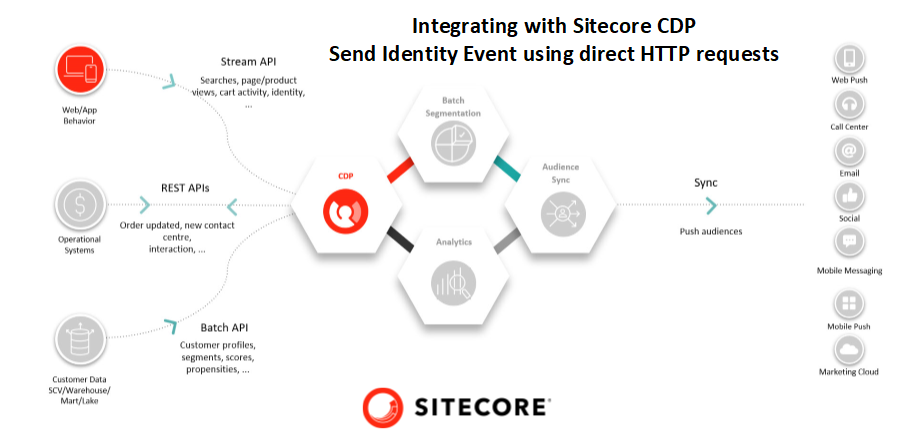
An IDENTITY event contains data that enables Sitecore CDP to perform identity resolution. When Sitecore CDP receives an IDENTITY event, it runs a linking algorithm to try to match guest data from separate guest profiles, based on your organization’s identity rules.
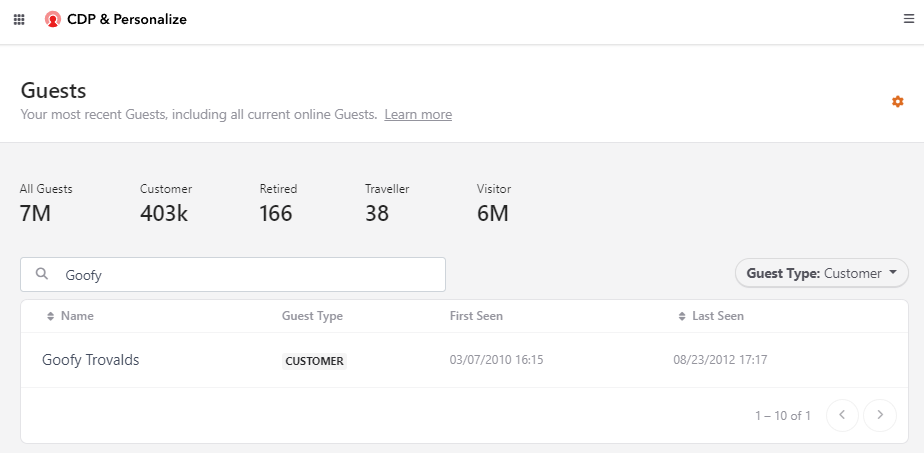
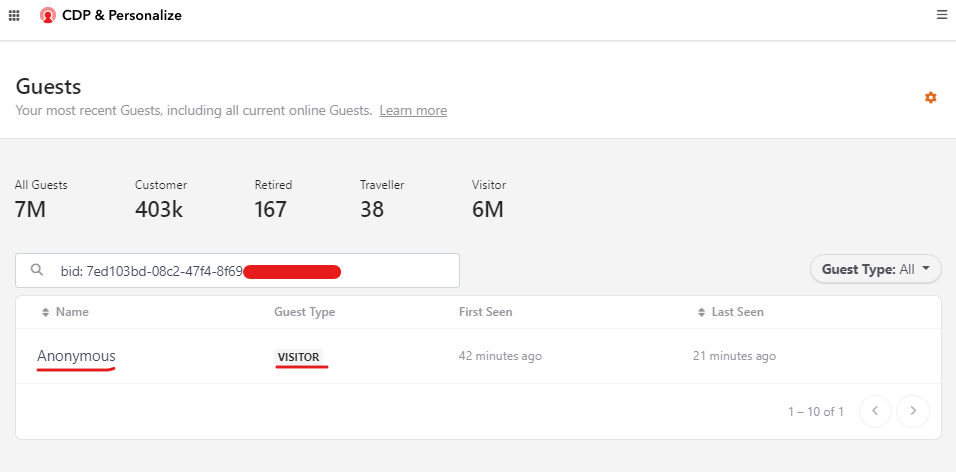
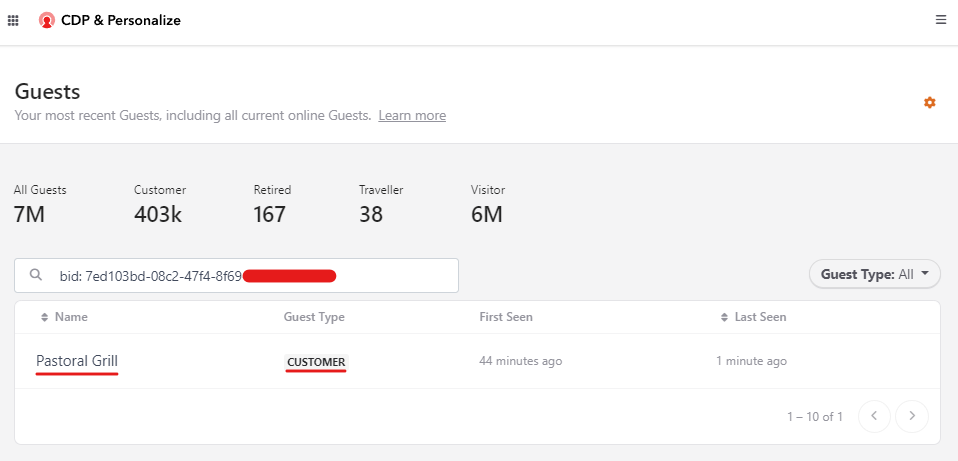
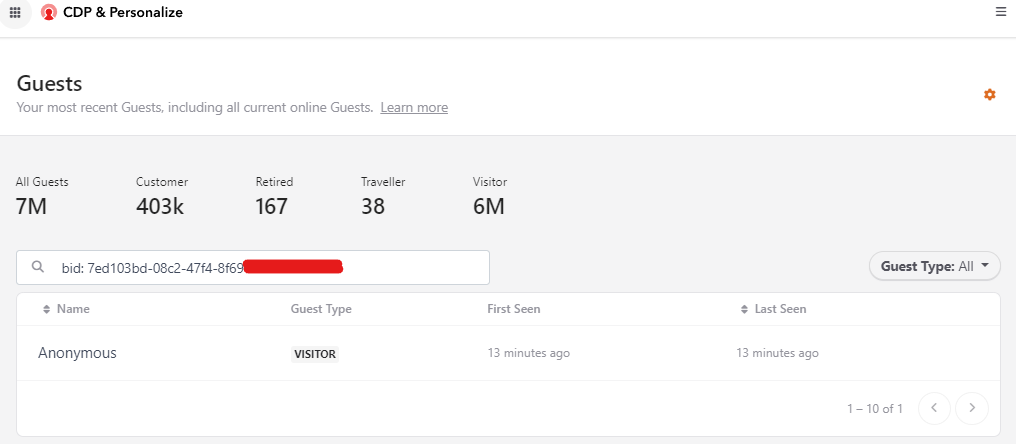
A guest is identified with the browser id. To search the guest Navigate to the Guest list page and search for the guest with the browwser id.
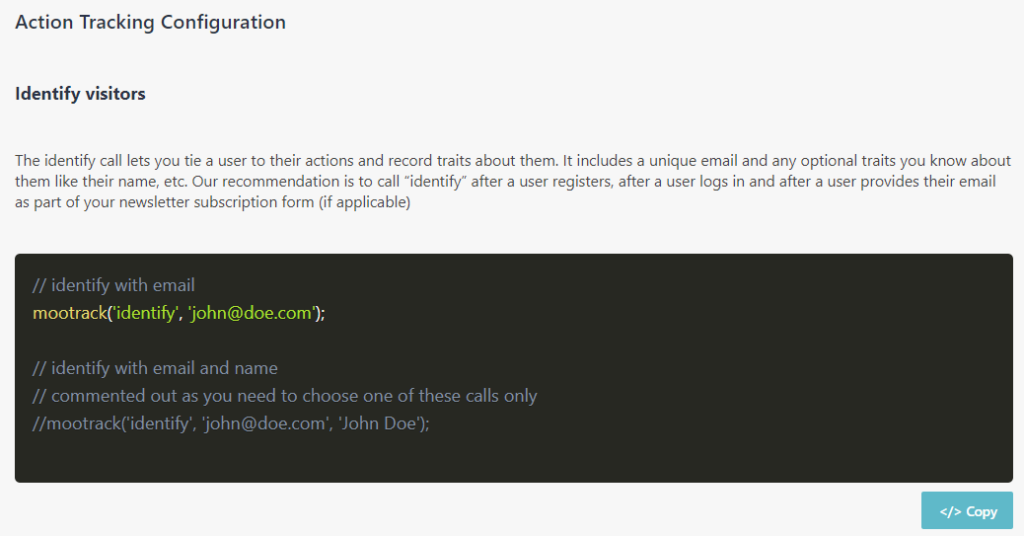
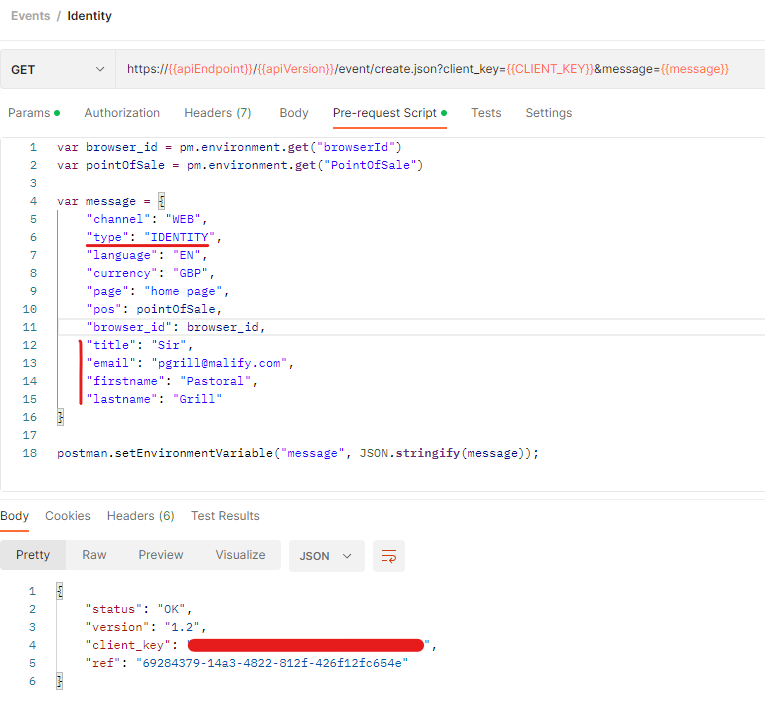
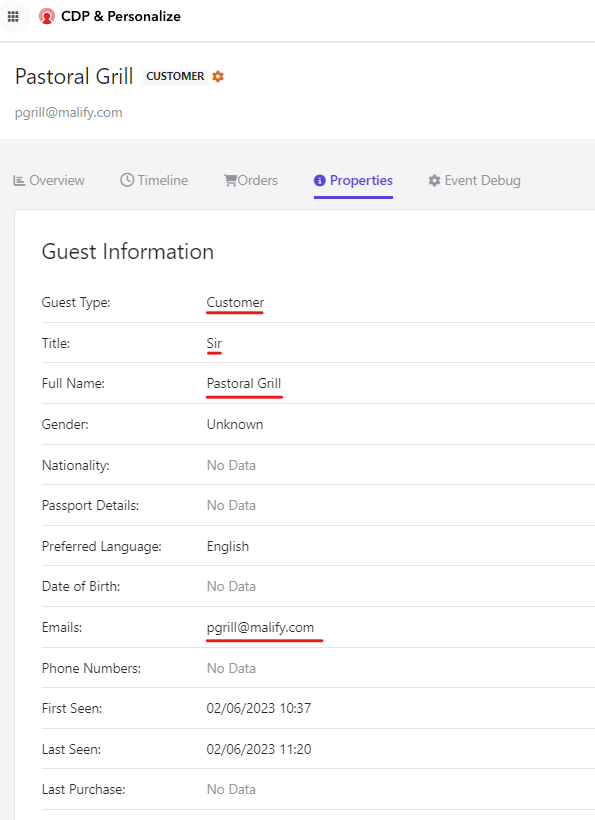
To identify the guest as a Customer provide the payload with the type as IDENTITY and the Customer details, such as their email, firstname, lastname etc.
Now search the Guest by browserid and the Gust Type should be Customer as the Guest has been identified.
CURL code snippet-
curl --location -g --request GET 'https://api.boxever.com/v1.2/event/create.json?client_key=<<client key>>&message={"channel":"WEB","type":"IDENTITY","language":"EN","currency":"GBP","page":"home page","pos":"pastoral-witty-grill","browser_id":"7ed103bd-08c2-47f4-8f69-91141ca3200d","title":"Sir","email":"pgrill@malify.com","firstname":"Pastoral","lastname":"Grill"}'
C# code snippet-
var client = new RestClient("https://api.boxever.com/v1.2/event/create.json?client_key=<<code key>>&message={\"channel\":\"WEB\",\"type\":\"IDENTITY\",\"language\":\"EN\",\"currency\":\"GBP\",\"page\":\"home page\",\"pos\":\"pastoral-witty-grill\",\"browser_id\":\"7ed103bd-08c2-47f4-8f69-91141ca3200d\",\"title\":\"Sir\",\"email\":\"pgrill@malify.com\",\"firstname\":\"Pastoral\",\"lastname\":\"Grill\"}");
client.Timeout = -1;
var request = new RestRequest(Method.GET);
IRestResponse response = client.Execute(request);
Console.WriteLine(response.Content);
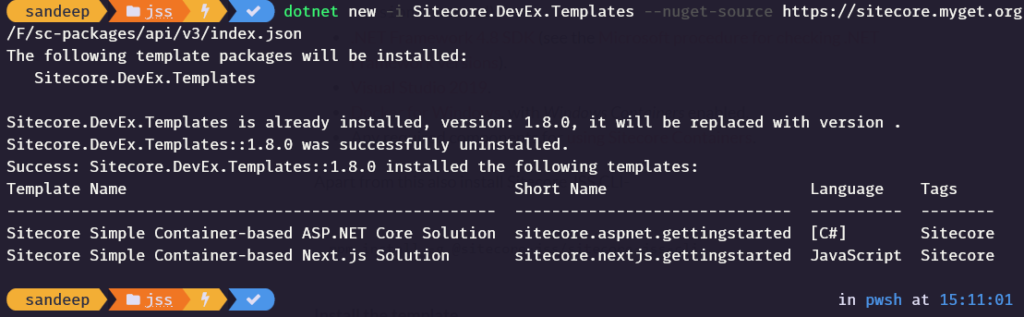
dotnet new -i Sitecore.DevEx.Templates --nuget-source https://sitecore.myget.org/F/sc-packages/api/v3/index.json
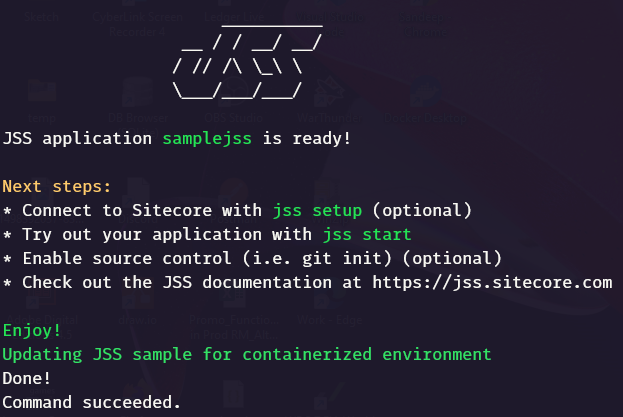
dotnet new sitecore.nextjs.gettingstarted -n samplejss
Should first Restores dotnet local tools for the solution and Initializes the JSS project
What is your Sitecore hostname (used if deployed to Sitecore)? (samplejss.dev.local) << leave blank or provide the host name>>

How would you like to fetch Layout and Dictionary data?
GraphQL
REST

How would you like to prerender your application?
SSG
SSR

Which additional language do you want to support (en is already included and required)? << leave blank or type the language you want. should select da-DK by default and additional language>>
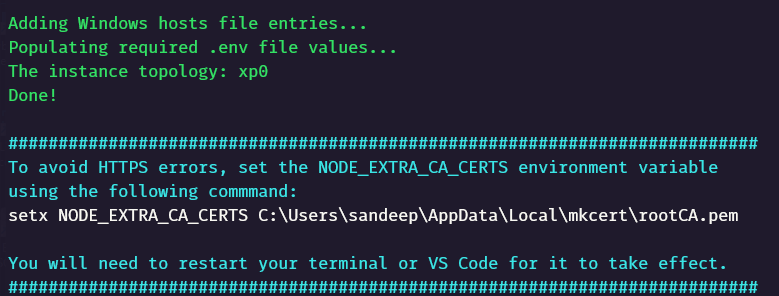
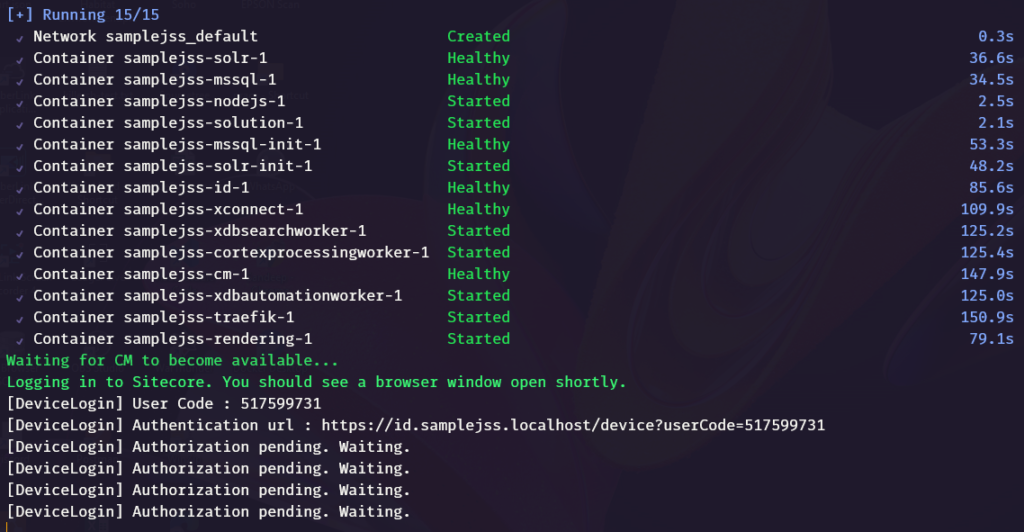
JSS application is now ready and updated for continerized environment.
Navigate to project folder and initialize the environment.
Working on Linux system after been worked on Windows for 2 decades is always fun.
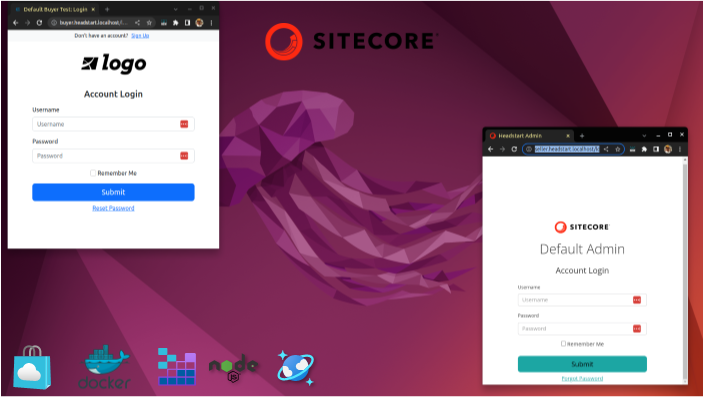
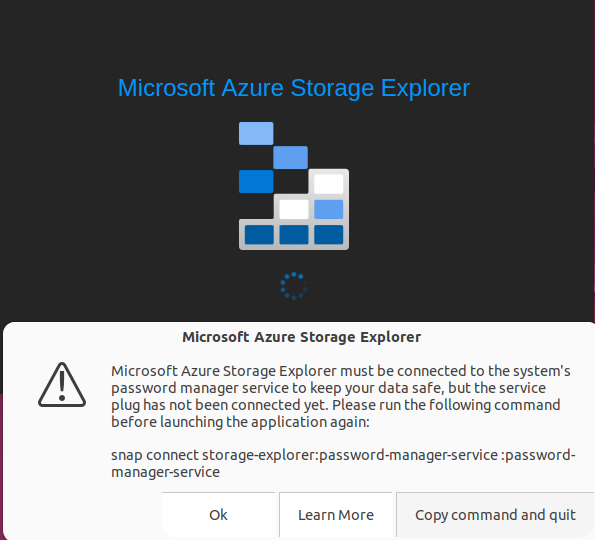
This blog post is to setup the Sitecore OrderCloud Headstart on Ubuntu the Docker way. As all the images used for the Headstart is are Linux based, this I didn’t find major difference how this is been setup in Windows system apart from few changes while installing Storage Explorer and few other erros which I have noted in this blog post.
Note – use sudo for each command or “sudo i”to run as root.
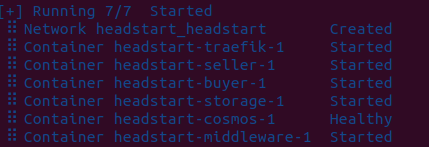
Lets start composing and solve errros that might come ourr way-
sudo docker-compose up -d
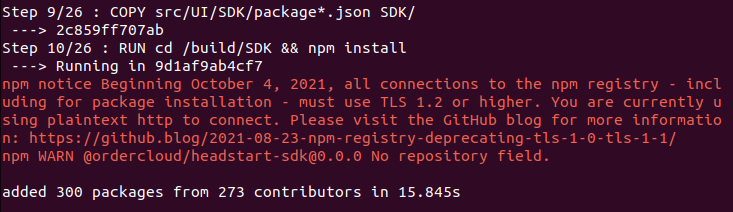
npm needs TLS1.2
npm notice Beginning October 4, 2021, all connections to the npm registry – including for package installation – must use TLS 1.2 or higher. You are currently using plaintext http to connect. Please visit the GitHub blog for more information: https://github.blog/2021-08-23-npm-registry-deprecating-tls-1-0-tls-1-1/ npm WARN @ordercloud/headstart-sdk@0.0.0 No repository field.
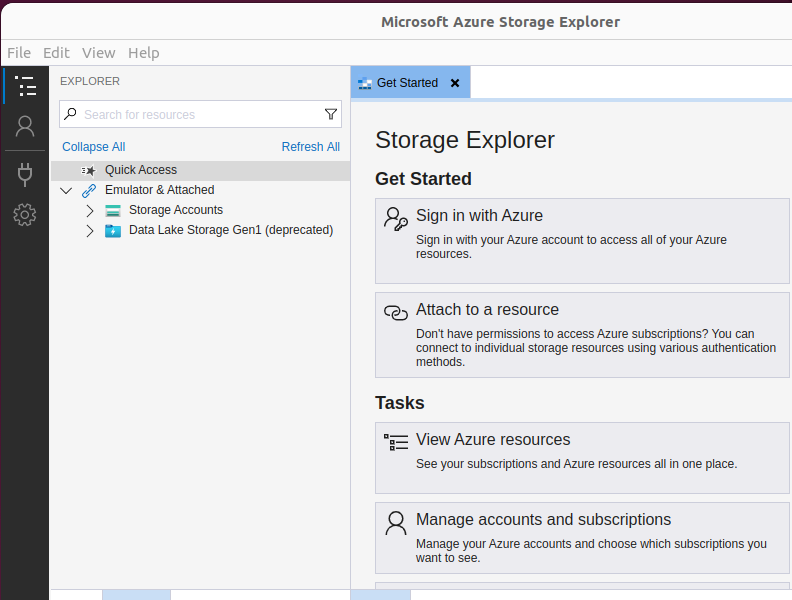
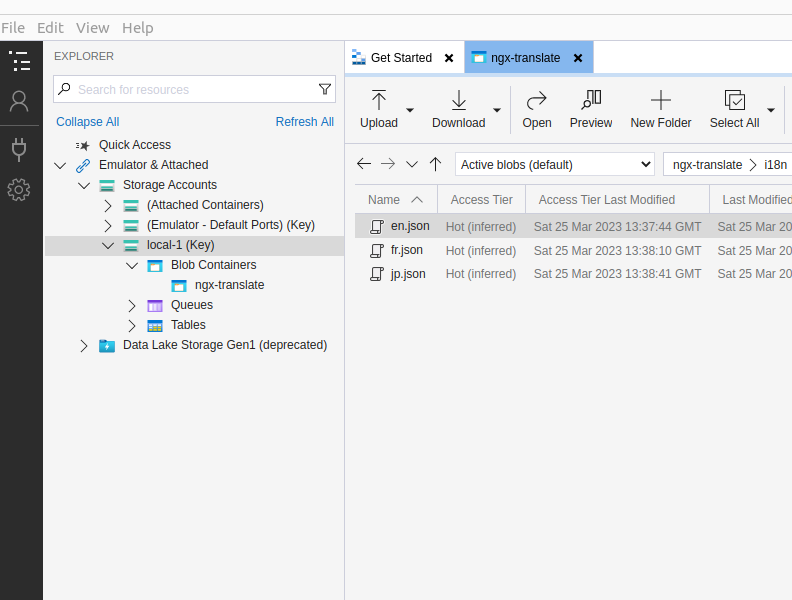
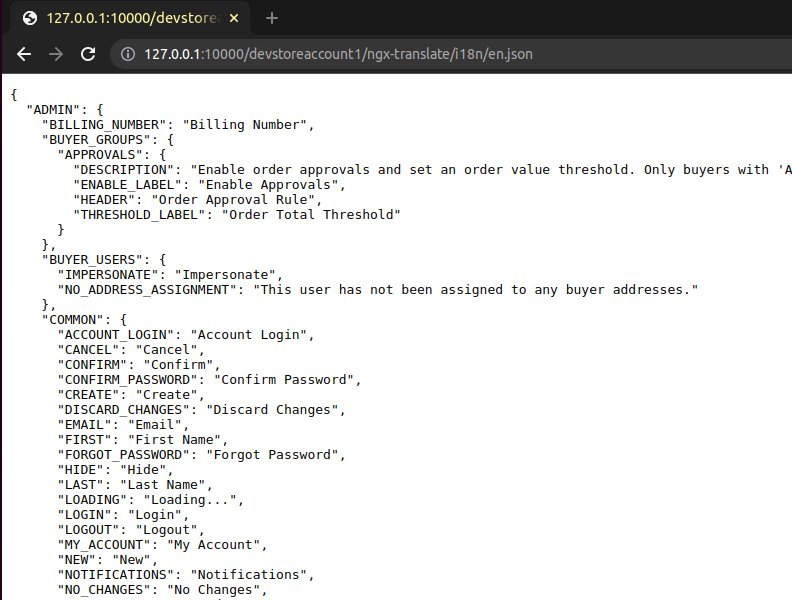
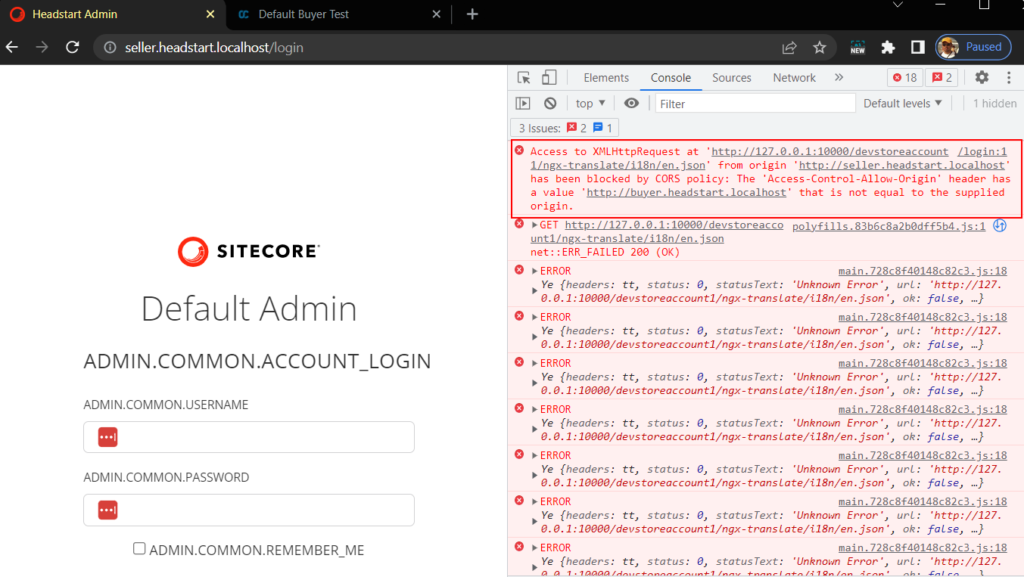
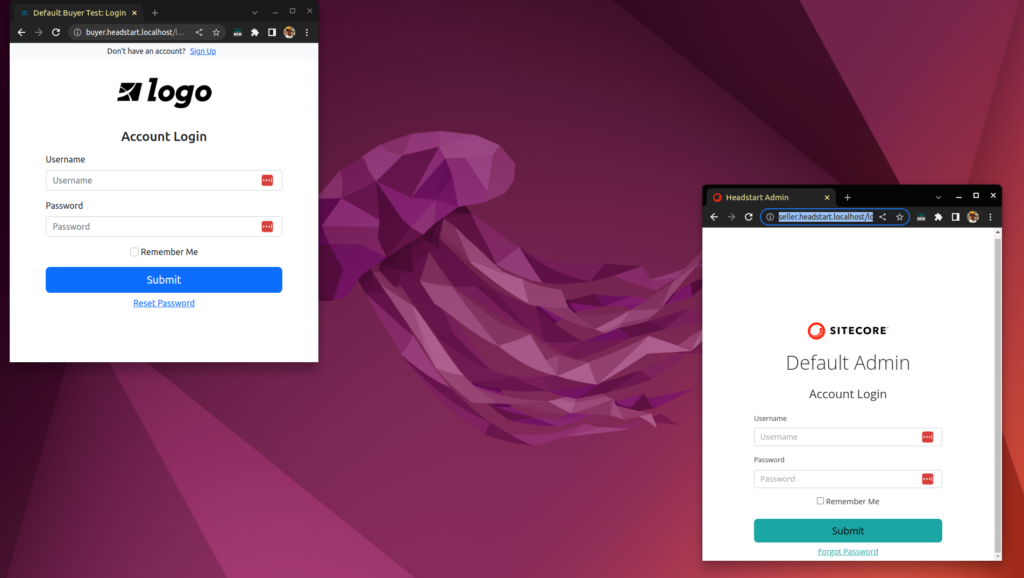
Once you have followed and applied the settings mentioned in the blog, should be able to see the translation files in local storage and able to access the file.
We also have to set CQRS for blob container – lets do this later.
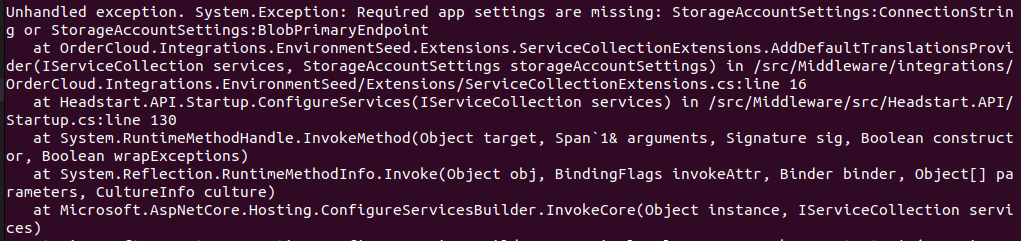
Middleware exited with errors-
Error –
See the resolution to this issue here – section – Unable to start Middleware container due to erros
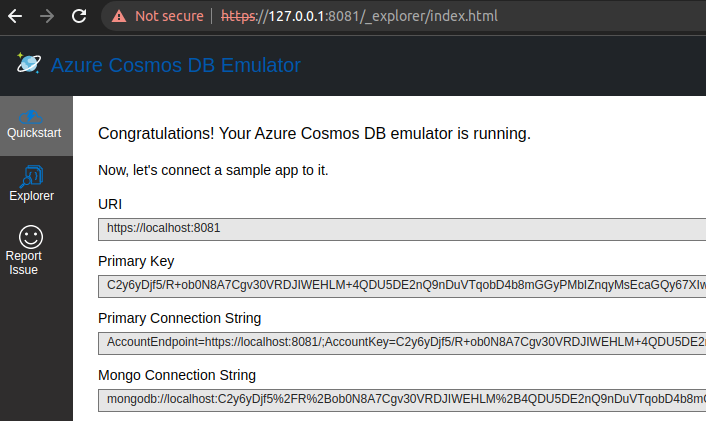
Error – Connection refused (127.0.0.1:8081)
System.AggregateException: One or more errors occurred. (Connection refused (127.0.0.1:8081))
       ---> System.Net.Http.HttpRequestException: Connection refused (127.0.0.1:8081)
See the resolution to this issue here – section – Connection to Comos DB is failing
Error- Unsupported platform
0 18.52 npm ERR! code EBADPLATFORM
#0 18.53 npm ERR! notsup Unsupported platform for fsevents@2.3.2: wanted {"os":"darwin","arch":"any"} (current: {"os":"linux","arch":"x64"})
#0 18.53 npm ERR! notsup Valid OS:    darwin
#0 18.53 npm ERR! notsup Valid Arch:  any
#0 18.53 npm ERR! notsup Actual OS:   linux
#0 18.53 npm ERR! notsup Actual Arch: x64