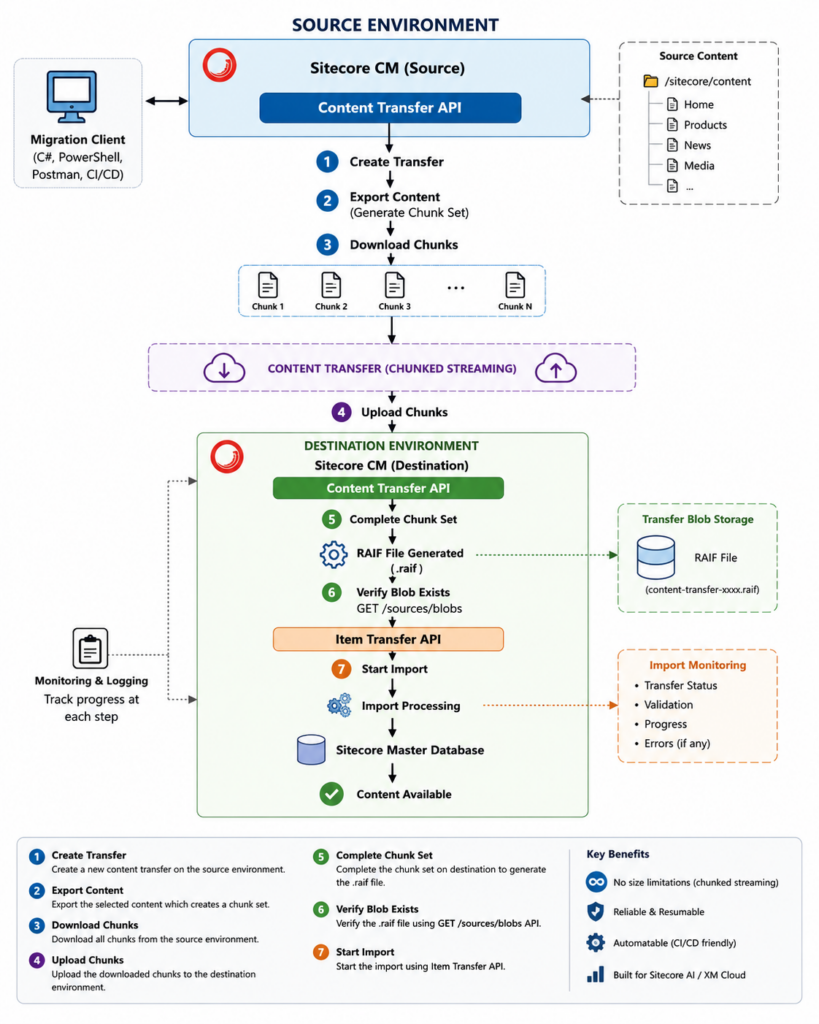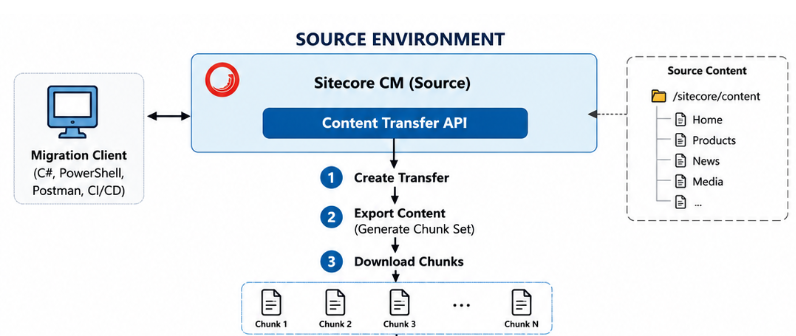
To understand the end to end flow for migrating the content between environments, please see this blog post – Link
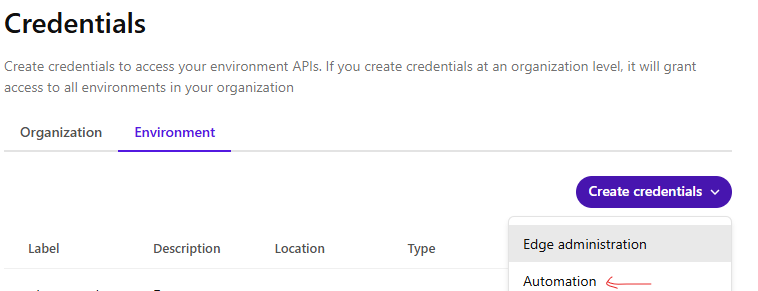
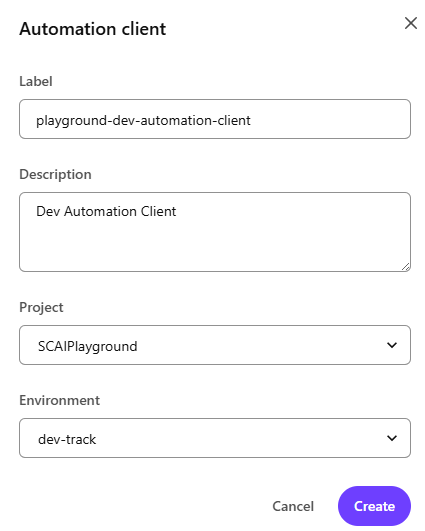
Pre-requisite – Automation Client and JWT Token
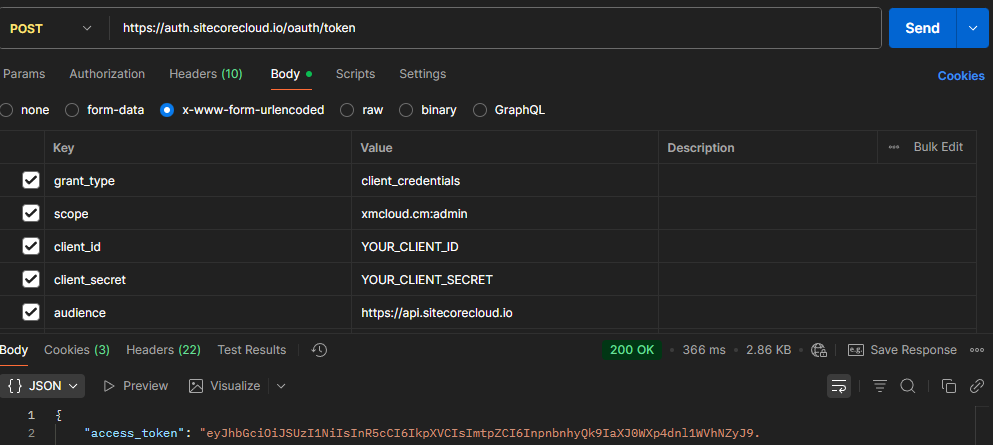
Before starting you will need the JWT token for the request to be made to the Content Transfer API. You should be Sitecore Admin or owner.
To generate the Automation client and token see this blog post – Link
Step 1 – Create Transfer
Used in source environment
Request-
Http Method – POST
URL – https://your-xmc-instance.sitecorecloud.io/sitecore/api/content/transfer/v1/transfers
Headers –
Authorization – Bearer token
Payload–
{
  "Configuration": {
    "DataTrees": [
      {
        "ItemPath": "/sitecore/content/Home",
        "Scope": "ItemAndDescendants",
        "MergeStrategy": "OverrideExistingItem"
      }
    ],
    "Database": "master"
  },
  "TransferId": "1ec8122c-a25e-49b0-a0fb-bd47dfccdf8b"
}
Response –
202 – Accepted
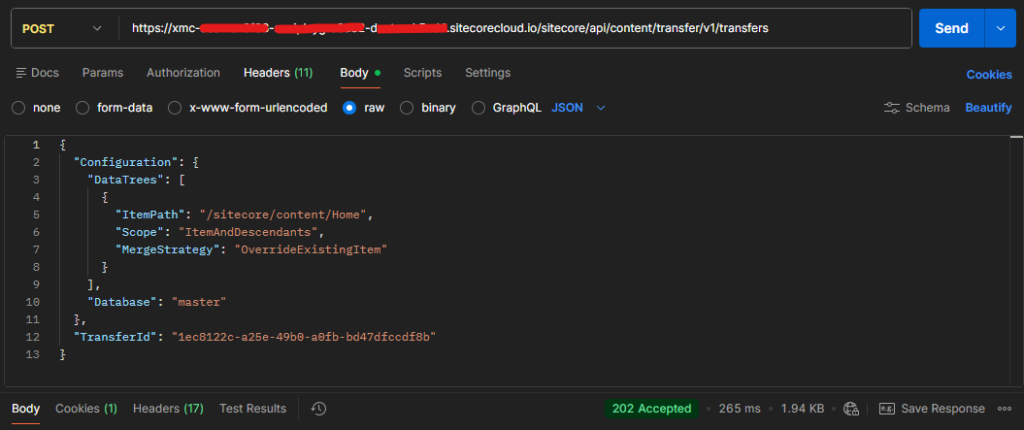
Note the Transfer ID – 1ec8122c-a25e-49b0-a0fb-bd47dfccdf8b
Transfer ID will be used in next API request.
Step 2 – Get Content Transfer
Used in source environment
Get content transfer status or wait for the transfer to be ready
Request
Http Method – GET
Url- https://your-xmc-instance.sitecorecloud.io/sitecore/api/content/transfer/v1/transfers/{transferId}/status
Example – https://your-xmc-instance.sitecorecloud.io/sitecore/api/content/transfer/v1/transfers/1ec8122c-a25e-49b0-a0fb-bd47dfccdf8b/status
Headers –
Authorization – token
Payload– Not Applicable
Response–
{
    "State": "Completed",
    "ChunkSetsMetadata": [
        {
            "ChunkSetId": "d71458d7-db08-4a74-a125-0d7d4eabf491",
            "ChunkCount": 1,
            "TotalItemCount": 2
        }
    ]
}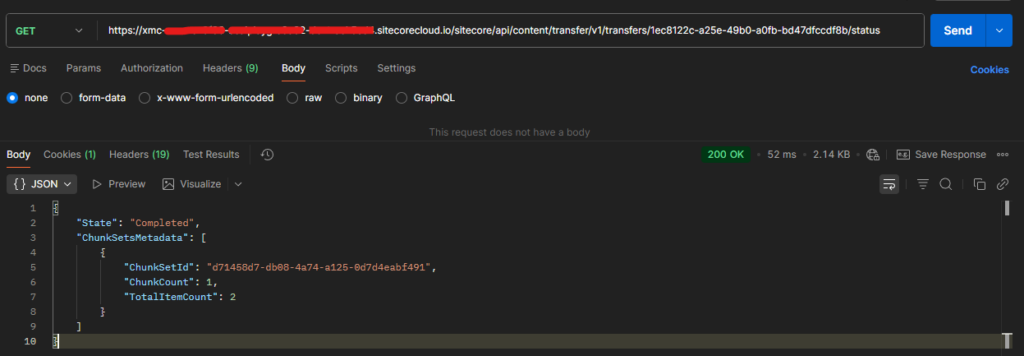
Note the chunkSetId – d71458d7-db08-4a74-a125-0d7d4eabf491
Step 3 – Retrieve a chunk
Used in source environment
Method- Get
Url – https://your-xmc-instance.sitecorecloud.io/sitecore/api/content/transfer/v1/transfers/{transferID}/chunksets/{chunksetID}/chunks/{chunkID}
Example – https://your-xmc-instance.sitecorecloud.io/sitecore/api/content/transfer/v1/transfers/1ec8122c-a25e-49b0-a0fb-bd47dfccdf8b/chunksets/d71458d7-db08-4a74-a125-0d7d4eabf491/chunks/0
Headers –
Authorization – token
Payload – Not applicable
Response-
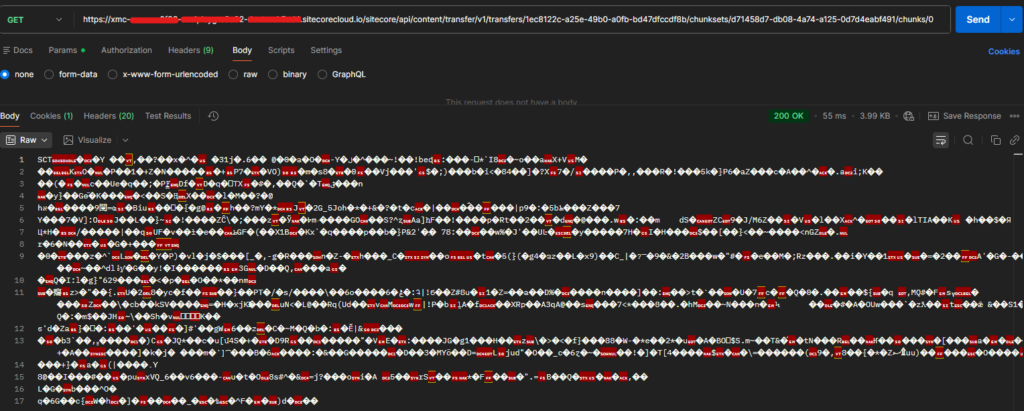
Save chunk –
Save response to file (response.bin)
Delete the transfer
Used in source environment
Method – Delete
Url – https://your-xmc-instance.sitecorecloud.io/sitecore/api/content/transfer/v1/transfers/{transferID}
Example- https://your-xmc-instance.sitecorecloud.io/sitecore/api/content/transfer/v1/transfers/1ec8122c-a25e-49b0-a0fb-bd47dfccdf8b
Headers –
Authorization – token
Payload – Not applicable
Response –
202 Accepted

Summary of API’s
| HTTP Method | API Endpoint | Purpose |
|---|---|---|
| POST | /sitecore/api/content/transfer/v1/transfers | Create a new content transfer. |
| GET | /sitecore/api/content/transfer/v1/transfers/{transferId}/status | Retrieve the status of a specific transfer. |
| GET | /sitecore/api/content/transfer/v1/transfers/{transferId}/chunksets/{chunksetId}/chunks/{chunkId} | Download or retrieve a specific chunk from a chunk set. |
| DELETE | /sitecore/api/content/transfer/v1/transfers/{transferId} | Delete or cancel a specific transfer. |
References