


Page 2 of 24

Sitecore Personalize – Create Fullstack Interactive Experience

Run interactive expereince using the friendlyID attribute. When the expereinces are created in Sitecore CDP an ID is created for the experience. Use this ID to run an experiemnet.

How to create a fullstack experience in Sitecore CDP-

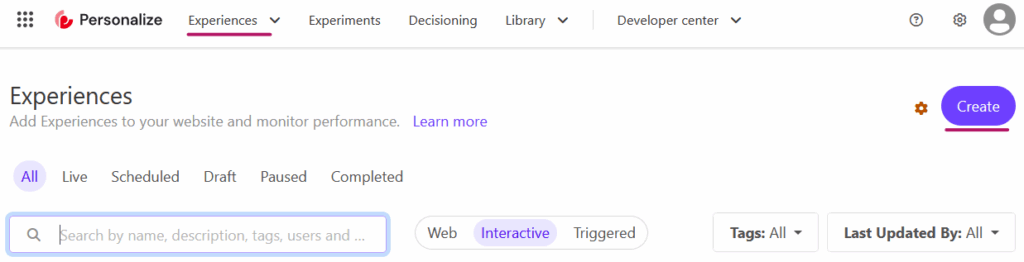
In the menu option click on Experiences => Full stack

This should show the list of existing experiences . Click on Create Experience

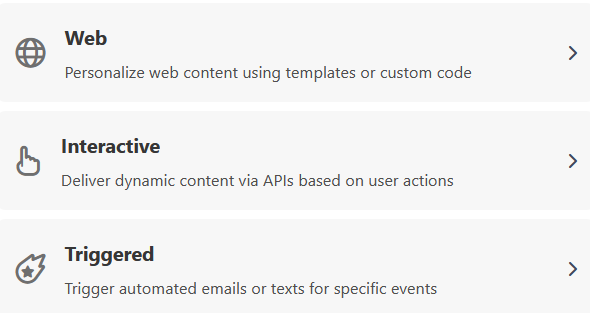
Select Interactive Experimence option-

Provide a name and note the ID –

Click on the Configure API response option-

Create a json response. Use “Copy Path as Freemaker” to copy the field name. In this case guest.title, guest.firstname etc.

One variant

You can have only one variant in an experience. Optionally, choose who will receive this experience using the audience filter. If you want to have multiple variants, create an experiment instead.

Click Save and “Preview API” to test the response

Note: dont forget to Save before testing the response.

Search for the guests. See how to create guests here <<enter blog details>>

Response for the guest that is searched. Back to “Interactive Expereience”

Error- if you receive this error. I had to add “” to the field names-

Run the Expereince immediately or schedule-

Experience is now live and the performance can be tracked in “Operational” Tab

At this point of time there are no executions. Check the “Operational” tab-

See this Full Stack Experiences list-

Next run the Experience in Postman or from the Web Site.

Loading

Sitecore Personalize – Run Fullstack Experience using Rest API endpoint

Continuing with the post – Sitecore Personalize – Create Fullstack Experience

In earlier post created a new Fullstack experience named- pastoral grill experience and ID for same was “”

Get the ID of the expereince in “Details” tab and a code snippet to run this in frontend. But in this post will see how to interact using rest api endpoint.

Send request to Rest API to recieve response-

https://{{apiEndpoint}}/{{restApiVersion}}/callFlows

See here API target endpoint to be used based on region-

https://doc.sitecore.com/cdp/en/developers/sitecore-customer-data-platform–data-model-2-1/walkthrough–preparing-to-integrate-with-sitecore-cdp.html

https://doc.sitecore.com/cdp/en/developers/sitecore-customer-data-platform–data-model-2-1/base-url-of-sitecore-cdp-apis-for-v2-1-data-model.html

Request and Response-

clientKey- I have client key as a ennvironment variable. See how to find Client Key

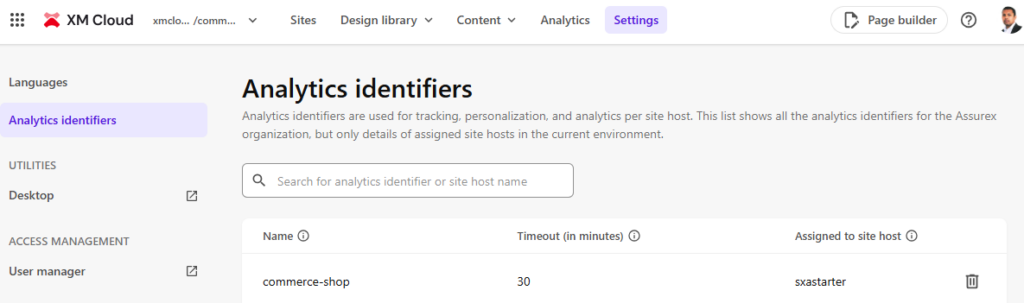
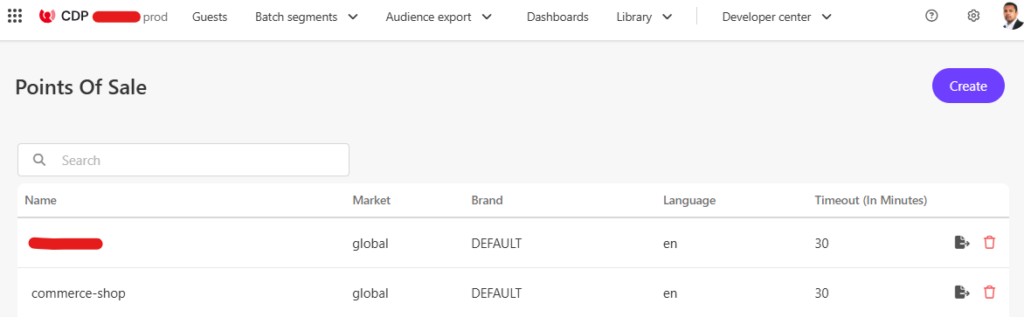
pointOfSale- Enter your configured point of sale. See how to create or get POS

friendlyId- Fullstack/Web Epxerience friendly id. See how to get interactive experience id

In the operational tab there is a spike at the time the request was sent-

Loading

Siteocre Personalize – Create a triggered experience to send abandon cart mail

This blog describes the step by step process to create a triggered expereience in Sitecore Personalize to send a abandon cart mail.

Create Experience

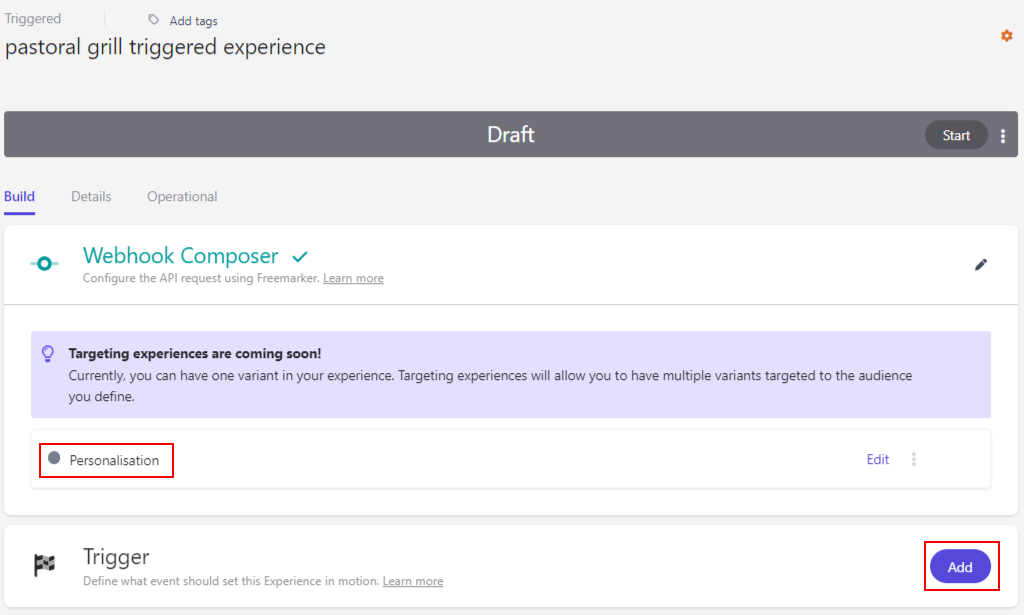
Choose Triggered Experience

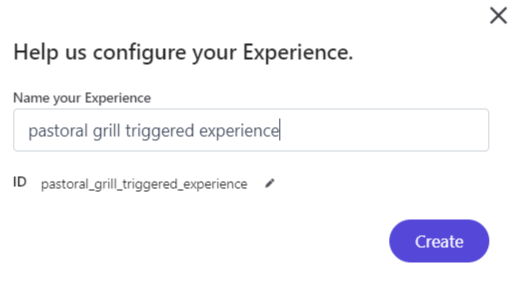
Name the experience

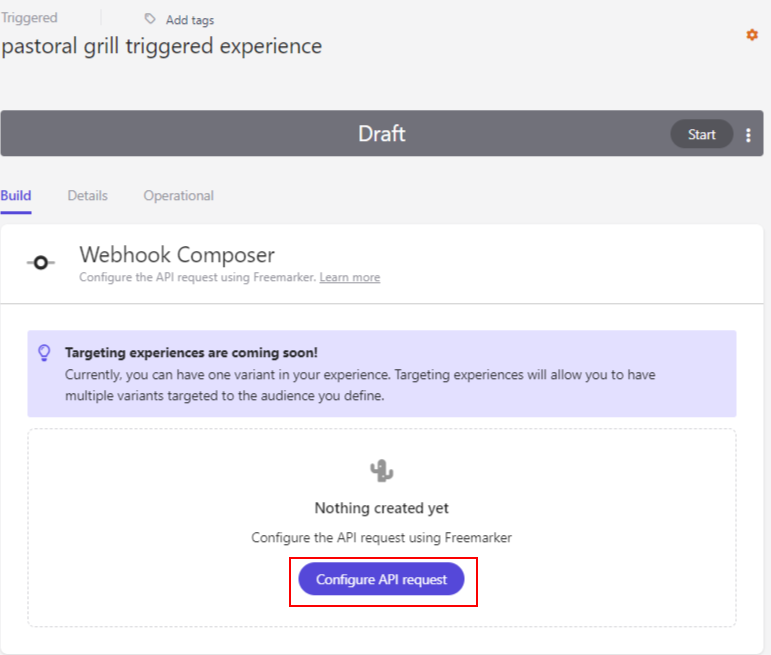
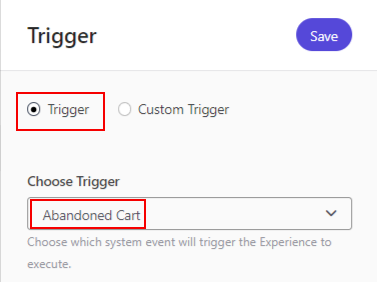
Configure API Request

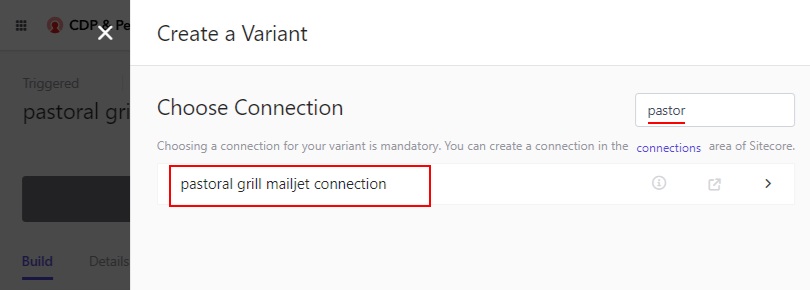
Choose a connection created in this blog post – here

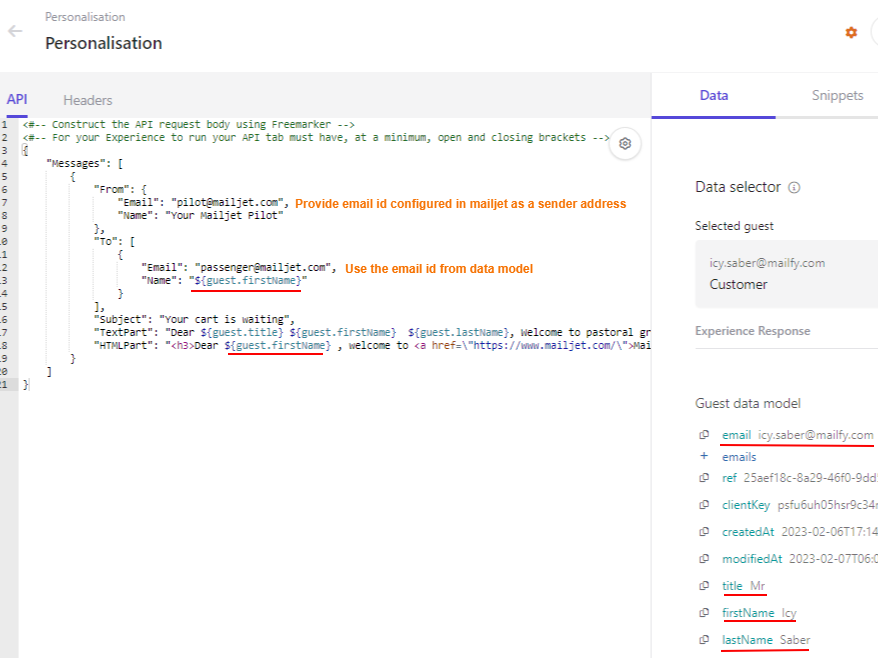
Configure the reponse

Save and Close

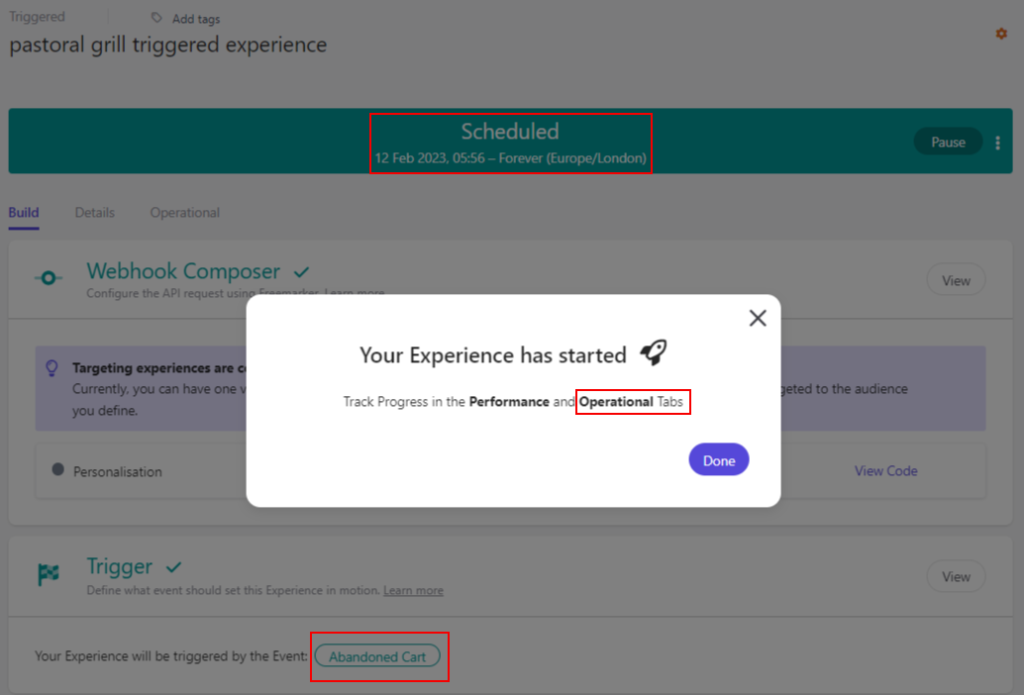
Start the Expereince and select option “Run immediately”

Steps to add abandon the cart-

Step 1 – View event

Follow the blog post – here

Step 2- Identity event

Follow the blog post – here

Step 3- Add event

Follow the blog post – here

Step 4 – Force Close event

Follow the blog post – here OR wait for session to expire ( normally 20 minutes or as configured in POS)

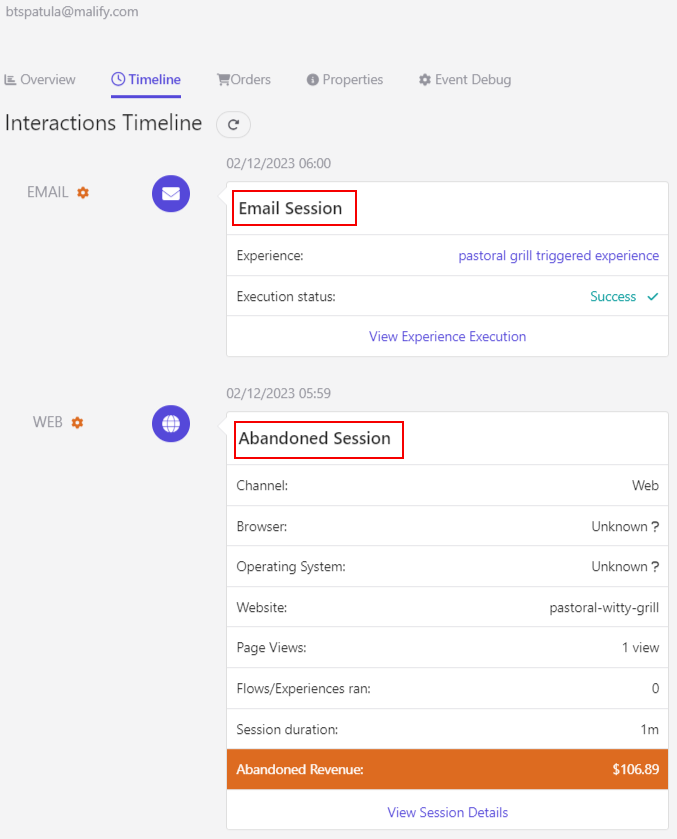
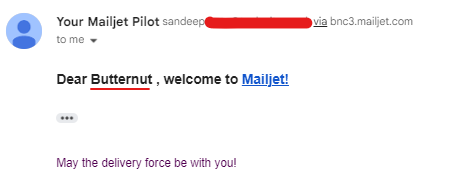
Mail is delivered to the customer

Loading

Sitecore Personalize – Create connection used by triggered experience

Create connection to external service used to trigger experience. This connections are outbound.

In this blog will see an example to create a connection to mailjet which can be used to trigger a expereience for abandon cart(covered in another blog post)- here

Setup mailjet account

Create a new account if you don’t have any- https://www.mailjet.com/

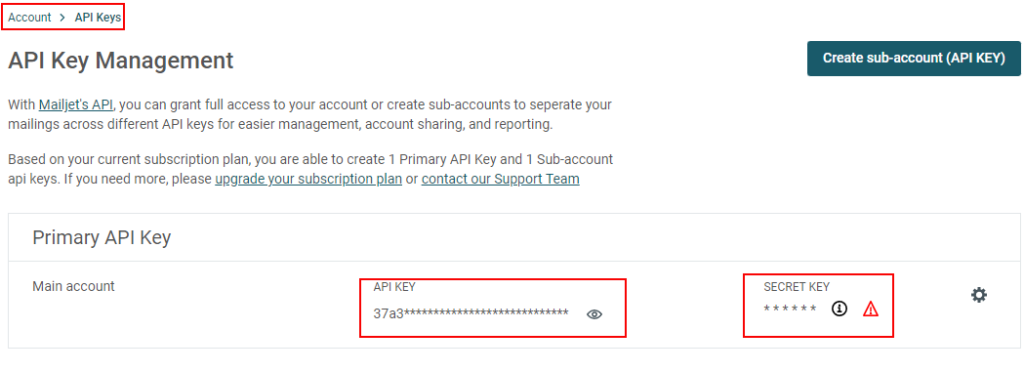
In the Account Settings => select optin “API Key management”

Note the API Key and Secret Key

Generate a secret key if not already generated.

Create a connection in Sitecore CDP portal

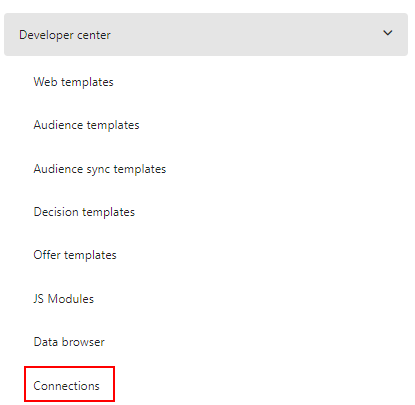
Navigate to “Develoepr center” => Connections option

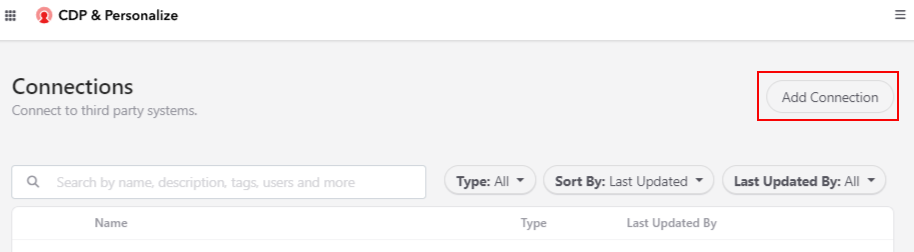
Search for existing connection or “Add Connection”

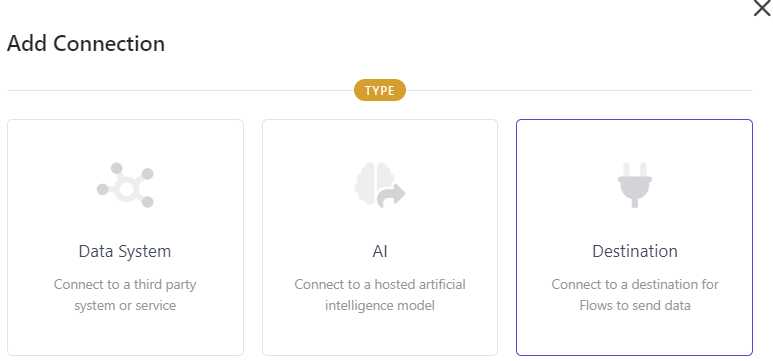
Select “Destination” option for Flows to send data.

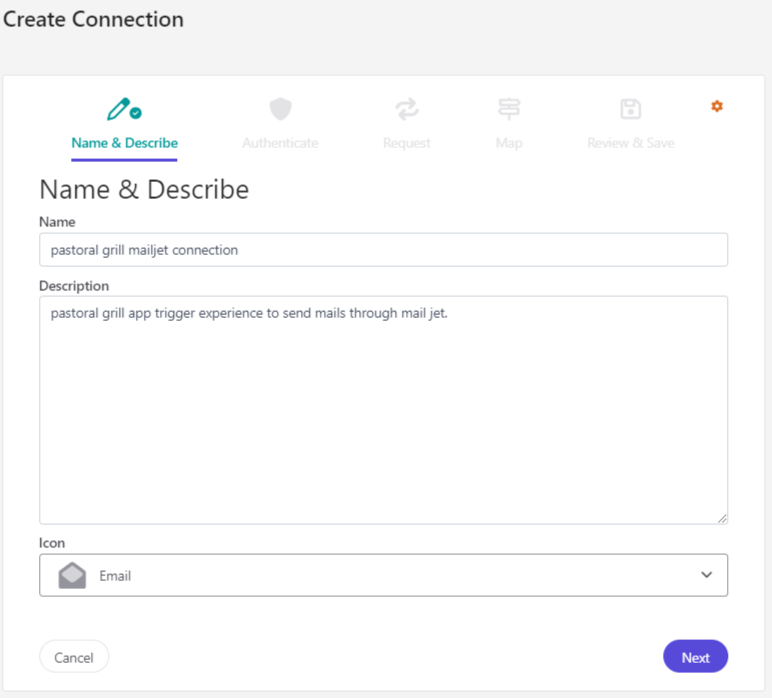
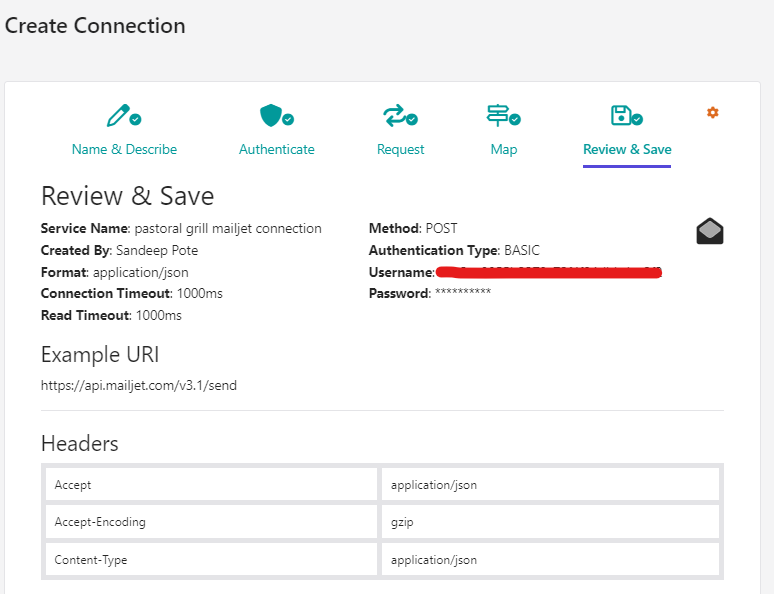
Fille in the required details and select icon-

Authentication

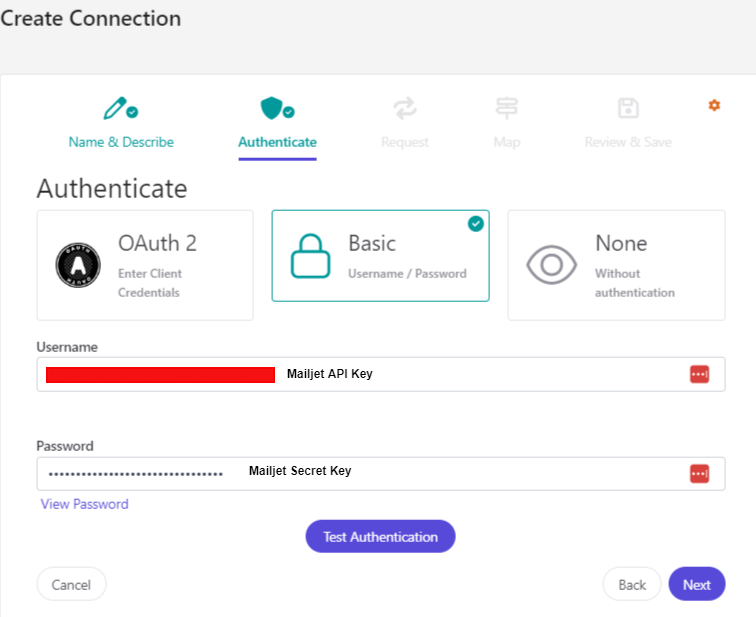
Next setup the Basic Authentication. Copy the API Key as User Name and Password as Secret Key and “Test Authentication”

Setup the request

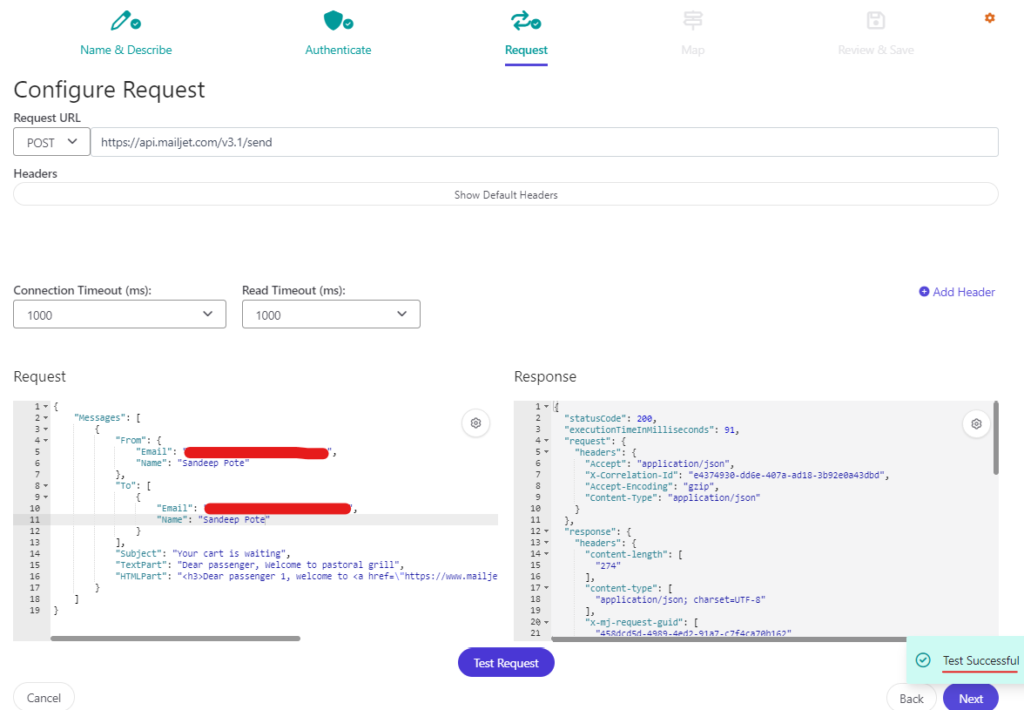
Get the api endpoint and the request body from here – https://dev.mailjet.com/email/guides/getting-started/

// Sample mail 
{
    "Messages": [
        {
            "From": {
                "Email": "pilot@mailjet.com",
                "Name": "Your Mailjet Pilot"
            },
            "To": [
                {
                    "Email": "passenger@mailjet.com",
                    "Name": "Customer 1"
                }
            ],
            "Subject": "Your cart is waiting",
            "TextPart": "Dear passenger, Welcome to pastoral grill",
            "HTMLPart": "<h3>Dear passenger 1, welcome to <a href=\"https://www.mailjet.com/\">Mailjet!</a></h3><br />May the delivery force be with you!"
        }
    ]
}

Tet the connection-

Note- add sender address to the contact list in mailjet or the mails will be blocked. Also the mails from gmail wont be triggered. Use this URL to add sender address-

https://app.mailjet.com/account/sender

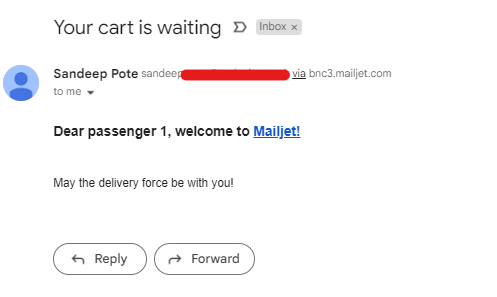
Check if the test Mail received-

Click Next, Review & Save

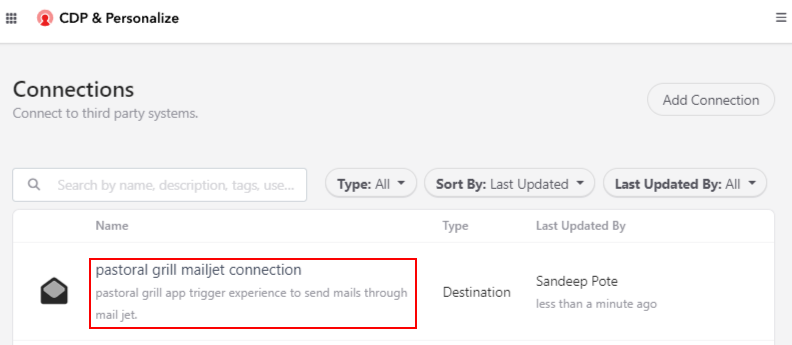
Connection is created and this can be used when an expereince is triggered.

Next setup the Triggered Expereince

Loading

Sitecore Send – How to Resubscribe a user to a mailing list

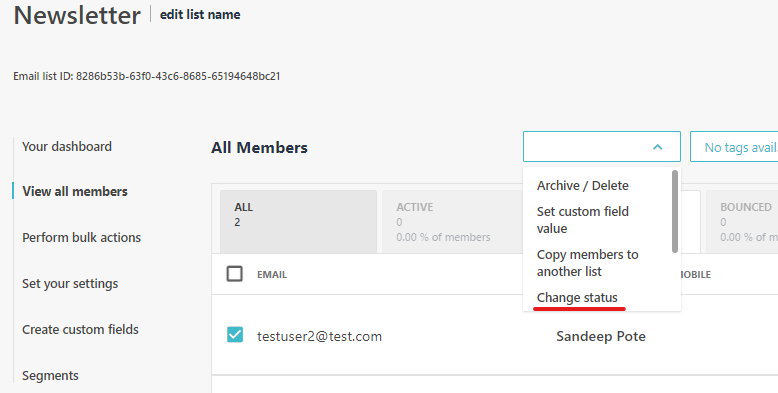
To resubscribe a user goto the mailing list where a user has unsubscribed, navigate to the Unsubscribe tab-

In the action menu – Select Change Status option

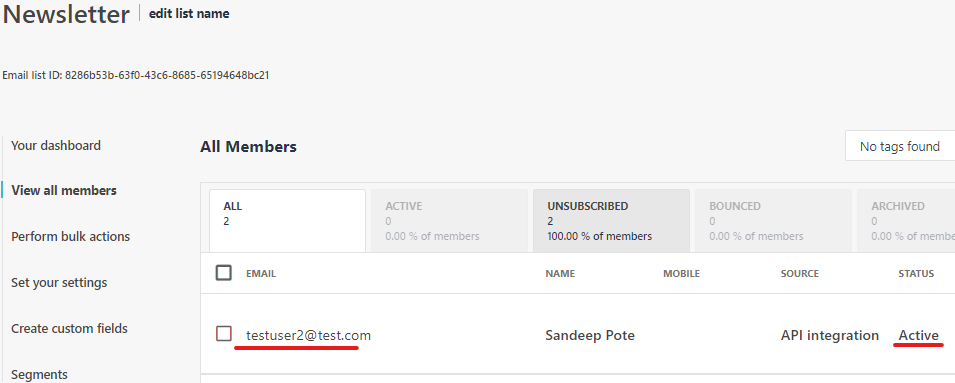
Select the Active option and Change Status-

The user will now be made Active and any mails from this mailing list will be sent to the user-

Or you can also ask user to Subscribe again following the steps in this blog.

Loading

Setup XM Cloud Site to host on Vercel

In this blog post we will Link the XM Cloud to Vercel. The XM Cloud site will be hosted in Vercel by Seting up the host

In this blog post we saw how to setup the Vercel Project manually but this whole process can be automated by Creating and linking the host.

Configure Hosting Connection

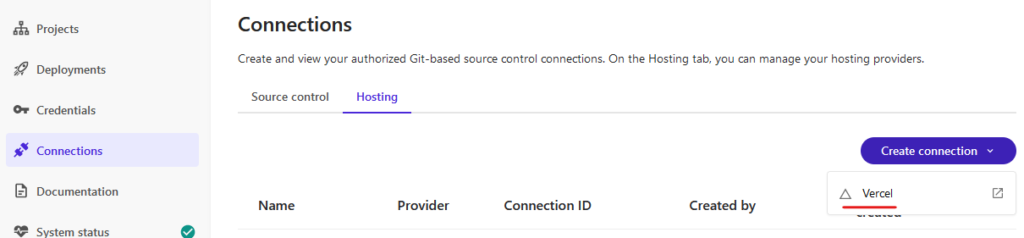
Login to XM Cloud and navigate to Connections –> Hosting tab

Click on Create connection –> Vercel

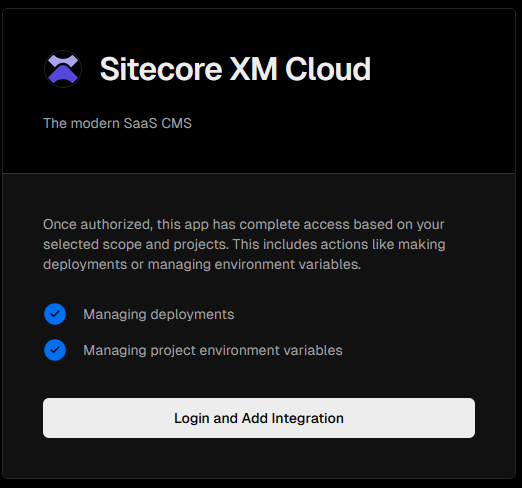
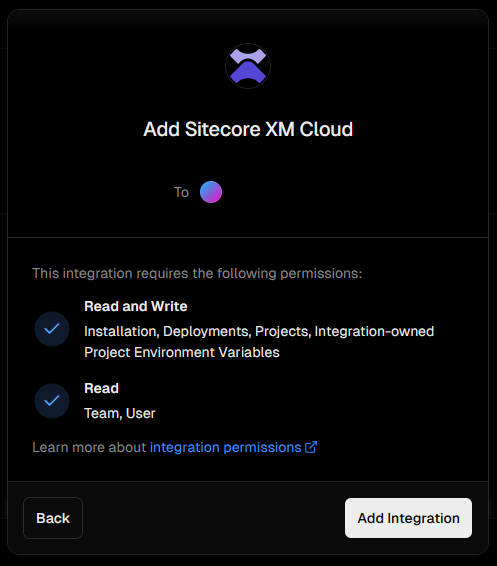
Login to Vercel and add Integration

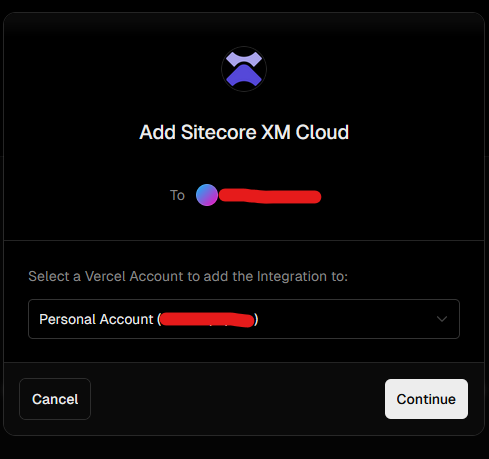
Select the account to connect. In my case its personal account

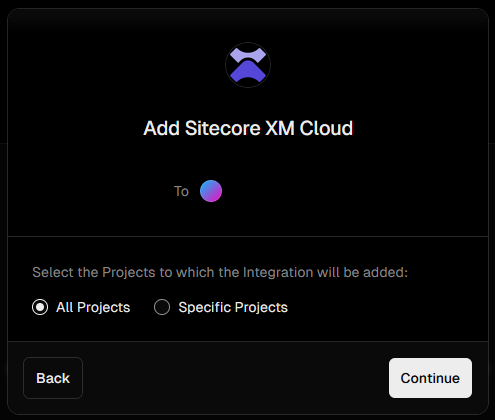
Select the all projects to integrate, dont selecy any specific project or you will get error. See errors section-

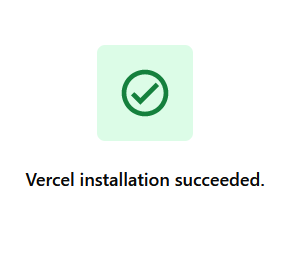
Confirm and Add Integration-

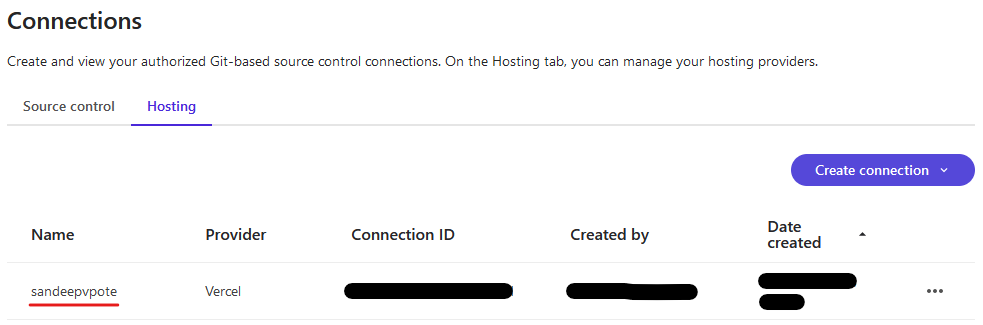
A new Hosting connection is created with the name-

Setup Hosting

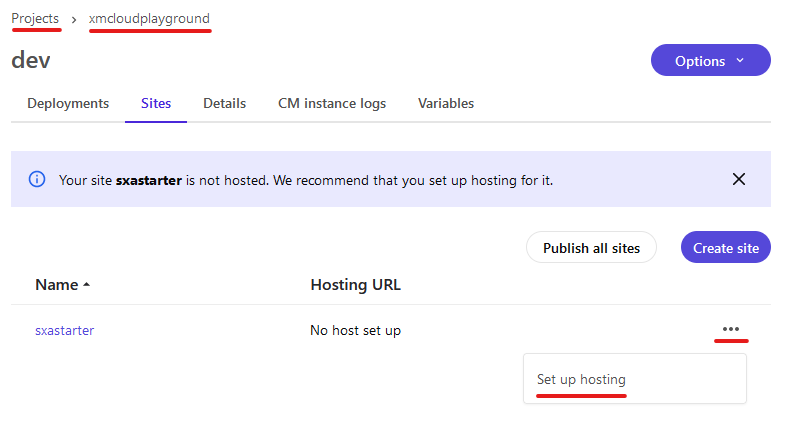
Navigate to Projects ==> Environments ==> Sites Tab

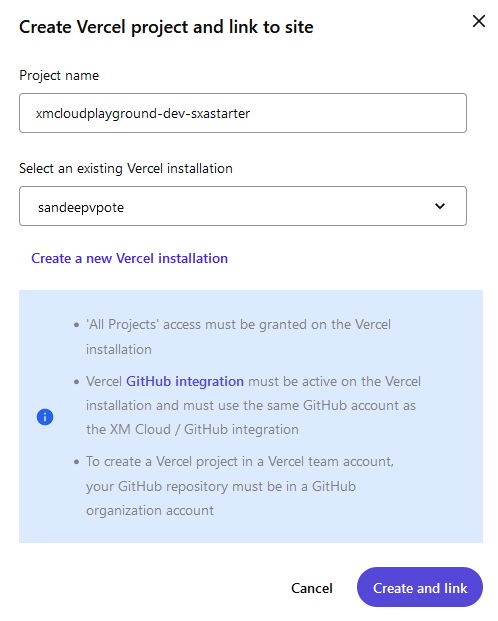
Link Vercel Site (Connection been already created)

You can create Hosting connection from here too.

Click “Create and link”

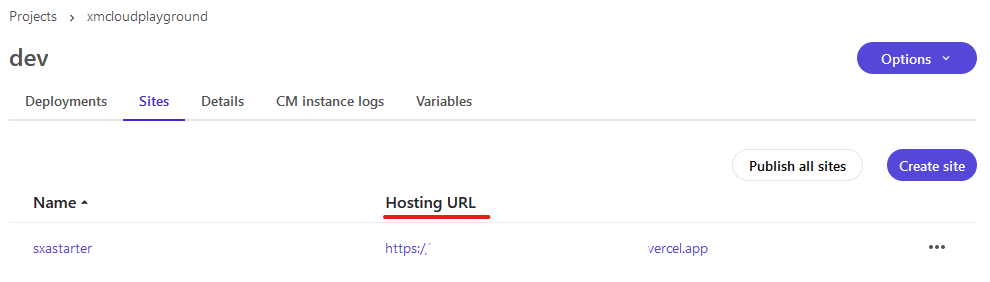
Now you can see the Site is linked to host i.e. Vercel.

Once the Site is linked you should be able to see the project in Vercel

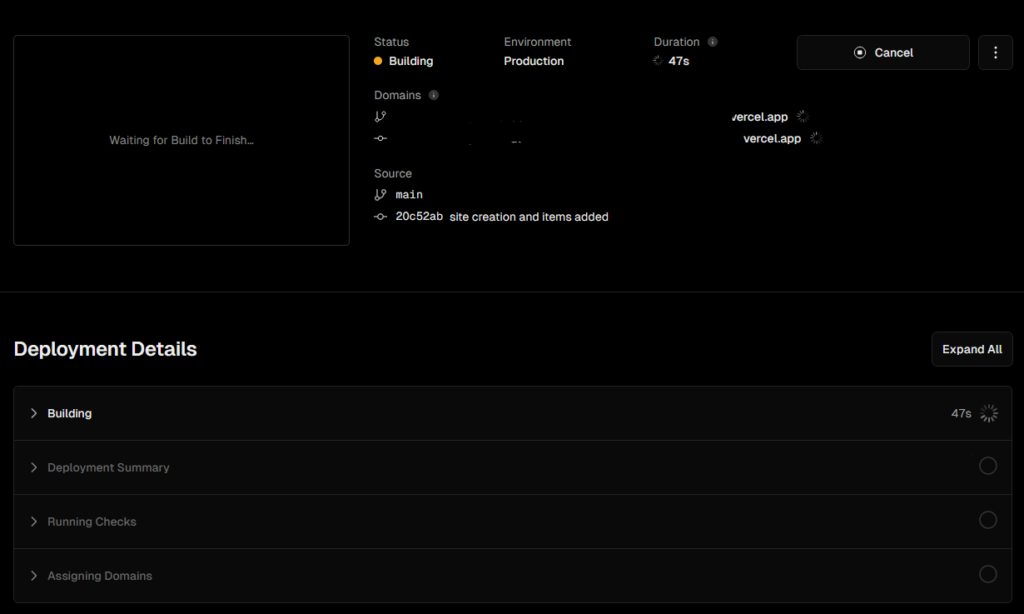
Login to vercel and see the newly created project and deployment in-progress.

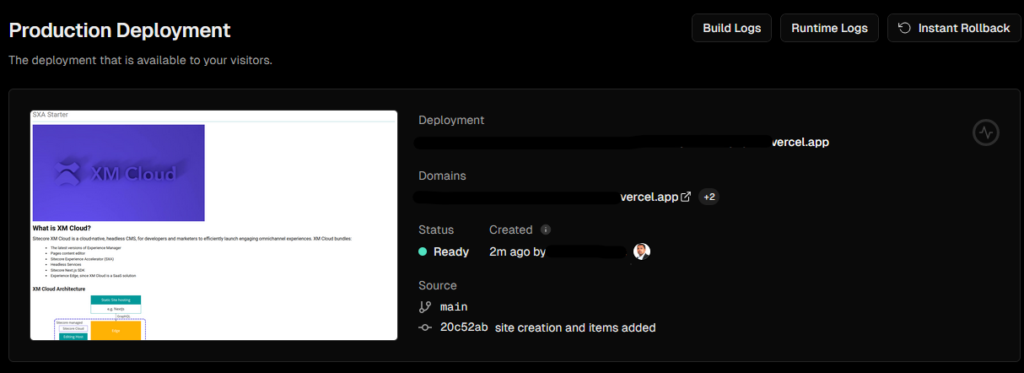
In few minutes the deployment should be completed

Click on the domains and should see the Site-

Errors-

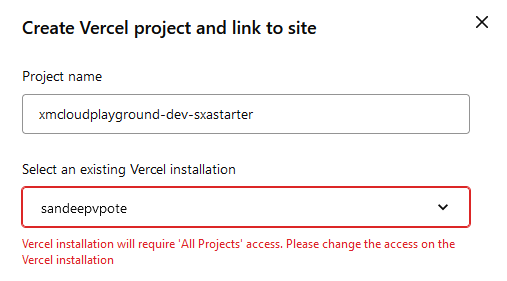
Vercel installation will require ‘All Projects’ access. Please change the access on the Vercel installation

Resolution

Delete any exisitng Hosting Connection and re-create the hosting with Integration to be allowed to all projects.

Loading

Use Experience Edge GraphQL to access XM Cloud hosted site

GraphQL delivery API is used to access the published site content. Experience Edge for Experience Manager (XM) is an API-based service from Sitecore that gives you globally replicated, scalable access to your XM Cloud items, layout, and media. You can use the standard publish tools in XM Cloud , but instead of rendering content from a self-hosted Content Delivery environment, Experience Edge provides you a Sitecore-hosted GraphQL API. 

To access the XM Cloud hosted published site content using Expereince Edge follow these steps-

Login to XM Cloud. Navigate to Projects ==> Environments ==>Details tab.

Launch IDE for Live GraphQL

The URL for GraphQL IDE –

https://edge.sitecorecloud.io/api/graphql/ide

GraphQL edge endpoint is –

https://edge.sitecorecloud.io/api/graphql/v1

Let stry a simple query to get siteinfo-

If you see this error- JSON.parse: unexpected character at line 1 column 1 of the JSON data

This means a header with GraphQL token is not provided or incorrect.

Generate Delivery API token-

Add X_GQL-TOKEN in header with newly generated token vlaue

You should now be able to access only the published Site content using Experience Edge.

If you are not able to see the items, you might have not published the ietms

Publish items to edge

Loading

Rust Tips and Tricks

Use todo! macro for unimplemented traits

todo! macro will compile and run successsfuly the unimplemented traits. But if we call the unimplemented trait it will panic and give error.

Struct

struct Language{
    name: String,
    stable_version: f32,
    launched_year: u32
}

Struct implementation with unimplmented method named – represent

impl Description for Language{    
    fn represent(&self) -> String{     // Error    
    }
}

Main Block


fn main() {
 
   let pro_langauge_rust = Language{
        name: String::from("Rust"),
        stable_version: 1.84,
        launched_year: 2012
    };

    println!("{}" , pro_langauge_rust.name);   
}

Compiler Error-

18 |     fn represent(&self) -> String{
   |        ---------           ^^^^^^ expected `String`, found `()`

Change the Struct implementation with todo! macro

impl Description for Language{    
    fn represent(&self) -> String{   
        todo!();     
        //format!("the language {} was lauched in {} year and current stable version is {}", self.name, self.launched_year, self.stable_version)
    }
}

Output

Rust

todo!() is actually the same as another macro: unimplemented!(). Programmers were using unimplemented!() a lot but it was long to type, so they created todo!() which is shorter.

  • No dummy variable needed
  • Visual “not complete” indicator
  • Will panic if reached

Panic if reached – if we call the unimplemented trait it will panic and give error.

fn main() {
 
   let pro_langauge_rust = Language{
        name: String::from("Rust"),
        stable_version: 1.84,
        launched_year: 2012
    };

    println!("{} {}" , pro_langauge_rust.name, pro_langauge_rust.represent()); // Error
   
}

Output

thread 'main' panicked at src\main.rs:19:9:
not yet implemented

Reference – https://dhghomon.github.io/easy_rust/Chapter_44.html

Unreachable! macro

This macro is kind of like todo!() except it’s for code that you will never do. Maybe you have a match in an enum that you know will never choose one of the arms, so the code can never be reached. If that’s so, you can write unreachable!() so the compiler knows that it can ignore that part.

enum

enum PaymentStatus{
    Succeeded,
    Processing,
    Fail    
}

Enum implementation

impl PaymentStatus {
    fn after_payment_action(&self) -> &str{
        match *self {
            PaymentStatus::Succeeded => "UpdateERP",
            PaymentStatus::Processing => "Wait",
            PaymentStatus::Fail => "Block",
            _ => unreachable!()
        }
    }    
}

unreachable!() is also nice for you to read because it reminds you that some part of the code is unreachable. You have to be sure that the code is actually unreachable though. If the compiler ever calls unreachable!(), the program will panic.

dbg! macro

dbg! is a very useful macro that prints quick information. It is a good alternative to println! because it is faster to type and gives more information

As per the Rust documentation, the dbg! macro works exactly the same in release builds. This is useful when debugging issues that only occur in release builds or when debugging in release mode is significantly faster.

fn main() {
 
   let pro_langauge_rust = Language{
        name: String::from("Rust"),
        stable_version: 1.84,
        launched_year: 2012
    };

    dbg!(&pro_langauge_rust);
    dbg!(pro_langauge_rust.represent());   
}

Output

[src\main.rs:33:5] &pro_langauge_rust = Language {
    name: "Rust",
    stable_version: 1.84,
    launched_year: 2012,
}
[src\main.rs:34:5] pro_langauge_rust.represent() = "the language Rust was lauched in 2012 year and current stable version is 1.84"

env! and option_env! macro

Any sensitive information that are harcoded can be a security breach. To avoid this these should be go set as environment variables. For this use env! or option_env!

env!(“key”) or option_env!(“key”)

env! will panic if the key does not exists. It is better to use env! if you want program to crash when the environment variable is not found.

option_env! – on the other hand is safer as it won’t panic if the key not found, instead allows to handle the error.

let language_name = env!("name");

This will not compile if the environment variable is not set in project. To do this you can use dotenc crate to read variables from .env file.

But what when the variables are set through command line. This won’t even compile to run the project. Use option_env! macro

let language_name = option_env!("name").expect("Language name is required!");

Make Struct Field optional using Option Enum

Use Option to make the struct field optional and set it to None if it has to be empty or Some if the value has to be set.

struct Language{
    name: String,
    stable_version: f32,
    launched_year: u32,
    description: Option<String>
}
{
   let pro_langauge_rust = Language{
        name:  String::from("Rust"),
        stable_version: 1.84,
        launched_year: 2012,
        description: None
    };

    dbg!(&pro_langauge_rust);

    let pro_langauge_rust1 = Language{
        name:  String::from("Rust"),
        stable_version: 1.84,
        launched_year: 2012,
        description: Some("Rust is a compiled language".to_string())
    };

    dbg!(&pro_langauge_rust1);
}

Output

[src\main.rs:37:5] &pro_langauge_rust = Language {
    name: "Rust",
    stable_version: 1.84,
    launched_year: 2012,
    description: None,
}
[src\main.rs:47:5] &pro_langauge_rust1 = Language {
    name: "Rust",
    stable_version: 1.84,
    launched_year: 2012,
    description: Some(
        "Rust is a compiled language",
    ),
}

Check if the option is None or Some using is_none() and is_some() method.

Match patterns

To match patterns use .. or | (pipe) operators. .. is used to match the range while | is used to match multiple OR expressions.

fn get_degree_class(percentage: u32) ->  String{
    match percentage {
        70..=100 => "First-Class Honours".to_string(),
        60..=69 => "Upper Second-Class Degree".to_string(),
        50..=59 => "Lower Second-Class Degree".to_string(),
        40..=49 => "Third Class Degree".to_string(),
        _ => "Fail".to_string()
    }
}

{
    dbg!(get_degree_class(75),get_degree_class(45), get_degree_class(61));
}

Output

[src\main.rs:52:5] get_degree_class(75) = "First-Class Honours"
[src\main.rs:52:5] get_degree_class(45) = "Third Class Degree"
[src\main.rs:52:5] get_degree_class(61) = "Upper Second-Class Degree"

Likewise use ! operator to match the mutiple OR expressions

fn get_degree_class(percentage: u32) ->  String{
    match percentage {
        99 | 100 => "Distinction".to_string(), // This is example. There is nothing above First Class
        70..=98 => "First-Class Honours".to_string(),
        60..=69 => "Upper Second-Class Degree".to_string(),
        50..=59 => "Lower Second-Class Degree".to_string(),
        40..=49 => "Third Class Degree".to_string(),
        _ => "Fail".to_string()
    }
}

Output

[src\main.rs:52:5] get_degree_class(99) = "Distinction"
[src\main.rs:52:5] get_degree_class(45) = "Third Class Degree"
[src\main.rs:52:5] get_degree_class(75) = "First-Class Honours"

For performance user release profile

Release profile – runs fast but compiles slow as it executes all of the compile optimisations.

cargom run --release

fold() method

fold is a consuming iterator adaptor which applies a function to each element of the iteration, accumulating the result into a new value.

This method is used a lot to add together the items in an iterator, but you can also do a lot more. It is somewhat similar to .for_each(). In .fold(), you first add a starting value (if you are adding items together, then 0), then a comma, then the closure. The closure gives you two items: the total so far, and the next item. First here is a simple example showing .fold() to add items together.
{ 
    let some_numbers = vec![9, 6, 9, 10, 11];
    
    println!("Total using fold method - {}", some_numbers
            .iter()
            .fold(0, |total_so_far, next_number| total_so_far + next_number)
        );
}    

Output

Total using fold method - 45

Rust Docs

Check installed components –

rustup component list --installed   

Add Rust docs component

rustup component add rust-docs

Open the Rust book

rustup docs --book
rustup docs std 
rustup docs std::iter

Installing the RUST-

Browse https://rustup.rs/

This should detect the current OS and provide the various installation instructions.

If using Visual Code – use rust-analyzer extension. https://marketplace.visualstudio.com/items?itemName=rust-lang.rust-analyzer

Tags- #todo! #macro #rust #unimplemented #traits #dbg! #env!

Loading