Welcome! This is my personal blog about Web technologies, software development, open source and other related topics
The ideas and opinions expressed here are solely mine and don't represent those of others, either individuals or companies.The code snippets or references to software products or analogous are to be used without any warranty of any kind. If you enjoy the content, feel free to share it and re-use it as long as you provide a link to the original post.
This guide explains how to create and configure authorization for an automation client in Sitecore AI. It covers the prerequisites, steps to register or configure the client, generating the required credentials, assigning appropriate permissions, and validating authentication. By following this guide, you will enable automation tools, scripts, or external applications to securely authenticate with Sitecore AI APIs while adhering to security best practices and the principle of least privilege.
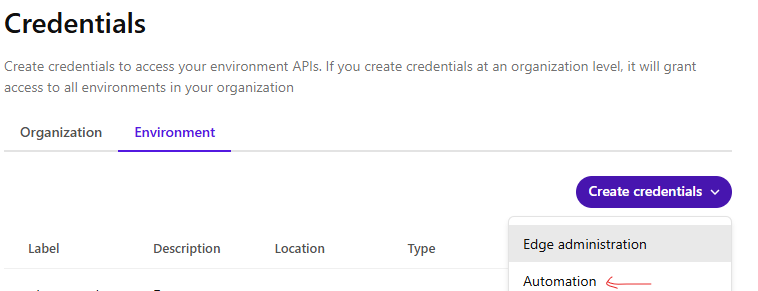
Create the Client credetntials
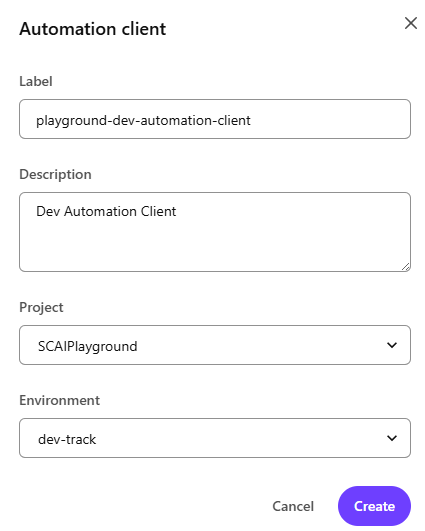
To generate the environment specific client credentitals select the project and the environment the Client ID and secret to be created for.
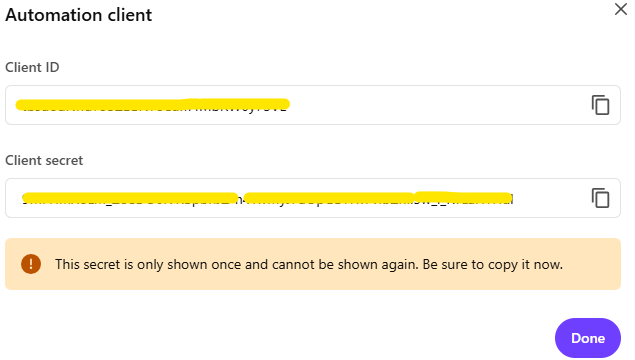
Client ID and secret is deplayed. Client secret cannot be shown again, so note this for future use.
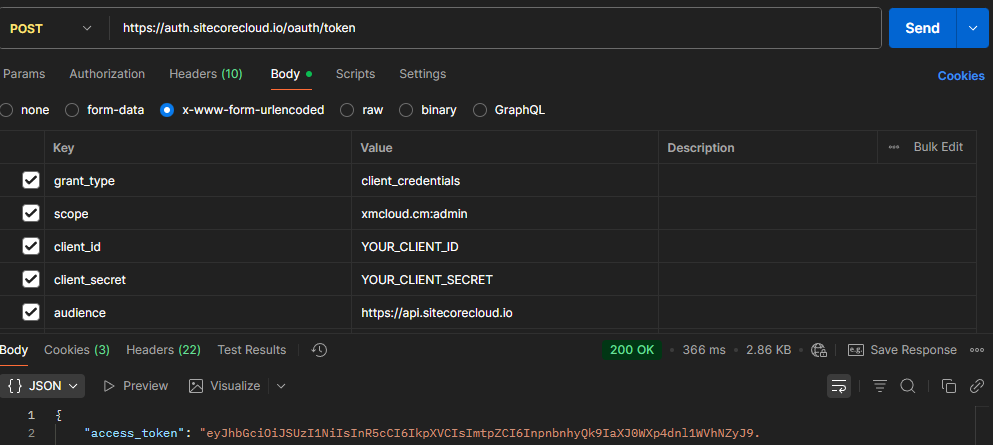
Generating JWT token for automation client
Url – https://auth.sitecorecloud.io/oauth/token
client_id – Use your client id
client_secret – use your client secret
audience – https://api.sitecorecloud.io
Use following cuRL command to run the get the token for this client-
In this blog post we saw how to use Sitecore Grpahql Search query to filter the items.
But search query has issues with results getting same items with different version in Preview mode. This works fine for the published item (edge) as a single version of item is published.
I created a new version of the same item-
Using the same query
# Write your query or mutation here

query SearchQuery($pageSize: Int = 10, ) {
  search(
    where: {
      AND: [
        {
          name: "_path"
          value: "{B08684BB-3CB0-4DFE-A378-054E26ECC5AE}"
          operator: CONTAINS
        }
        { name: "ProductId", value: "bali-power-bank-3000mah" }
      ]
    }
    first: $pageSize
  ) {
    total
    results {
      id
      name
      version
      url {
        path
      }
	... on Product{
        productId{value}
        productFeature{value}
      }
    }
  }
}
See the output results in same item with versions available in Sitecore-
{
  "data": {
    "search": {
      "total": 2,
      "results": [
        {
          "id": "8716FE4AD58345589AB04369C39F5CC0",
          "name": "bali-power-bank-3000mah",
          "version": 2,
          "url": {
            "path": "/Data/Commerce-Data/Product-Data/bali-power-bank-3000mah"
          },
          "productId": {
            "value": "bali-power-bank-3000mah"
          },
          "productFeature": {
            "value": "UPDATE - official-camera - Product Feature. JIGA power bank is a high-quality battery pack, with all-day powerThe power bank can charge your phone at least 3-5 times,the perfect partner for gamers, camping and business trips."
          }
        },
        {
          "id": "8716FE4AD58345589AB04369C39F5CC0",
          "name": "bali-power-bank-3000mah",
          "version": 1,
          "url": {
            "path": "/Data/Commerce-Data/Product-Data/bali-power-bank-3000mah"
          },
          "productId": {
            "value": "bali-power-bank-3000mah"
          },
          "productFeature": {
            "value": "official-camera - Product Feature. JIGA power bank is a high-quality battery pack, with all-day powerThe power bank can charge your phone at least 3-5 times,the perfect partner for gamers, camping and business trips."
          }
        }
      ]
    }
  }
}
See the highlighted fields in result. Same ID, multiple result set with different versions. Unfortunately, there is no option here to get the latest version. Sitecore has clarified this and raised a bug for same as of October 2025. this might be resolved in future. The related public reference number is DEVEX-2992.
How to solve this issue- This needs to be handled in headless app.
Headless app needs to filter this for each item and should pick only latest version from the result set for the same item.
GraphQL delivery API is used to access the published site content. Experience Edge for Experience Manager (XM) is an API-based service from Sitecore that gives you globally replicated, scalable access to your XM Cloud items, layout, and media. You can use the standard publish tools in XM Cloud , but instead of rendering content from a self-hosted Content Delivery environment, Experience Edge provides you a Sitecore-hosted GraphQL API.
To access the XM Cloud hosted published site content using Expereince Edge follow these steps-
Login to XM Cloud. Navigate to Projects ==> Environments ==>Details tab.
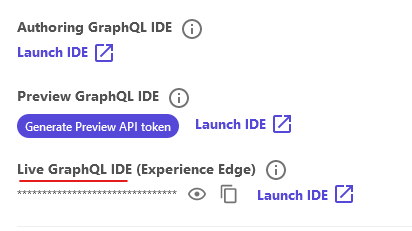
This should be the GraphQL Delivery token i.e. GQL token-
There are different ways to generate GQL Token. One of the way is generate from portal. Login to XM Cloud and navigate to Projects ==> Environments ==> Details tab
Click on Generate Delivery API Key (Note this key as this won’t be avilable again and needs to be re-generated again if lost)
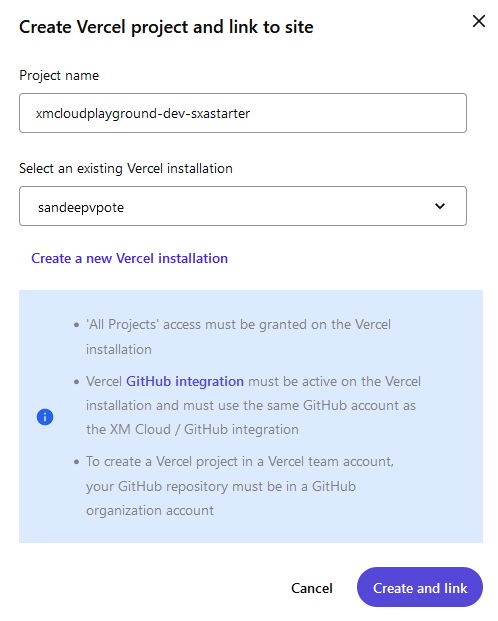
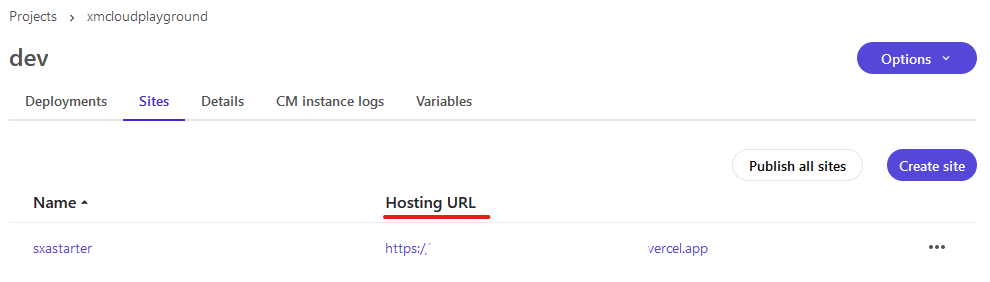
Note this API key as this is required later whilst configuring the Vercel hosting.
Publish Site–
Publish the site to Edge before starting to configure Project in Vercel, since we are configuring GraphQL Delivery API token items in Sitecore needs to be published
Create a Project in Vercel
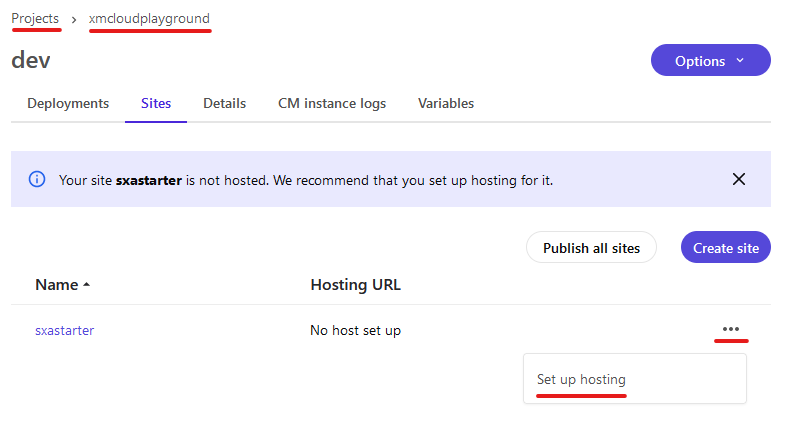
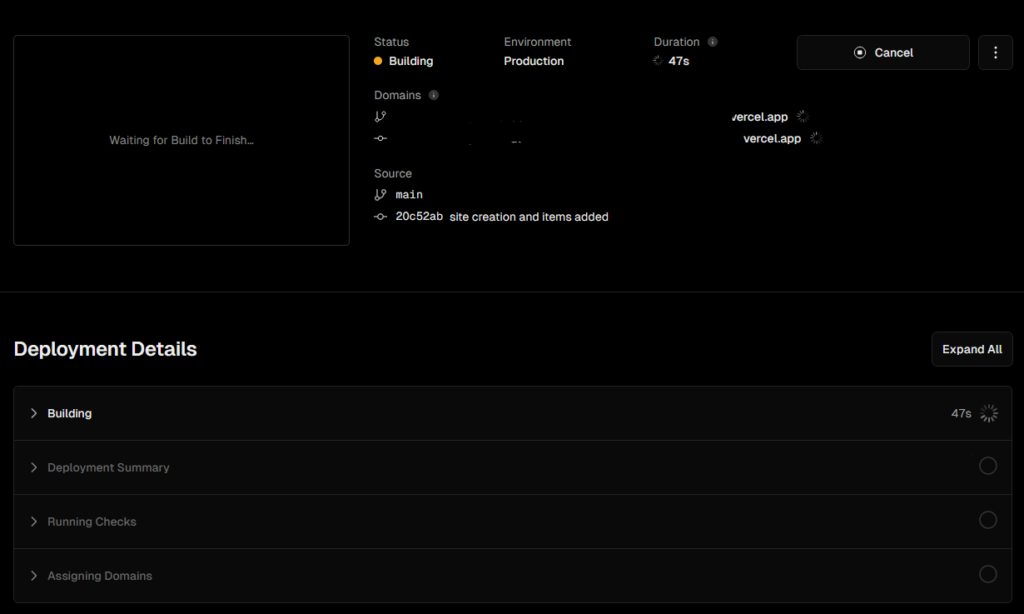
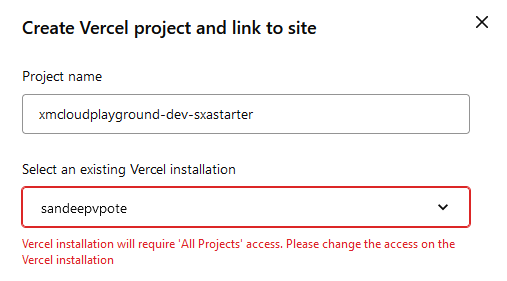
Login to Vercel and Create Project-
Since I have logged in using GitHub account it displays the repositories in Github the project will be based on-
Import the repository-
Configure Project
Once the project is created configure the project by selecting the Framework and repo folder FE code exists-
Choose the Nextjs Framework
Choose the sxastarter folder from the repo i.e. /src/sxastarter
Add following environment variables extracted earlier-
There are various ways you should be able to do this. I am adding 5 times more space to the existing indent-top style.
_indent.scss
// $middle-margin is defined in _margins.scss
.indent-large-top {
  margin-top: calc($middle-margin * 5);
}
Apply a custom style to rendering
Select the component or container you want to apply style and choose option “Indent Large Top” in Spacing section
Now the space between the 2 component is increased and is 100px as per the requirement.
New style applied to container-
Apply style to specific renderings
As above when the style was created it was applied to all renderings.
If you want to restrict the style to be applied to only certain renderings you can do so by setting Allowed renderings field in new created Style item.
For “Indent Large Top” only SectionContainer will be able to see the new Spacing Style.
In Experience Editor you wont see the “Indent Large Top” for other renderings e.g.- for container rendering-
While for Section Container rendering the new style is available-
This is a very common scenario where a background image needs to be set to certain components. Banner’s on any page on your website is a very common place to have a background image.
This blog assumes you have setup the Foundation Head setup or have your own Nextjs project setup implemented using the Sitecore NextJS SDK.
Note: This is not specific to XM Cloud but for any Headless implementation
Foundation Head already has an example on setting the background image using params. In this blog post will explore how this works and where in Sitecore the image can be applied. Will see how this can applied using using OOTB _Background Image item.
To apply image background using rendering parameters to the container see this blog here
Applying background image using rendering field to the components
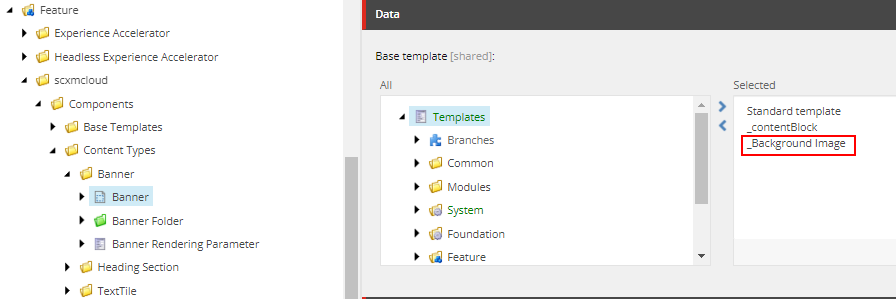
Background image can be applied to components inheriting the existing __Background Image item to the custom component template.
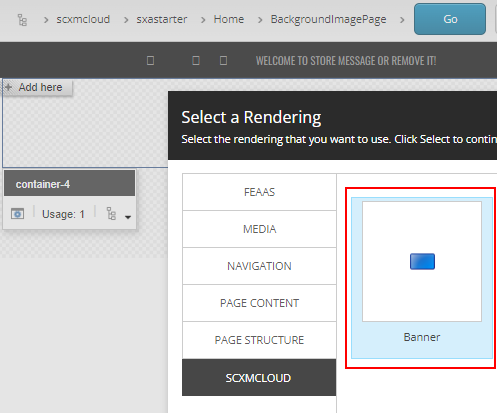
Create a template for your component. Here I am creating a Banner component-
Inherit _Background Image from /sitecore/templates/Foundation/Experience Accelerator/Presentation/_Background Image
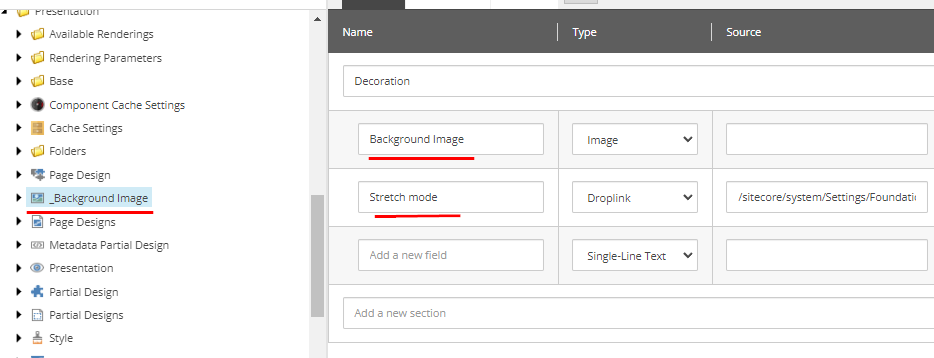
_Background Image has “Background Image” and “Stretch mode” field.
Note that there is a space between the field names, although not recommended but this comes OOTB.
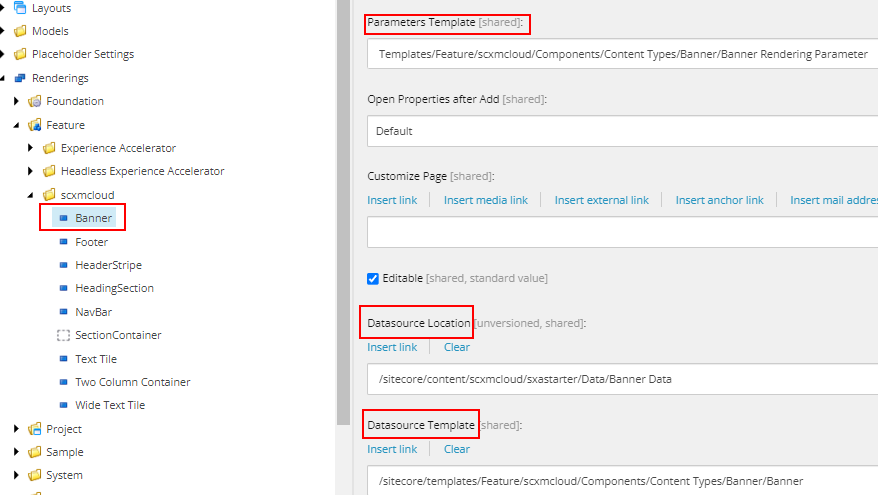
Create a “Banner” JSON Rendering and provide the “Parameters Template”, “Datasource Location” and “Datasource Template” as per your requirement and add this rendering to the “Available Renderings”
Create a Nextjs component in sxastarter project
Note below how the “Background Image” field is set. This is due to the same in field name. Not recommended but this is OOTB.
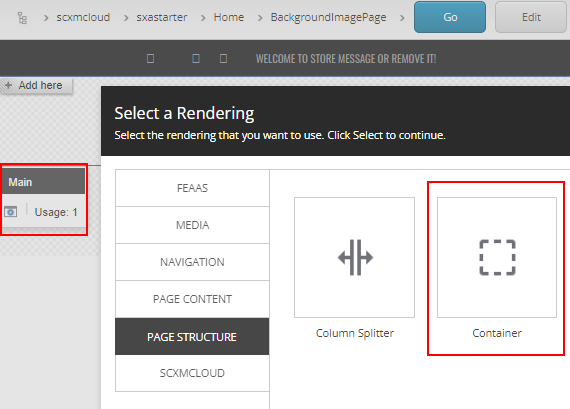
Add a newly created component (Banner) in Container placeholder-
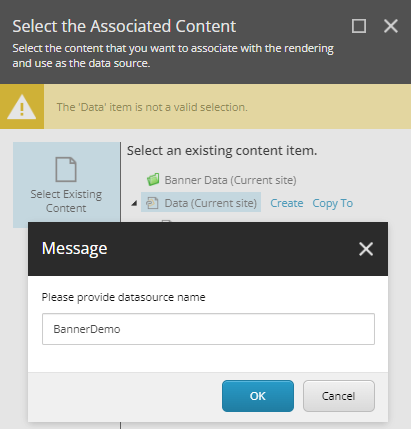
Create or select associated content
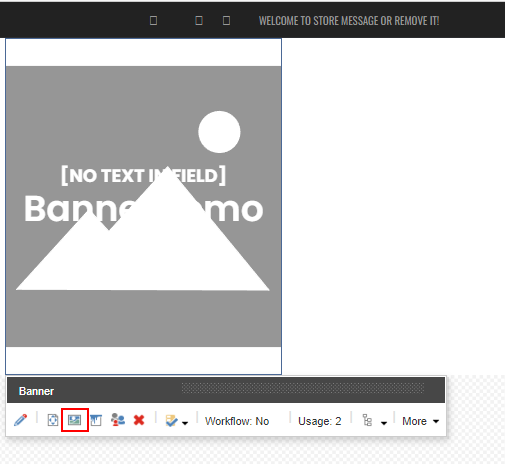
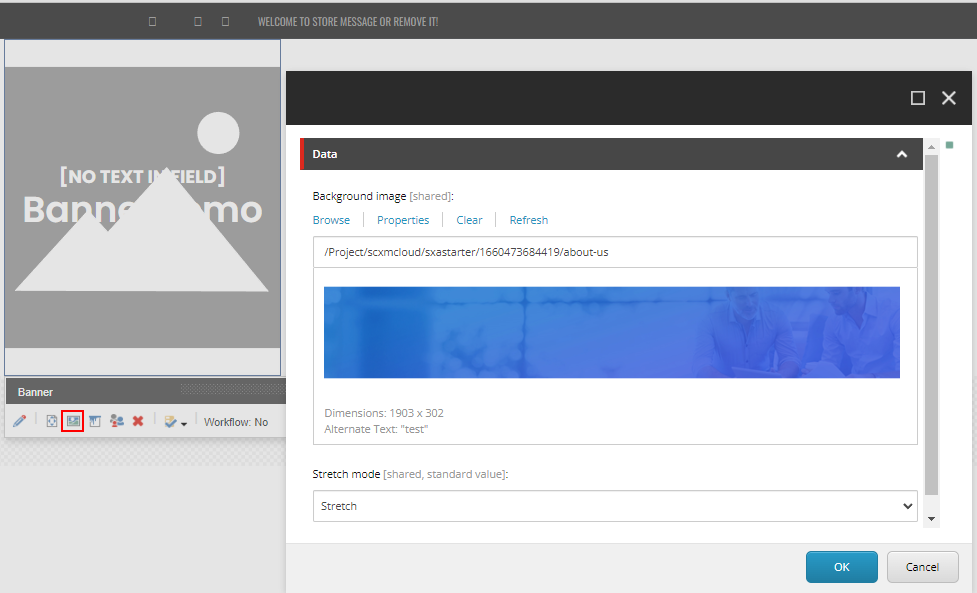
Once the component is added you should see the button to Add Background Image ( ths is added when the template inherits from _Background Image template.
Select the Background Image and Save-
You should now able to see the background image to component-
This is a very common scenario where a background image needs to be set to certain components. Banner’s on any page on your website is a very common place to have a background image.
Note: This is not specific to XM Cloud but for any Headless implementation
Foundation Head already has an example on setting the background image using params. In this blog post will explore how this works and where in Sitecore the image can be applied. Will see how this can applied using Rendering Parameters and using OOTB _Background Image item.
Applying background image using rendering parameters
Background image can be applied to container. If you are using Foundation Head repo you can find this component OOTB.
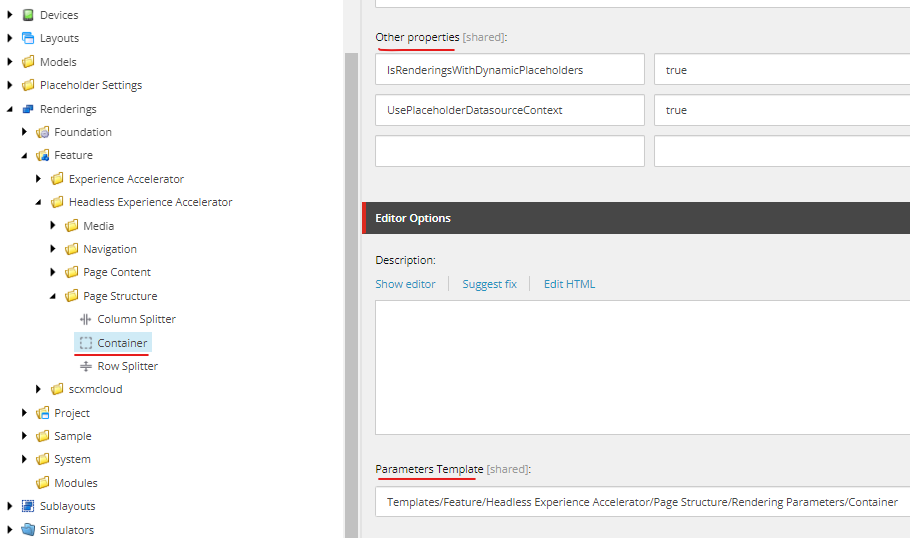
Thre Container rendering is at following lcoation in Sitecore –
Note Other properties- IsRenderingsWithDynamicPlaceholders and IsRenderingsWithDynamicPlaceholders is set to true
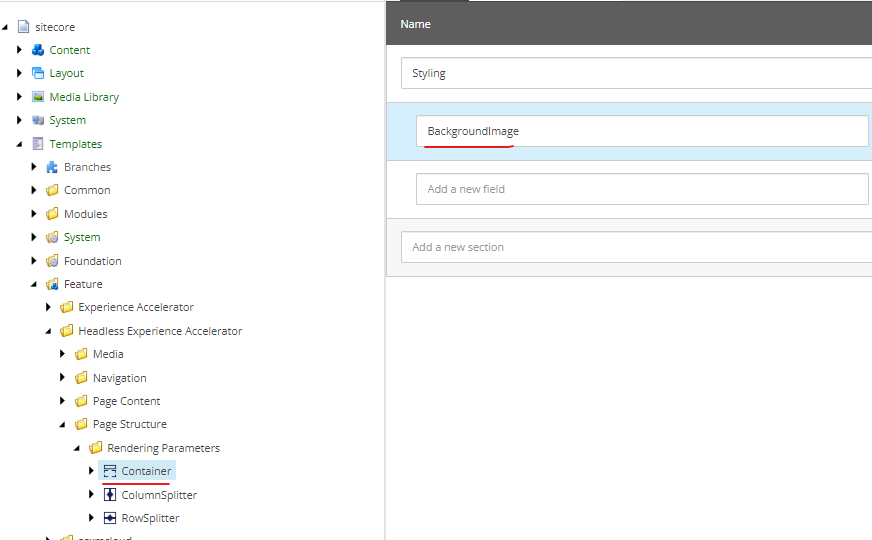
Rendering parameter is located – /sitecore/templates/Feature/JSS Experience Accelerator/Page Structure/Rendering Parameters/Container
Rendering paramter template has the BackgroundImage field. The background image will be set based on the image selected in this field.
How the image is set in Head
Lets see background image set in nextjs (sxastarter) Container.tsx
// image string from the rendering parameters
 let backgroundImage = props.params.BackgroundImage as string;
  let backgroundStyle: { [key: string]: string } = {};
  console.log('backgroundImage1');
  console.log(backgroundImage);
  if (backgroundImage) {
    const prefix = `${sitecoreContext.pageState !== 'normal' ? '/sitecore/shell' : ''}/-/media/`;
    backgroundImage = `${backgroundImage?.match(BACKGROUND_REG_EXP)?.pop()?.replace(/-/gi, '')}`;
    backgroundStyle = {
      backgroundImage: `url('${prefix}${backgroundImage}')`,
    };
  }

  return (
    <div className={`component container-default ${styles}`} id={id ? id : undefined}>

// style applied to <div> having background image
      <div className="component-content" style={backgroundStyle}>
        <div className="row">
          <Placeholder name={phKey} rendering={props.rendering} />
        </div>
      </div>
    </div>
  );
};
Lets see this in working in experience editor and rendering host
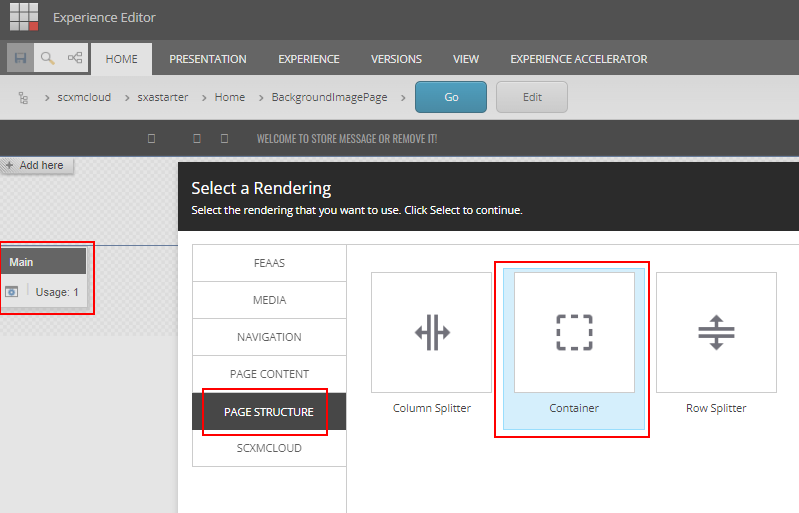
In the experience editor main section add a container component.
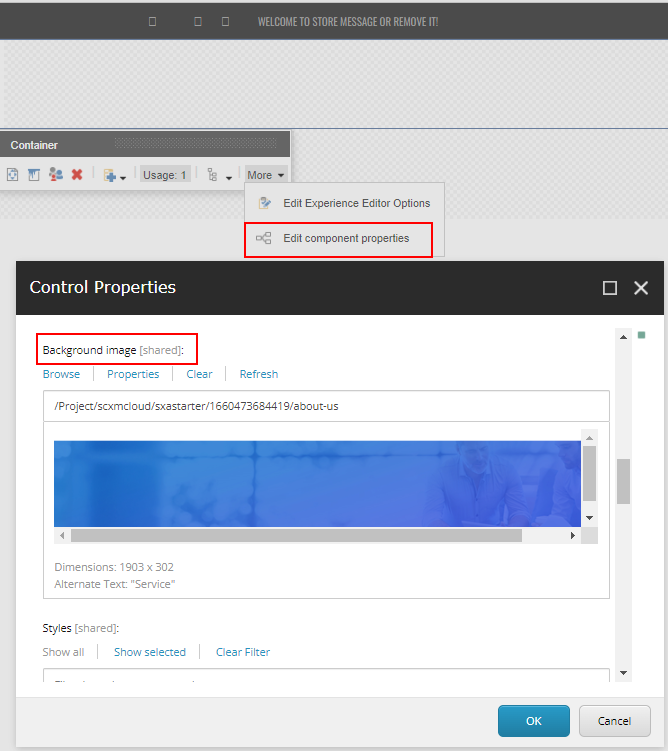
Once the rendering is added, goto “Edit component properties” and add an background image
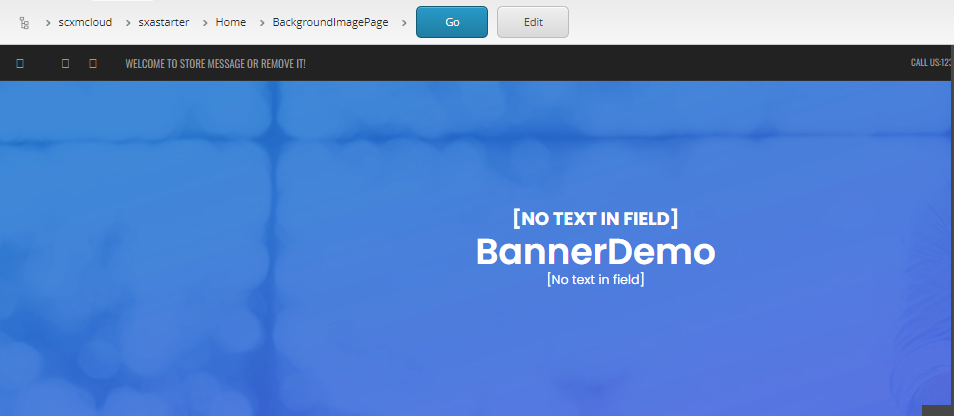
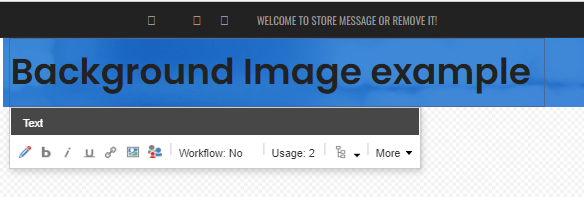
Now you are able to see the background image applied ot container and I have added RichText in containerto show the image in background-
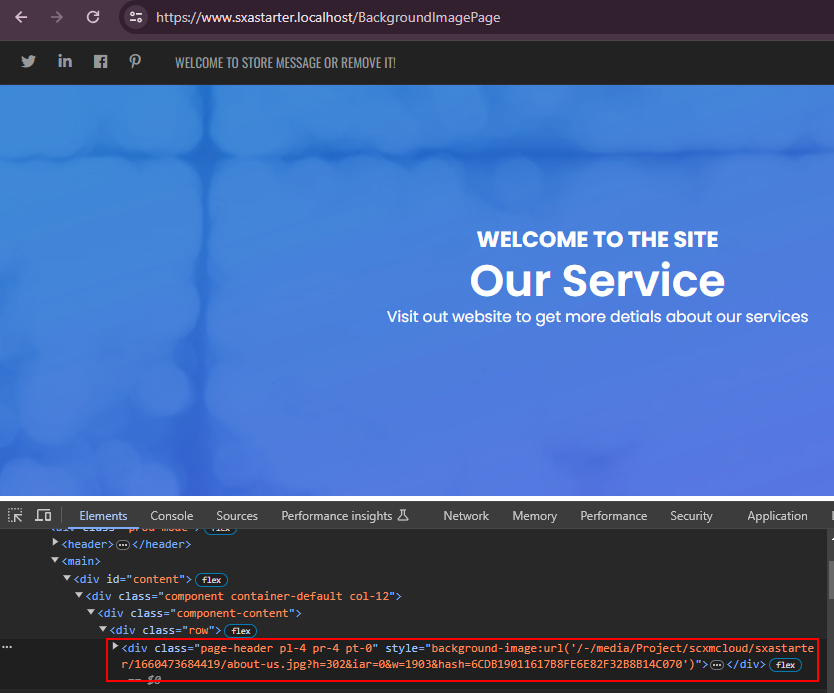
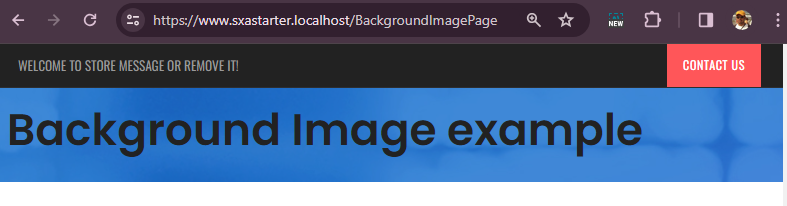
Rendering Host displays the image in background-
Nested containers to apply differnt background image or component
If you add only one container the image will be applied to the main section.
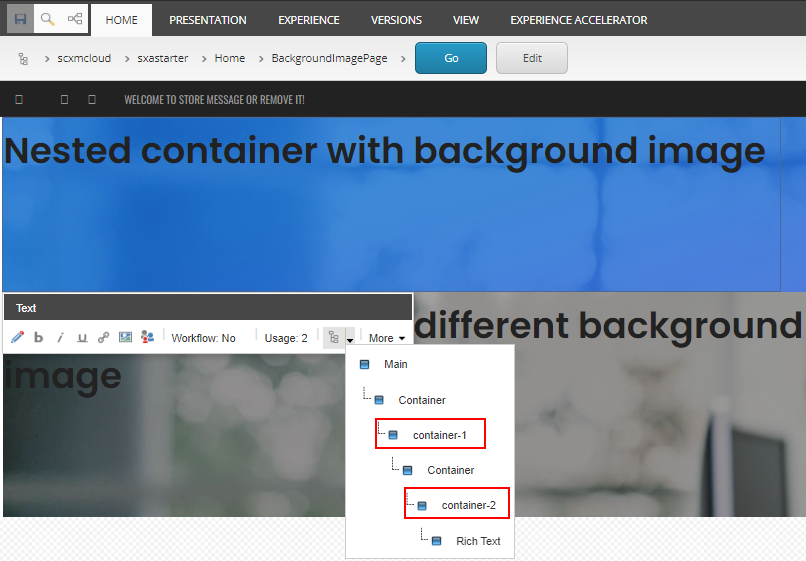
To resolve this you can add a container within main container. add mutiple containers as per your requirements. To set the background image to specific container in this example contianer-2 select the parent(i.e. container) and set the image by Editing the Component properties
This should apply the different images for various other sections in the sampe page and since the Container rendering has IsRenderingsWithDynamicPlaceholders property set this should create a unique Id for each container.
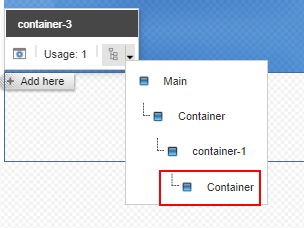
Here for example container-2 and container-3 is a child of container-1
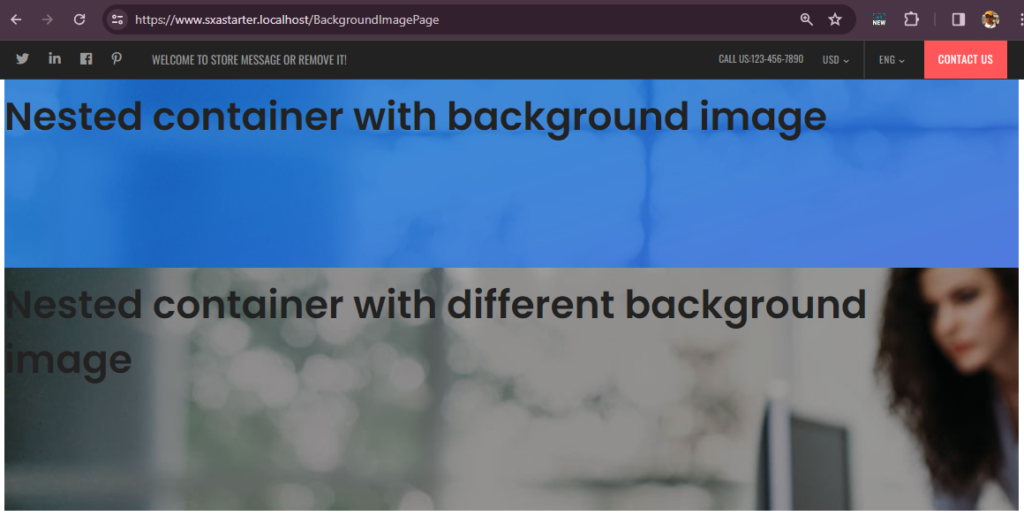
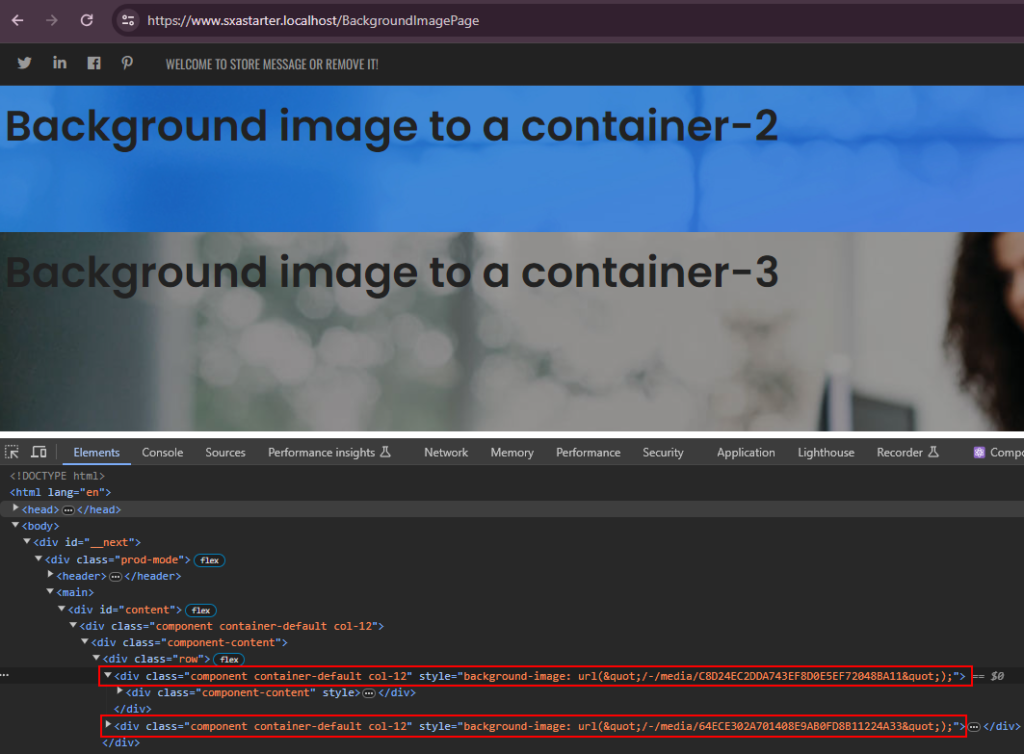
Rendering Host displays banckgroung images with there respective components-
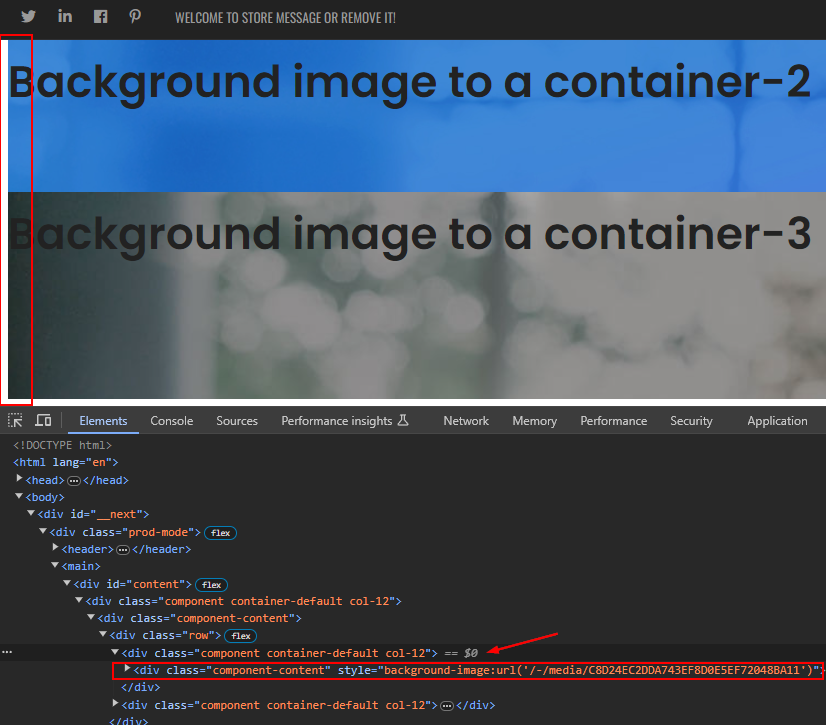
Isusue- Here you can see there is a white patch when applied to child container and the image is applied to inner div.
To resolev this apply the image to the outer div instead in container.tsx