Category: Sitecore

Siteocre Personalize – Create a triggered experience to send abandon cart mail

This blog describes the step by step process to create a triggered expereience in Sitecore Personalize to send a abandon cart mail.

Create Experience

Choose Triggered Experience

Name the experience

Configure API Request

Choose a connection created in this blog post – here

Configure the reponse

Save and Close

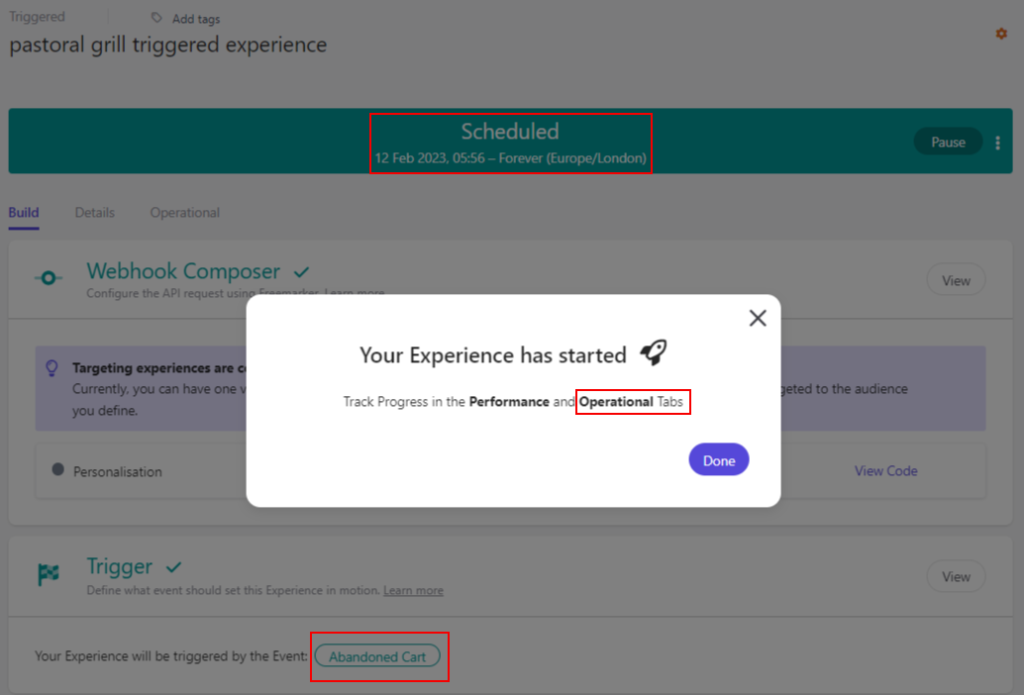
Start the Expereince and select option “Run immediately”

Steps to add abandon the cart-

Step 1 – View event

Follow the blog post – here

Step 2- Identity event

Follow the blog post – here

Step 3- Add event

Follow the blog post – here

Step 4 – Force Close event

Follow the blog post – here OR wait for session to expire ( normally 20 minutes or as configured in POS)

Mail is delivered to the customer

Loading

Sitecore Personalize – Create connection used by triggered experience

Create connection to external service used to trigger experience. This connections are outbound.

In this blog will see an example to create a connection to mailjet which can be used to trigger a expereience for abandon cart(covered in another blog post)- here

Setup mailjet account

Create a new account if you don’t have any- https://www.mailjet.com/

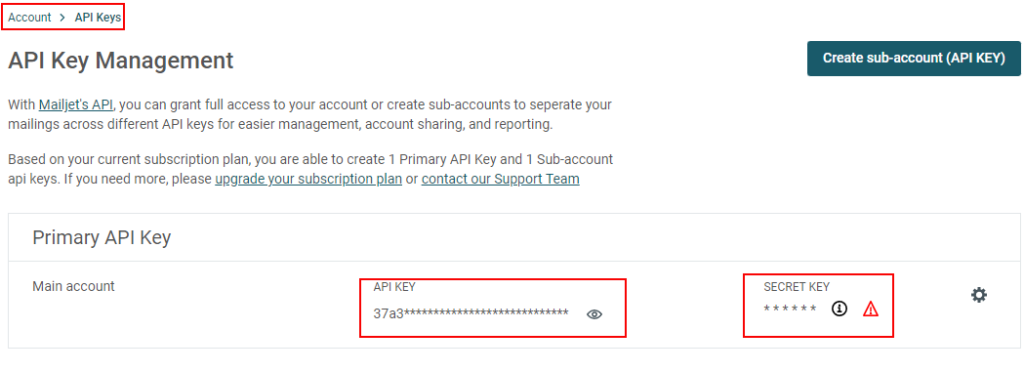
In the Account Settings => select optin “API Key management”

Note the API Key and Secret Key

Generate a secret key if not already generated.

Create a connection in Sitecore CDP portal

Navigate to “Develoepr center” => Connections option

Search for existing connection or “Add Connection”

Select “Destination” option for Flows to send data.

Fille in the required details and select icon-

Authentication

Next setup the Basic Authentication. Copy the API Key as User Name and Password as Secret Key and “Test Authentication”

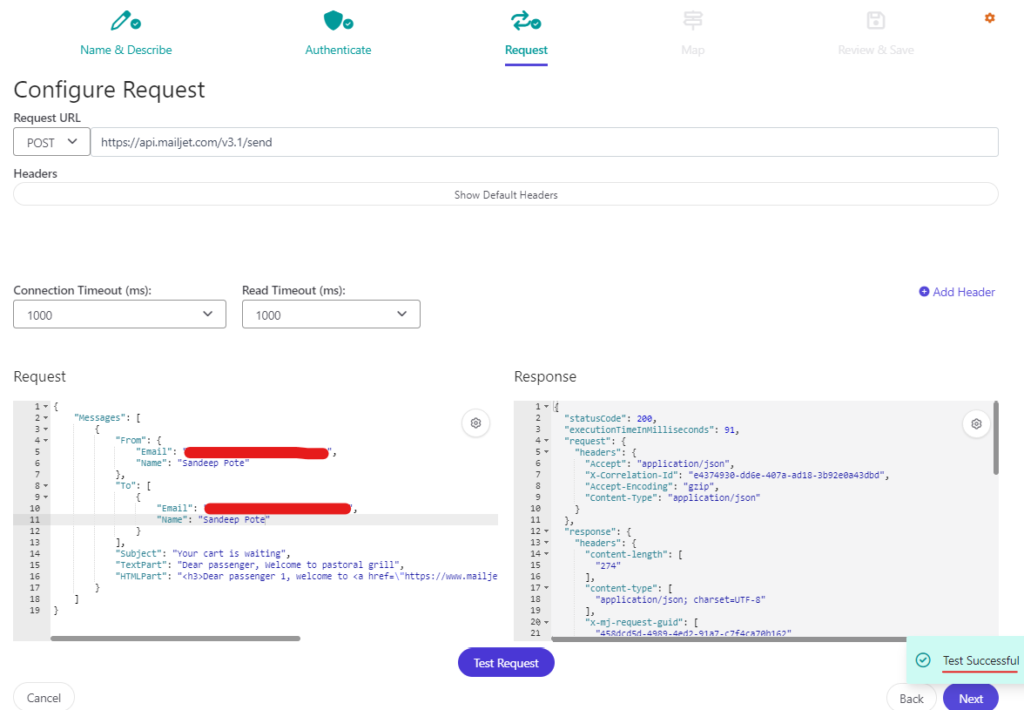
Setup the request

Get the api endpoint and the request body from here – https://dev.mailjet.com/email/guides/getting-started/

// Sample mail 
{
    "Messages": [
        {
            "From": {
                "Email": "pilot@mailjet.com",
                "Name": "Your Mailjet Pilot"
            },
            "To": [
                {
                    "Email": "passenger@mailjet.com",
                    "Name": "Customer 1"
                }
            ],
            "Subject": "Your cart is waiting",
            "TextPart": "Dear passenger, Welcome to pastoral grill",
            "HTMLPart": "<h3>Dear passenger 1, welcome to <a href=\"https://www.mailjet.com/\">Mailjet!</a></h3><br />May the delivery force be with you!"
        }
    ]
}

Tet the connection-

Note- add sender address to the contact list in mailjet or the mails will be blocked. Also the mails from gmail wont be triggered. Use this URL to add sender address-

https://app.mailjet.com/account/sender

Check if the test Mail received-

Click Next, Review & Save

Connection is created and this can be used when an expereince is triggered.

Next setup the Triggered Expereince

Loading

Sitecore Send – How to Resubscribe a user to a mailing list

To resubscribe a user goto the mailing list where a user has unsubscribed, navigate to the Unsubscribe tab-

In the action menu – Select Change Status option

Select the Active option and Change Status-

The user will now be made Active and any mails from this mailing list will be sent to the user-

Or you can also ask user to Subscribe again following the steps in this blog.

Loading

Setup XM Cloud Site to host on Vercel

In this blog post we will Link the XM Cloud to Vercel. The XM Cloud site will be hosted in Vercel by Seting up the host

In this blog post we saw how to setup the Vercel Project manually but this whole process can be automated by Creating and linking the host.

Configure Hosting Connection

Login to XM Cloud and navigate to Connections –> Hosting tab

Click on Create connection –> Vercel

Login to Vercel and add Integration

Select the account to connect. In my case its personal account

Select the all projects to integrate, dont selecy any specific project or you will get error. See errors section-

Confirm and Add Integration-

A new Hosting connection is created with the name-

Setup Hosting

Navigate to Projects ==> Environments ==> Sites Tab

Link Vercel Site (Connection been already created)

You can create Hosting connection from here too.

Click “Create and link”

Now you can see the Site is linked to host i.e. Vercel.

Once the Site is linked you should be able to see the project in Vercel

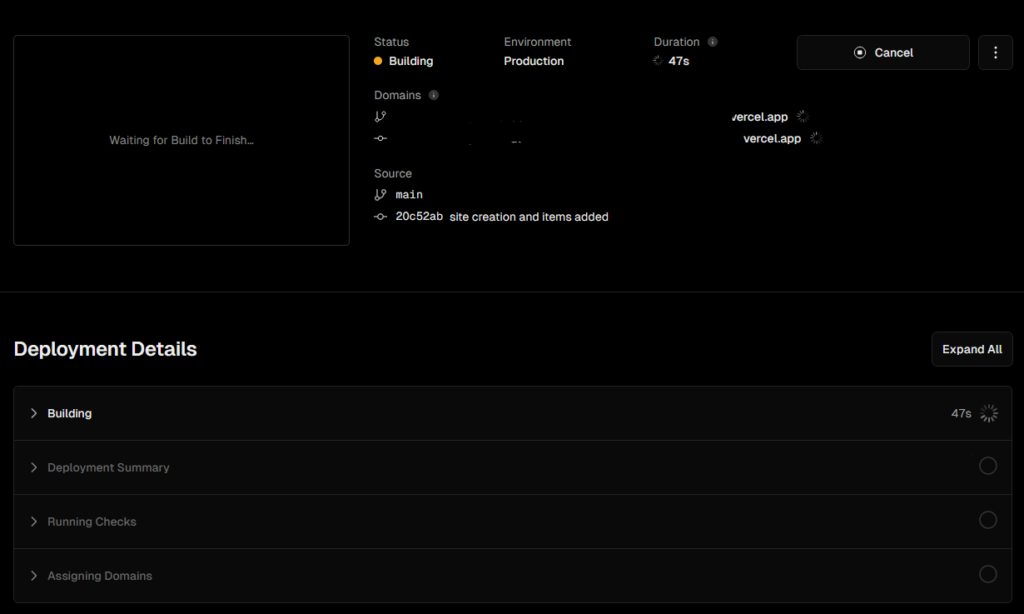
Login to vercel and see the newly created project and deployment in-progress.

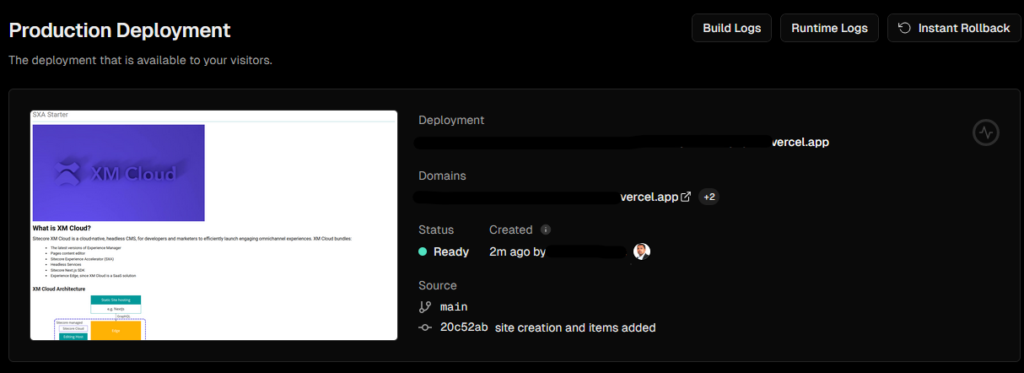
In few minutes the deployment should be completed

Click on the domains and should see the Site-

Errors-

Vercel installation will require ‘All Projects’ access. Please change the access on the Vercel installation

Resolution

Delete any exisitng Hosting Connection and re-create the hosting with Integration to be allowed to all projects.

Loading

Use Experience Edge GraphQL to access XM Cloud hosted site

GraphQL delivery API is used to access the published site content. Experience Edge for Experience Manager (XM) is an API-based service from Sitecore that gives you globally replicated, scalable access to your XM Cloud items, layout, and media. You can use the standard publish tools in XM Cloud , but instead of rendering content from a self-hosted Content Delivery environment, Experience Edge provides you a Sitecore-hosted GraphQL API. 

To access the XM Cloud hosted published site content using Expereince Edge follow these steps-

Login to XM Cloud. Navigate to Projects ==> Environments ==>Details tab.

Launch IDE for Live GraphQL

The URL for GraphQL IDE –

https://edge.sitecorecloud.io/api/graphql/ide

GraphQL edge endpoint is –

https://edge.sitecorecloud.io/api/graphql/v1

Let stry a simple query to get siteinfo-

If you see this error- JSON.parse: unexpected character at line 1 column 1 of the JSON data

This means a header with GraphQL token is not provided or incorrect.

Generate Delivery API token-

Add X_GQL-TOKEN in header with newly generated token vlaue

You should now be able to access only the published Site content using Experience Edge.

If you are not able to see the items, you might have not published the ietms

Publish items to edge

Loading

Create Vercel project to host XM Cloud Site

Sitecore XM Cloud Vercel connector helps to host Website to Vercel

Before using this connector you have to create Project and Environment.

Prerequisite

Before we ould start configuring Project in Vercel we need following info-

JSS APP Name- can be found and should be same as configured in package.json in sxastarter folder

In this case it is sxastarter

GRAPHQL ENDPOINT

GraphQL endpoint for published Sitecore items i.e. Delivery/Live endpoint is –

https://edge.sitecorecloud.io/api/graphql/v1

Sitecore API Key

This should be the GraphQL Delivery token i.e. GQL token-

There are different ways to generate GQL Token. One of the way is generate from portal. Login to XM Cloud and navigate to Projects ==> Environments ==> Details tab

Click on Generate Delivery API Key (Note this key as this won’t be avilable again and needs to be re-generated again if lost)

Note this API key as this is required later whilst configuring the Vercel hosting.

Publish Site

Publish the site to Edge before starting to configure Project in Vercel, since we are configuring GraphQL Delivery API token items in Sitecore needs to be published

Create a Project in Vercel

Login to Vercel and Create Project-

Since I have logged in using GitHub account it displays the repositories in Github the project will be based on-

Import the repository-

Configure Project

Once the project is created configure the project by selecting the Framework and repo folder FE code exists-

Choose the Nextjs Framework

Choose the sxastarter folder from the repo i.e. /src/sxastarter

Add following environment variables extracted earlier-

JSS_APP_NAME – sxastarter

GRAPH_QL_ENDPOINT – https://edge.sitecorecloud.io/api/graphql/v1

SITECORE_API_KEY – Delivery API Key generated from portal.

Should have this confiogured in the Vercel Project-

Deploy the Project

Deployment complete-

Visit the Site and should get the same view as configued in local environment and Experience Editor-

Thats all for how to create a Vercel Project and deploy site.

Errors-

If you see error-

The field 'item' does not exist on the type 'query'

Resolution-

Publish the site

Loading

OrderCloud Headstart Docker Setup Error- package installation must use TLS 1.2 or higher

0 47.60 npm notice Beginning October 4, 2021, all connections to the npm registry – including for package installation – must use TLS 1.2 or higher. You are currently using plaintext http to connect. Please visit the GitHub blog for more information: https://github.blog/2021-08-23-npm-registry-deprecating-tls-1-0-tls-1-1/

0 114.7 npm ERR! Cannot read properties of null (reading ‘pickAlgorithm’)

Update the UI docker file in this location- \headstart\docker\build\UI\Dockerfile

Change this to https

RUN npm config set registry https://registry.npmjs.org/ --global

Also clear cache –

This should resolve the error

Loading

Sitecore Headless SXA – Create, apply and restrict a custom style to renderings

In this blog post I will show how to apply a custom style to a rendering.

Requirement-

I have a requirement to add extra spacing between the components.

There is already a indent-top style which provides this space (20px) but neesd 100px space.

And the same can see in Experience Editor-

Same can also see in css file in sxastarter project-

Create a custom style (indent-large-top)

Create custom style in Sitecore-

Create a new style (Indent Large Top) in Sitecore under Presentations => Styles ==> Spacing

/sitecore/content/scxmcloud/sxastarter/Presentation/Styles/Spacing

Provide the value of the Style-

Create a style in FE project with the same value-

There are various ways you should be able to do this. I am adding 5 times more space to the existing indent-top style.

_indent.scss

// $middle-margin is defined in _margins.scss
.indent-large-top {
  margin-top: calc($middle-margin * 5);
}

Apply a custom style to rendering

Select the component or container you want to apply style and choose option “Indent Large Top” in Spacing section

Now the space between the 2 component is increased and is 100px as per the requirement.

New style applied to container-

Apply style to specific renderings

As above when the style was created it was applied to all renderings.

If you want to restrict the style to be applied to only certain renderings you can do so by setting Allowed renderings field in new created Style item.

For “Indent Large Top” only SectionContainer will be able to see the new Spacing Style.

In Experience Editor you wont see the “Indent Large Top” for other renderings e.g.- for container rendering-

While for Section Container rendering the new style is available-

References-

https://doc.sitecore.com/xp/en/developers/sxa/103/sitecore-experience-accelerator/add-a-style-for-a-rendering.html

Loading

How to set background image using Next js in Sitecore XM Cloud

This is a very common scenario where a background image needs to be set to certain components. Banner’s on any page on your website is a very common place to have a background image.

This blog assumes you have setup the Foundation Head setup or have your own Nextjs project setup implemented using the Sitecore NextJS SDK.

Note: This is not specific to XM Cloud but for any Headless implementation

Foundation Head already has an example on setting the background image using params. In this blog post will explore how this works and where in Sitecore the image can be applied. Will see how this can applied using using OOTB _Background Image item.

To apply image background using rendering parameters to the container see this blog here

Applying background image using rendering field to the components

Background image can be applied to components inheriting the existing __Background Image item to the custom component template.

Create a template for your component. Here I am creating a Banner component-

Inherit _Background Image from /sitecore/templates/Foundation/Experience Accelerator/Presentation/_Background Image

_Background Image has “Background Image” and “Stretch mode” field.

Note that there is a space between the field names, although not recommended but this comes OOTB.

Create a “Banner” JSON Rendering and provide the “Parameters Template”, “Datasource Location” and “Datasource Template” as per your requirement and add this rendering to the “Available Renderings”

Create a Nextjs component in sxastarter project

Note below how the “Background Image” field is set. This is due to the same in field name. Not recommended but this is OOTB.

View this gist on GitHub

Experience Editor-

Add a container component in Main placeholder-

Add a newly created component (Banner) in Container placeholder-

Create or select associated content

Once the component is added you should see the button to Add Background Image ( ths is added when the template inherits from _Background Image template.

Select the Background Image and Save-

You should now able to see the background image to component-

Rendering Host-

Reference-

https://doc.sitecore.com/xmc/en/users/xm-cloud/add-a-background-image.html

Setup BTCPay server in Azure

BTCPay Server is a self-hosted, open-source cryptocurrency payment processor. It’s secure, private, censorship-resistant and free.

Refer this link

Create a Resource group in Azure. I create this in West Us region.

Choose the template from the provided link and should take straight to your Azure subscription-

Enter the valid Vm Size and the supported crypto payment.

Select the Network – Mainnet, TestNet or regtest

Select the Ubuntu version. You may select the latest

Resources in Azure

This should create following resources in Azure in the selected resource group-

Navigate to BTCPayServerPublicIP resource. This should show the dns name.

This is your BTC pay admin portal.

Register Admin user

First time when you access the Btc Pay server should ask you to register a user. This user will be a owner.

Login to BTC pay server

Login with the newly created user

You will be asked to configure the lightining network and create a wallet.

Configuring the wallet and lightning network will follow in next blog along with integration with integration with commerce system such as Order Cloud.

Stay tuned to know how to configure this which should ulitmately sync the nodes as shown in below screen.

Loading