Author: sandeeppote

Version issues with Sitecore Graphql Search Query

In this blog post we saw how to use Sitecore Grpahql Search query to filter the items.

But search query has issues with results getting same items with different version in Preview mode. This works fine for the published item (edge) as a single version of item is published.

I created a new version of the same item-

Using the same query

# Write your query or mutation here

query SearchQuery($pageSize: Int = 10, ) {
  search(
    where: {
      AND: [
        {
          name: "_path"
          value: "{B08684BB-3CB0-4DFE-A378-054E26ECC5AE}"
          operator: CONTAINS
        }
        { name: "ProductId", value: "bali-power-bank-3000mah" }
      ]
    }
    first: $pageSize
  ) {
    total
    results {
      id
      name
      version
      url {
        path
      }
	... on Product{
        productId{value}
        productFeature{value}
      }
    }
  }
}

See the output results in same item with versions available in Sitecore-

{
  "data": {
    "search": {
      "total": 2,
      "results": [
        {
          "id": "8716FE4AD58345589AB04369C39F5CC0",
          "name": "bali-power-bank-3000mah",
          "version": 2,
          "url": {
            "path": "/Data/Commerce-Data/Product-Data/bali-power-bank-3000mah"
          },
          "productId": {
            "value": "bali-power-bank-3000mah"
          },
          "productFeature": {
            "value": "UPDATE - official-camera - Product Feature. JIGA power bank is a high-quality battery pack, with all-day powerThe power bank can charge your phone at least 3-5 times,the perfect partner for gamers, camping and business trips."
          }
        },
        {
          "id": "8716FE4AD58345589AB04369C39F5CC0",
          "name": "bali-power-bank-3000mah",
          "version": 1,
          "url": {
            "path": "/Data/Commerce-Data/Product-Data/bali-power-bank-3000mah"
          },
          "productId": {
            "value": "bali-power-bank-3000mah"
          },
          "productFeature": {
            "value": "official-camera - Product Feature. JIGA power bank is a high-quality battery pack, with all-day powerThe power bank can charge your phone at least 3-5 times,the perfect partner for gamers, camping and business trips."
          }
        }
      ]
    }
  }
}

See the highlighted fields in result. Same ID, multiple result set with different versions. Unfortunately, there is no option here to get the latest version. Sitecore has clarified this and raised a bug for same as of October 2025. this might be resolved in future. The related public reference number is DEVEX-2992.

How to solve this issue- This needs to be handled in headless app.

Headless app needs to filter this for each item and should pick only latest version from the result set for the same item.

function GetLatestVersion(products: ProductResult[]) 
{ 
  if (products.length === 0) 
  { return null; } 
  const latestVersions = Object.values( products.reduce<Record<string,        ProductResult>>((acc, item) => { 
  const existing = acc[item.id]; 
  if (!existing || item.version > existing.version) 
  { 
    acc[item.id] = item; 
  } 
  return acc; 
}, 
{})); 
 return latestVersions; 
}

This should only provide the latest version of item.

Loading

XMCloud Graphql Search query

To search items in Sitecore you can use Graphql search query. It uses where conditions which can have AND and OR operators on any fields in an item.

See below examples for using search query.

I have following list of items in Sitecore-

I want to search by ProductId. This item has only one version.

Use below search query-

query SearchQuery($pageSize: Int = 10, ) {
  search(
    where: {
      AND: [
        {
          name: "_path"
          value: "{B08684BB-3CB0-4DFE-A378-054E26ECC5AE}"
          operator: CONTAINS
        }
        { name: "ProductId", value: "bali-power-bank-3000mah" }
      ]
    }
    first: $pageSize
  ) {
    total
    results {
      id
      name
      version
      url {
        path
      }
      ... on Product{
        productId{value}
        productFeature{value}
      }
    }
  }
}

We used the where condition with the AND operator.

AND operator has _path and ProductId for searching a secific product or a list of products matching the search criteria.

Here the value of _path is the folder/path where you want to make the query. It is always good to provide the path to increase the performance of search.

ProductId is the field in item to search on. You can also apply more filters here, for example template you want to search.

Output of the above query-

{
  "data": {
    "search": {
      "total": 1,
      "results": [
        {
          "id": "8716FE4AD58345589AB04369C39F5CC0",
          "name": "bali-power-bank-3000mah",
          "version": 1,
          "url": {
            "path": "/Data/Commerce-Data/Product-Data/bali-power-bank-3000mah"
          },
          "productId": {
            "value": "bali-power-bank-3000mah"
          },
          "productFeature": {
            "value": "official-camera - Product Feature. JIGA power bank is a high-quality battery pack, with all-day powerThe power bank can charge your phone at least 3-5 times,the perfect partner for gamers, camping and business trips."
          }
        }
      ]
    }
  }
}

Loading

Sitecore Personalize – Create Fullstack Interactive Experience

Run interactive expereince using the friendlyID attribute. When the expereinces are created in Sitecore CDP an ID is created for the experience. Use this ID to run an experiemnet.

How to create a fullstack experience in Sitecore CDP-

In the menu option click on Experiences => Full stack

This should show the list of existing experiences . Click on Create Experience

Select Interactive Experimence option-

Provide a name and note the ID –

Click on the Configure API response option-

Create a json response. Use “Copy Path as Freemaker” to copy the field name. In this case guest.title, guest.firstname etc.

One variant

You can have only one variant in an experience. Optionally, choose who will receive this experience using the audience filter. If you want to have multiple variants, create an experiment instead.

Click Save and “Preview API” to test the response

Note: dont forget to Save before testing the response.

Search for the guests. See how to create guests here <<enter blog details>>

Response for the guest that is searched. Back to “Interactive Expereience”

Error- if you receive this error. I had to add “” to the field names-

Run the Expereince immediately or schedule-

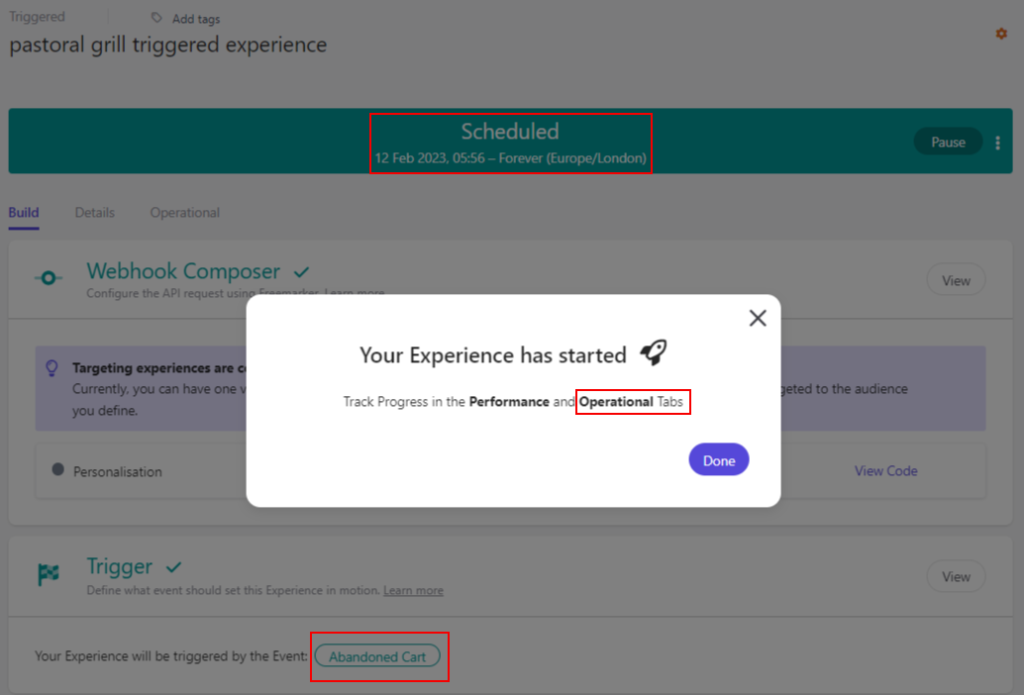
Experience is now live and the performance can be tracked in “Operational” Tab

At this point of time there are no executions. Check the “Operational” tab-

See this Full Stack Experiences list-

Next run the Experience in Postman or from the Web Site.

Loading

Sitecore Personalize – Run Fullstack Experience using Rest API endpoint

Continuing with the post – Sitecore Personalize – Create Fullstack Experience

In earlier post created a new Fullstack experience named- pastoral grill experience and ID for same was “”

Get the ID of the expereince in “Details” tab and a code snippet to run this in frontend. But in this post will see how to interact using rest api endpoint.

Send request to Rest API to recieve response-

https://{{apiEndpoint}}/{{restApiVersion}}/callFlows

See here API target endpoint to be used based on region-

https://doc.sitecore.com/cdp/en/developers/sitecore-customer-data-platform–data-model-2-1/walkthrough–preparing-to-integrate-with-sitecore-cdp.html

https://doc.sitecore.com/cdp/en/developers/sitecore-customer-data-platform–data-model-2-1/base-url-of-sitecore-cdp-apis-for-v2-1-data-model.html

Request and Response-

clientKey- I have client key as a ennvironment variable. See how to find Client Key

pointOfSale- Enter your configured point of sale. See how to create or get POS

friendlyId- Fullstack/Web Epxerience friendly id. See how to get interactive experience id

In the operational tab there is a spike at the time the request was sent-

Loading

Siteocre Personalize – Create a triggered experience to send abandon cart mail

This blog describes the step by step process to create a triggered expereience in Sitecore Personalize to send a abandon cart mail.

Create Experience

Choose Triggered Experience

Name the experience

Configure API Request

Choose a connection created in this blog post – here

Configure the reponse

Save and Close

Start the Expereince and select option “Run immediately”

Steps to add abandon the cart-

Step 1 – View event

Follow the blog post – here

Step 2- Identity event

Follow the blog post – here

Step 3- Add event

Follow the blog post – here

Step 4 – Force Close event

Follow the blog post – here OR wait for session to expire ( normally 20 minutes or as configured in POS)

Mail is delivered to the customer

Loading

Sitecore Personalize – Create connection used by triggered experience

Create connection to external service used to trigger experience. This connections are outbound.

In this blog will see an example to create a connection to mailjet which can be used to trigger a expereience for abandon cart(covered in another blog post)- here

Setup mailjet account

Create a new account if you don’t have any- https://www.mailjet.com/

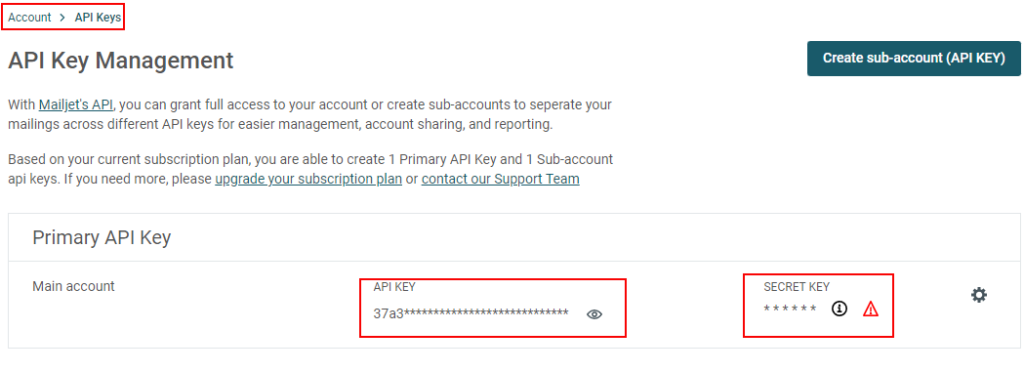
In the Account Settings => select optin “API Key management”

Note the API Key and Secret Key

Generate a secret key if not already generated.

Create a connection in Sitecore CDP portal

Navigate to “Develoepr center” => Connections option

Search for existing connection or “Add Connection”

Select “Destination” option for Flows to send data.

Fille in the required details and select icon-

Authentication

Next setup the Basic Authentication. Copy the API Key as User Name and Password as Secret Key and “Test Authentication”

Setup the request

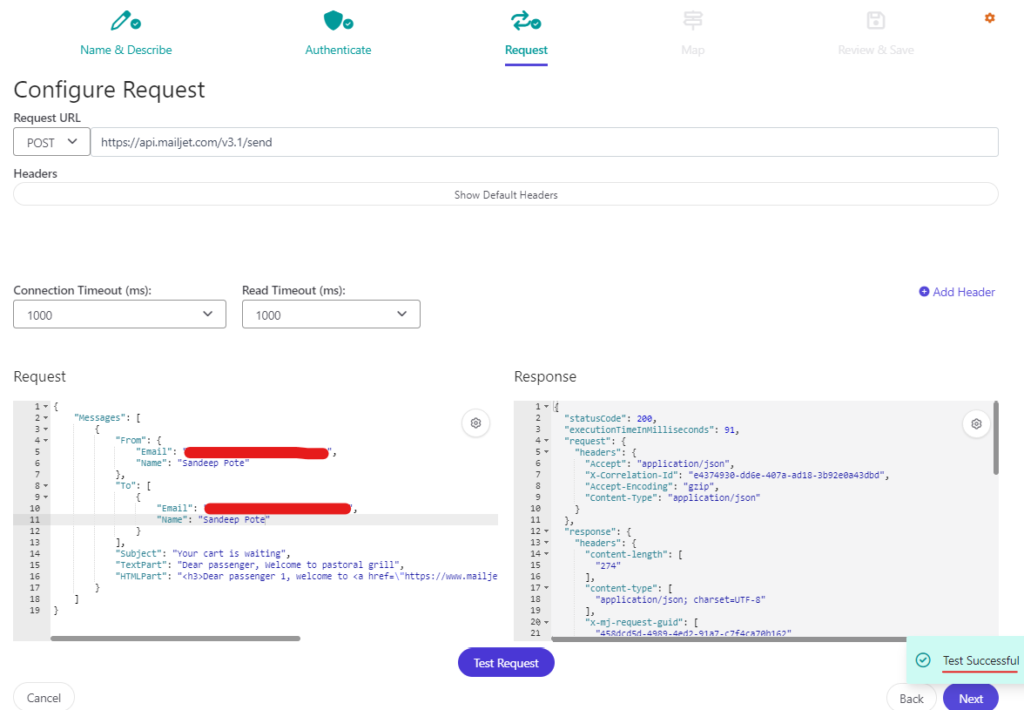
Get the api endpoint and the request body from here – https://dev.mailjet.com/email/guides/getting-started/

// Sample mail 
{
    "Messages": [
        {
            "From": {
                "Email": "pilot@mailjet.com",
                "Name": "Your Mailjet Pilot"
            },
            "To": [
                {
                    "Email": "passenger@mailjet.com",
                    "Name": "Customer 1"
                }
            ],
            "Subject": "Your cart is waiting",
            "TextPart": "Dear passenger, Welcome to pastoral grill",
            "HTMLPart": "<h3>Dear passenger 1, welcome to <a href=\"https://www.mailjet.com/\">Mailjet!</a></h3><br />May the delivery force be with you!"
        }
    ]
}

Tet the connection-

Note- add sender address to the contact list in mailjet or the mails will be blocked. Also the mails from gmail wont be triggered. Use this URL to add sender address-

https://app.mailjet.com/account/sender

Check if the test Mail received-

Click Next, Review & Save

Connection is created and this can be used when an expereince is triggered.

Next setup the Triggered Expereince

Loading

Sitecore Send – How to Resubscribe a user to a mailing list

To resubscribe a user goto the mailing list where a user has unsubscribed, navigate to the Unsubscribe tab-

In the action menu – Select Change Status option

Select the Active option and Change Status-

The user will now be made Active and any mails from this mailing list will be sent to the user-

Or you can also ask user to Subscribe again following the steps in this blog.

Loading

Setup XM Cloud Site to host on Vercel

In this blog post we will Link the XM Cloud to Vercel. The XM Cloud site will be hosted in Vercel by Seting up the host

In this blog post we saw how to setup the Vercel Project manually but this whole process can be automated by Creating and linking the host.

Configure Hosting Connection

Login to XM Cloud and navigate to Connections –> Hosting tab

Click on Create connection –> Vercel

Login to Vercel and add Integration

Select the account to connect. In my case its personal account

Select the all projects to integrate, dont selecy any specific project or you will get error. See errors section-

Confirm and Add Integration-

A new Hosting connection is created with the name-

Setup Hosting

Navigate to Projects ==> Environments ==> Sites Tab

Link Vercel Site (Connection been already created)

You can create Hosting connection from here too.

Click “Create and link”

Now you can see the Site is linked to host i.e. Vercel.

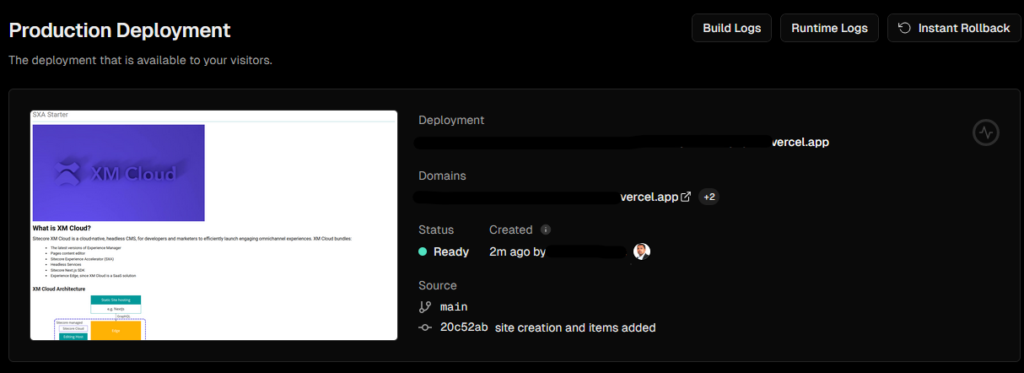
Once the Site is linked you should be able to see the project in Vercel

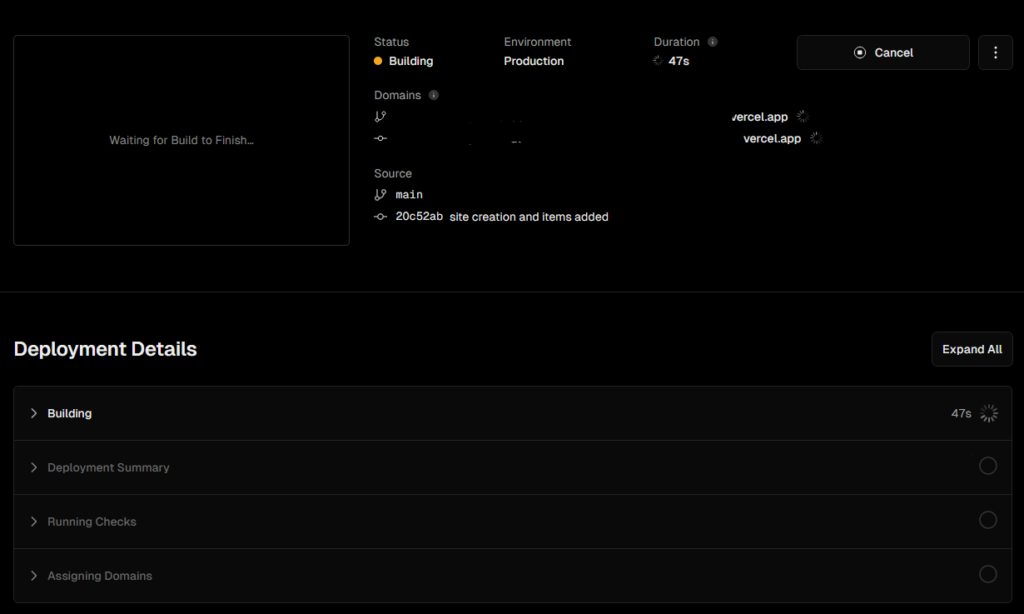
Login to vercel and see the newly created project and deployment in-progress.

In few minutes the deployment should be completed

Click on the domains and should see the Site-

Errors-

Vercel installation will require ‘All Projects’ access. Please change the access on the Vercel installation

Resolution

Delete any exisitng Hosting Connection and re-create the hosting with Integration to be allowed to all projects.

Loading