


Last Updated on November 29, 2025 by sandeeppote
Follow below steps to configure Sitecore Ordercloud Headstart middleware using Azure Resources
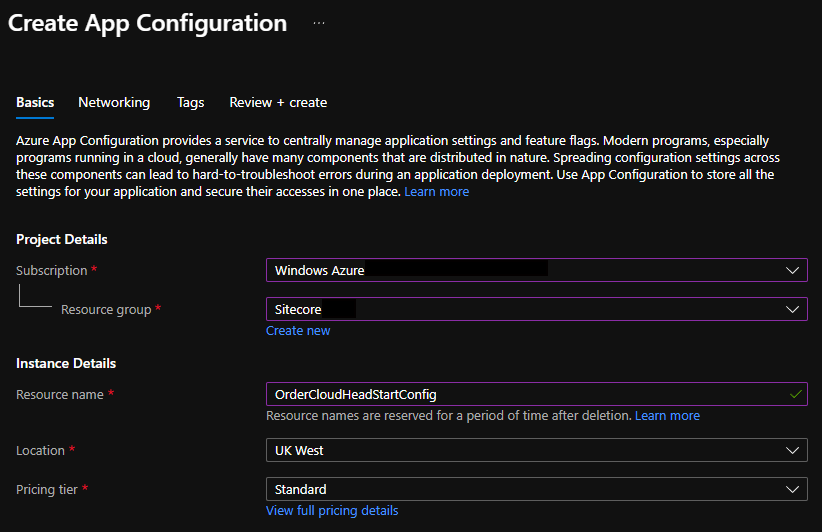
Step 1 – Setup a Azure App Configuration
Since we will be now setup a backend application (i.e. admin etc) the Client IDs and Client Secret that was create in Step 5 needs to be secured. This can be condifured in Azure App Configuration. See the link on how to setup this.
Use/Download the template here provided by Sitecore to setup the configuration
Create a json file on your local machine by copying the content in the template. In my case I have created OCHeadstartConfig.json. The template looks as below-
{
    "ApplicationInsightsSettings:InstrumentationKey": "",
    "AvalaraSettings:AccountID": 0,
    "AvalaraSettings:CompanyCode": "",
    "AvalaraSettings:CompanyID": 0,
    "AvalaraSettings:LicenseKey": "",
    "AvalaraSettings:BaseApiUrl": "https://sandbox-rest.avatax.com/api/v2",
    "StorageAccountSettings:ConnectionString": "",
    "StorageAccountSettings:BlobPrimaryEndpoint": "",
    "StorageAccountSettings:BlobContainerNameQueue": "queue",
    "StorageAccountSettings:BlobContainerNameCache": "cache",
    "StorageAccountSettings:BlobContainerNameExchangeRates": "currency",
    "StorageAccountSettings:BlobContainerNameTranslations": "ngx-translate",
    "CardConnectSettings:Authorization": "",
    "CardConnectSettings:AuthorizationCad": "",
    "CardConnectSettings:BaseUrl": "cardconnect.com",
    "CardConnectSettings:CadMerchantID": "",
    "CardConnectSettings:Site": "fts-uat",
    "CardConnectSettings:UsdMerchantID": "",
    "CosmosSettings:DatabaseName": "",
    "CosmosSettings:EnableTcpConnectionEndpointRediscovery": "false",
    "CosmosSettings:EndpointUri": "",
    "CosmosSettings:PrimaryKey": "",
    "CosmosSettings:RequestTimeoutInSeconds": "15",
    "EasyPostSettings:APIKey": "",
    "EasyPostSettings:FreeShippingTransitDays": "3",
    "EasyPostSettings:NoRatesFallbackCost": "20",
    "EasyPostSettings:NoRatesFallbackTransitDays": "3",
    "EnvironmentSettings:AppTimeoutInSeconds": "30",
    "EnvironmentSettings:MiddlewareBaseUrl": "",
    "EnvironmentSettings:BuildNumber": "",
    "EnvironmentSettings:Commit": "",
    "EnvironmentSettings:Environment": "Test",
    "EnvironmentSettings:TaxProvider": "Avalara",
    "FlurlSettings:TimeoutInSeconds": "40",
    "OrderCloudSettings:ApiUrl": "https://sandboxapi.ordercloud.io",
    "OrderCloudSettings:MiddlewareClientID": "",
    "OrderCloudSettings:MiddlewareClientSecret": "",
    "OrderCloudSettings:IncrementorPrefix": "DB_TEST",
    "OrderCloudSettings:WebhookHashKey": "",
    "OrderCloudSettings:MarketplaceID": "",
    "OrderCloudSettings:MarketplaceName": "",
    "SendGridSettings:ApiKey": "",
    "SendgridSettings:FromEmail": "",
    "SendgridSettings:CriticalSupportEmails": "",
    "SendgridSettings:SupportCaseEmail": "",
    "SendgridSettings:BillingEmail": "",
    "SendgridSettings:OrderSubmitTemplateID": "",
    "SendgridSettings:OrderApprovalTemplateID": "",
    "SendgridSettings:LineItemStatusChangeTemplateID": "",
    "SendgridSettings:QuoteOrderSubmitTemplateID": "",
    "SendgridSettings:NewUserTemplateID": "",
    "SendgridSettings:ProductInformationRequestTemplateID": "",
    "SendgridSettings:PasswordResetTemplateID": "",
    "SendgridSettings:CriticalSupportTemplateID": "",
    "SmartyStreetSettings:AuthID": "",
    "SmartyStreetSettings:AuthToken": "",
    "SmartyStreetSettings:RefererHost": "",
    "SmartyStreetSettings:WebsiteKey": "",
    "UI:BaseAdminUrl": "",
    "ZohoSettings:AccessToken": "",
    "ZohoSettings:ClientId": "",
    "ZohoSettings:ClientSecret": "",
    "ZohoSettings:OrgID": "",
    "ZohoSettings:PerformOrderSubmitTasks": "false"
  }
Select the subscription and Resource group
Provide the Resource name in this case I have used OrderCloudHeadStartConfig
Select Location and Pricing tier.
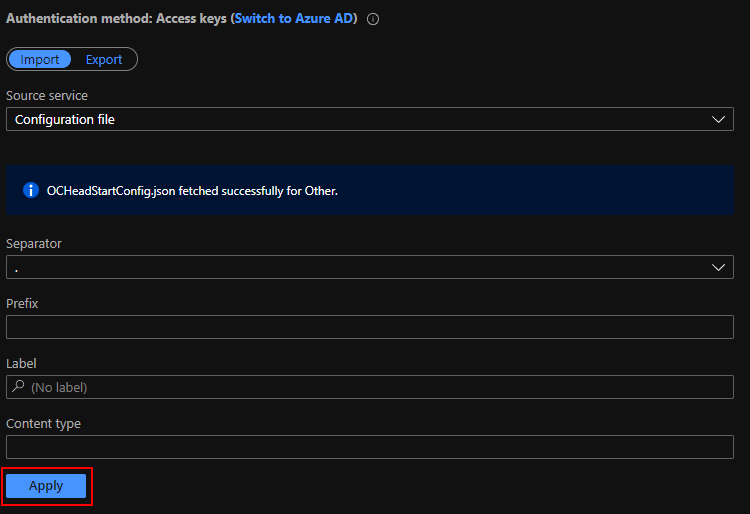
Once the resource is created in the Import/Export option select –
Source service – Configuration file
For language – Other
File type- Json
Source file – *.json (auto selected)
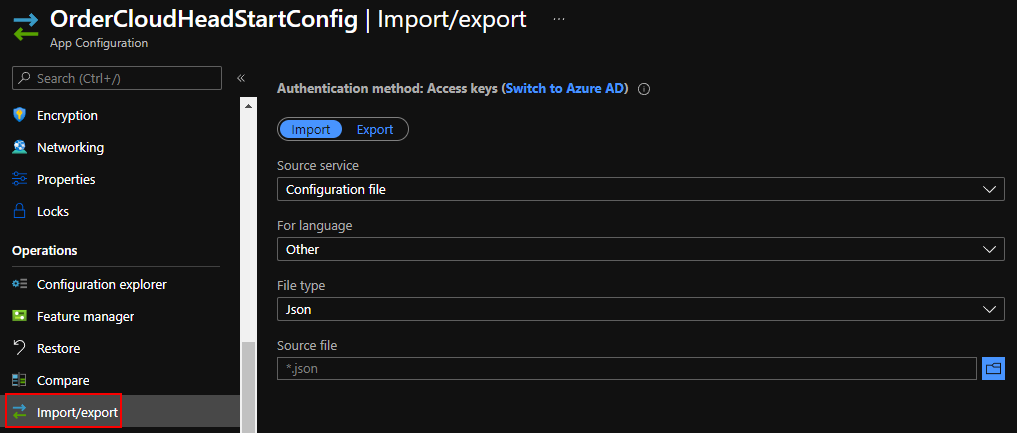
Select the folder icon in Source file option and click Apply to import the configuration.
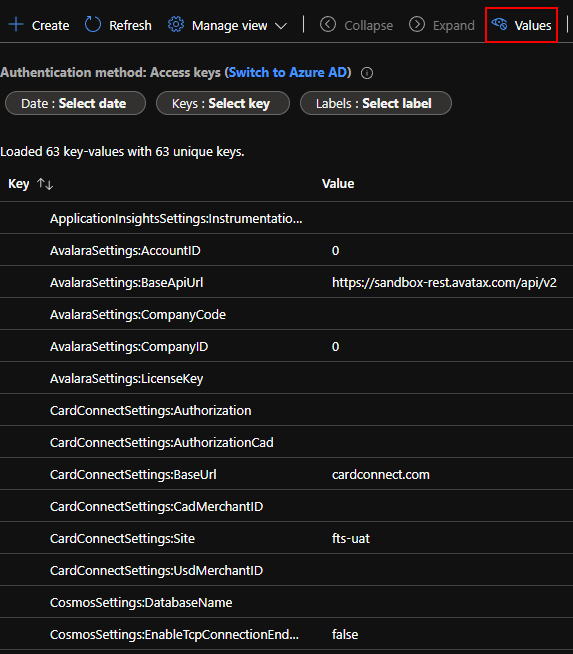
After the config file is imported navigate to “Configuration Explorer”. There are 63 config key values are imported but in template there are 64.
“SendgridSettings:OrderApprovalTemplateID”: “”, is not imported for due to some reason. Create a new manually if required. For the Demo this is not required.
Click on the values to see the values of the key that was imported-
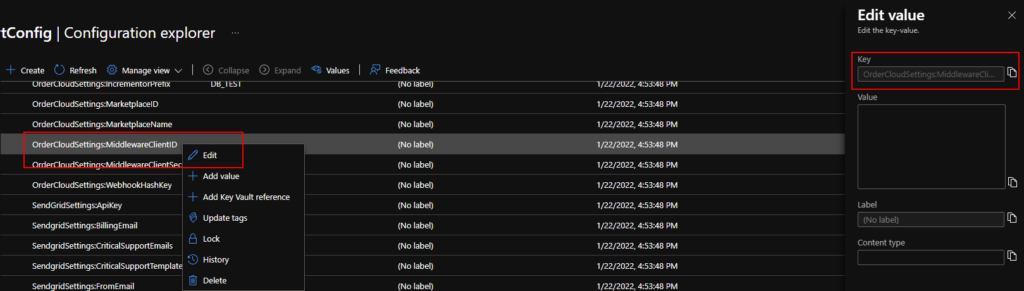
Set the following values by Right clicking the keys. Copy this from Step 4 where the response was received from seed request-
OrderCloudSettings:MiddlewareClientID
OrderCloudSettings:MiddlewareClientSecret
OrderCloudSettings:MarketplaceID
OrderCloudSettings:MarketplaceName
Continue updating config in next section for Storage Account.
Step 2- Create a Azure Storage Account (if you already don’t have)
Create a Azure Storage Account
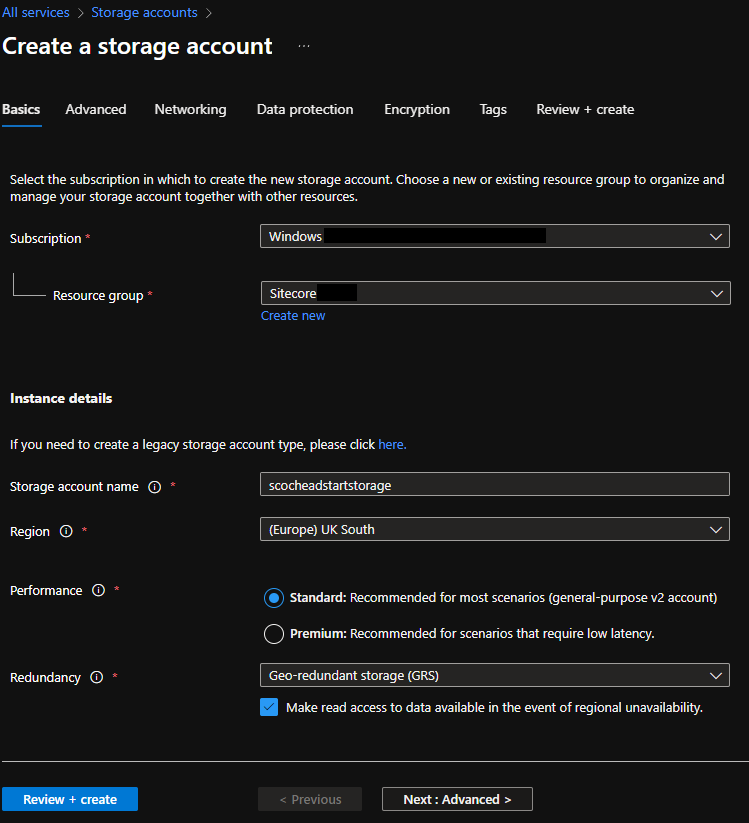
Follow the steps and set the configuration as per your requirements
Copy the storage account name and Storage connection string

Set StorageAccountSettings:BlobPrimaryEndpoint – https://yourstorageaccount.blob.core.windows.net/occontainer
Set StorageAccountSettings:ConnectionString
Thats in in this blog. In next blog will cover setting up the UI project.
Hope you are enjoying setting your Ordercloud Headstart project.
0 Comments
1 Pingback