Month: September 2020

Asp.Net Core – Route Constraints

Last Updated on November 16, 2024 by sandeeppote

Routing constraints lets you restrict how the parameters in the route template are matched. It helps to filter out the input parameter and action method can accept.

For example if the URL Parameter is restricted to have int value, the route engine will match the controller action having integer value in the parameter or restrict.

How Route Constraints are applied-

  1. Using constraint parameter in the MapControllerRoute at the application startup where the endpoints are defined i.e. Inline Constraint
  2. Route attribute at the controller or action method
endpoints.MapControllerRoute(
name: "default",
pattern: "controller=Home}/{action=Index}/{id:int?}");

Route engine when matches the incoming url, it invokes the routing constraint to the the values in the url matches the pattern. In this case which is seperated by : in the above example restricts the value should be int or null.

Quick example on how the routing constraints are defined and used-

  • Inline Constraint

Inline constraint are added after the URL parameter and sperated by : (colon) with the primitive type and also defines if the parameter can be nullable. Below code see – {id:int?}

app.UseEndpoints(
endpoints =>
{
 endpoints.MapControllerRoute(
name: "default",
pattern: "{controller=Home}/{action=Index}/{id:int?}");
}
);

The int constraints checks if the parameter value sent is integer and allows to execute the action method by passing the parameter value to the matching method.

The other way to define same if to pass the default values and constraint parameter in the MapControllerRoute

 app.UseEndpoints(endpoints =>
{
    endpoints.MapControllerRoute(
name: "default",
pattern: "  {controller}/{action}/{id?}", new {Controller = "Home", action="Index"}, new {id = new IntRouteConstraint()});
}
);
  • Constraints in route attribute

You can also define the constraints in route attribute as follows-

[Route("Home/Index/{id:int?}")]
public IActionResult Index(int? id)
{
     return View();
}

Here are the list of constraints from the Microsoft doc site, try it yourself-

ConstraintDescriptionExample
alphaMatches uppercase or lowercase Latin alphabet characters (a-z, A-Z){x:alpha}
boolMatches a Boolean value.{x:bool}
datetimeMatches a DateTime value.{x:datetime}
decimalMatches a decimal value.{x:decimal}
doubleMatches a 64-bit floating-point value.{x:double}
floatMatches a 32-bit floating-point value.{x:float}
guidMatches a GUID value.{x:guid}
intMatches a 32-bit integer value.{x:int}
lengthMatches a string with the specified length or within a specified range of lengths.{x:length(6)} {x:length(1,20)}
longMatches a 64-bit integer value.{x:long}
maxMatches an integer with a maximum value.{x:max(10)}
maxlengthMatches a string with a maximum length.{x:maxlength(10)}
minMatches an integer with a minimum value.{x:min(10)}
minlengthMatches a string with a minimum length.{x:minlength(10)}
rangeMatches an integer within a range of values.{x:range(10,50)}
regexMatches a regular expression.{x:regex(^\d{3}-\d{3}-\d{4}$)}

Sitecore Commerce 10- Setup Development Environment for Business Tools – Part 1

Last Updated on November 16, 2024 by sandeeppote

Business Tools is extensible using pluggable framework and can extend a UI using Entity Views. Although Business Tools offers a rich set of controls you might want to create your own custom control for the best business experience.

For this you need to first setup the development environment for business tools. Once the environment is setup you should be ready to develop custom control/customize the business tools.

Prerequisites

  1. Instance of Commerce Engine deployed in development environment
  2. Install Node.js Javascript runtime
  3. Install Angular CLI tool – npm install -g @angular/cli

NPM configuration to have NPM Packages from Sitecore public feed

Sitecore BizFx SDK relies on NPM packages available on the Sitecore official public feed for NPM packages.

Open Poswershell as Administrator

Execute these 2 commands in powershell

npm config set @speak:registry=https://sitecore.myget.org/F/sc-npm-packages/npm/

npm config set @sitecore:registry=https://sitecore.myget.org/F/sc-npm-packages/npm/

This will add following line to–

C:\Users\[your user]\.npmrc

[Optional] – you may check if this lines are added

@speak:registry=https://sitecore.myget.org/F/sc-npm-packages/npm/
@sitecore:registry=https://sitecore.myget.org/F/sc-npm-packages/npm/

Setup and Install SPEAK and BizFx packages for development solution

Copy Sitecore.BizFX.SDK.4.0.8 folder to your development folder and extract the SDK zip file to folder e.g. c:\BizFXDevelopment\SitecoreBizFx

Copy below files to the folder SDK was extracted. You should find this files from the Sitecore XC release package.

  1. speak-icon-fonts-1.1.0.tgz
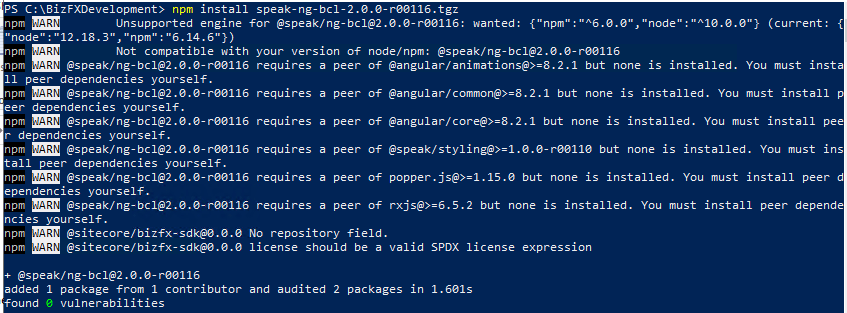
  2. speak-ng-bcl-2.0.0-r00116.tgz
  3. speak-styling-1.0.0-r00110.tgz

Execute the following commands where the above files were copied

​​​​​​​npm install speak-icon-fonts-1.1.0.tgz
​​​​​​​npm install speak-ng-bcl-2.0.0-r00116.tgz
npm install speak-styling-1.0.0-r00110.tgz
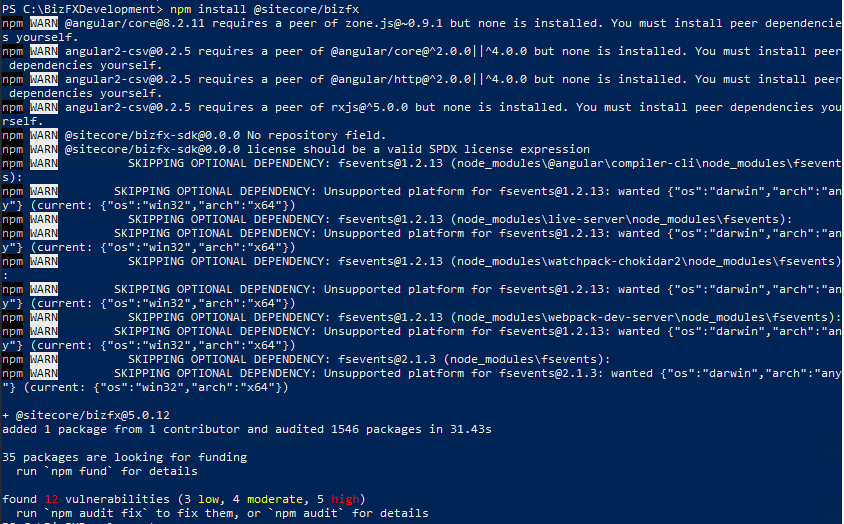
npm install @sitecore/bizfx

Run npm install. This should install required npm modules and add a folder node_modules

npm install

Setup the business tools config.json with your deployment configuration

Once the npm installed successfully open config.json file located in src\assets folder

Update the config to the same as the BizFx site instance except for BizFxUri. Note BizFxUri points to http in below config

{
  "EnvironmentName": "HabitatAuthoring",
  "EngineUri": "https://localhost:5000",
  "IdentityServerUri": "https://xp10.IdentityServer",
  "BizFxUri": "http://localhost:4200",
  "Language": "en",
  "ContentLanguage": "en",
  "Currency": "USD",
  "ShopName": "CommerceEngineDefaultStorefront",
  "LanguageCookieName": "selectedLanguage",
  "ContentLanguageCookieName": "selectedContentLanguage",
  "EnvironmentCookieName": "selectedEnvironment",
  "AutoCompleteTimeout_ms": 300,
  "AccessTokenUpdateInterval_ms": 300000
}

Run the development environment

Important!

Stop the SitecoreBizFx site as the site listens to 4200 port. Next step will help listen the site from the extracted SDK folder.

Execute following Powershell command –

ng server

Open browser on http://localhost:4200/ this should ask to enter the Sitecore client credentials, once provided it will throw an error

This site can’t provide a secure connection

The reason this error occurs the identity server is not configure to server BizFx site on http

Update the Sitecore Identity Server Configuration

Open the Sitecore.Commerce.Identity ServiceHost.xml from the installed Identity Server instance \wwwroot\Config\production

Add http://localhost:4200 to AllowedCorsOriginGroup1

<AllowedCorsOrigins>
<AllowedCorsOriginsGroup1>http://localhost:4200</AllowedCorsOriginsGroup1>
</AllowedCorsOrigins>

Update Commerce Engine configuration

  • Open config.json from wwwroot folder in CommerceAuthoring site
  • Update AllowedOrigins in AppSettings to have http://localhost:4200
  • Since the config is changed need to bootstrap so the changes are applied to authoring site
  • Restart IIS. Optionally you may just restart Commerce Authoring site

Run Business tool from development environment

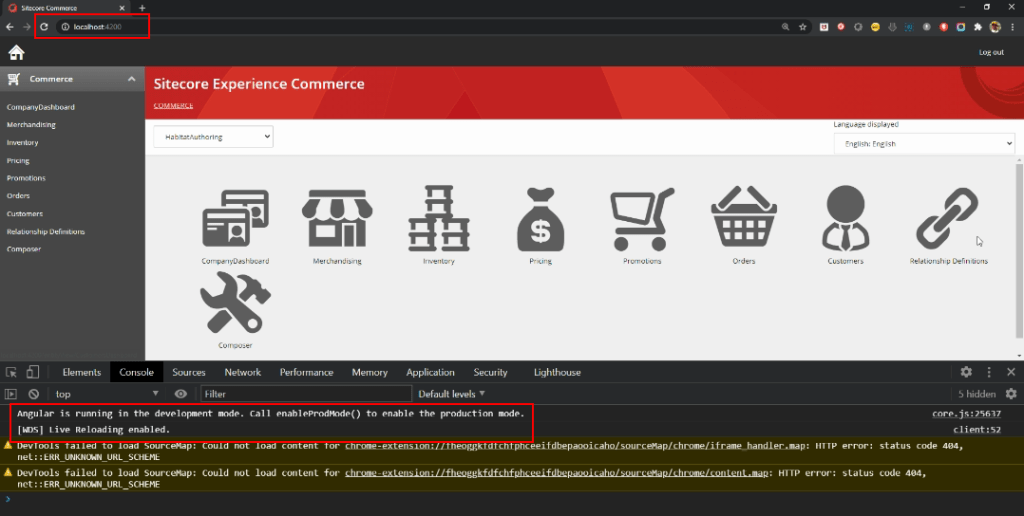
Open browser on http://localhost:4200/

Business tools running on http and in developer mode.

References –

step-by-step instructions on how to setup and compile the Business Tools (BizFX) application using the ​Sitecore.BizFX.SDK

Stay tuned next blog will walk through on how to create a new custom control/component in Business Tools

This image has an empty alt attribute; its file name is image-43.png

Setup development environment for Sitecore Commerce Engine 10 and 10.2

Last Updated on November 16, 2024 by sandeeppote

Update: Below is applicable for Sitecore Commerce 10.2. Change the SDK version accordingly. Ignore the step mention for Content Hub

Sitecore Experience Commerce 10 has come up with great new features like Dynamic Bundles, Free gift with Purchase promotion and a sample Sitecore DAM to Commerce connector.

Before you start looking into this, it is important to setup the development environment to debug and test the changes you are making to engine.

Main changes I could see compared to previous versions are integration with Content Hub and Configuring the Commerce Engine using environment variables which not only helps for on-premise installation of Commerce Instance but also helps setup the Docker technology where XC solution is running in containers.

In this post I will walk you through on how to setup the development environment. This post assumes you have Sitecore Commerce Engine along with Visual Studio 2019 installed on developer workstation. If Commerce not installed no worries see this post on how to install Sitecore XC 10 step-by-step.

Step-by-step install Sitecore Commerce (XC) 10

For previous version of XC you may follow this blog post

Step-by-step – Setup development environment for Sitecore Commerce 9.3 Engine

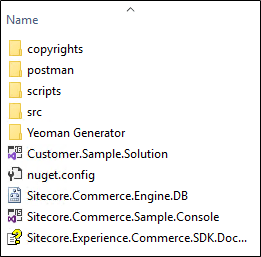
Step 1- Extract Commerce Engine SDK

  • Copy the downloaded SDK Sitecore.Commerce.Engine.SDK.6.0.130.zip on your development folder. e.g: c:\development. Note– there is an update on 19th August where the external dependencies are removed. Download the package again if you have a version before this date.
  • If not available you may download Packages for On Premise WDP 2020.08-6.0.238. Login before you download the file.
  • Extract the commerce package and then extract Sitecore.Commerce.Engine.SDK.6.0.130.zip in your development folder

Step 2 – Setup Visual Studio Solution

  • Open the Solution, by default this is Customer.Sample.Solution.sln
  • Ensure Package Source is configured for Commerce- https://sitecore.myget.org/F/sc-commerce-packages/api/v3/index.json
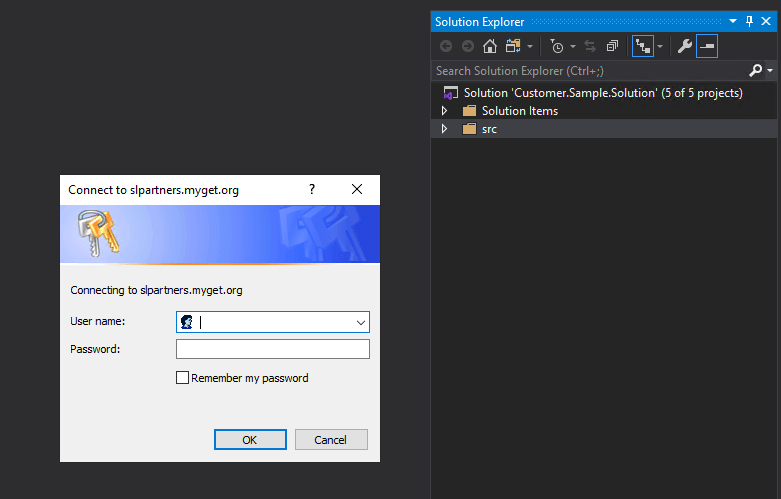
  • Whilst opening solution login from slpartners.myget.org will be prompted
  • Create an account on https://slpartner.myget.org/ and login here. You may unload Plugin.Sample.ContentHub project if you dont want to integrate ContentHub and the login should not require. Also note myget account has a trial for 14 days.
  • Build the Solution. It should restore the package and build successfully.
  • (optional)Rename the Solution name. In this case I have renamed to Retail.Commerce
  • (Optional) Create Foundation and Feature projects. Build the solution again.

Step 3- Important – Commerce Engine configuration

Sitecore.Commerce.Engine project should have a config.json file in wwwroot folder. Open this file you will see the placeholders that needs to be filled in.

Instead updating config file, you should update the launchSettings.json and the placeholders in config.json will be updated on launch on commerce engine.

Similarly Global.json you can find this in wwwroot/bootstrap folder of your Sitecore.Commerce.Engine project. Again this file has the Placeholders that will be populated from launchSettings.json,

You need to update mainly following variables in launchSettings.json file for both config and global json. There are other variables apart from listed below, you may need to update those based on your site instance name etc.-

  1. COMMERCEENGINE_Caching__Redis__Options__Configuration
  2. COMMERCEENGINE_GlobalDatabaseServer
  3. COMMERCEENGINE_GlobalDatabaseUserName
  4. COMMERCEENGINE_GlobalDatabasePassword
  5. COMMERCEENGINE_SharedDatabaseServer
  6. COMMERCEENGINE_SharedDatabaseUserName
  7. COMMERCEENGINE_SharedDatabasePassword
  8. COMMERCEENGINE_AppSettings__SitecoreIdentityServerUrl
  9. COMMERCEENGINE_EngineAuthoringUrl
  10. COMMERCEENGINE_EngineShopsUrl
  11. COMMERCEENGINE_EngineMinionsUrl
  12. COMMERCEENGINE_EngineHealthCheckUrl
  13. COMMERCEENGINE_AppSettings__AllowedOrigins

Step 4 – Generate Development Certificate

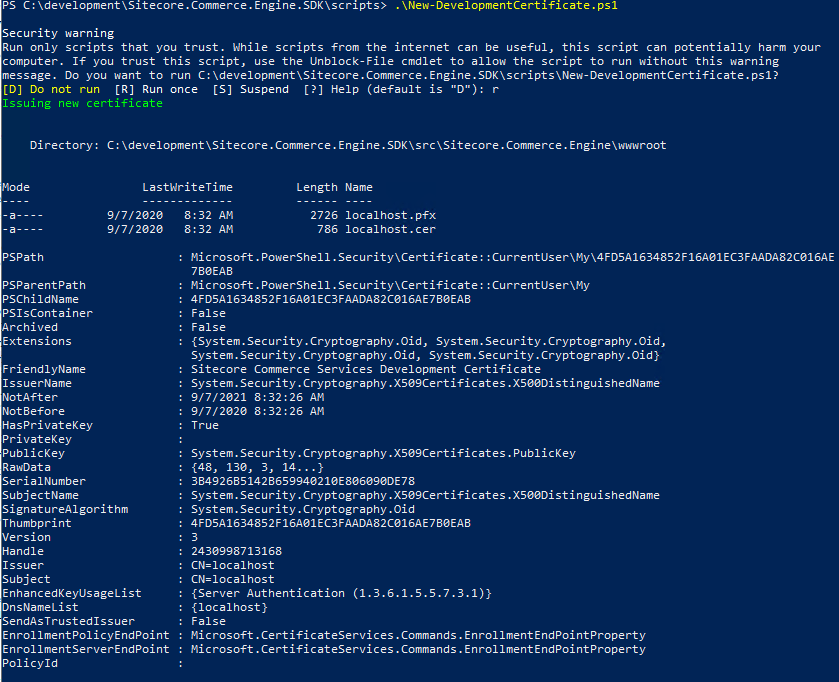
Generate development certificate using script “New-DevelopmentCertificate”, so the localhost runs on SSL(https)

  1. Create a folder named “dev” in the root directory of SDK
  2. Create a folder named “Sitecore.Commerce.Engine_Dev” under “dev” folder
  3. Create a folder named “wwwroot” under “Sitecore.Commerce.Engine_Dev” folder
  4. Open powershell script and navigate to scripts folder.
  5. Change the Path($certificateOutputDirectory) if required. Certificate should be copied to \src\Project\Engine\code\wwwroot
  6. Execute New-DevelopmentCertificate script. This script should be available in script folder in SDK folder.

Step 5 – Update EngineUri in BizFx Site

  • Open config.json file. Should be in assets folder of your BizFx instance
  • Change EngineUri to https://localhost:5000
  • Change BizFxUri to https://localhost:4200
  • Restart BizFx site

Step 6- Run the Commerce Engine from Visual Studio

  • Set the Sitecore.Commerce.Engine project as Startup Project
  • Change the emulator to Engine
  • Stop the CommerceAuthoring_SC site hosted in IIS
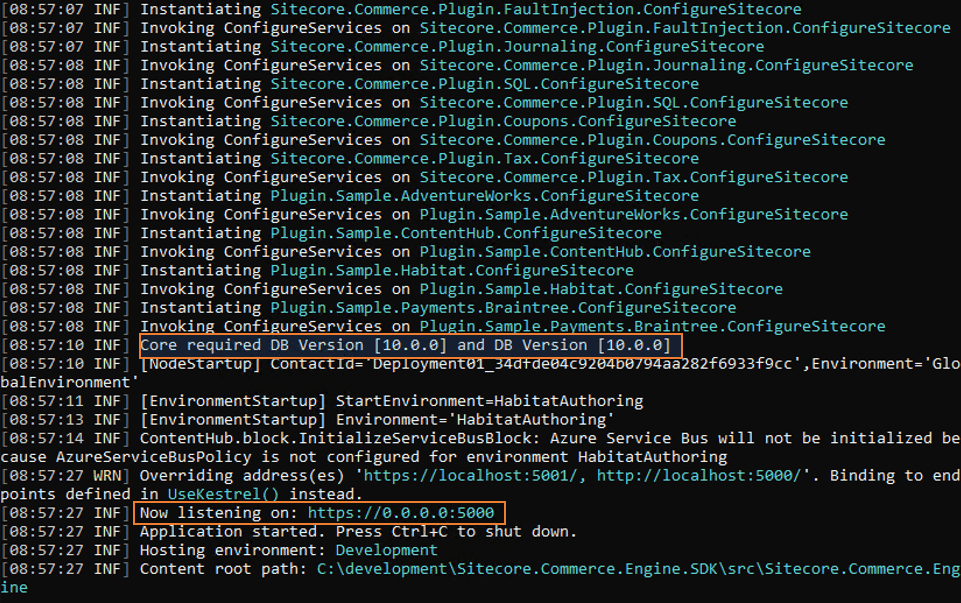
  • Run the solution

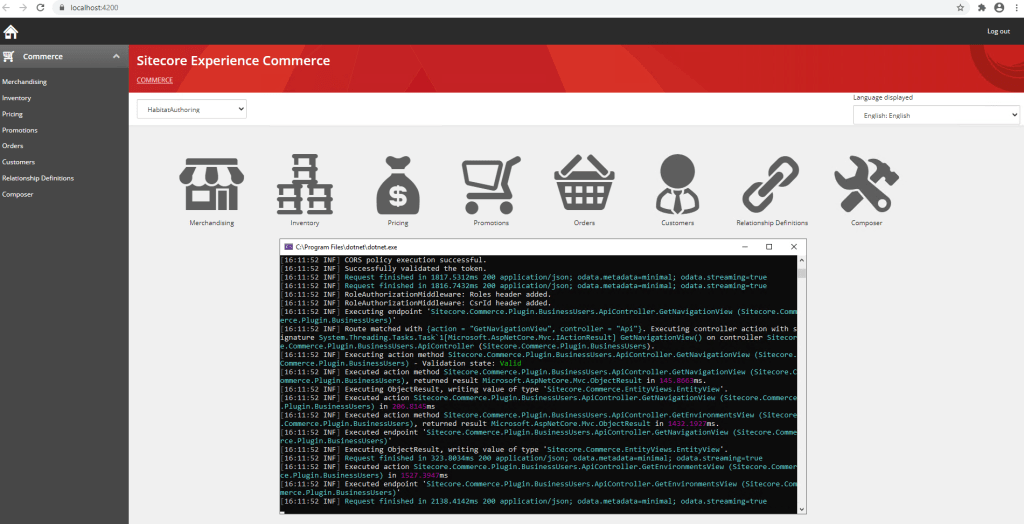
Hope there should be nothing that should block to run the Business Tools requesting a call to Engine running from Visual Studio

Note: some places you may have to restart IIS also clear the browser cache before you start checking Business Tools is highly recommended.

Hope this post helps you setting your XC 10 development environment.

ISSUES

Request origin https://bizfx.sc.com does not have permission to access the resource

Resolution- Follow Step 5

Options to Install Sitecore (XP) and Commerce (XC) 10

Last Updated on November 16, 2024 by sandeeppote

If you are looking for upgrade to Sitecore 10, below are the various options you are able to install Sitecore 10.

Sitecore XP 10

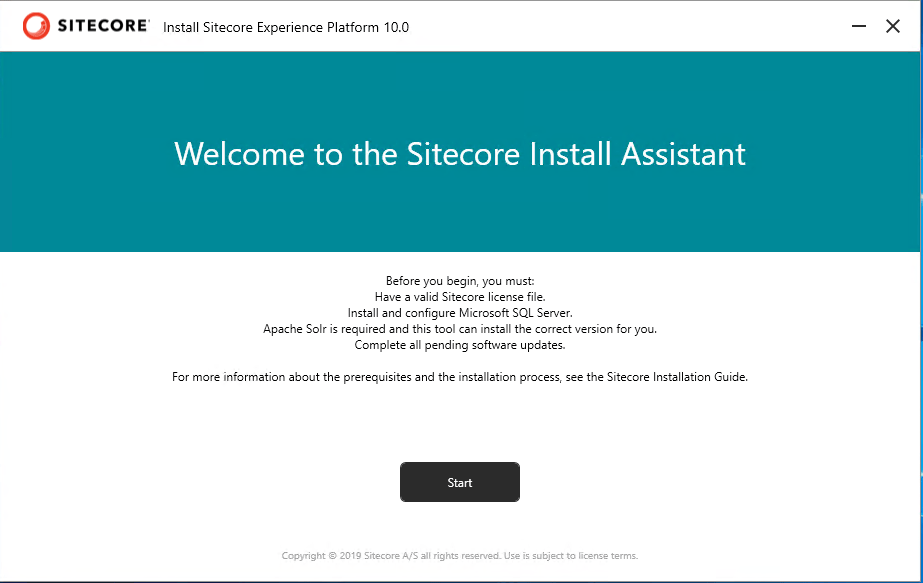
Sitecore Installation Assistant (SIA)

Sitecore Installation Assistant helps guides you through the Sitecore XP Developer Workstation installation. Use this option to review system requirements, install prerequisites and complete the entire installation process. With Sitecore 10 you have a option to also install SXA with SIA.

To install Sitecore 10 using SIA follow this post- Step-by-step how to install Sitecore 10 using SIA

Sitecore Installation Framework On-Premises (SIF)

Sitecore Install Framework (SIF) is a Microsoft PowerShell module that supports local and remote installations of Sitecore Experience Platform.

SIF deploys Web Deploy Packages (WDP) by passing parameters to SIF configuration through a Microsoft PowerShell module and is fully extensible.
The Sitecore Experience Platform is designed to be secure-by-default. For developer environments all the required self-signed certificates are created automatically if you do not provide any.
In a production environment, you can provide your own certificates In a non-production environment, you can choose to have the module generate the certificates for you.

You must set up SIF before you can install Sitecore Experience Platform

To install Sitecore XP 10 using SIF follow this post – Step-by-step install Sitecore XP 10 using Sitecore Installation Framework (SIF)

Sitecore Containers

Sitecore Containers support rapid deployment and more efficient solution and team onboarding with modern Docker and Kubernetes technology.

Sitecore Experience Platform 10.0.0 uses Docker Compose as the container
orchestrator on developer workstations. Docker Compose is a simple containerdeployment tool that is bundled with Docker for Windows. Sitecore container images can be deployed with other tools but we recommend that you use Docker Compose to deploy the containers that form the Sitecore Experience Platform.

To install Sitecore XP 10 using Sitecore Containers with Docker Compose- Step-by-step install Sitecore XP 10 to developer workstation using Sitecore Containers with Docker Compose

Sitecore XC 10

Sitecore Installation Framework (SIF)

Sitecore Install Framework (SIF) is a Microsoft PowerShell module that supports local and remote installations of Sitecore Experience Platform.

The SIF.Sitecore.Commerce package contains Sitecore Installation Framework scripts and Web Deployment Packages (WDP).

To install Step-by-step install Sitecore Commerce (XC) 10