To know more about containers here is the official documentation from Sitecore on Containers
Lets get started to create a Sitecore XP 10.1 development environment using docker.
Before getting started please see Installation Guide for Developer Workstation with Containers
Topology user here will XP0 or per guide XP Workstation (XP Single)
Hardware and Networking Requirements-
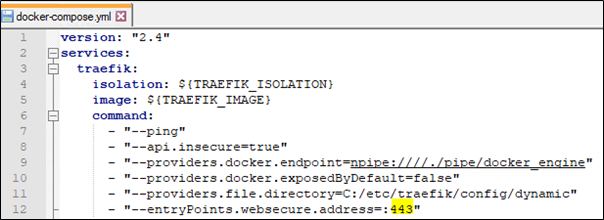
Sitecore instance needs below ports, avoid using these ports other than Sitecore.
| Required port | Role | Description |
| 443 | Traefik | HTTPS proxy |
| 8079 | Traefik | Traefik dashboard |
| 8984 | Solr | Solr API and dashboard |
| 14330 | SQL | SQL Server |
Prepare/prerequisite for Sitecore XP workstation
- [Optional] OS- Windows 10 1809 or later or Windows Server 1809 or later
Login to Azure portal to create a VM

Image – Select Image to Windows 10 Pro, Version 1809- Gen 1
Size – Standard_D8s_v3- * vcpus, 32GiB memory
Inbound ports– Select RDP, dont select HTTPS 443 as this will be used by Traefik as mentioned in previous section
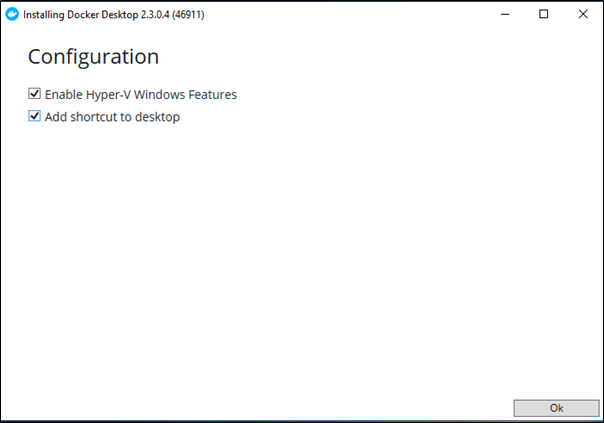
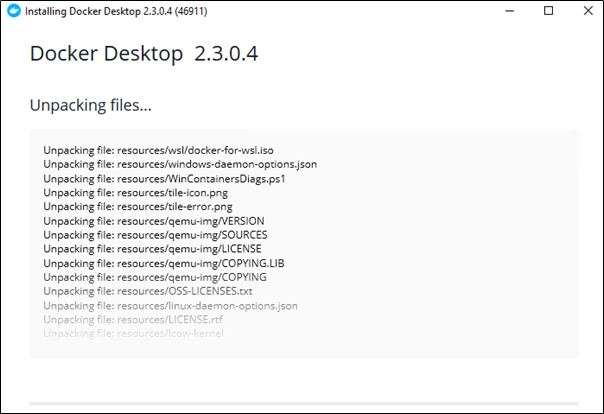
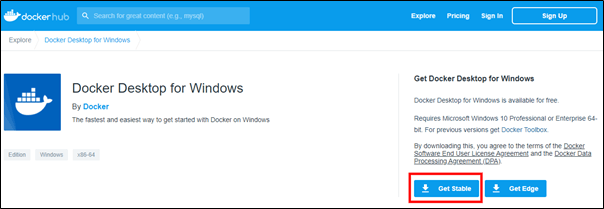
- Download and Install Docker Desktop for Windows
Download and install Docker Desktop for Windows. You can get Stable version from here
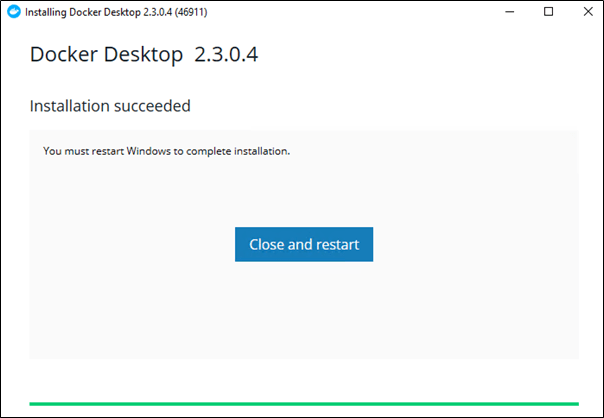
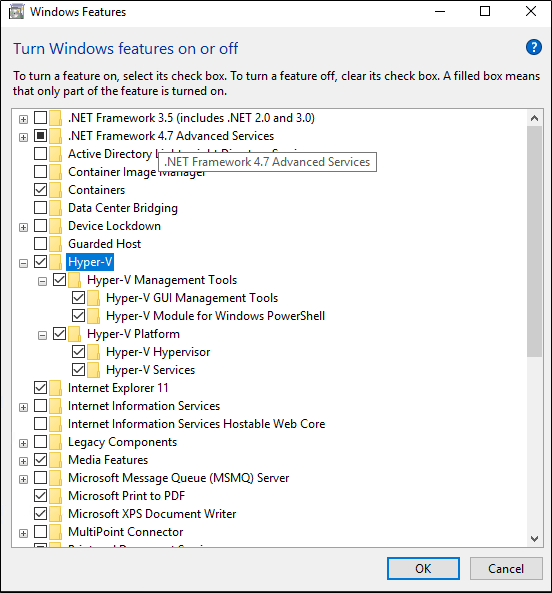
After installation Restart the machine, this should enable the Hyper-V feature
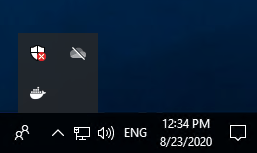
This should also have Docker running and should see the same in system tray
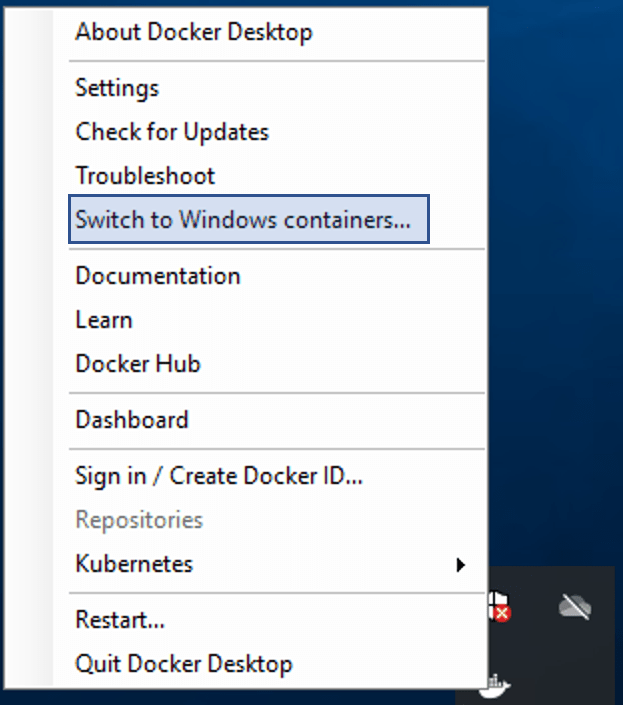
- Switch to Windows containers
Right click on Docker icon and switch to Windows Container. See this link for more details as per guide
Download and Prepare for installation
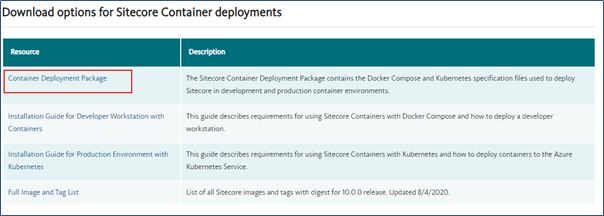
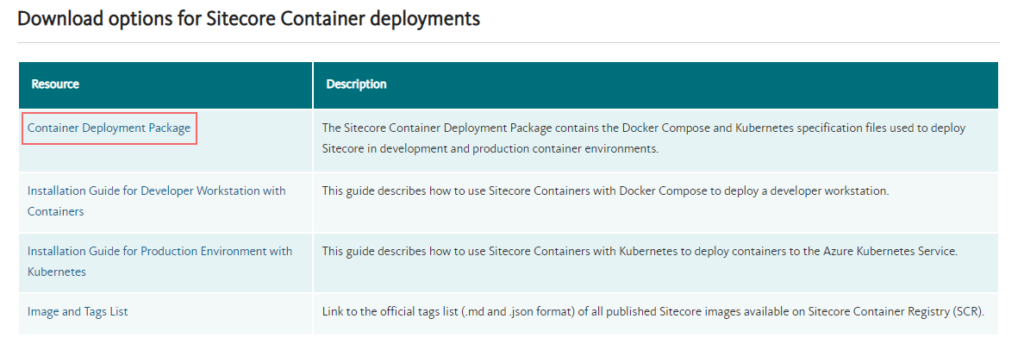
- Download and extract the Sitecore Container Deployment Package from the Sitecore Developer Portal and store it on your local workstation or check releases here
- Copy and extract SitecoreContainerDeployment.10.1.0.005207.309.zip for e.g:- C:/sc101_install
Navigate to C:\sc101_install\compose\ltsc2019\xp0
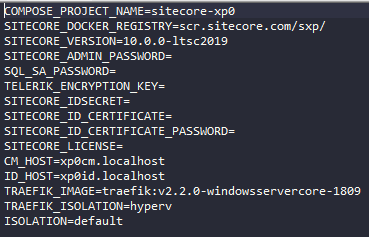
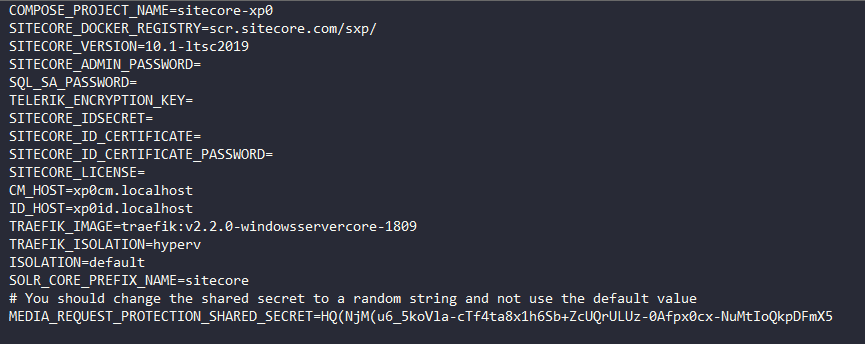
- Open .env file, we need to fill in this parameters before starting installation. You can find more details in guide for each option.
- Download PowerShell script to initialize (init.ps1) the parameters from docker-examples. Parameter values in .env can be populated manually by individually executing the commands for required for each parameter in guide(see Appendices) but I would recommend to use init.ps1 as this is provided by Sitecore and hence tried and tested.
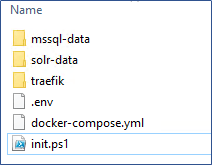
Folder structure should look like this-
- Change parameter values in init.ps1 file.
Change the SitecoreAdminPassword, SqlSaPassword and host entries as per requirement. If you are changing host entries also ensure the same is updated in .env file for CM_HOST and ID_HOST parameters. Lets keep the default values.
- Populate .env file using init command
Open PowerShell as a Administrator, navigate to the folder having init.ps1 file.
Execute init.ps1 script. You may have to set the execution rights to current user to execute the script-
Set-ExecutionPolicy -Scope CurrentUser Unrestricted.init.ps1Provide the path of license file
This should Install and Import SitecoreDockerTools and Populate the environment file.
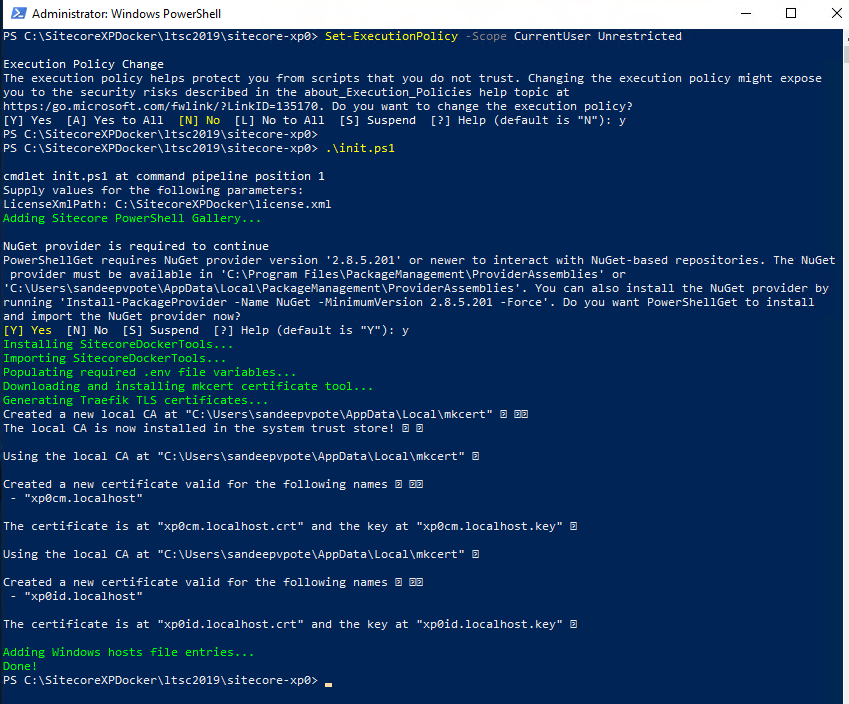
Ensure to Switch to Windows Container before executing below command
Install
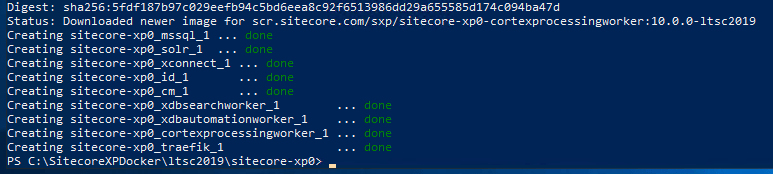
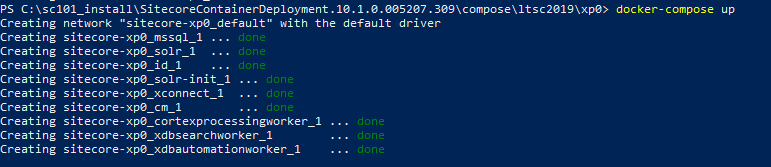
Execute docker compose command
docker-compose.exe up --detachInstallation complete-
Once command execution is complete, should see all the checks done and Sitecore dev. instance ready in 20 minutes
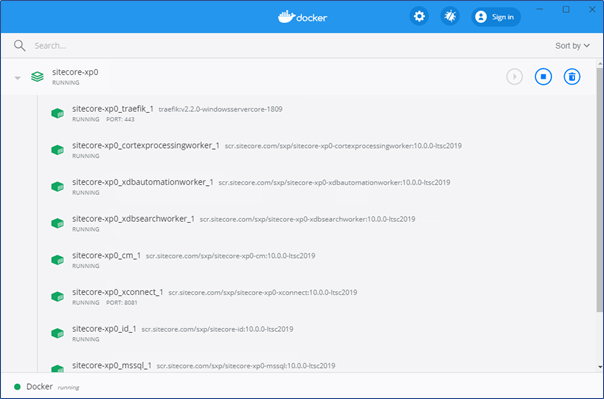
Open Docker Dashboard and should see Sitecore-XP0 running
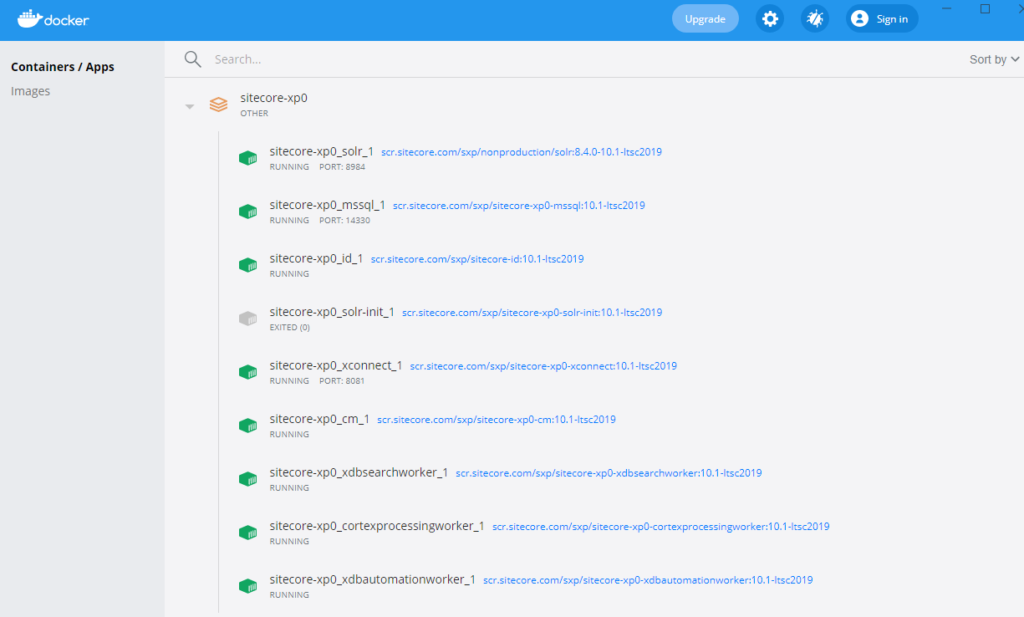
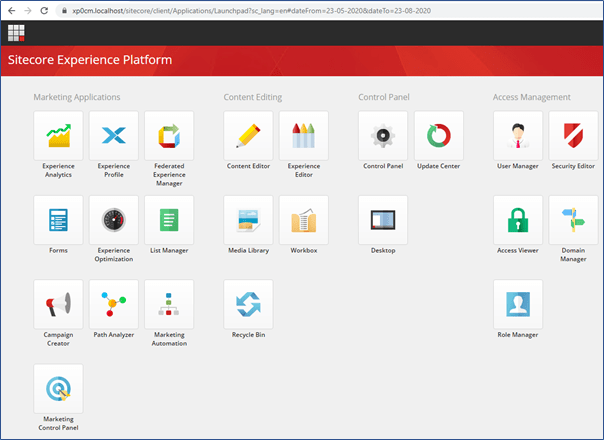
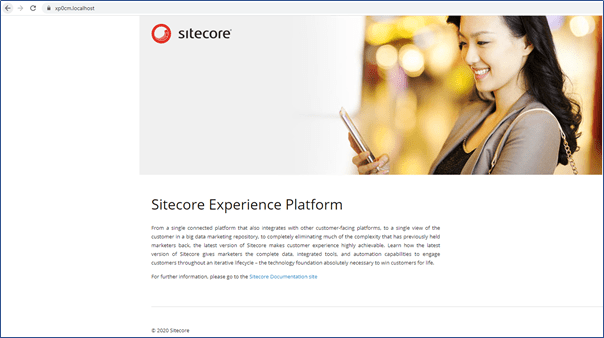
Site listening to address- https://xp0cm.localhost/
Cleanup the workstation
To cleanup/stop workstation use following commands. You can find these in instllation guide
To stop a Docker Compose environment without removing its contents:
docker-compose.exe stopTo resume a previously stopped Docker Compose environment:
docker-compose.exe startTo remove a Docker Compose environment and all the non-mounted volumes
docker-compose.exe downHope this helps to install Sitecore XP 10.1 using Docker!!!