Tag: Plugin

Sitecore Commerce 10 Create a custom plugin project

If you want to get started and create a custom plugin for XC 9.3 here is the post for same First Steps | Sitecore Commerce Development | Create a Custom Plugin

There are few updates on how the plugins are created in XC 10.

Sitecore Commerce 10 SDK does not include Visual Studio Extension (VSIX) package for creating a plugin project.

Let’s get started and look into the steps to create a new plugin in Sitecore Commerce 10. If you have already set up your commerce development environment, please skip to step 2

Step 1 – Setup developer environment

Create a developer environment for Sitecore Commerce to run the engine from Visual Studio, can be either VS 2017 or 2019. Follow this blog post for same Setup development environment for Sitecore Commerce 10 Engine

Step 2: Download Sitecore.Commerce.Plugin.Template from Nuget Feed

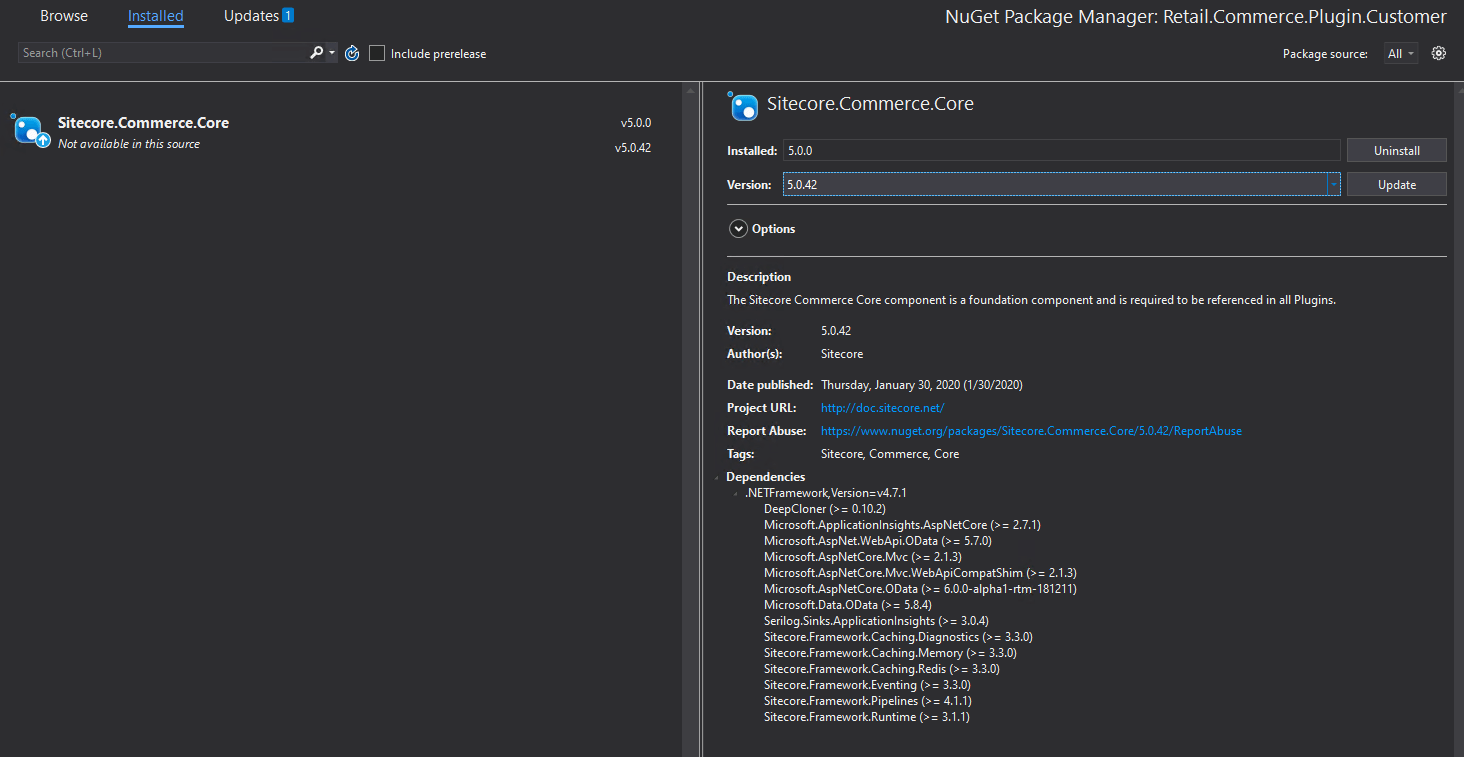
  • Navigate to Official Sitecore Commerce Nuget Feed
  • Search for Sitecore.Commerce.Plugin.Template
  • Download the package for Sitecore.Commerce.Plugin.Template 6.0.4. Copy to file Sitecore.Commerce.Plugin.Template.6.0.4.nupkg desired folder.

3. Install Sitecore Commerce Plugin Template Nuget Package

  • Open Powershell in admin mode and navigate to the folder nupkg file is copied and execute following command to install package
dotnet new -i .\Sitecore.Commerce.Plugin.Template.6.0.4.nupkg
  • Run the dotnet new command and should be able to see Sitecore Commerce Sample Plugin template

4. Create a new Sitecore Commerce Plugin Project

As we have a plugin project template we should be able create a new plugin project.

Execute following command in Powershell. Navigate to the solution src folder-

dotnet new pluginsample -o Sitecore.Commerce.Plugin.SampleTest

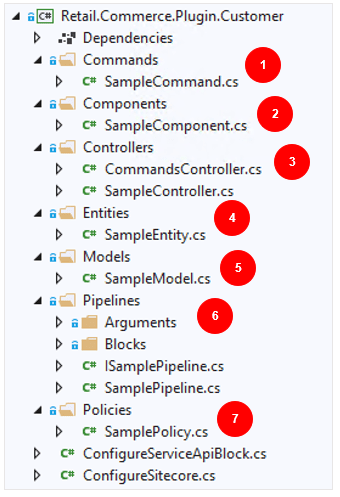
New plugin project is created with the project name specified in command.

Include the project in Customer.Sample.Solution and compile.

Notice even though the command has project name “Sitecore.Commerce.Plugin.SampleTest” the actual project is created as “Sitecore.Commerce.Plugin.Sample”. You will have to rename this unfortunately as per your requirement.

Elements of a Sitecore Commerce Plugin project template

In my previous post we saw the first step to create a new plugin by adding a new plugin project to the solution, restoring the correct binaries and reference new plugin to the Engine project.

In this post I will share what comes with the Plugin project template.

Sitecore Commerce Plugin project template creates folders and classes which helps to quick start creating a plugin, lets see what are these files –

1. Commands

To my understanding command is unit of work to perform set of actions. Commands allows to execute a pipeline and blocks within a transaction scope. Create a custom command by inheriting from CommerceCommand class. Use PerformTransaction method to run a pipeline in a transaction scope.

2. Components

If you want to extend existing or custom entities, use component. Component has attributes that support entities.

3. Controllers –

Controllers expose commerce functionality implemented in plugins. They are the api endpoints. Sitecore Commerce has various Controller type- Entity, Api, Devops and Command. Create your own controllers by inheriting from CommerceController

4. Entities-

They are the persistable unit and represent the business concept. Inherited from the CommerceEntity they has a unique identifier that helps to retrieve the entity by using a Entity controller type.

5. Models –

They are the POCO classes that are reusable in entities and components. Can be used to present data as part of command response .

6. Pipelines – They do the heavy lifting in plugin by making it possible to define the extensible behavior. Create your own pipeline and add blocks you want to execute to implement your business logic. Blocks within pipelines execute in a sequence they are registered.

7. Policies

Policies defines behavior for the functionality provided by the plugin. Its is recommended to not extend or inherit out-of-box plugins instead create your own. Plugins can be changed or created new by updating the JSON files provided in environment folder of the various roles site.

ConfigureSitecore

ConfigureSitecore class helps to register the pipeline and block definitions that a plugin defines. You can create a new plugin and AddPipeline or extend the existing pipeline by adding a block After or Before any existing blocks. ConfigureSitecore class registers pipelines every time engine loads. You can also register commands or register your custom class in this class.

ConfigureServiceApiBlock

This registers customer entities, components and controller action with ODATA model. It allows to these elements to be used when a REST API call is made and available when generating a proxy.

First Steps | Sitecore Commerce Development | Create a Custom Plugin

In my last post, I have described the steps to set up the Sitecore Commerce development environment. In this post, I will describe how to create a custom plugin in Sitecore Commerce. I was working on version 9.3 but these steps should work with all versions of 9 series.

Sitecore Commerce provides an extensible framework which can be extended using plugins. A plugin is an independently publishable extension to the Sitecore Commerce Engine. Generally, you will find the following contained in a plugin and are used to extend the platform.

  • Entities
  • Components
  • Entity Views
  • Pipeline
  • Policies etc.

You can extend the platform or add more features using the plugins. Let’s get started and look into the steps to create a new plugin in Sitecore Commerce 9.3. If you have already set up your commerce development environment, please skip to step 2

Step 1 – Setup developer environment

Create a developer environment for Sitecore Commerce to run the engine from Visual Studio, can be either VS 2017 or 2019. Follow this blog post for same Setup development environment for Sitecore Commerce 9.3 Engine

Step 2 – Install Visual Studio Extension for creating plugin

  1. Go to  solution root folder or SDK folder and run the Sitecore.Commerce.Plugin.vsix file. Close the Visual Studio solution if open.
  2. This should install extension on selected Visual Studio Version
create plugin1

Step 3 – Create a plugin

  1. Open your solution. Create a Feature solution folder, just to follow Helix best practice. Right click solution folder to create a new project
  2. Search Sitecore.Commerce.Plugin. Select project type and click next.
create plugin2
  1. Give the project name, location and select .Net Framework 4.7.1. Create a Project.
create plugin3
  1. Sample Folder and Files for Commands, Components, Controller etc shall be added.
create plugin4
  1. Update the Sitecore Commerce Core from 5.0.0 to 5.0.4
create plugin5
create plugin6

4. Build the project. There shouldn’t be any reason the build should fail.

Step 4 – Reference project and run engine

  1. Add Plugin project reference to your Commerce.Engine Project
  2. Run the Engine. You should be able to see the newly created plugin is now registered in Engine.

This should allow to start customizing commerce and truly use plug-gable and extendable feature of Sitecore Commerce.

create plugin9

We intentionally didn’t add any code to this plugin to keep this simple. In the next blog, we will cover the anatomy of the newly created plugin and show how to inject this plugin into Commerce Pipelines and execute some custom code.

Next understand the Elements of Sitecore Commerce Plugin project templates

Hope you enjoyed this post. Stay tuned.