Welcome! This is my personal blog about Web technologies, software development, open source and other related topics
The ideas and opinions expressed here are solely mine and don't represent those of others, either individuals or companies.The code snippets or references to software products or analogous are to be used without any warranty of any kind. If you enjoy the content, feel free to share it and re-use it as long as you provide a link to the original post.
The browser ID is a universally unique identifier (UUID) that Sitecore CDP assigns to every user of your application. It associates sessions, events, and orders with the respective user.
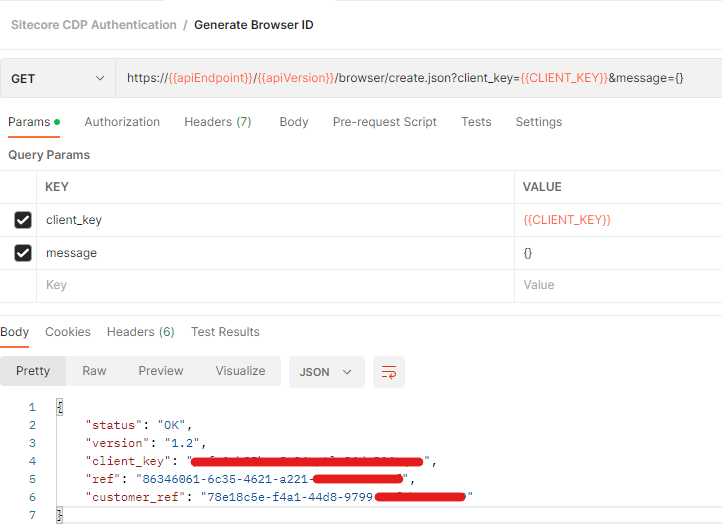
To generate browser id at server side in this case using postman use following URL-
{{apiEndpoint}} – API target endpoint depends on the region client key is available in. Following are the regions and url available at the point of writing this blog and as per this document –
Europe – https://api.boxever.com
Asia Pacific – https://api-ap-southeast-2-production.boxever.com
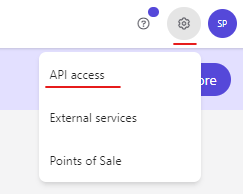
Top right click the clog icon. Select API Access option
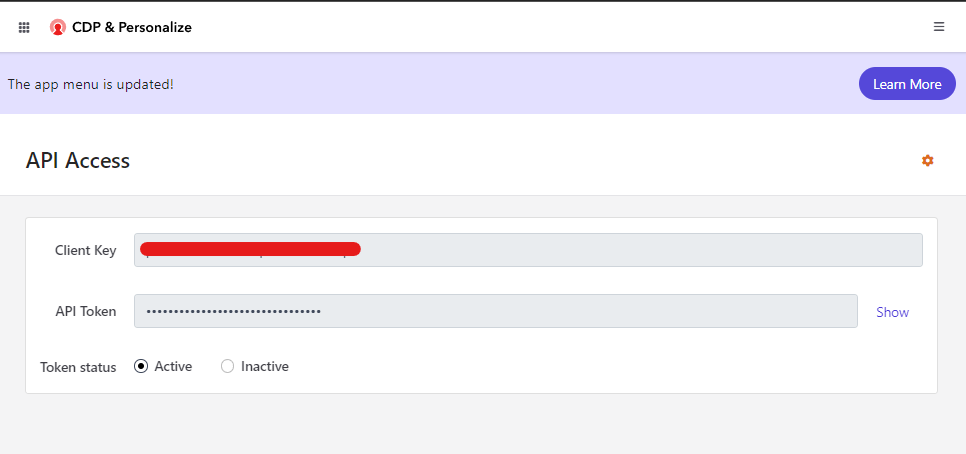
Get teh client key from this page-
Request/Response-
Status- OK. The request was served successfuly
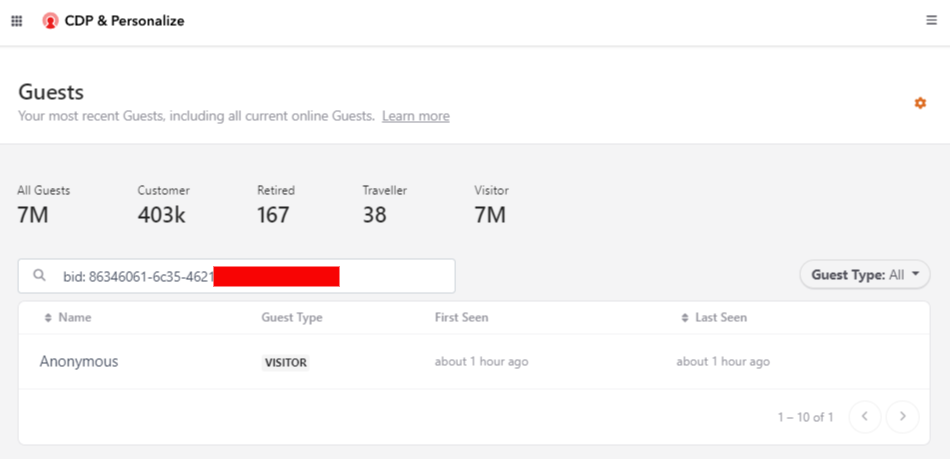
Anantmous(Guest) should be created. Browser ID is in “ref” field in the response
Check the guest details in portal with the Browser ID-
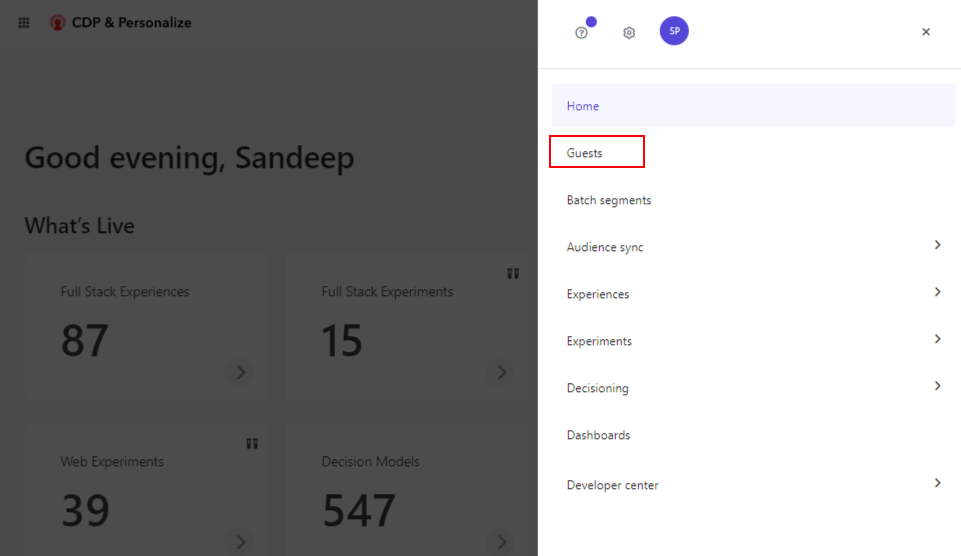
Goto the Guests page –
Search guests with browser id. (bid: <<browser id>>)
This should the Guest Type as Visitor which means its Anonymous and not yet known or uniquely identified.
CURL code snippet-
curl --location -g --request GET 'https://api.boxever.com/v1.2/browser/create.json?client_key=<<client key>>&message={}'
C# code snippet-
var client = new RestClient("https://api.boxever.com/v1.2/browser/create.json?client_key=<<client key>>&message={}");
client.Timeout = -1;
var request = new RestRequest(Method.GET);
IRestResponse response = client.Execute(request);
Console.WriteLine(response.Content);
Synchronizing items between environments with Sitecore Serialization. The repository already contains the necessary setup for enabling serialization if you are using an official Sitecore XM Cloud foundation template.
Pre-requisite- Setup Sitecore local instance for XM Cloud development. See this blog << Blog to setup Sitecoer instance>>
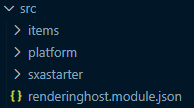
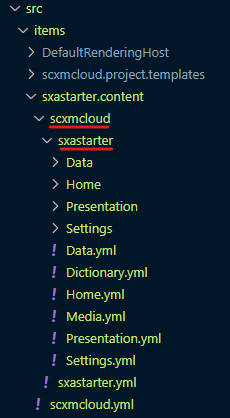
You may already see the rendering host module setup in the forked repository.
This should be available in the src folder.
Lets sync the sxastarter site created earlier whilst setting up the SXA Headless Site. << Blog post to setuop SXA headless site>>.
Please note this might not be the method you want to sync the items. Ideally you should create project in XM Cloud and site created in XM Cloud environment. I am doing the other way just to demo.
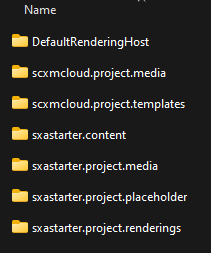
Create various modules to sync your locally created site to serialize the items
This should help to push the config and items to repository and deploy to XM Cloud later.
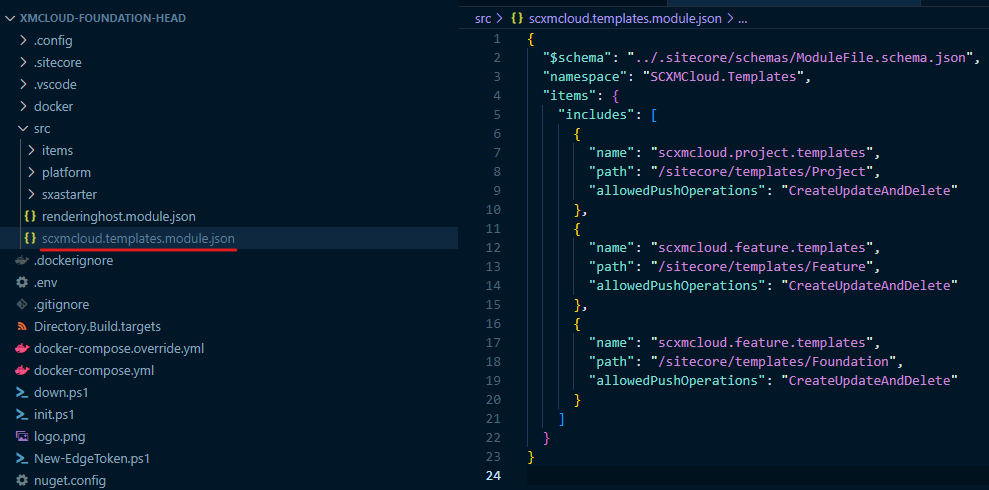
Sync templates-
Create a scxmcloud.templates.module.json in src folder.
We are trying to serialise templates to local. These items will be searlised-
scope by default is ItemAndDescendants. Hence not defined. Any new templates added here will be auto serialised. allowedPushOperations is set to CreateUpdateAndDelete. Like wise define the same for Feature and Foundation folders.
Define the same for Content (if required) or specific items, Media Library and Layout but this may be site specific.
For media I have configured following – Where scope id Single item and allowedPushOperations is CreateOnly, so these items are created only once.
Finally you should have following modules depending upon the youe site requirements and configuration.
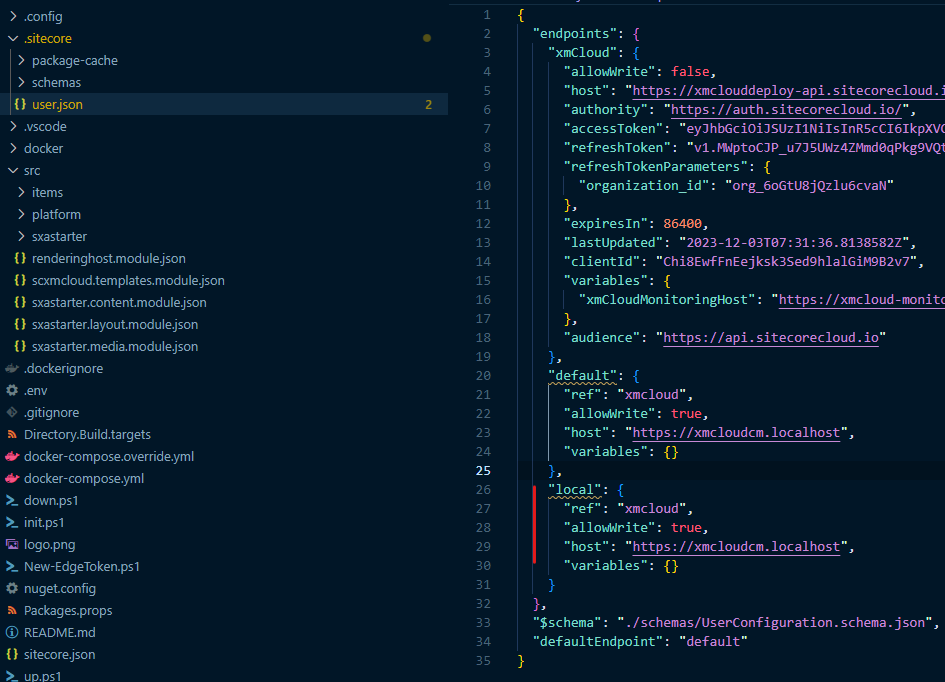
Connect the local environment
After SCS configuration you should connect to local environment. To do so use the following command
This will add the endpoint in user.json file located in .sitecore folder. Alrthough there is a default endpoint which should suffice. Provide your Sitecore instnace host name as appropriate.
Local environment should be connected and now can perform sync operations.
An entry will be added in user.json file.
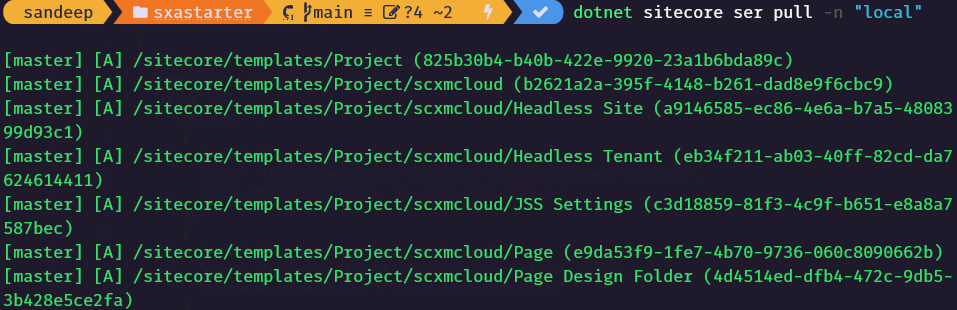
Next pull the items from local Sitecore instance-
dotnet sitecore ser pull -n "local"
If you see this error – ensure the names should be unique. I did a mistake by providing same name in templates module
If you see this error ensure the items to be searialised should be repeated in any other module or any other name. You may also exclude the paths for Feature and Foundation folders – /sitecore/layout/Renderings/Feature/Experience Accelerator