In my previous post we saw how to create a simple rendering with data source.
For creating rendering using content resolver first follow the blog <<enter blog url here>>
Content resolvers help provice more complex data beyond the serialization of a component data source.
In this blog will list all the Articles on the page which are marked as Featured Article.
The custom logic for filtering will go in Content resolver.
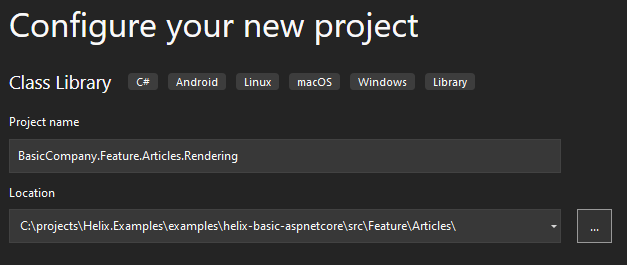
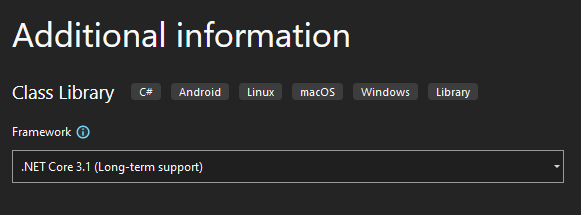
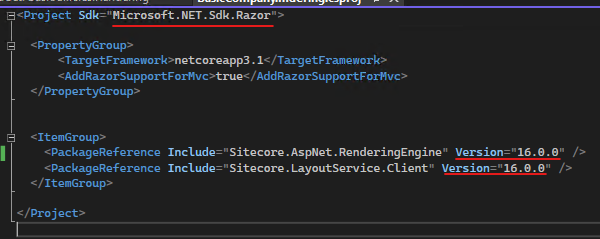
Craete a project for Content Resolver(.net framework 4.8) . This framework is used just to follow with the exisitng content resolvers provided by Helix Examples Solution.
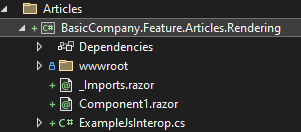
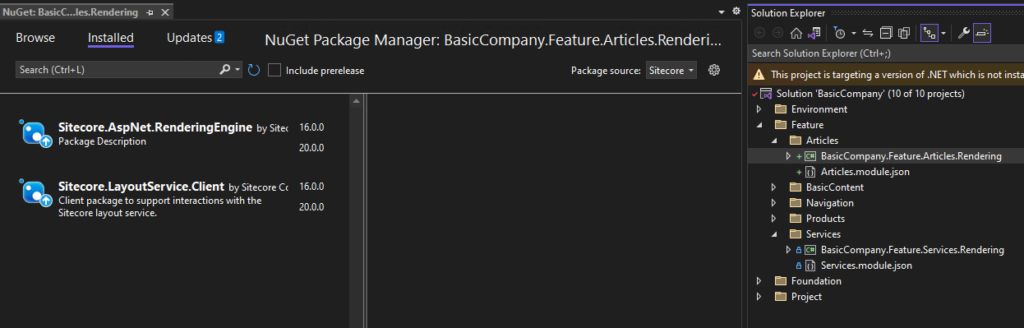
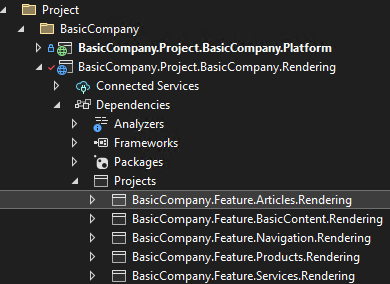
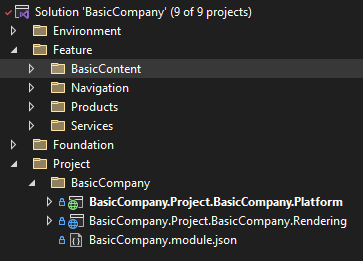
Content Resolver Project (BasicCompany.Feature.Articles.Platform)
Create a new .Net Framework project
Instead of creating new poroject I will copy the project from Navigation/Platform folder and rename it to BasicCompany.Feature.Articles.Platform.
Delete all the files from this project as it relates to Navigation. You may also want to change the AssemblyName and the AssemblyInfo file.
Create Models for Articles and Article
Create Models Folder and add below models
Articles.cs
using Sitecore.Data.Items;
using System.Collections.Generic;

namespace BasicCompany.Feature.Articles.Models
{
    public class Articles
    {
        public Item ArticlesPage { get; set; }

        public IList<Article> ArticleItems { get; set; }
    }
}
Article.cs
using Sitecore.Data.Items;

namespace BasicCompany.Feature.Articles.Models
{
    public class Article
    {
        public Item Item { get; set; }

        public Item ItemData { get; set; }
        public string Url { get; set; }
    }
}
Create Service for ArticleBuilder and ArticleRootResolver
Create a new folder Services and following-
//IArticleBuilder
 public interface IArticleBuilder
    {
        Articles.Models.Articles GetArticles(Item contextItem);
    }
//ArticleBuilder

 public class ArticleBuilder : IArticleBuilder
    {
        private readonly IArticleRootResolver _articleRootResolver;
        private readonly BaseLinkManager _linkManager;

        public ArticleBuilder(BaseLinkManager linkManager, IArticleRootResolver articleRootResolver)
        {
            _articleRootResolver = articleRootResolver;
            _linkManager = linkManager;
        }

        public Articles.Models.Articles GetArticles(Item contextItem)
        {
            var articleRoot = _articleRootResolver.GetArticleRoot(contextItem);
            if (articleRoot == null)
            {
                return new Articles.Models.Articles();
            }

            return new Articles.Models.Articles()
            {
                ArticlesPage = articleRoot,
                ArticleItems = GetArticleItems(articleRoot, contextItem)
            };
        }

        private IList<Article> GetArticleItems(Item articleRoot, Item contextItem)
        {
            var items = new List<Item>();

            items.AddRange(articleRoot.Children.Where(item => item.DescendsFrom(Templates.ArticleItem.Id)));

            var articleItems = items.Select(item => new Article()
            {
                Item = item,
                ItemData = item.Axes.GetDescendants().FirstOrDefault(itemData => itemData.DescendsFrom(Templates.ArticleItemData.Id)),
                Url = _linkManager.GetItemUrl(item)
            }).ToList();

            return articleItems;
        }
    }
//IArticleRootResolver
public interface IArticleRootResolver
{
Item GetArticleRoot(Item contextItem);
}
namespace BasicCompany.Feature.Articles.Services
{
public class ArticleRootResolver : IArticleRootResolver
{
public Item GetArticleRoot(Item contextItem)
{
if (contextItem == null)
{
return null;
}
return contextItem.DescendsFrom(Templates.ArticleRoot.Id)
? contextItem
: contextItem.Axes.GetAncestors().LastOrDefault(x => x.DescendsFrom(Templates.ArticleRoot.Id));
}
}
}Create Layout Service i.e. content resolver class
Create new folder LayoutServices and add following-
namespace BasicCompany.Feature.Articles.LayoutService
{
    public class ArticleContentResolver : Sitecore.LayoutService.ItemRendering.ContentsResolvers.RenderingContentsResolver
    {
        private readonly IArticleBuilder _articleBuilder;

        public ArticleContentResolver(IArticleBuilder articleBuilder)
        {
            _articleBuilder = articleBuilder;
        }

        public override object ResolveContents(Rendering rendering, IRenderingConfiguration renderingConfig)
        {
            var articles = _articleBuilder.GetArticles(this.GetContextItem(rendering, renderingConfig));

            var contents = new
            {
                ArticleItems = articles.ArticleItems.Select(item => new
                {
                    Item = item.Item,
                    ItemData = item.ItemData,
                    Serialized = base.ProcessItem(item.ItemData, rendering, renderingConfig)
                }).Select(article => new
                {
                    Url = LinkManager.GetItemUrl(article.Item),
                    Id = article.Item.ID,
                    Fields = new
                    {
                        Title = article.Serialized[article.ItemData.Fields["Title"].Name],
                        Description = article.Serialized[article.ItemData.Fields["Description"].Name],
                        ShortDescription = article.Serialized[article.ItemData.Fields["ShortDescription"].Name],
                    }
                })
            };

            return contents;
        }
    }
}
Create Service Configurator to register the services-
namespace BasicCompany.Feature.Articles
{
    public class ServicesConfigurator : IServicesConfigurator
    {
        public void Configure(IServiceCollection serviceCollection)
        {
            serviceCollection.AddTransient<Services.IArticleBuilder, Services.ArticleBuilder>();
            serviceCollection.AddTransient<Services.IArticleRootResolver, Services.ArticleRootResolver>();
        }
    }
}
Create Template Class
Change the Item ID’s as per your Sitecore Instance
namespace BasicCompany.Feature.Articles
{
  public static class Templates
  {
        public static class ArticleItem
        {
            public static readonly ID Id = new ID("{EE5CE126-890D-4F01-9DD5-3D81FC397A91}"); //
        }

        public static class ArticleItemData
        {
            public static readonly ID Id = new ID("{8AA19CA1-99A6-4588-B1D7-3FA9A8F6756A}"); //
        }

        public static class ArticleRoot
        {
            public static readonly ID Id = new ID("{A46A11C6-C7F9-4F61-BF0C-FFF060F0FECC}"); //
        }
  }
}
Create App Config to register the ServiceConfigurator-
Create Feature.Articles.config file in App_Config/Include/Feature folder
<?xml version="1.0"?>
<configuration xmlns:patch="http://www.sitecore.net/xmlconfig/">
<sitecore>
<services>
<configurator type="BasicCompany.Feature.Navigation.ServicesConfigurator, BasicCompany.Feature.Navigation" />
</services>
</sitecore>
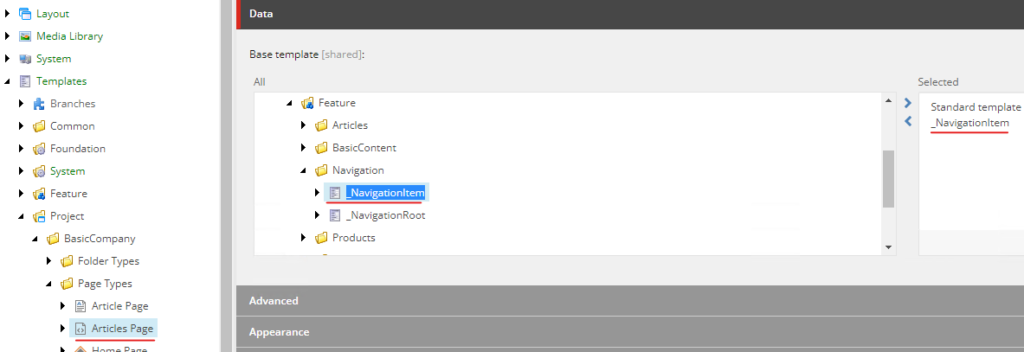
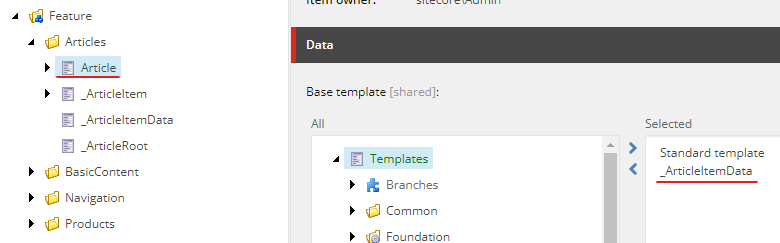
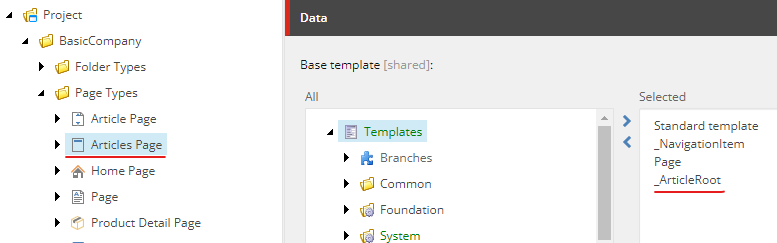
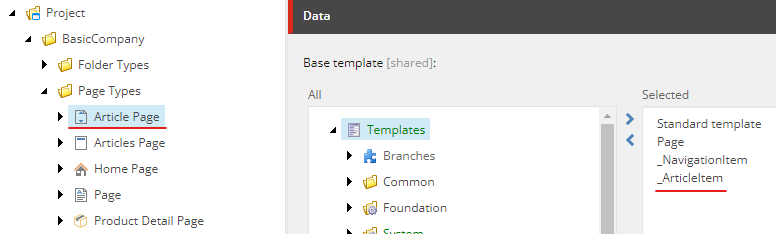
</configuration>Create Templates for Article
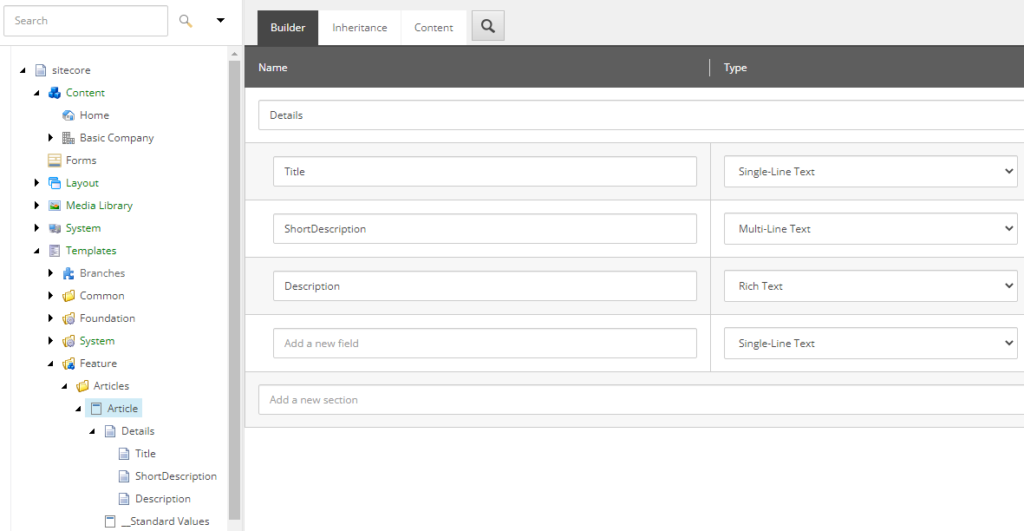
These templates are used to indicate the different level s of Article. i..e Article Page- will inherit from _ArticleRoot, ArticlePage will inherit from _ArticleItem and Article Content will inherit from _ArticleItemData
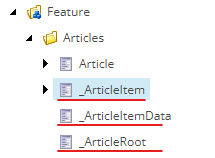
Sitecore Items
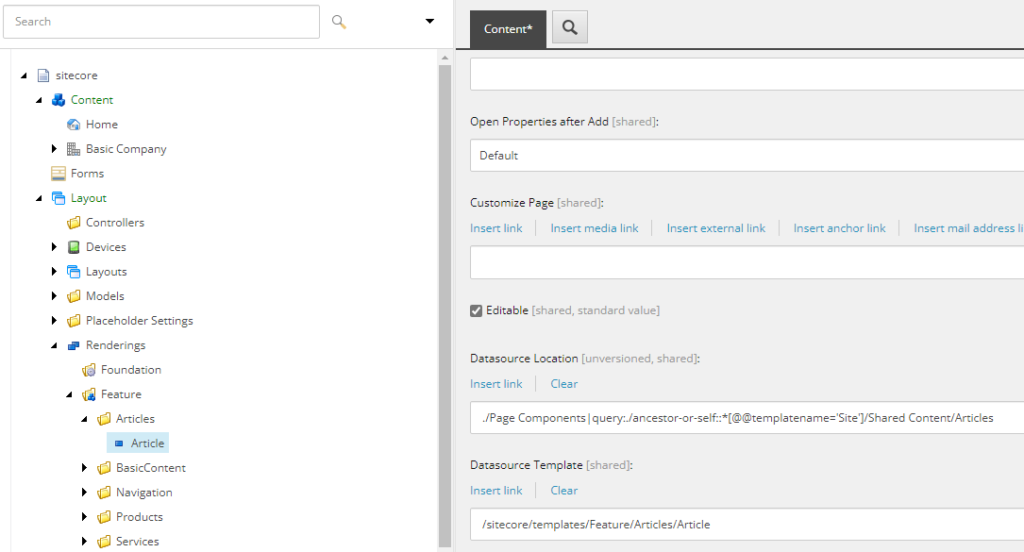
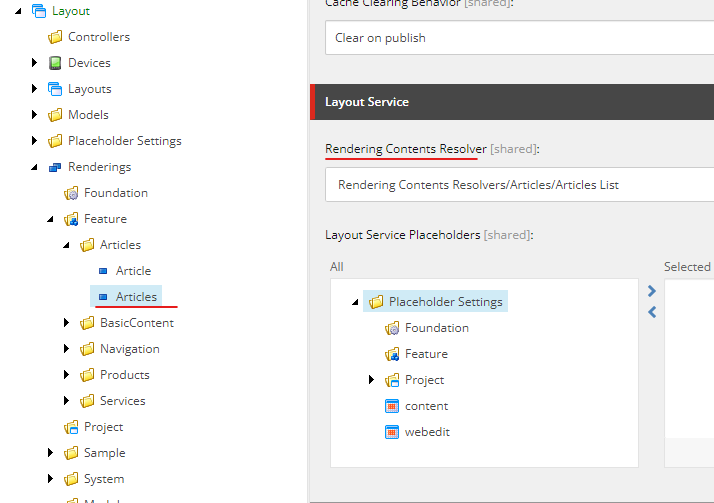
Create Rendering Content Resolver
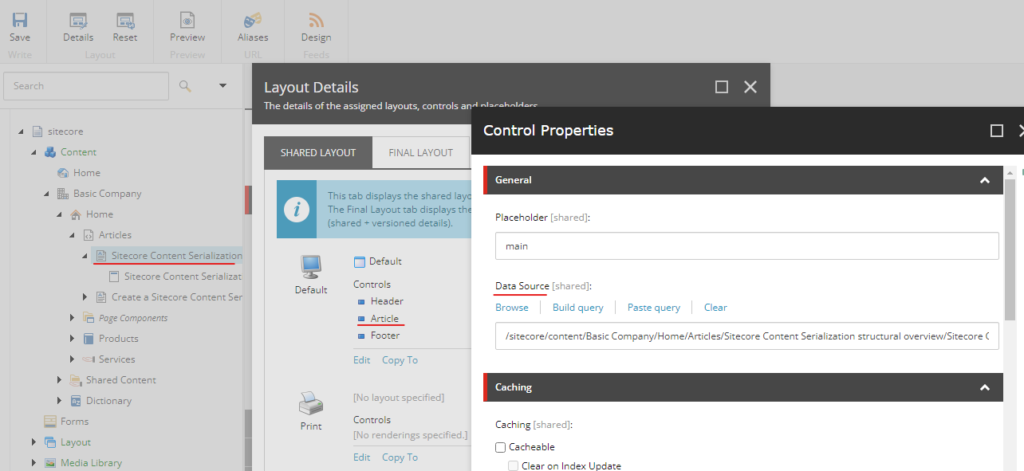
Create a New “Rendering Contents Resolvers Folder” in /sitecore/system/Modules/Layout Service
Craete a New “Rendering Contents Resolver” in this folder.
Provide the type – BasicCompany.Feature.Articles.LayoutService.ArticleContentResolver, BasicCompany.Feature.Articles

Create Articles Json Rendering
Craete a neJson rendering name “Articles” and newly created content resolver in the “Rendering Contents Resolver” field.
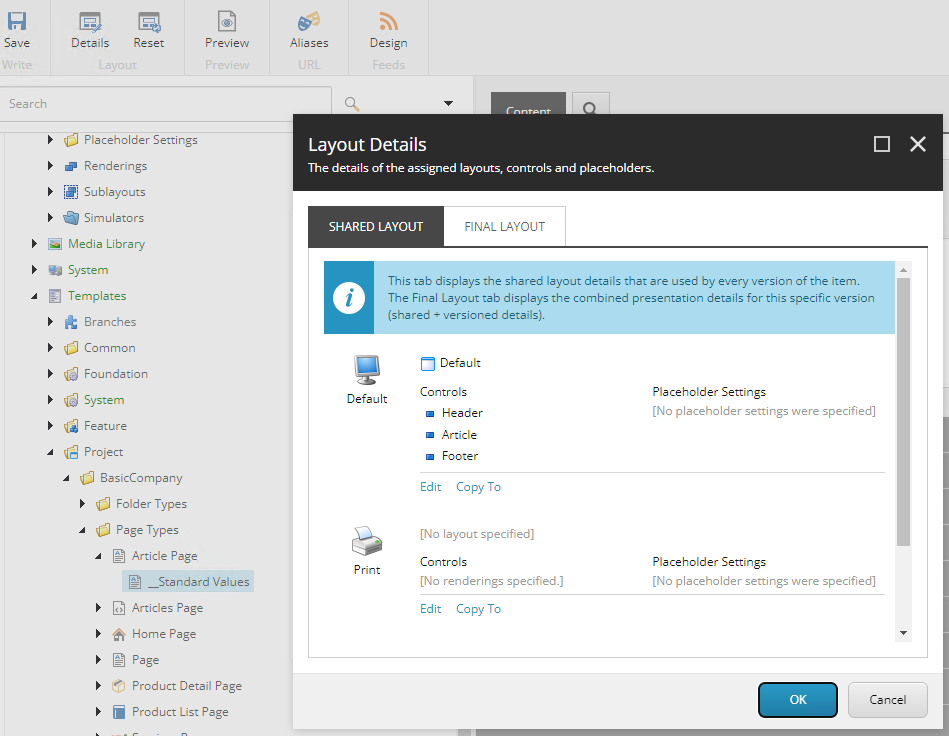
Add the new rendering to the page
Publish items
Rendering Project
Create Models Articles.cs
using Sitecore.AspNet.RenderingEngine.Binding.Attributes;
using Sitecore.LayoutService.Client.Response.Model.Fields;

namespace BasicCompany.Feature.Articles.Models
{
    public class Articles
    {
        [SitecoreComponentField]
        public ContentListField<Article> ArticleItems { get; set; }
    }
}
Create new view Articles.cshtml in /Views/Shared/Components/SitecoreComponent
@using Sitecore.AspNet.RenderingEngine.Extensions
@model BasicCompany.Feature.Articles.Models.Articles


<div class="container">
    <div class="product-list-columns columns is-multiline">
        @foreach (var article in Model.ArticleItems)
        {
            <partial name="_ArticleList" model="article" />
        }
    </div>
</div>
Create _ArticleList.cshtml in Views/Shared folder
Note its using ItemLinkField
@model ItemLinkField<Article>

<a href="@Model.Url" class="column product-list-column is-4-desktop is-6-tablet">
    <div class="card">
        <div class="card-content">
            <div class="content">
                <h4 asp-for="@Model.Fields.Title"></h4>
                <p asp-for="@Model.Fields.ShortDescription"></p>
            </div>
        </div>
    </div>
</a>
Update the RenderingEngineOptionsExtensions
namespace BasicCompany.Feature.Articles.Extensions
{
    public  static class RenderingEngineOptionsExtensions
    {
        public static RenderingEngineOptions AddFeatureArticle(this RenderingEngineOptions options)
        {
            options

                .AddModelBoundView<Article>("Article")
                .AddModelBoundView<Models.Articles>("Articles");
            return options;
        }
    }
}
Update Articles.modules.json to serialiaze content resolver
{
"namespace": "Feature.Articles",
"items": {
"includes": [
{
"name": "templates",
"path": "/sitecore/templates/Feature/Articles"
},
{
"name": "renderings",
"path": "/sitecore/layout/Renderings/Feature/Articles"
},
{
"name": "contents-resolvers",
"path": "/sitecore/system/Modules/Layout Service/Rendering Contents Resolvers/Articles"
}
]
}
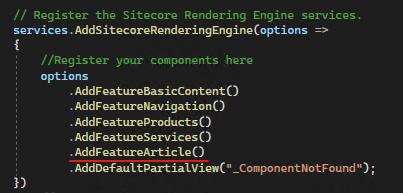
}IMP – Ensure the Startup.cs has AddFeatureArticle() added in AddSitecoreRenderingEngine
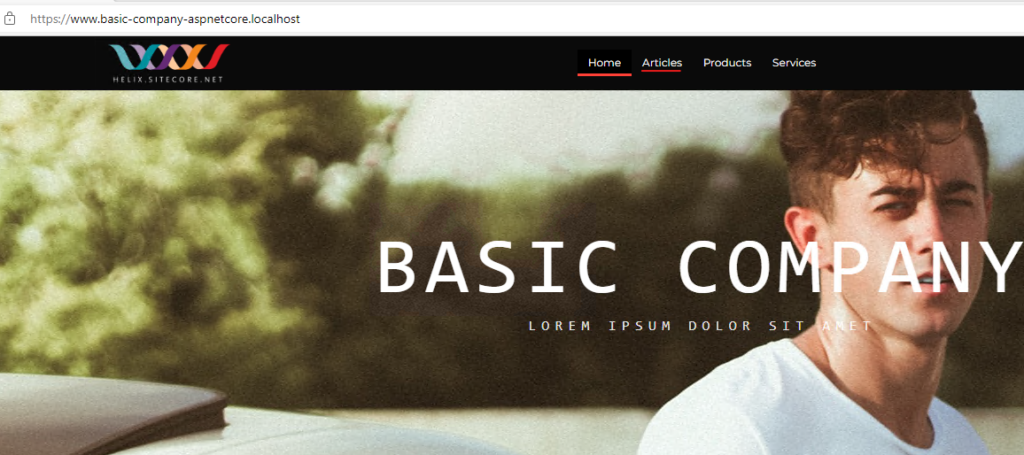
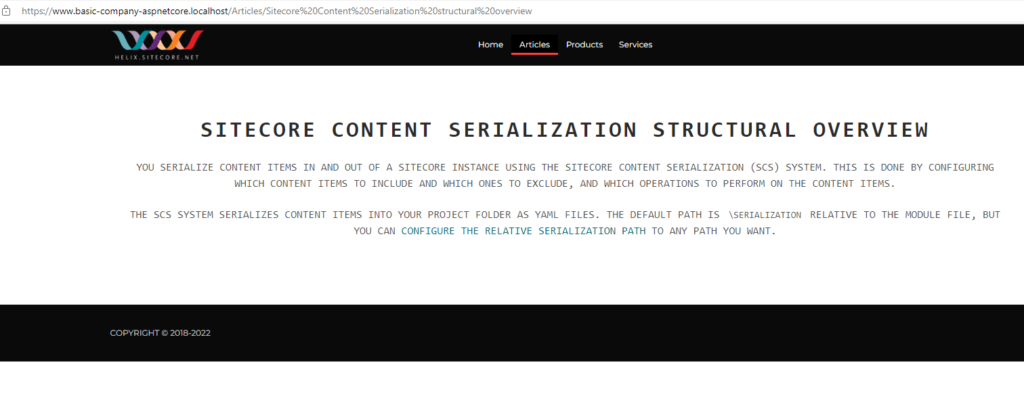
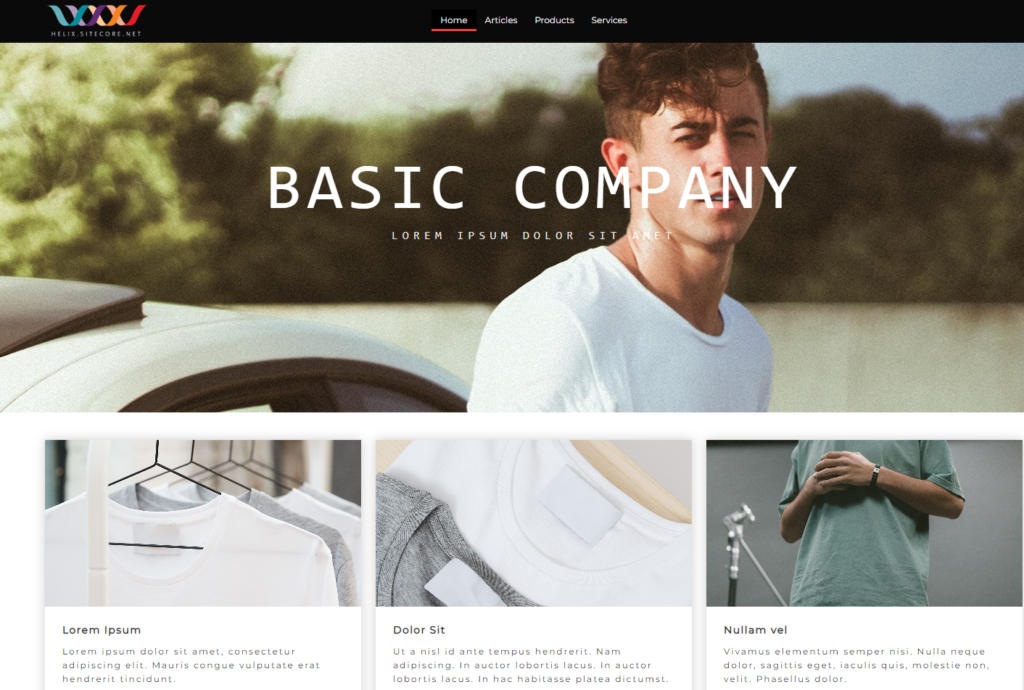
Output–
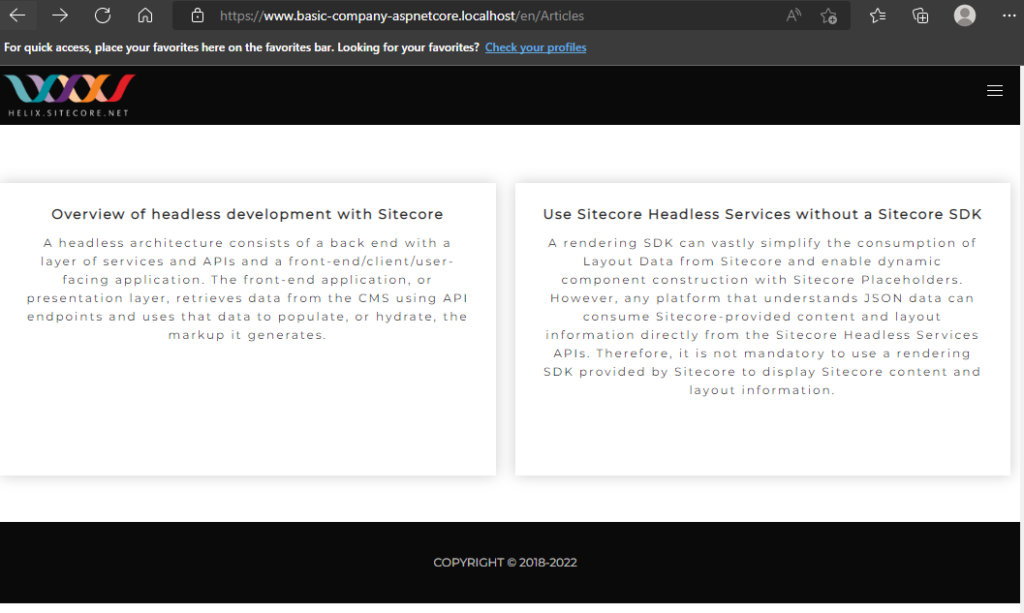
List of Articles-
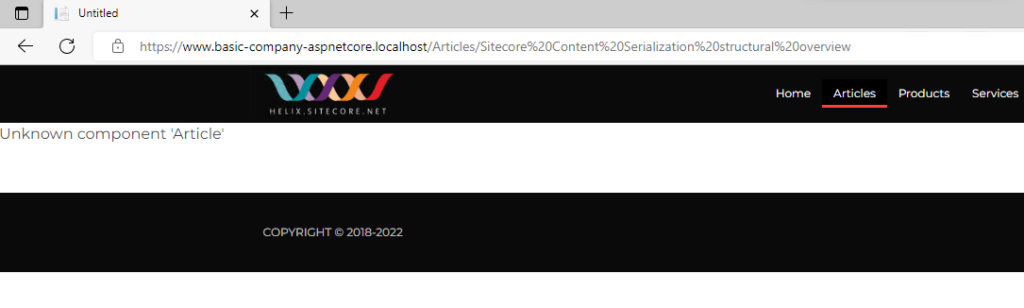
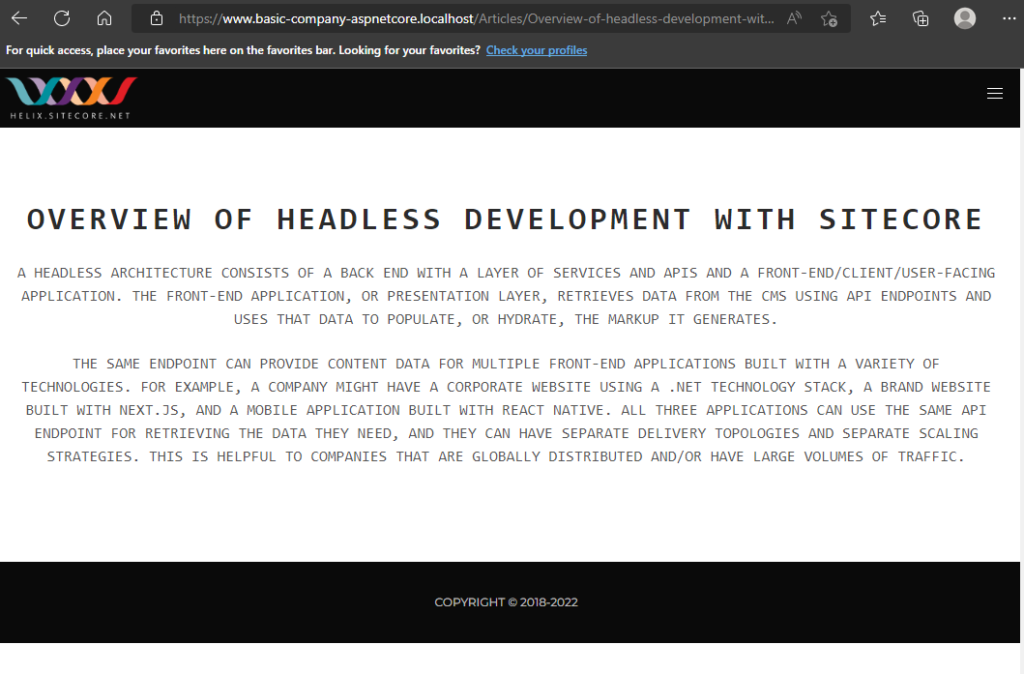
When we click on any of the Article take to the Article page-
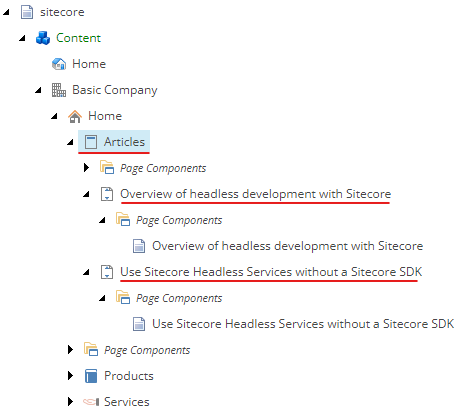
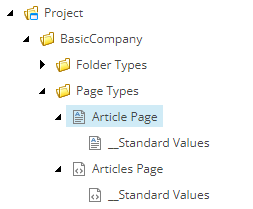
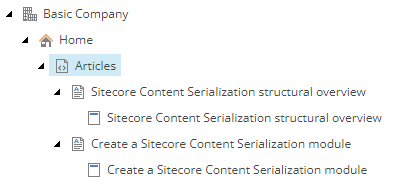
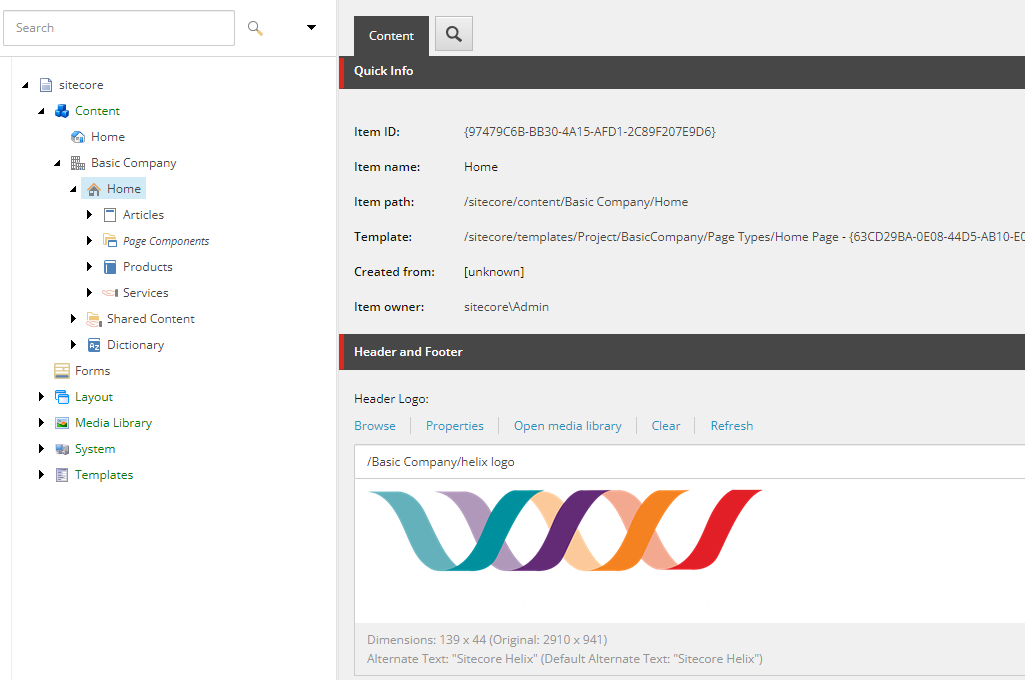
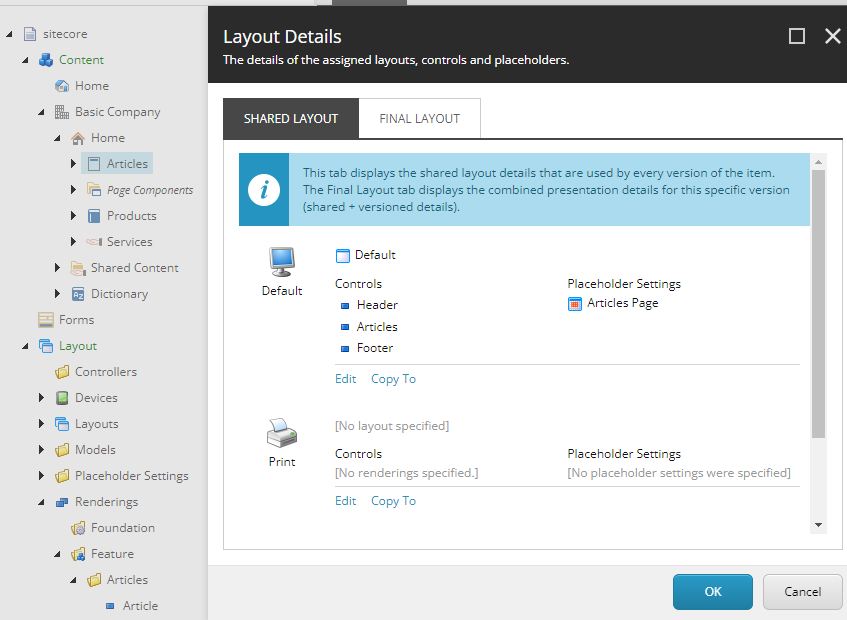
The above pages are shown as per this structure in Sitecore